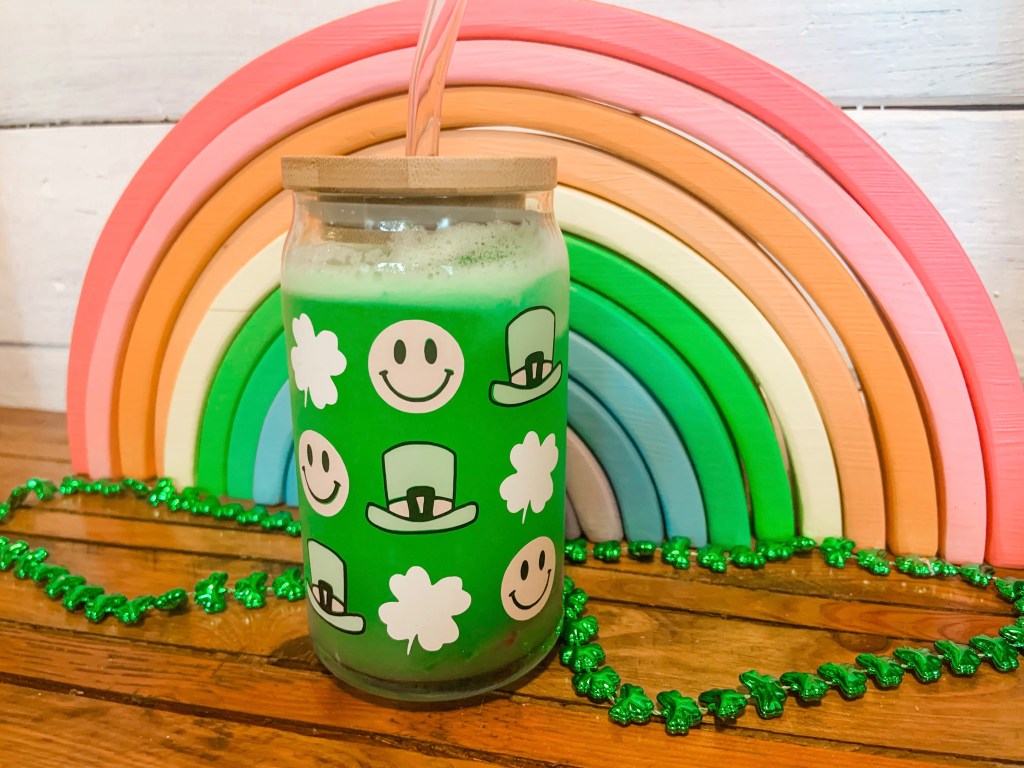
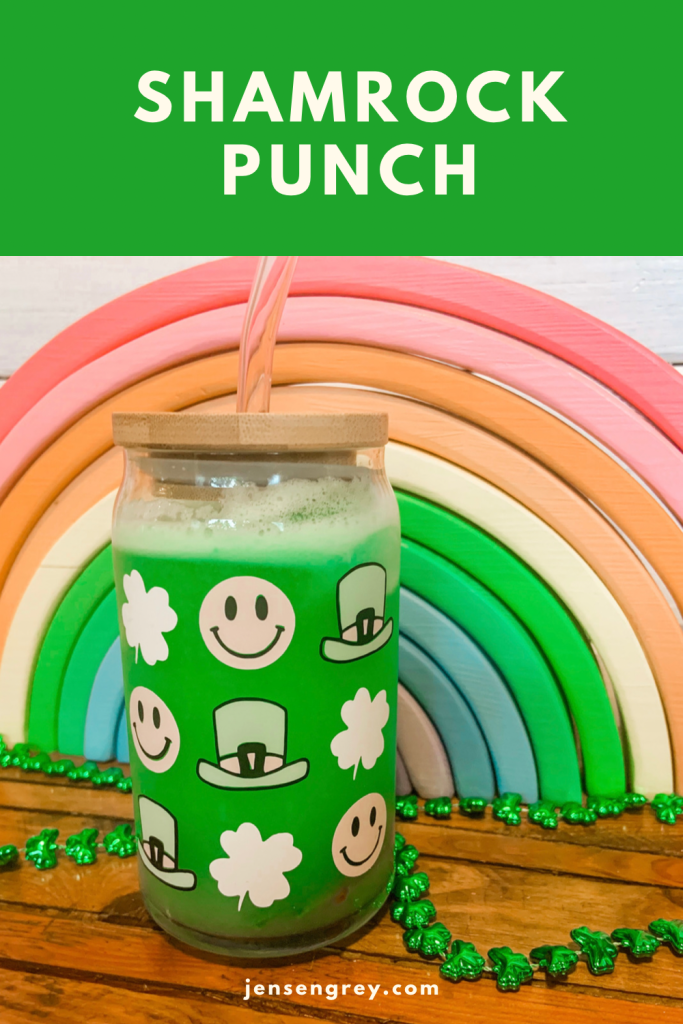
If you’re looking for a tasty drink to draw in leprechauns, tiny humans, and adults.. you’ll need this Shamrock Punch recipe.
With its bright green appearance and sweet taste, it’ll be a hit at any St. Patrick’s Day party!
Mila suggested that leprechauns might like a drink when they’re getting into their shenanigans. She told me it had to be green and it needed rainbows.
Since we’re always down for punch, I had a magical idea. Here’s all you’ll need:
Green Juice – we used hugs but would’ve used Bug Juice if Mila hadn’t drank it first.
Sprite
Lemon-Lime Sherbet
Rainbow Candy (Airheads Xtreme Bites)
Green Food Coloring
Vodka – *Optional for Adults*
Just like any punch recipe I’ve talked about on this blog, this one is just as easy and good.
First, start off putting lemon-lime sherbet in a cup or punch bowl. I like to put extra because I’ve always been the person to want the sherbet in my cup!
Add some Airhead Xtreme Rainbow candies too! This is optional, but it amps up the magic.
Then, pour your green juice in. You could easily use Hawaiian Punch, but we used Hugs since it was just for a single cup.
To get the BRIGHT green color, put a few drops of green food coloring in Sprite. Add this to your cup or bowl too.
Then you’re all ready to attract some leprechauns or have a fun time! You can make it extra fun by adding your favorite choice of vodka to the adult drinks!
Fingers crossed this will help us catch our leprechaun. If not, we still have a few tricks up our sleeve.
What do you like to drink for St. Patrick’s Day? Let me know in the comments.
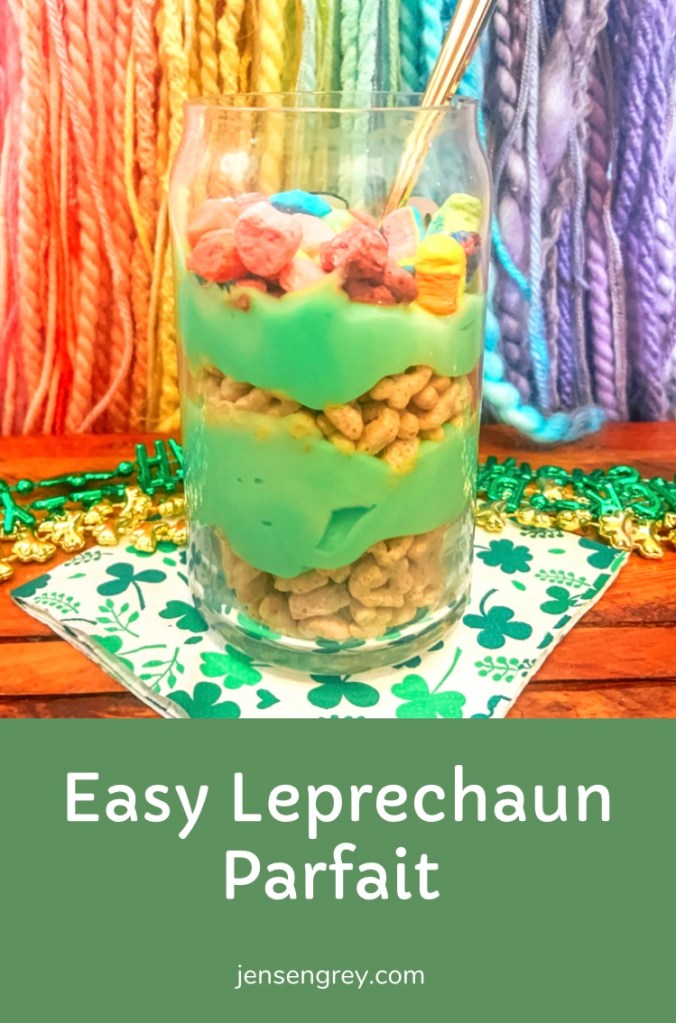
If you’re in the midst of leprechaun hunting this year, you might be able to tempt one with this Easy Leprechaun Parfait.
With only a few tasty ingredients, your little ones won’t be able to resist the temptation of trying this magically delicious treat.
Mila is on a full fledge hunt for a leprechaun before St. Patrick’s Day. The one in our house has already turned all our milk green and is hiding things of her’s. We have a few tricks up our sleeve to capture him.
One tasty way we came up with was getting our leprechaun to try a tasty parfait. Of course filled with all a leprechaun’s favorite things…
Here’s what you’ll need to charm a leprechaun with this treat:
Lucky Charm Cereal
Vanilla Pudding
Food Coloring
The first thing for the sweet treat is to have littles separate the Lucky Charm’s cereal and marshmallows. Mila loves doing this and sneaking a few to eat too!
While they’re doing that, put green food coloring in the vanilla pudding. Of course leprechauns LOVE the color green. Mix it up until it’s consistently green. I tried to make it a lighter green, but it all depends on the amount of food coloring you put in.
Once you and your little are done, it’s time to start layering.
Our layering went like this: cereal, pudding, cereal, pudding, marshmallows. Personally, I think it was a pretty good decision.
The best part was, Mila was super excited to try this since it was for the leprechaun. She ate SO much for it, but left a little bit to catch one. They’re small anyways!
We’ll keep you updated on our catching adventure… until then, you have to try this sweet treat.
What are your tips and tricks to catch one of those sneaky leprechauns? Let me know in the comments.
If your child (or you) love to paint and want to try a cool new way to do so, try this DIY Ice Cube Painting.
Mila paints all the time. Usually with acrylic paints on canvas, but a switch was needed. With a little prep, this ice cube painting activity was a morning full of fun and creativity.
Prepping for this activity was really easy. All I did was pick out a few of her go to colors. Then I painted them inside the resin mold.
I tried my best to get a lot in there. It’s be easier if it was squeezable paint bottle.
Before you put water in the mold, set on a baking sheet to freeze. It is near impossible to move a mold full of water without spilling it. This won’t be an issue if you’re using and ice cube tray.
When all the letters are painted, pour water in each of them. I would suggest using something that isn’t going to overflow the mold easy and mix colors. Honestly, I reused an old Starbucks iced coffee glass to pour.
Then, when they’re all filled, place it in the freezer.
When they’re done, you can place them in a tray for your child to paint. We personally used thick stock paper for this painting.
To warm up the ice, Mila dipped her brush in salt. Not only is this activity creative, she learned a little science as well. I just explained to her that salt melts ice and she thought it was so much fun.
The best part of this activity was it was easy to clean up.
I just threw the left over letters back in the tray. Then I put them in the freezer so we can use as after school activities this week! That means I only had to prep once for days of fun!
Using frozen letter cubes is a fun way to introduce more learning too. I used ‘lucky one’ since St. Patrick’s Day is coming. BUT you can spell out whatever to help them learn.
I’ll use the letters in her name to give her some more practice seeing and writing it.
This activity would be perfect in the summer too. You can battle the heat and see if the sun or your child ends up getting done with the ice first.
Either way, this Ice Cube Painting activity is a cool way to create.
What are some fun spring activities your child likes to do? Let me know in the comments.
It’s Random Acts of Kindness Week! There are so many ways to spread kindness and make others smiles. This has been something special to me since I had Jensen.
Now I get to pass it to Mila!
I believe by letting her know it’s important to share happiness, she’ll continue it in the future. Always striving to make her a great human.
Wondering where to start? Here are 10 Random Acts of Kindness you can do with your child and toddler.
Share a gift of love.
This year, Mila and I made these cute little notes for her dance friends. I found them on Sierra L Miller’s Blog and added a scrunchie. They turned out to be a cute little gift and helpful for a little dancer’s hair.
Last year, we made Lollipop Flowers that were a complete hit.
Write a thank you note.
I’m ALL about a classic thank you note. Writing a small note to someone you care about can mean the world. Anytime I send cards or notes now, I have Mila write a little something and sign her name.
It was a fun way to make someone smile and share my Jensen too.
Send a nice video.
Mila LOVES making videos and sending them to our friends and family. One way to make someone smile is to do just this.
You and your child can tell someone how much you love them. It’s guaranteed to be a random act of kindness that they’ll love to receive. The best part, you don’t have to leave your home!
Leave a gift card as a surprise.
This goes along along with the flowers… but leaving random gift cards is a cute way to surprise someone.
Mila and I have left them in books at book stores or just sent them to others when we’re out to eat. You could even leave them at gas station pumps to help someone out.
Paint a rock.
Rock painting was so big and so many people still do it. Mila loves to paint rocks or just find them to give to her grandpa. Painting kind words on a rock and giving them to someone could be a small way to brighten their day.
Tip nicely.
I know a lot of people pay it forward, but it can cause some chaos. Instead of doing this, why not tip your barista or waitress nicely.
Mila loves tipping and this is a fun way to pretend she’s paying!
Make a craft.
Just like getting a thank you card, I love receiving crafts. When I’m making different things, I try to make three extra to give to family and friends. They always smile when seeing Mila’s artwork or something special we made together.
It’s a fun way to share the love when you’re already creating!
Cook someone a meal.
There are so many families that could use the extra help with meals. One friend of ours ordered us pizza one night and it made the whole night (and week) go a lot more smoothly with having it done for us already.
If you usually have leftovers, it would be a beautiful idea to share. I know this has been my favorite on the receiving end.
Kids love cooking and baking too! A perfect way to get them involved as well.
Smile.
The smallest thing you can do with a BIG impact is smile. You never know… it could be their first smile they have seen all day.
I hope you can find something on this list to do with your child for someone you love. Let me know in the comments some acts of kindness you’ve performed.
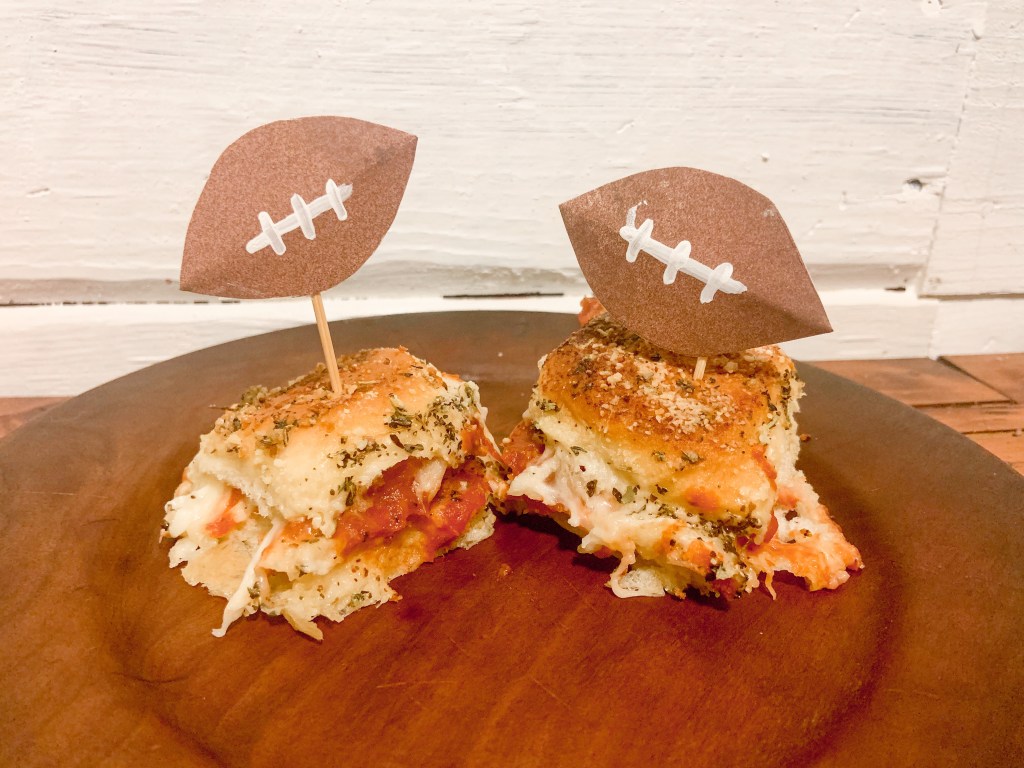
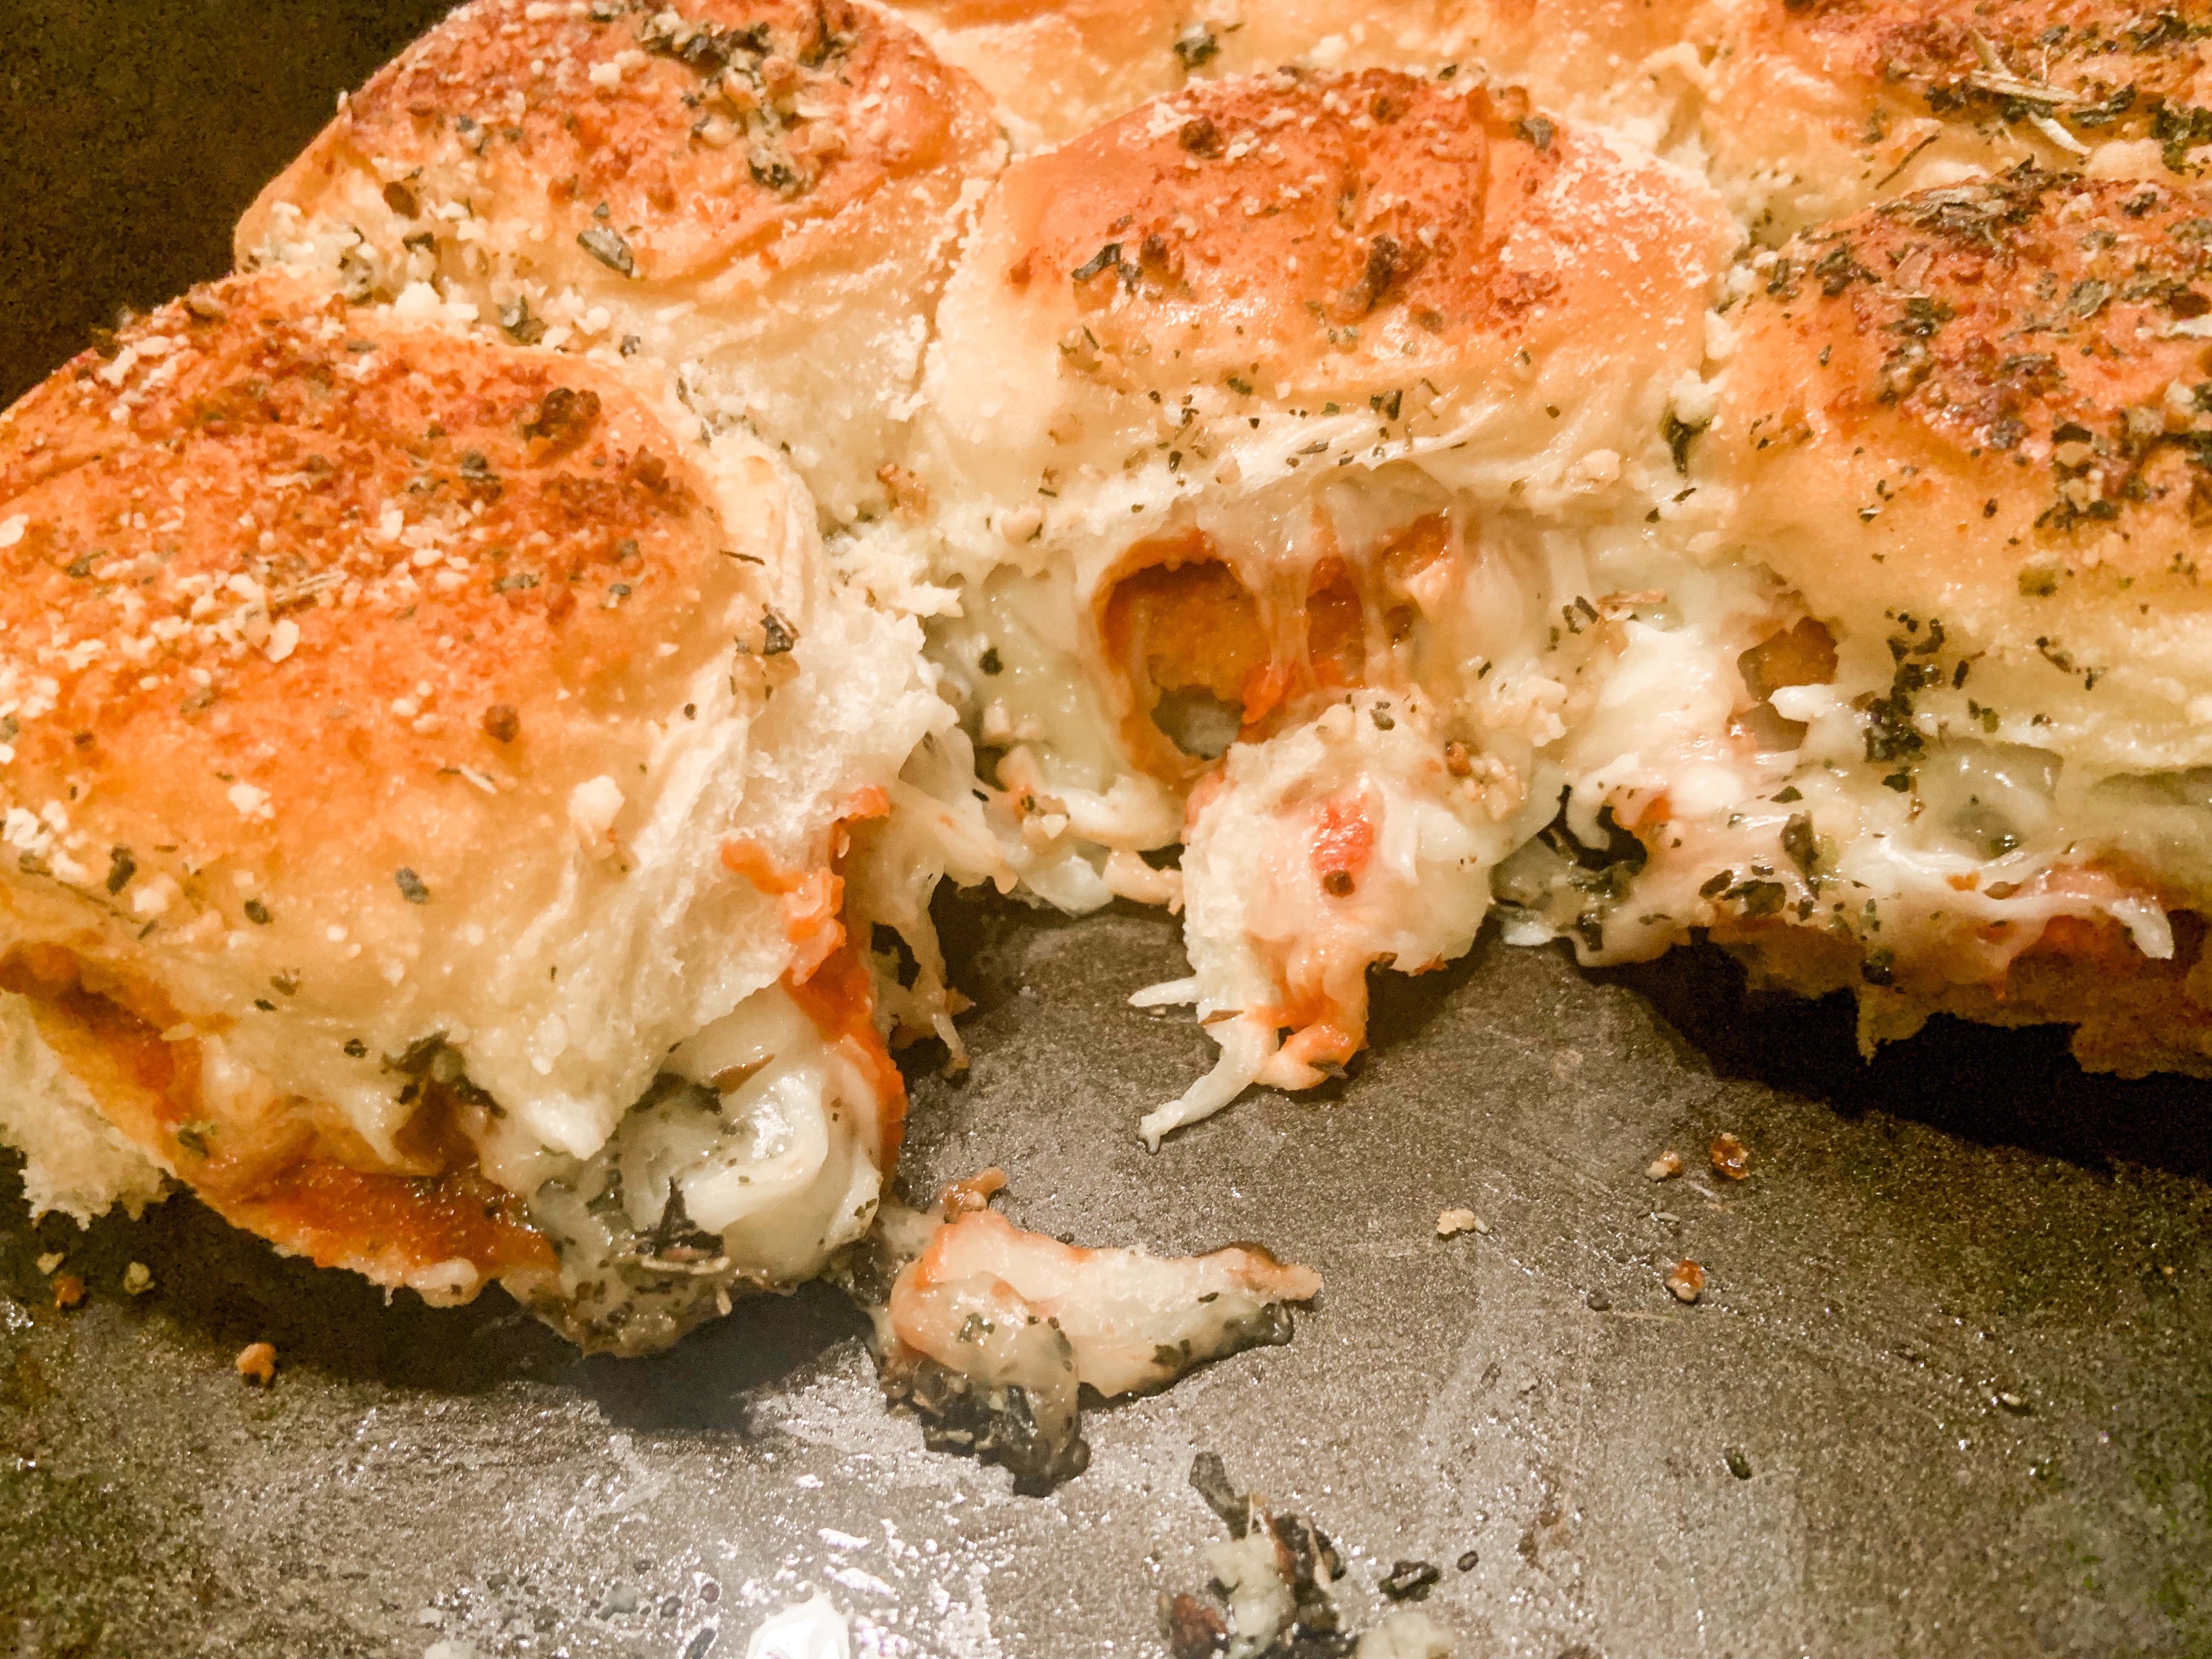
One of the biggest sports days of the year is coming up. You’ll have your friends and family cheering for you when you bring these Chicken Parmesan Sliders to your Super Bowl party.
After you have these once, you’ll easily want to keep making them for easy week night dinners too.
My family watches the Super Bowl every year. It’s a tradition that I love, even though I’m in it for the commercials and half time show now. Instead of just buying chips and drinks, I made one of my favorite meals into handheld sandwich.
Before I go into how to make this, I’d highly suggest doubling this recipe.
It goes FAST!
But, you’ll score a touchdown with this meal by getting these ingredients:
Chicken Nuggets
Hawaiian Rolls
Pasta or Pizza Sauce
Mozzarella Cheese (I used shredded)
Parmesan
Butter
Italian Seasoning
First, cook your chicken nuggets or tenders as directed on their bag or box.
While they are cooking, slice your Hawaiian rolls across the middle leaving a top and a bottom. You won’t want to pull the individual rolls apart.
Before putting the rolls on a cooking sheet, coat the bottom of the sheet with melted butter. After the chicken nuggets are cooked, put your oven to 350.
Place the bottoms of the rolls in the oven for around three minutes. This will toast them and not make the bottoms soggy when you’re eating. Trust me, it’s a much needed step!
When it’s toasted, it’s time to assemble the sliders.
Place a chicken nugget on each roll.
Then, coat them with pizza or pasta sauce. I personally like the taste of pizza sauce better so that’s what I chose to do!
Next, either sprinkle shredded cheese or place mozzarella slices on your sliders. I probably put way too much cheese on mine, but that’s the way I like them! It makes it more satisfying to pull apart after they’re cooked too.
Place the top half of the rolls on top. Add melted butter mixed with Italian seasoning and garlic over the rolls.
Cook in the oven for 18-20 minutes.
Once they’re done, allow them five minutes to cool down before eating.
I love the simplicity and quickness of this recipe. Mila and I both loved it and I know the rest of my family will too.
If you have any left over, they taste great as leftovers!
These Chicken Parmesan Sliders will definitely be in our dinner rotation for a long time. I hope they will be for your family as well
What’s your go to Super Bowl food? Let me know in the comments.
Whether your spending your Valentine’s Day weekend with your partner or throwing a party for your child, this Sweetheart Punch will be a hit.
Perfectly sweet, you can easily transform this into an adult drink too.
Mila has loved making pink lemonade lately. I think she likes pouring everything in and stirring it up. So, when I was thinking of a fun Valentine’s Day drink, I knew I had to incorporate those elements to make it fun for her.
This Sweetheart Punch has the typical punch ingredients, but elevated with what gives it some color. Here’s what you’ll need:
Sprite
Raspberry Sherbet
Strawberry Kool-Aid Packet
Pink Lemonade
Sugar
Lemon Juice
Water
Pink Whitney Vodka (optional for adults)
First, Mila and I made the strawberry lemonade. We mixed one strawberry Kool-Aid packed with pink lemonade mix. We followed the instructions on the container to make all of it. You could also just buy premade pink lemonade and add a packet to it too.
At first, it was really sweet. To make it a little more tart, I added lemon juice in it. This made it taste really good to me and Mila didn’t mind cutting out the sweetness either.
When that’s mixed up really good, it’s time to add in the punch elements.
I start off with putting the raspberry sherbet in a glass. Usually, I just do 1/2 of whatever cup of the sherbet.
Then, I filled up until 3/4 of the cup with the strawberry lemonade. The rest of the cup should be topped off with Sprite. When it’s all filled, I usually give it a little spin.
This drink turned out tasting amazing. Mila and I both enjoyed it and it was easy to make. I’ll definitely be using this again for Mila’s Valentine’s Day party.
I hope you like it too and update me with your thoughts on it.
Let me know in the comments what your favorite type of punch is or what you’ll be drinking on Valentine’s Day.
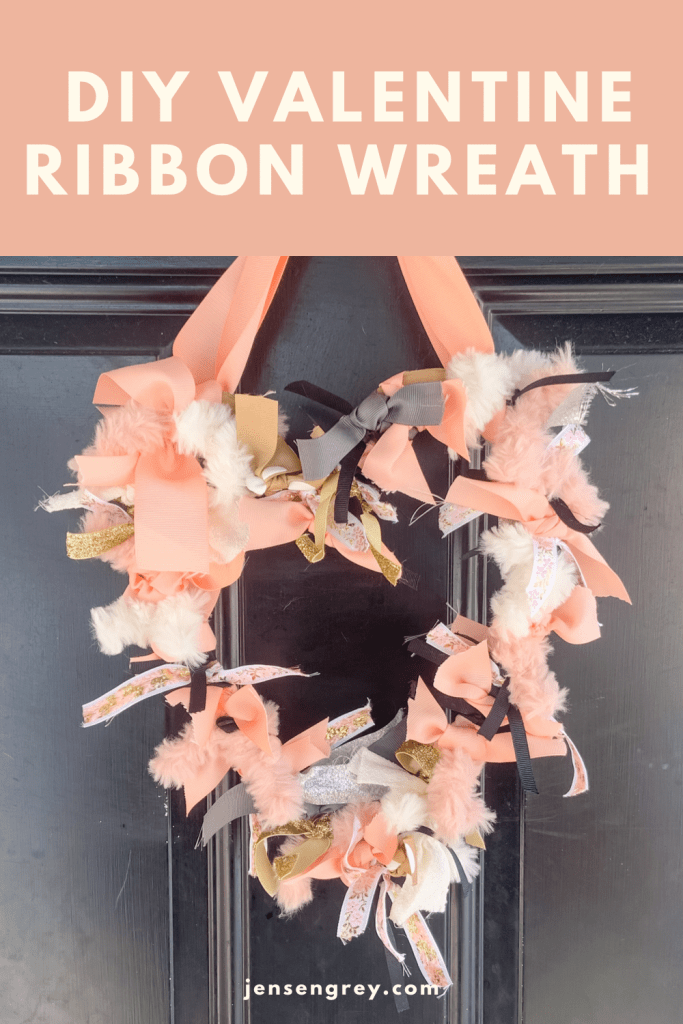
If you’re looking for a fun way to add interest to your front door and celebrate Valentine’s Day, try making this DIY Valentine Ribbon Wreath.
It’s a cute way to be festive AND thin out your craft supplies too.
Real talk. I’m the type of person who saves everything just in case I can use it in the future. Most of this ribbon comes from a project I did in Mila’s room… while I was pregnant.
Now I’m happy I saved it for this quick DIY, but it’s a little embarrassing I kept it for that long, oops.
Anyways, here’s what I used for this DIY Valentine Ribbon Wreath:
Cardboard
Scrap Ribbons
Scrap Fluffy Yarn
The first thing I did was cut out a heart for the frame out of cardboard. I actually cut out a big one then cut a smaller one from it to just get the outline. This can be a little tricky with cardboard, but I promise it can be done!
After the heart frame was ready, I got my scrap ribbons out. Like I said before, they’re from Mila’s nursery, so a ton of pinks. What’s fun about this DIY is you can use any color ribbon or yarn to fit your style.
To secure on the heart, I double knotted the ribbon. Then if the ends were too long, I trimmed it up.
I actually use quite a lot of ribbon. Just keep adding until it’s almost full.
Then, I added my fluffy yarn in pink and cream to the heart. This gave it so much more dimension and interest. When I just had the ribbon on it, it was boring, so I totally would recommend adding something like yarn or anything soft.
When everything on there, you can fluff the ribbon and yarn to make it look fuller.
To make it be able to hang, I attached a run on on both side of the heart bumps (no idea what else to call this). Then, I tied a bow at the top to hang it from my wreath holder. This way it wasn’t hanging at an angle and you can clearly tell it’s a heart.
Now you have a beautiful DIY Valentine Ribbon Wreath and was able to use that extra craft supplies you have laying around.
A total win-win for Love Day.
Have you ever used cardboard to make a wreath? What are some other items you use?
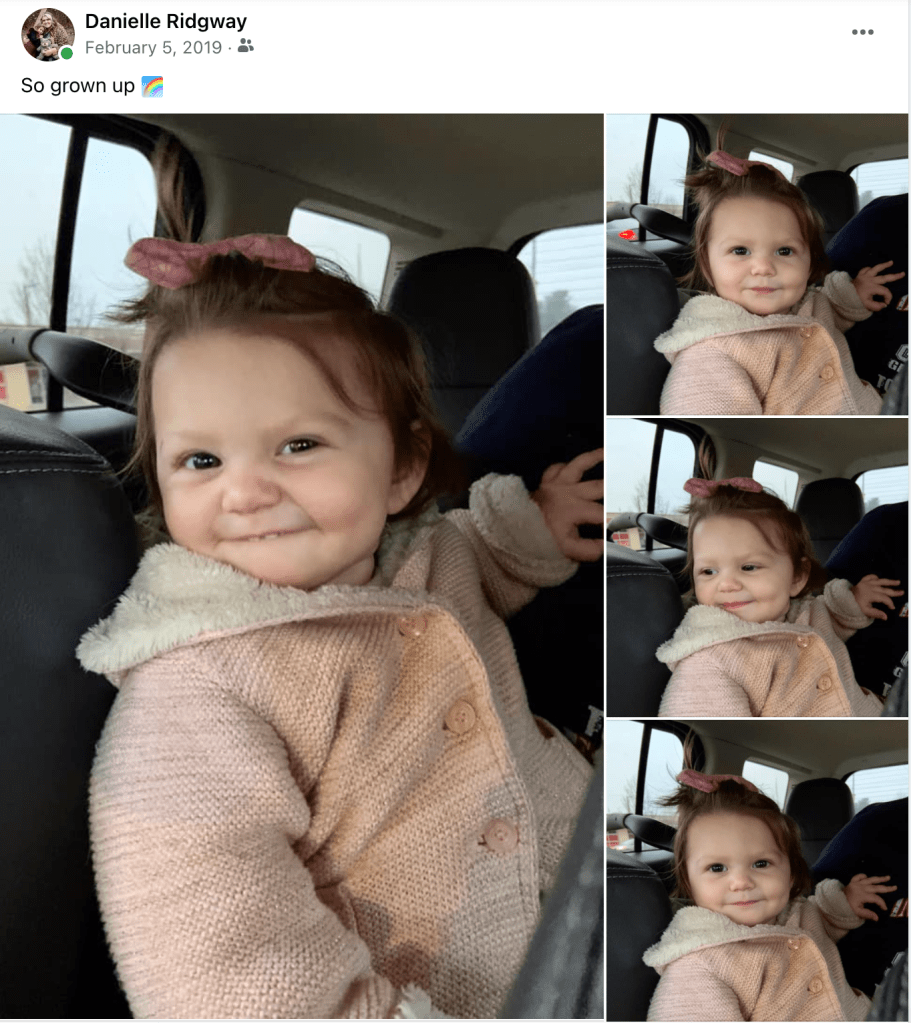
It’s Mila from three years ago. She wasn’t even a year old yet and she had already mastered the orneriest smile. At the same time, she could look right in your eyes and it felt like she could read all of your thoughts. There was so much going on in her head at such a young age — and if you are around her now, you’d still agree to that.
Honestly, it’s been a while since I’ve done one of these blogs. Something that I need to talk about, but pushing it in the back of my head. I keep working on different things, but anytime I go to write anything else, this wants to get out first.
I have a hard time looking at my memories from early 2019. Even when it’s this beautiful little face smiling on my screen, I get a knot in my stomach.
Seriously, there were two before this that almost made me throw up.
During this time, I was fighting so many mental battles after all the nasty things he (her whatever you want to call him) had said about me and her. I was in such a cloud of anger and heartbreak, I know I missed so many small moments during this time of Mila’s life. Even though I was there every single day, the mental take over that was going on clouded what was going on right in front of me.
I’ll never forget when he asked why I sent a picture to him because, “she means nothing to me.” This wasn’t a normal response, it was to hurt me. Now, it hurts to see those pictures and think someone could ever say that about a child, my child. After that, I stopped sharing her with him.
Instead, I shared her with all of you.
I’m unsure if I needed the validation of someone else seeing her the way I did or what was going on there. She deserves to be shared. I know she’s always been important and just… Mila. She’s always loved her picture taken and asks me to do it now. Some part of me wonders if it was rooted during this time in our lives though.
Still… these memories are hard for me. My brain still blocks a lot of this time out. A mix of postpartum depression, grief from Jensen, and heartbreak tugs at my heart in all of them.
The hardest part is knowing I should have been a better mom at this time. I had to take care of myself and she deserved a happy mom. Like in other moments of my life, I wish I could go back and just take over for me. I would go back and birth Jensen for that Danielle and I would go back and take over for 2019 Danielle too.
I just see those pictures and wish I would have soaked them up more. Instead, I knew I had to snap those pictures, even if they brought up bad memories. I had to be able to look back at her toothy smile, those waves hello, and the chunky leg rolls. Believe me, I’m so happy I did and that Facebook has me see them every year.
One day I’ll be able to look back at all those moments and not be clouded by the hurt I felt while taking them. Every day I’m healing through so much trauma I face in such a short time. It takes time. One day I won’t skip over them or remember those hurtful words.
Today I get to say thank you for everyone that let me share her with them. You don’t know how much that helped save me. I am so thankful that Mila is surrounded by love and support from so many people. When she gets older, she’ll know her impact in our little space. Hopefully she decides to keep spreading the love that shines every time she smiles.
I also get to make a promise to myself. I promise to keep healing and to give myself grace. If I would have known better, I would have done better. Every day I try to keep bettering myself and realizing that smile isn’t so toothy, those waves are getting shorter, and the chunky legs aren’t so chunky anymore. Even when being a mom is hard, I try to remember that I’m still learning and growing just like Mila. Instead of taking in all the negative emotions and feelings, I promise to have a positive outlook on our life and always look back at this time as magical.
Deep down, I know I’ll be able to look back at those pictures and remember all the good emotions and things first. Because even though I had to take care of me, I’ve always been a good mom.
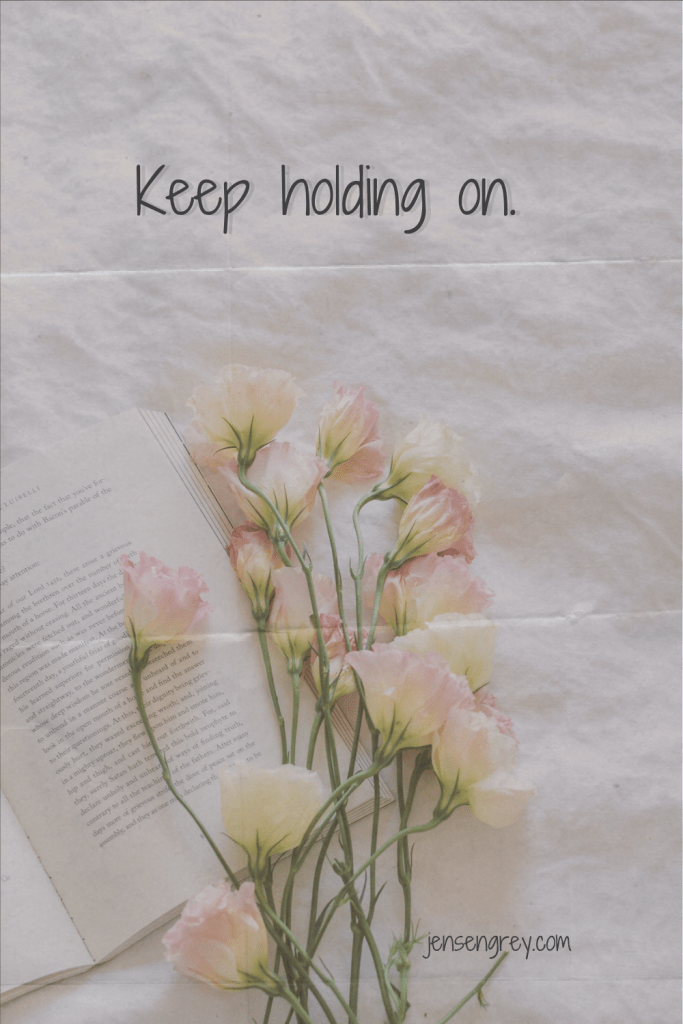
To every mom going through a trying or difficult time, you will make it through this. I promise you just have to keep holding on. There are so many people rooting for you.
Is there anything more nostalgic than a school Valentine’s Day Party? The rush of having a cute card box and picking out the perfect Valentine’s Day card for your friends. They’re little reminders to show your friends that they are loved.
Since this is Mila’s first year at school for the big event, we decided to make a DIY Valentine’s Day Cards.
It’s been so much fun creating for Valentine’s Day. If we hadn’t had so many snow days, I’m unsure whether or not DIY cards would be in the picture, but I’m happy they are.
Mila and I talked about different Valentine’s Day cards and gifts. We decided we liked the phrase, “You Color My World.” Mostly because I pushed it really hard because I was already thinking about crayons
A lot of the elements in these Valentine’s Day cards should look familiar!
On the front of the cards, if you can remember to a few blog posts ago, Mila had already painted the tops of her cards. All I did was take the dry pages and cut them out into small rectangles. Then, I wrote “You Color My World” with glitter markers over it.
For the back, I cut the same size rectangle with white card stock and taped them together. If the back of the painted paper wasn’t messy, I would have skipped this step.
Next, I wrote “to” and the name of Mila’s classmate. Then, I had Mila write her name under the “from.” I think it’s important she keeps writing her name and actively participates in helping with these DIYs.
On the back of the card, I made space either on the side of their names or above for a little gift. Since we were doing “You Color My World,” we had to make personalized crayons.
If love isn’t in the air, then you can conjure it! Well, your toddler can through this fun Love Potion Sensory Play.
Toddlers will feel magical and interact with Valentine’s elements.
Mila seriously had so much fun making a love potion. She ended up pretending she was a witch and made our dogs fall in love with each other. Anytime sensory play opens to imaginative play, I get happy!
She also had a blast renaming all her ingredients, which I thought was so creative.
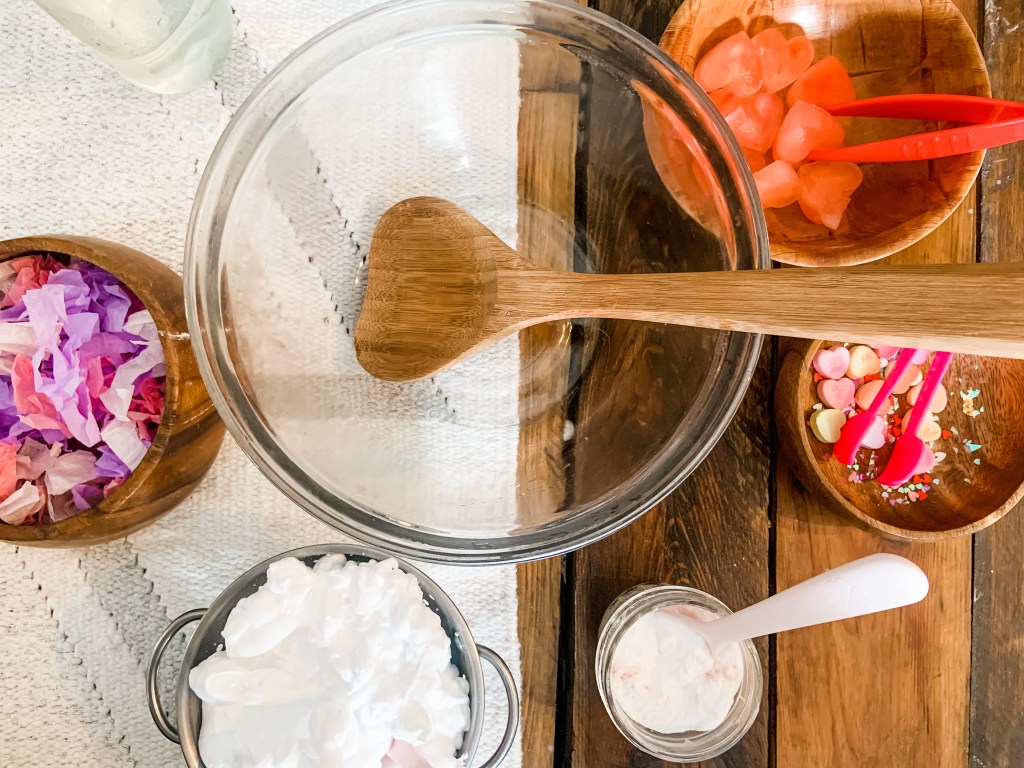
Speaking of ingredients, here’s the ingredients you’ll need to make your little fall in love with this potion:
A Big Bowl
Jars
Tissue Paper
White Vinegar
Baking Soda
Heart Ice Cubes
Shaving Cream
Food Coloring
Tongs
Candy Hearts
Heart Sprinkles
Spoons
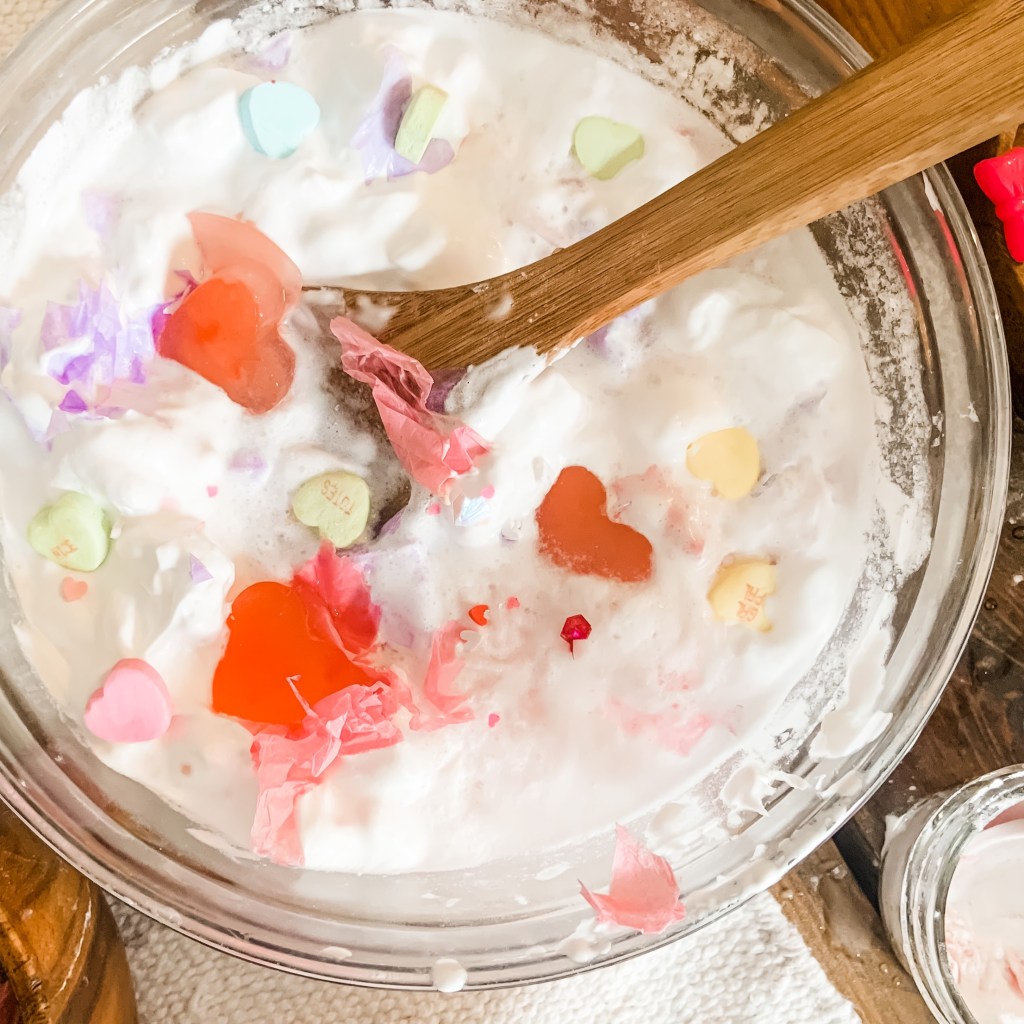
I let Mila do her thing when she put all the ingredients in. The only rule I gave her was to put the big jar (water) in last. That way everything could fizz and look magical.
Although I didn’t give her an order, I think it’s best if you mix the baking powder with the other solid things first. Then, add vinegar.
The longer it can fizz and pop, the better!
She also loved stirring it when she did add the water. I just made sure to keep getting more hearts and tissue paper for her to add in there. It just extends play longer when they can put more things in.
We had so much fun with this simple Love Potion Sensory Play idea. It was easy to set up, but can get messy. I would totally suggest adding kraft paper or a sensory bin underneath to catch rogue water.
No matter what, this potion was a hit and we’ll make sure to keep making potions in the future too!
What fun Valentine Activities do you do with your littles?