If you’re looking for an easy, but cute Valentine’s Day gift — look no further than Sticker & Co’s Valentine’s Day collection. They have so many fun stickers that your Valentines would love to receive this year.
One of my favorite things from Sticker & Co was their sticker greeting cards. I actually stuck it on a magnet so I could keep it on the fridge. Our fridge is constantly covered by pictures and artwork. This sticker greeting card was a must needed Valentine’s Day update. Mila saw it instantly and was in love with it.
I’m sure she’ll be using this sticker greeting card as a magnet for all her heart-themed projects this year.
Since all of their stickers were so cute, I had to get some to make gifts.
The easiest gift to make with stickers is to decorate a mug! I feel like everyone needs a good mug and stickers make it even more personable. My favorite one was the “I Love You Sign Language Pink Sticker.” I’ve been teaching Mila a few ASL words and she’ll definitely love her new hug chocolate mug.
There’s a ton of different stickers to decorate mugs, cups, and water bottles too. The one that made me laugh was “You are one hot dog” and “You have a pizza my heart” stickers. They would be absolutely perfect for your partner.
Whether your spending your Valentine’s Day weekend with your partner or throwing a party for your child, this Sweetheart Punch will be a hit.
Perfectly sweet, you can easily transform this into an adult drink too.
Mila has loved making pink lemonade lately. I think she likes pouring everything in and stirring it up. So, when I was thinking of a fun Valentine’s Day drink, I knew I had to incorporate those elements to make it fun for her.
This Sweetheart Punch has the typical punch ingredients, but elevated with what gives it some color. Here’s what you’ll need:
Sprite
Raspberry Sherbet
Strawberry Kool-Aid Packet
Pink Lemonade
Sugar
Lemon Juice
Water
Pink Whitney Vodka (optional for adults)
First, Mila and I made the strawberry lemonade. We mixed one strawberry Kool-Aid packed with pink lemonade mix. We followed the instructions on the container to make all of it. You could also just buy premade pink lemonade and add a packet to it too.
At first, it was really sweet. To make it a little more tart, I added lemon juice in it. This made it taste really good to me and Mila didn’t mind cutting out the sweetness either.
When that’s mixed up really good, it’s time to add in the punch elements.
I start off with putting the raspberry sherbet in a glass. Usually, I just do 1/2 of whatever cup of the sherbet.
Then, I filled up until 3/4 of the cup with the strawberry lemonade. The rest of the cup should be topped off with Sprite. When it’s all filled, I usually give it a little spin.
This drink turned out tasting amazing. Mila and I both enjoyed it and it was easy to make. I’ll definitely be using this again for Mila’s Valentine’s Day party.
I hope you like it too and update me with your thoughts on it.
Let me know in the comments what your favorite type of punch is or what you’ll be drinking on Valentine’s Day.
Looking for ways to spread love and enjoy your local wildlife? Try making these Rainbow Heart Bird Feeders. They’re a great way to have fun with your child and show them the importance of the world around us.
Plus, they turn out really cute AND it doubles as a snack time for your little. A total win-win for every being involved!
This easy DIY Rainbow Heart Bird Feeders only need three items to make create. Here’s what they are:
Pipe Cleaners
Fruit Loops or Cheerios
Yarn
To begin making these, there’s just a simple prep that won’t take too much time at all. All you need to do is pour some fruit loops in a little bowl. Then, twist the pipe cleaners into v’s. Once you do this, your child will be ready to start threading.
Mila and I had talked about making bird feeders before we started this activity. So, she knew what she was supposed to do. We also have threaded with pipe cleaners before too.
If your toddler has never threaded with looped cereal before, I would suggest showing them, thread together, and then they’ll be able to pick it up by themselves. It’s such a good skill for them to have and tremendously helps with their fine motor development; which is beneficial for so many reasons.
Once they have threading down, you can challenge them to do different patterns too.
For Mila, I lined up the Fruit Loops in the order I wanted her to thread. We just did a simple rainbow patter for one of the hearts. This challenged her to find specific colors and to keep the pattern.
When the pipe cleaners are filled with cereal (or your child has snacked on the rest of it), all you need to do is twist the ends of the pipe cleaner together. Then, pinch where the two heart bumps would be at the top. I had to move the cereal around so I could do this and form it into the shape it needed.
After, we just tied yarn to the tops of the heart. We headed outside to find the most perfect tree that our birds fly too.
Mila was very proud to see her Rainbow Heart Bird Feeders on the tree. Then she played out in the snow afterwards too. We love connecting with nature and being outside as much as we can. Thank goodness spring will be here soon!
This bird feeder was a fun way to play and help the animals we love so much. We hope that you’d love to make one too for Valentine’s Day or spring.
Have you ever fed birds before? What’s your favorite way to do so? Let me know in the comments.
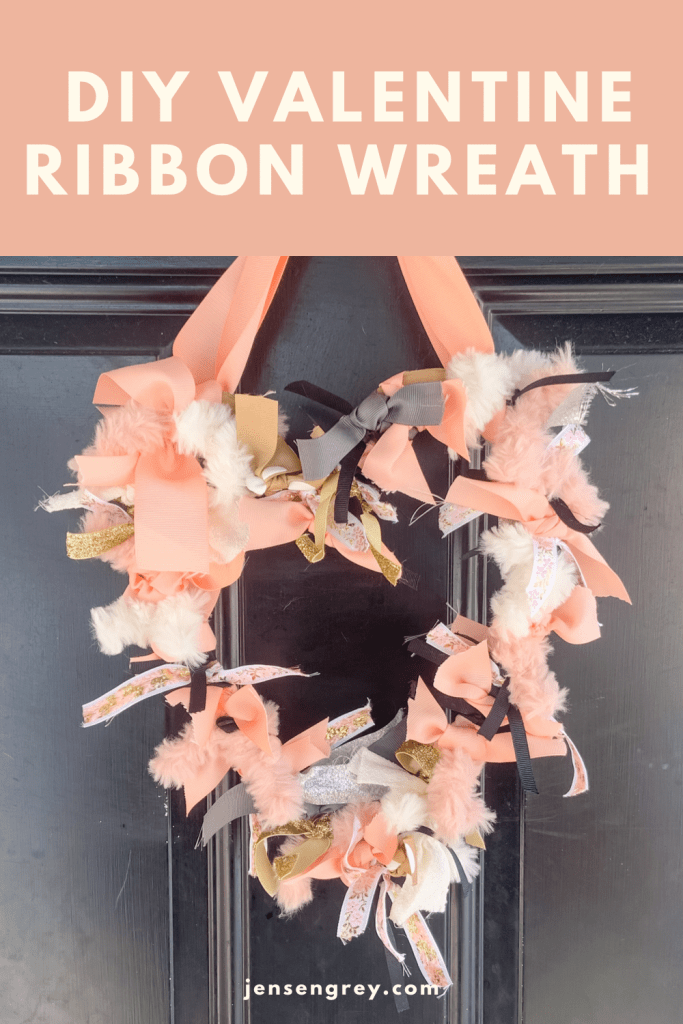
If you’re looking for a fun way to add interest to your front door and celebrate Valentine’s Day, try making this DIY Valentine Ribbon Wreath.
It’s a cute way to be festive AND thin out your craft supplies too.
Real talk. I’m the type of person who saves everything just in case I can use it in the future. Most of this ribbon comes from a project I did in Mila’s room… while I was pregnant.
Now I’m happy I saved it for this quick DIY, but it’s a little embarrassing I kept it for that long, oops.
Anyways, here’s what I used for this DIY Valentine Ribbon Wreath:
Cardboard
Scrap Ribbons
Scrap Fluffy Yarn
The first thing I did was cut out a heart for the frame out of cardboard. I actually cut out a big one then cut a smaller one from it to just get the outline. This can be a little tricky with cardboard, but I promise it can be done!
After the heart frame was ready, I got my scrap ribbons out. Like I said before, they’re from Mila’s nursery, so a ton of pinks. What’s fun about this DIY is you can use any color ribbon or yarn to fit your style.
To secure on the heart, I double knotted the ribbon. Then if the ends were too long, I trimmed it up.
I actually use quite a lot of ribbon. Just keep adding until it’s almost full.
Then, I added my fluffy yarn in pink and cream to the heart. This gave it so much more dimension and interest. When I just had the ribbon on it, it was boring, so I totally would recommend adding something like yarn or anything soft.
When everything on there, you can fluff the ribbon and yarn to make it look fuller.
To make it be able to hang, I attached a run on on both side of the heart bumps (no idea what else to call this). Then, I tied a bow at the top to hang it from my wreath holder. This way it wasn’t hanging at an angle and you can clearly tell it’s a heart.
Now you have a beautiful DIY Valentine Ribbon Wreath and was able to use that extra craft supplies you have laying around.
A total win-win for Love Day.
Have you ever used cardboard to make a wreath? What are some other items you use?
Is there anything more nostalgic than a school Valentine’s Day Party? The rush of having a cute card box and picking out the perfect Valentine’s Day card for your friends. They’re little reminders to show your friends that they are loved.
Since this is Mila’s first year at school for the big event, we decided to make a DIY Valentine’s Day Cards.
It’s been so much fun creating for Valentine’s Day. If we hadn’t had so many snow days, I’m unsure whether or not DIY cards would be in the picture, but I’m happy they are.
Mila and I talked about different Valentine’s Day cards and gifts. We decided we liked the phrase, “You Color My World.” Mostly because I pushed it really hard because I was already thinking about crayons
A lot of the elements in these Valentine’s Day cards should look familiar!
On the front of the cards, if you can remember to a few blog posts ago, Mila had already painted the tops of her cards. All I did was take the dry pages and cut them out into small rectangles. Then, I wrote “You Color My World” with glitter markers over it.
For the back, I cut the same size rectangle with white card stock and taped them together. If the back of the painted paper wasn’t messy, I would have skipped this step.
Next, I wrote “to” and the name of Mila’s classmate. Then, I had Mila write her name under the “from.” I think it’s important she keeps writing her name and actively participates in helping with these DIYs.
On the back of the card, I made space either on the side of their names or above for a little gift. Since we were doing “You Color My World,” we had to make personalized crayons.
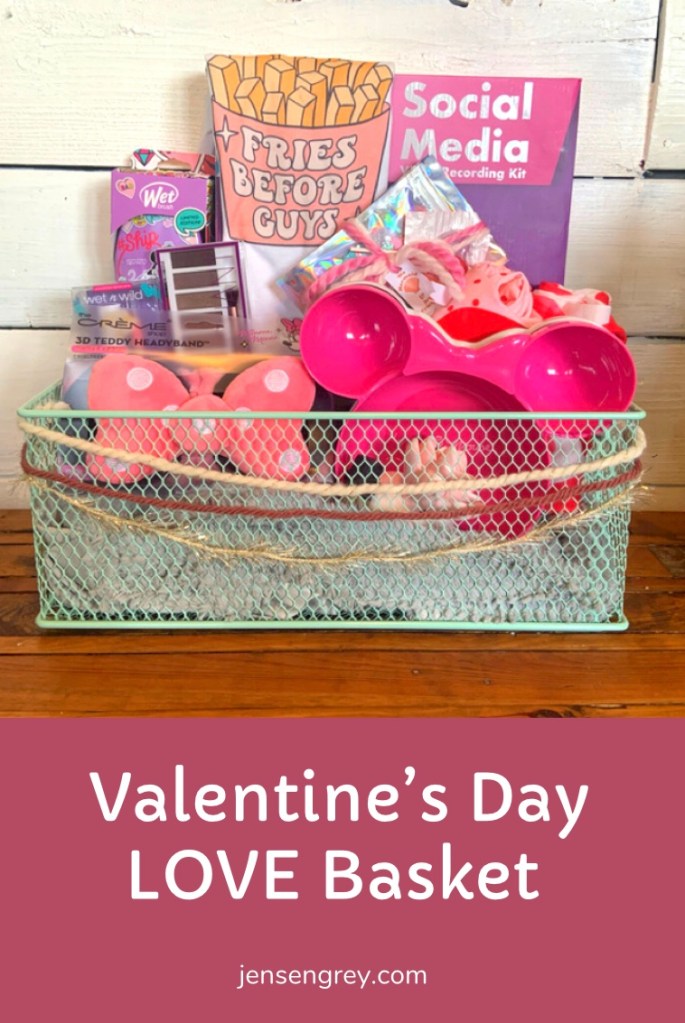
I only have heart eyes for Mila… and her Valentine’s Day LOVE Basket this year!
Happy February everyone. I can’t believe we’re already in the second month of 2022. It’s already flying by and I have a feeling February is going to go just as fast too. To celebrate this holiday and to just show Mila how much I appreciate her, I put together this little basket.
It’s always nice to share some of our purchases and these just scream Mila. She’s already opened this and has already started using them.
Love Baskets could either be opened on Valentine’s Day or I love doing it the night before February or on February first. Either way, I know kids loving getting surprises and if you can swing a few Valentine’s Day items like pajamas, candy, or a little toy, they’ll be thrilled to open it up.
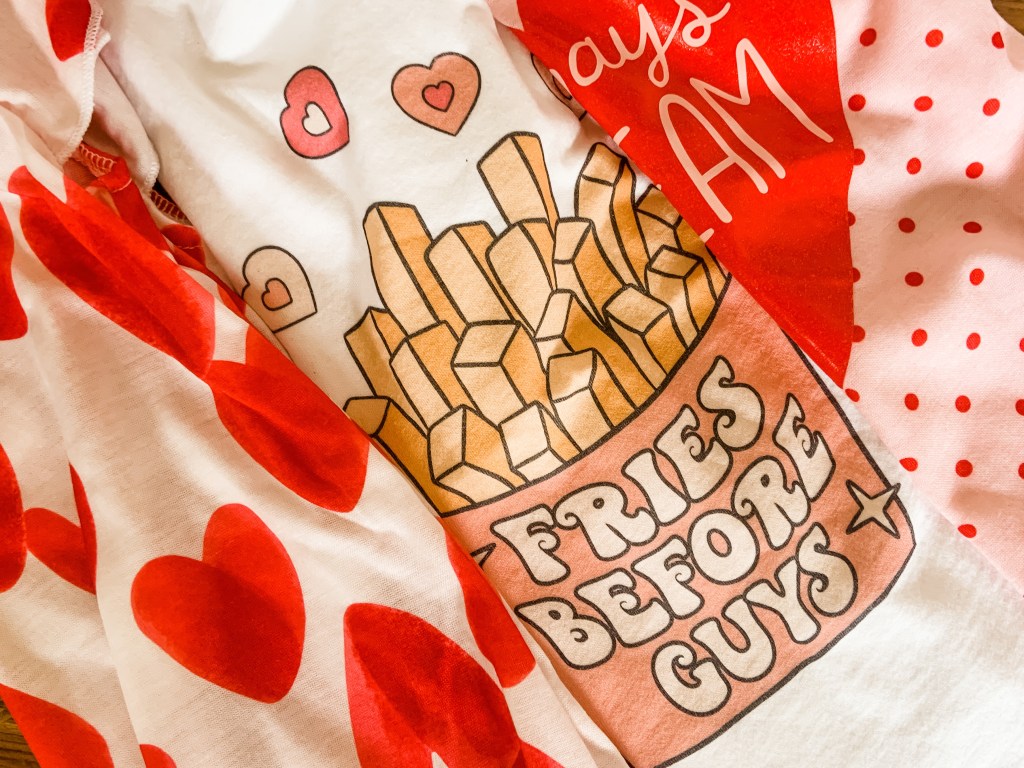
Clothes
If you haven’t noticed, Mila likes to dress up… a lot. We have a ton of clothes at our house, but a girl needs options, right?! It’s so much fun to buy themed items. Although it seems like themed items can only be wore during one time of year, I try to buy items that can be worn whenever.
Valentine’s Day definitely makes this easy for Mila. She LOVES hearts and all things pink. So, these three little items will be worn over and over again.
The “fries before guys” shirt is from Adelynn Mae. Mila reps for them and we’re always buying goodies from their website. We also got another Valentine’s Day tee (I’m a sucker for you) that I posted on social media last week. She’s obsessed with both of them and will be wearing these to her school’s Valentine’s Day party! I cannot wait to see her all done up in both of these outfits.
Another Adelynn Mae plug… she has St. Patrick’s Day shirts for sale and they’re ADORABLE. If you’re looking for whatever holiday shirt, go to their website and make sure to use MILA10 for 10% off!
There are also the cutest heart nightgowns here too. I got them from Carter’s and they’re the sweetest little nightgowns. Anytime we can find nightgowns, I buy them. Mila prefers them over anything, besides her fuzzy onesies on cold nights! Anyways, these are adorable and I know they’ll definitely be in the pajama rotation for quite a while.
Here’s some other cute Valentine’s Day pajamas on Amazon that you can get in time for the big day:
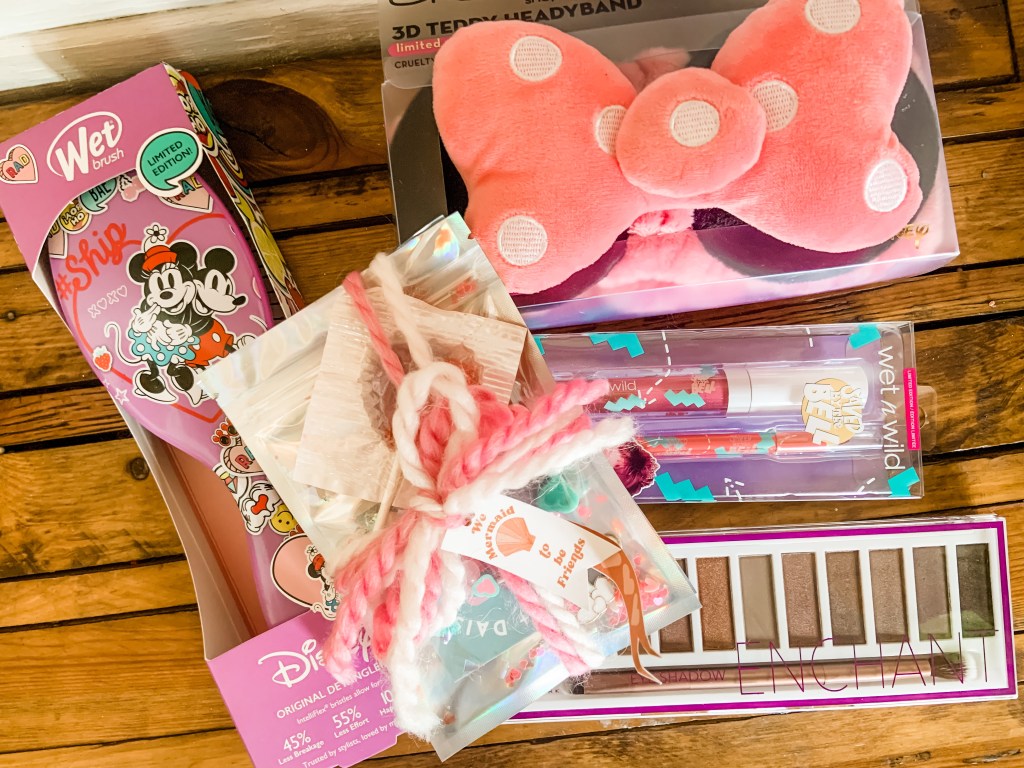
Right now, Mila just wants to make makeup videos when we’re home. I swear she’s going to be turn into a mini-influencer and I’m all for it. She has been telling me she wants different make up and I just had to surprise her with new lip gloss, eye shadow, a Minnie Mouse makeup headband, and a new Minnie and Mickey hairbrush.
Honestly, I bought all of this off the clearance shelf at Marshalls. They had a ton of goodies. When I want to buy makeup for Mila, I make sure it’s real and for a good price. I don’ think I spent more than $5 on any product here.
Why don’t I give her ‘fake’ or ‘kids’ makeup? Well, it’s not tested or as safe as real makeup. There’s a lot less chemicals and she know that there’s a difference between the two too. I want her to feel like she’s appreciated and supported as well as being safe when getting all those Tik Tok fans when she’s allowed to have it (way in the future).
She also received the CUTEST bracelets from our favorite Etsy shop: Sloane and Daisy. We have purchased so many of their bracelets and necklaces and are obsessed. Of course we had to have one in our LOVE Basket.
Mila also reps for Sloane and Daisy and you can use GREYSKIES15 to get your little (or you) a bracelet of your dreams.
Social Media Kit
To further feed her love for social media, I surprised her with this video recording kit!
It comes with different lights to get the perfect video. We didn’t put the tape lights up, but she’s in love with her ring light. Then thinks it’s so cool when I put the mini one on my phone to record her that way too.
I think I’ll end up giving her an old phone without anything but the camera to record herself. She truly enjoys it and it’s harmless. I guess it’ll give her the skills to use technology too.
We’re always looking for learning experiences.
Mila loved everything in her LOVE Basket and I was so happy to give them to her. We’re excited to enter February and get this month under way!
Do you get your littles anything special for Valentine’s Day? Let me know in the comments.
Pinks, hearts, and love all around. Valentine’s Day is the perfect holiday to craft and create. To start off the fun, we played around with Valentine’s Day Painting Activities that will be helpful for our crafts all February long.
Even if you’re not ‘crafty,’ you’ll love these easy painting ideas and your kids will have fun with it too.
I think it’s a little obvious that Mila (and I) love painting and being creative. Usually Mila’s go-to colors are pinks and purples, so it just makes Valentine’s Day prep a little more fun.
Since we’ve had a lot of snow days lately, we’ve been experimenting with different ideas of how to express ourselves. All of these listed are simple, BUT they can get really messy. I just like to state that beforehand. I highly suggest putting something down underneath your painting area and putting old clothes on your kids.
That way everything stays safe and clean.
We used four different types of painting styles and I’m going to save our favorite for last. Here’s all the supplies we used for the entire day:
Stock paper
Paint
Bubble wrap
Cotton Balls
Toilet paper rolls
Shaving cream
Kraft paper
Tray
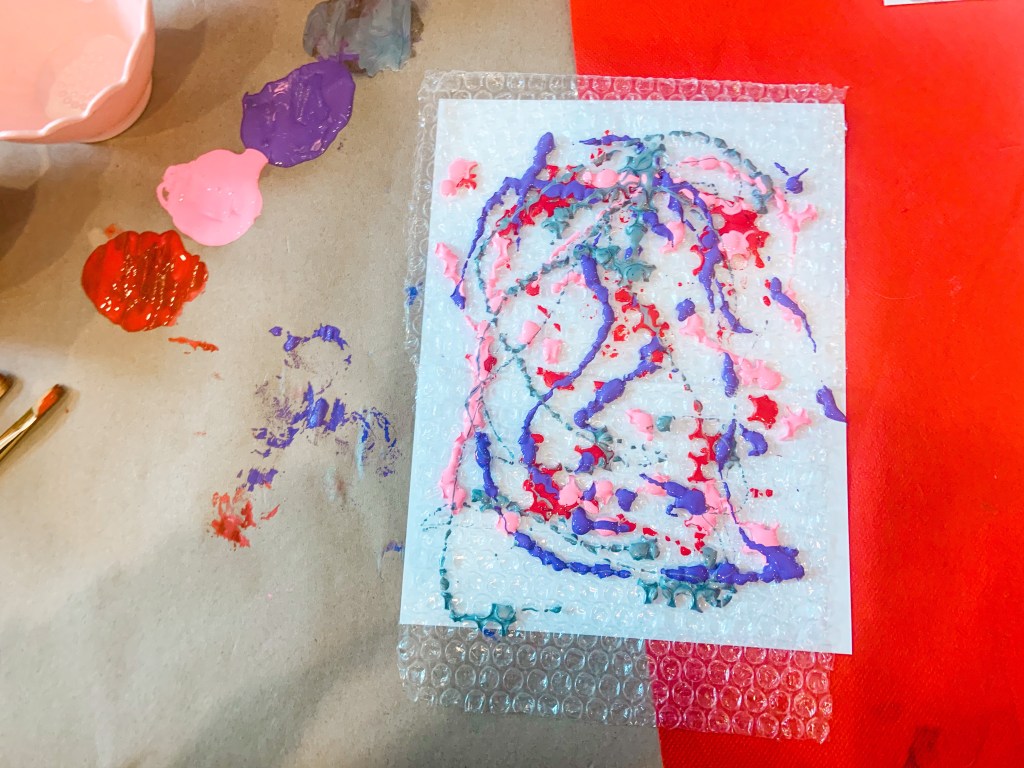
Bubble Wrap Painting
One fun way to add texture in painting is to use different supplies. Mila and I used bubble wrap last year for a heart garland, so we wanted to redo it again. I actually loved the little dots it creates. It sort of reminds me of honeycombs.
This year, we used WAY too much paint and didn’t get the honeycomb effect. I love the way it did turn out though.We also popped the bubbles too, which was fun for Mila. It made the paint explode out, so beware of that. I think it just looks like a big swirl, but we had the most fun using this method.
With the extra paint, I put it on another piece of craft paper. We’ll use that for wrapping paper.
It’s also a great way to reuse bubble wrap instead of just throwing it away. Always looking for ways to reuse, reduce, and recycle.
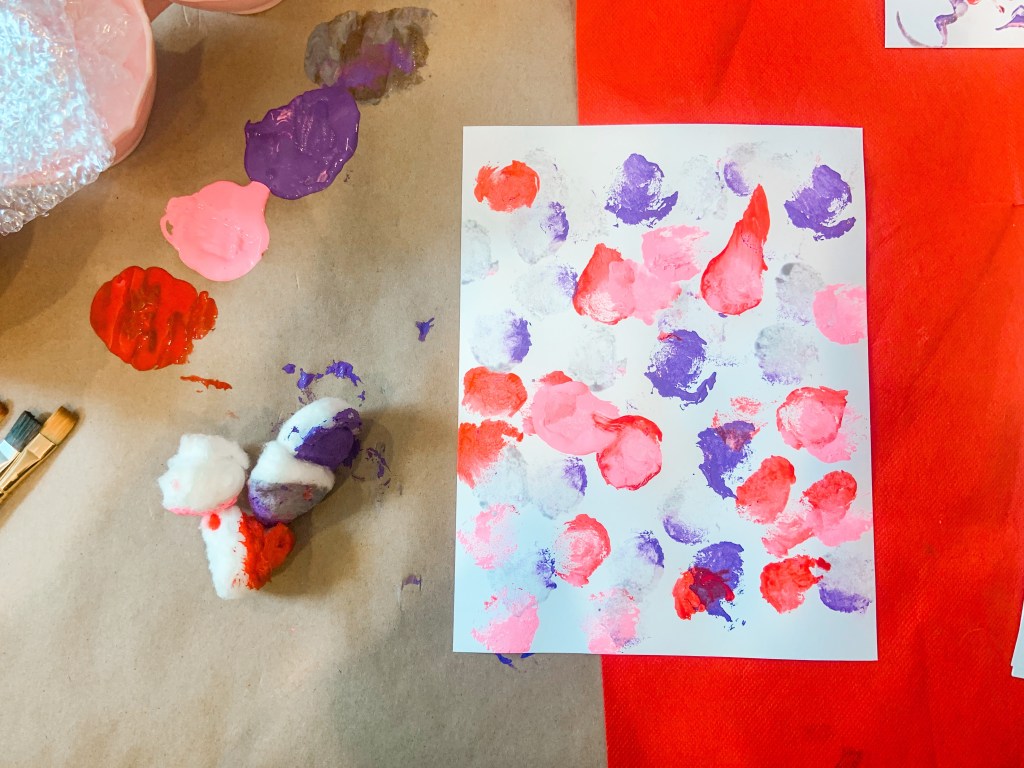
Cotton Ball Painting
With toddlers and preschoolers, using anything but paint brushes makes painting way more fun. Cotton balls are a perfect stepping stone for them. Although Mila just used her hands, you can easily add them on clips to make it less messy and easier for kids to grab.
This one seems a little typical to add, but I want to share the reasons I love using cotton balls for painting.
The circle shape is so cute and stays consistent. Mila talked the entire time how she was making circles and was very proud of them. It also holds the paint really neat. It soaks it up and if you mix colors, it gives a cool ombre pattern. Usually I don’t let Mila mix her paint to avoid making brown, but you can do it with cotton balls. You can tell which colors she mixed together.
Even though this is simple, kids activities do not have to be extravagant to get a cute outcome filled with fun.
Toilet Paper Roll Stamp
I promise I won’t go on and on about reusing things around the house, but here’s another example of it. Most people have empty rolls so they’re accessible to use for Valentine’s Day crafts.
The best part, you can easily shape them into little hearts. All you have to do is push down in the middle to get the indent in the top of the heart and press the sides in. It’s super simple to do! I think they’re the cutest little hearts as well.
This was definitely Mila’s favorite painting. She’s obsessed with hearts and draws them constantly. Being able to paint them just made it a little sweeter.
One issue that we ran into is the heart not being even when you press down. If you don’t get them just right, you have to show your child how to get the stamp fully down. For us this time, we just had to rock it from the bottom point then tilt it to the top arches. I only had to show Mila one time how to get a complete heart and then she was all over it.
We’ll 100% be using this technique for a future craft. I’ll make sure to share and link back here just in case you’d like to keep up and see.
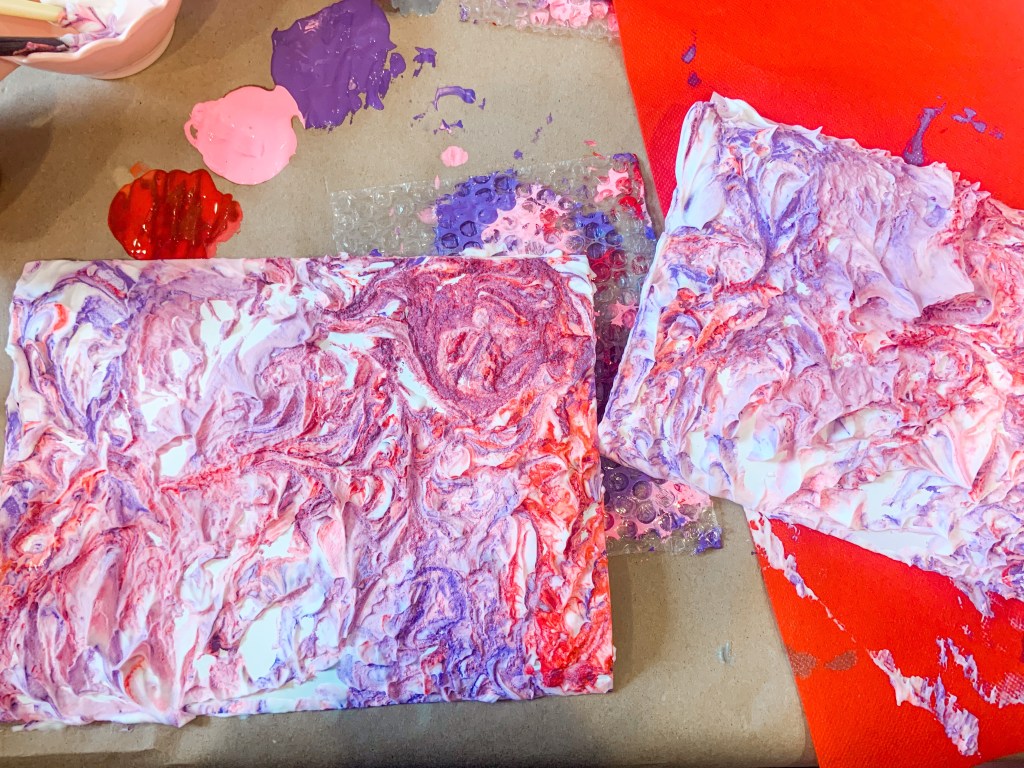
Shaving Cream Marbling Art
Out of all of these methods, this is the only one we’ve done for the first time. I’ve been eyeing this technique for a long time, but didn’t think Mila was ready for it. Now we have peaked in our painting. The outcome of this is my favorite, but it was the messiest of the bunch.
For this, all you have to do is put shaving cream in a tray. I used Mila’s sensory one. Then, Mila poured acrylic paint on top of the shaving cream and mixed it around with a paint brush. She might have swirled it a little too much, but the pattern was perfect no matter how she did it. After you have it the way you like, you push the paper in it. Make sure all of it is covered or you’ll have blank spaces. Peel it off the top and use a popsicle stick or old card to scrape off the remaining shaving cream on top. After, let it dry.
We ended up using the same pattern for three sheets of paper and could have easily done more! It was the quickest way to paint and is so unique.
I personally got a ton of shaving cream and paint on my hands through this. Mila saw how messy it was and dipped pretty quick. I would just suggest having wipes close to you or doing this technique by the sink.
Painting with these different styles was a lot of fun and gives us so many opportunities for future projects too. I can’t wait for you all to see what we’re making with these sheets too! Try to guess in the comments what you think we’re making.
Also, I want to say I know I’ve been a little quiet on the blog this month. I’ve been posting more on Instagram and Facebook the last few weeks, but it’s been nice to have a little writing break. We have a ton of fun recipes, activities, and crafts for the rest of this month and February to bring you though! One of them is about our trip to Florida and DISNEY! Let’s just say Mila keeps asking to go back.
For now, I’d love to hear what your favorite crafts and activities you do for Valentine’s Day are in the comments… and again, let me know what you think we’re doing with these sheets too.
Looking for other fun Valentine’s Day activities? Check these out:
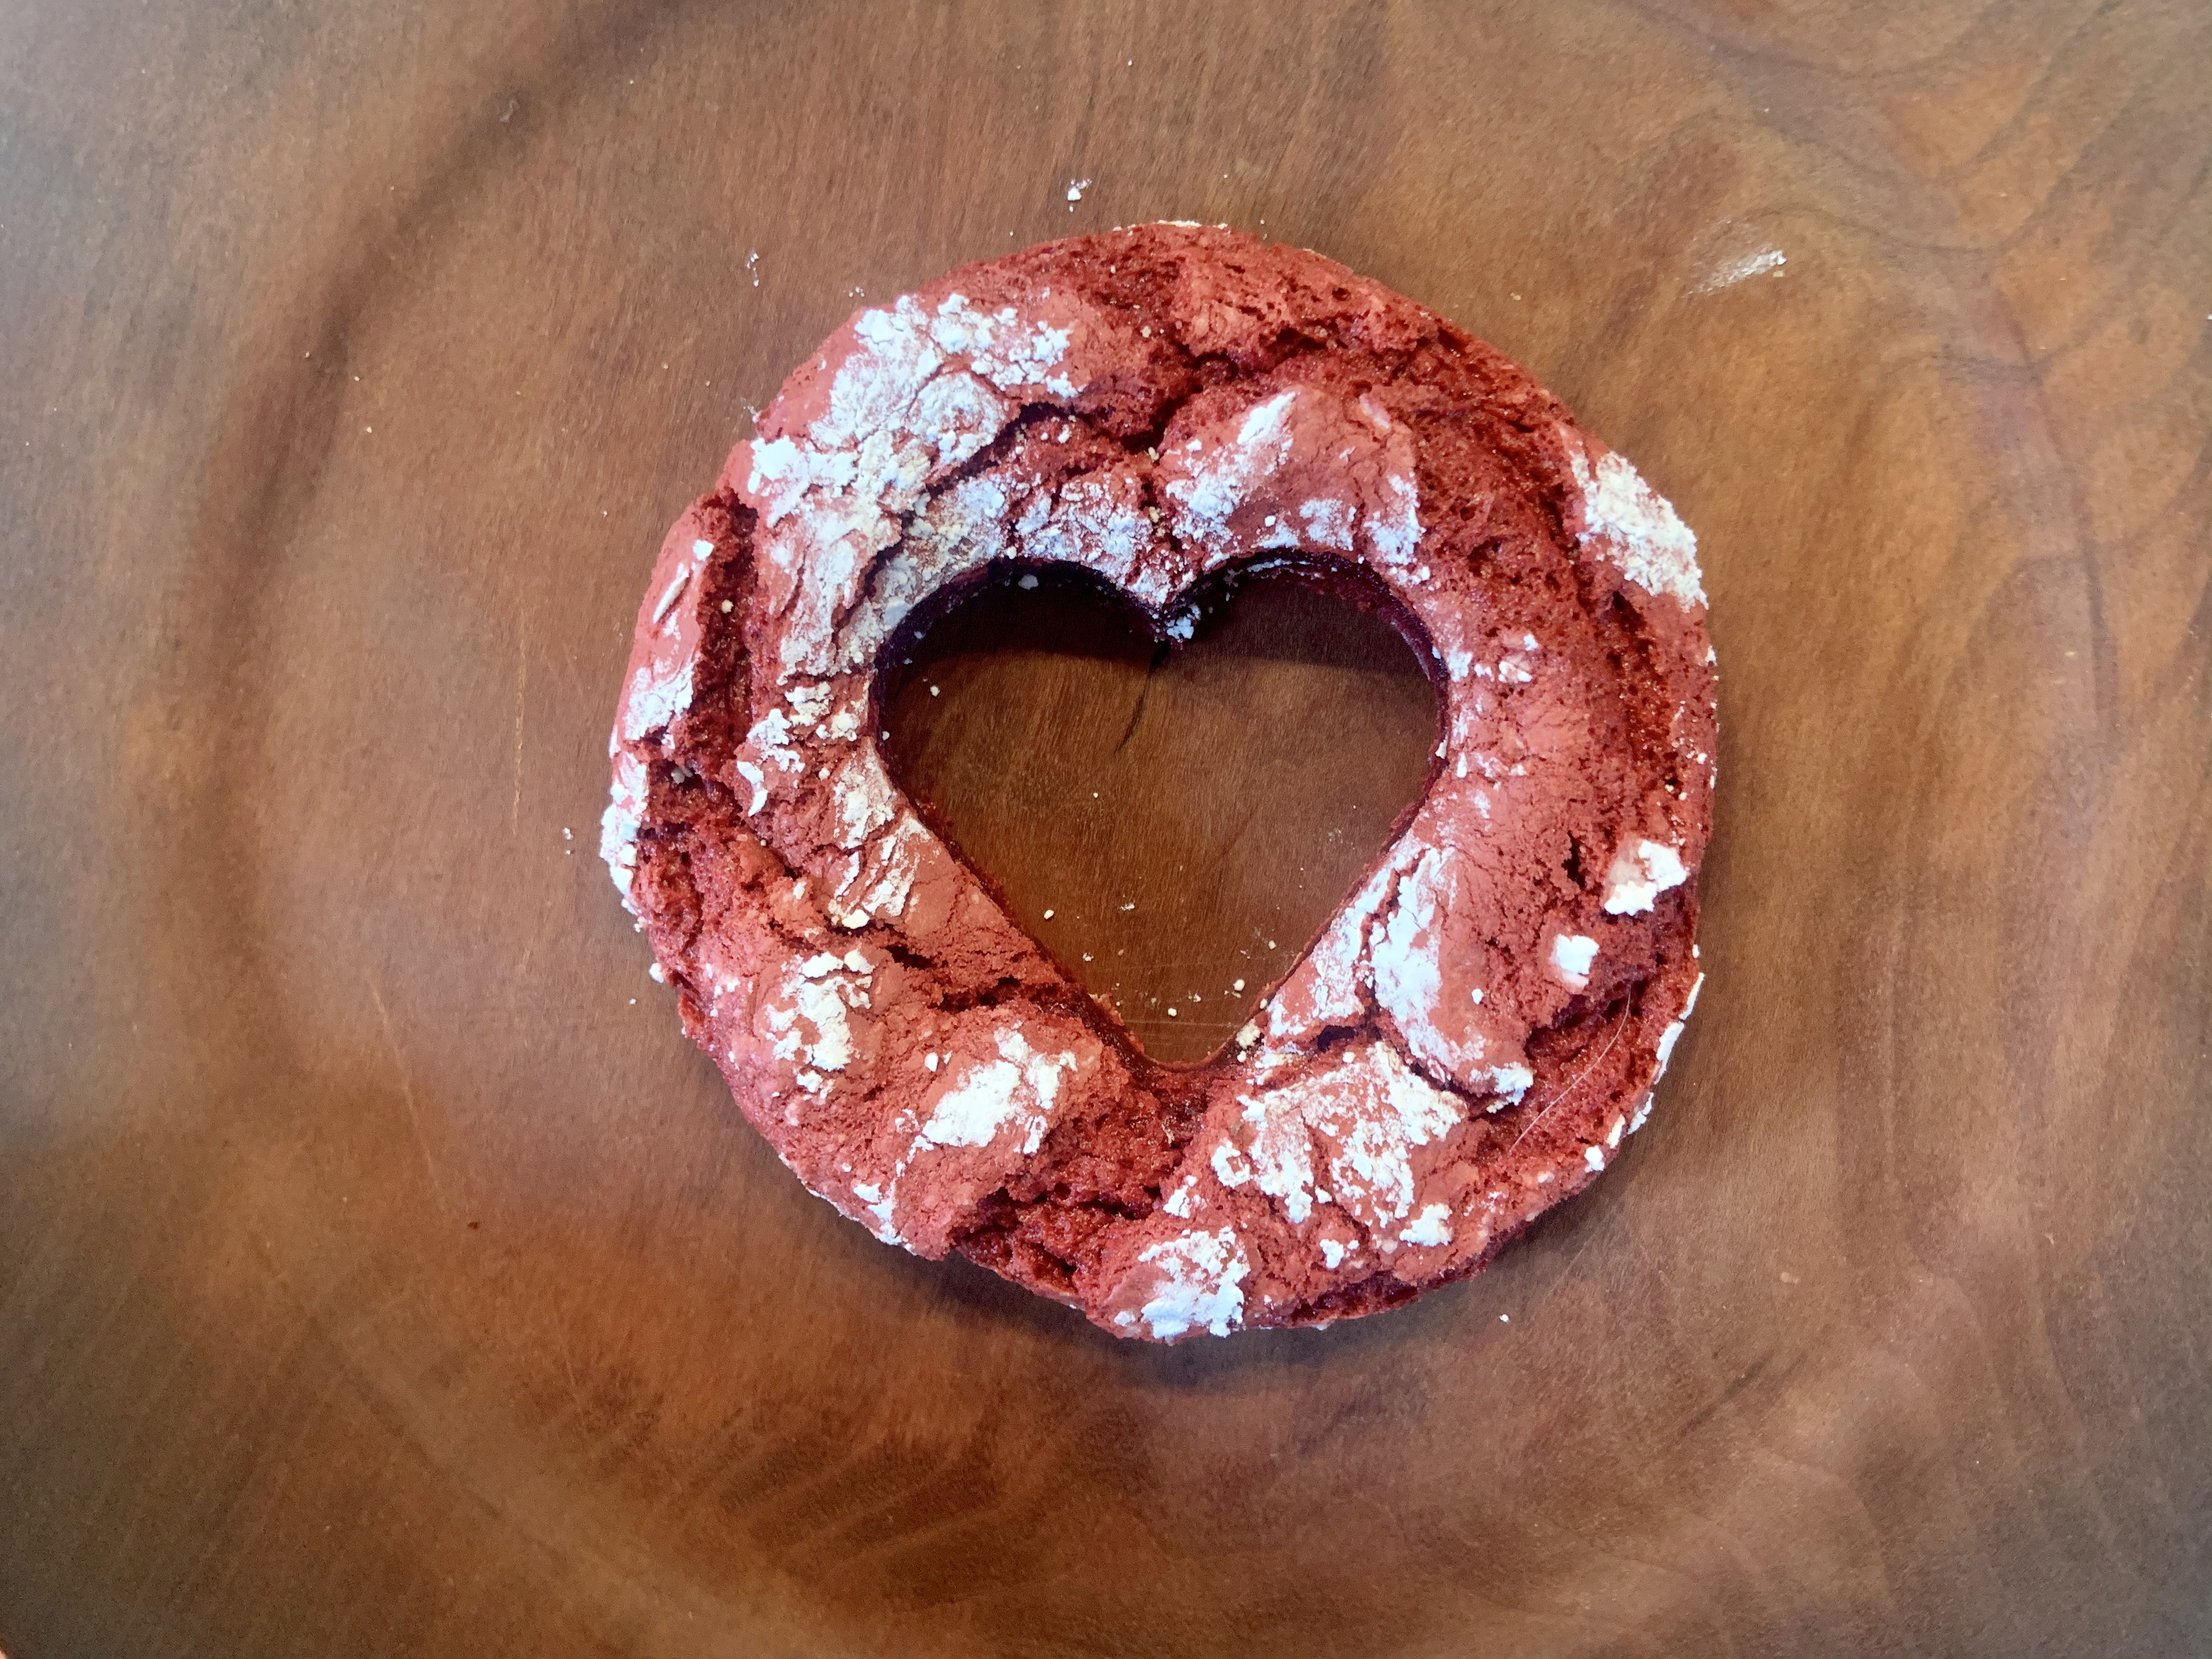
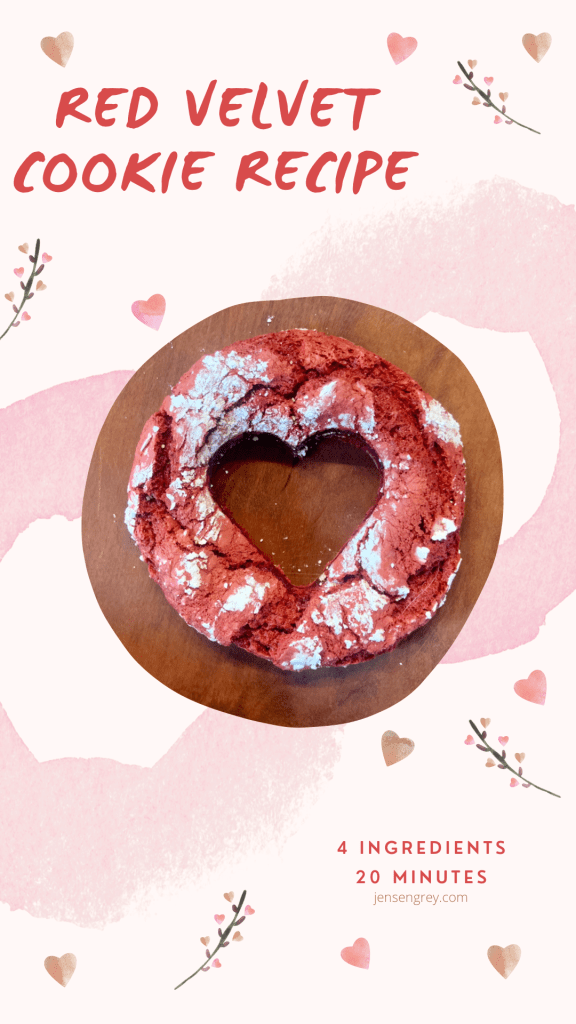
If you need a last minute Valentine’s Day treat/present or are really craving something delicious, you’ll love these cookies.
They take about twenty minutes to make and everyone will want more. It’s easy too!
This recipe also reminds me of Jensen. I craved these throughout my pregnancy. They’re always fun to make and honor him too.
The best part of this recipe is there’s only FOUR ingredients:
Red Velvet Cake Box
Two Eggs
1/3 Cup of Vegetable Oil
Powdered Sugar
First, preheat your over to 375.
Then mix the red velvet cake box, eggs, and oil together. It’ll get to a cookie dough consistency. When it does stop mixing.
Next, make the dough into little balls. I did one at a time and then coated them into powdered sugar. Without the powdered sugar, they’ll stick to a baking sheet. That makes it hard to pick them back up again.
Put them in the oven for ten minutes.
After you pull them out, you’ll notice they’ll fall. Don’t worry, they’re not supposed to stay risen. They still taste fluffy!
One little word of caution with the doughs stickiness… throw some flour or something on your hands.
Mila tried to help before I could cover her hands and…
She had fun helping roll little cookie balls, but it got messy quick!
This would definitely be a great and quick way to surprise your kids, partner, or whoever your celebrating Valentine’s Day with!
Let me know what you think of this recipe in the comments.
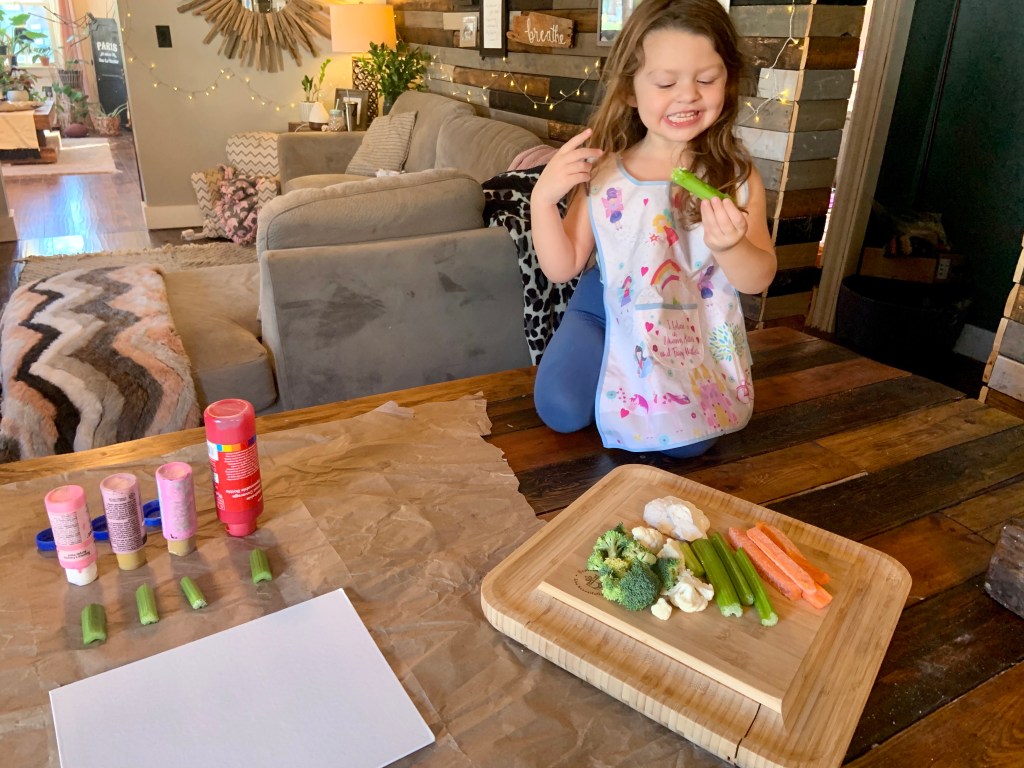
Process art is one of my and Mila’s favorite ways to be creative. This week we discovered that celery makes the cutest, little hearts.
Isn’t that just amazing or is it just for me since I’m the worst at drawing heart?
Anyways, this celery heARTwork activity is so easy to set up and your child can be as creative as they want. It was also great for us to mix in with snack time.
It takes playing with your food to a different level.
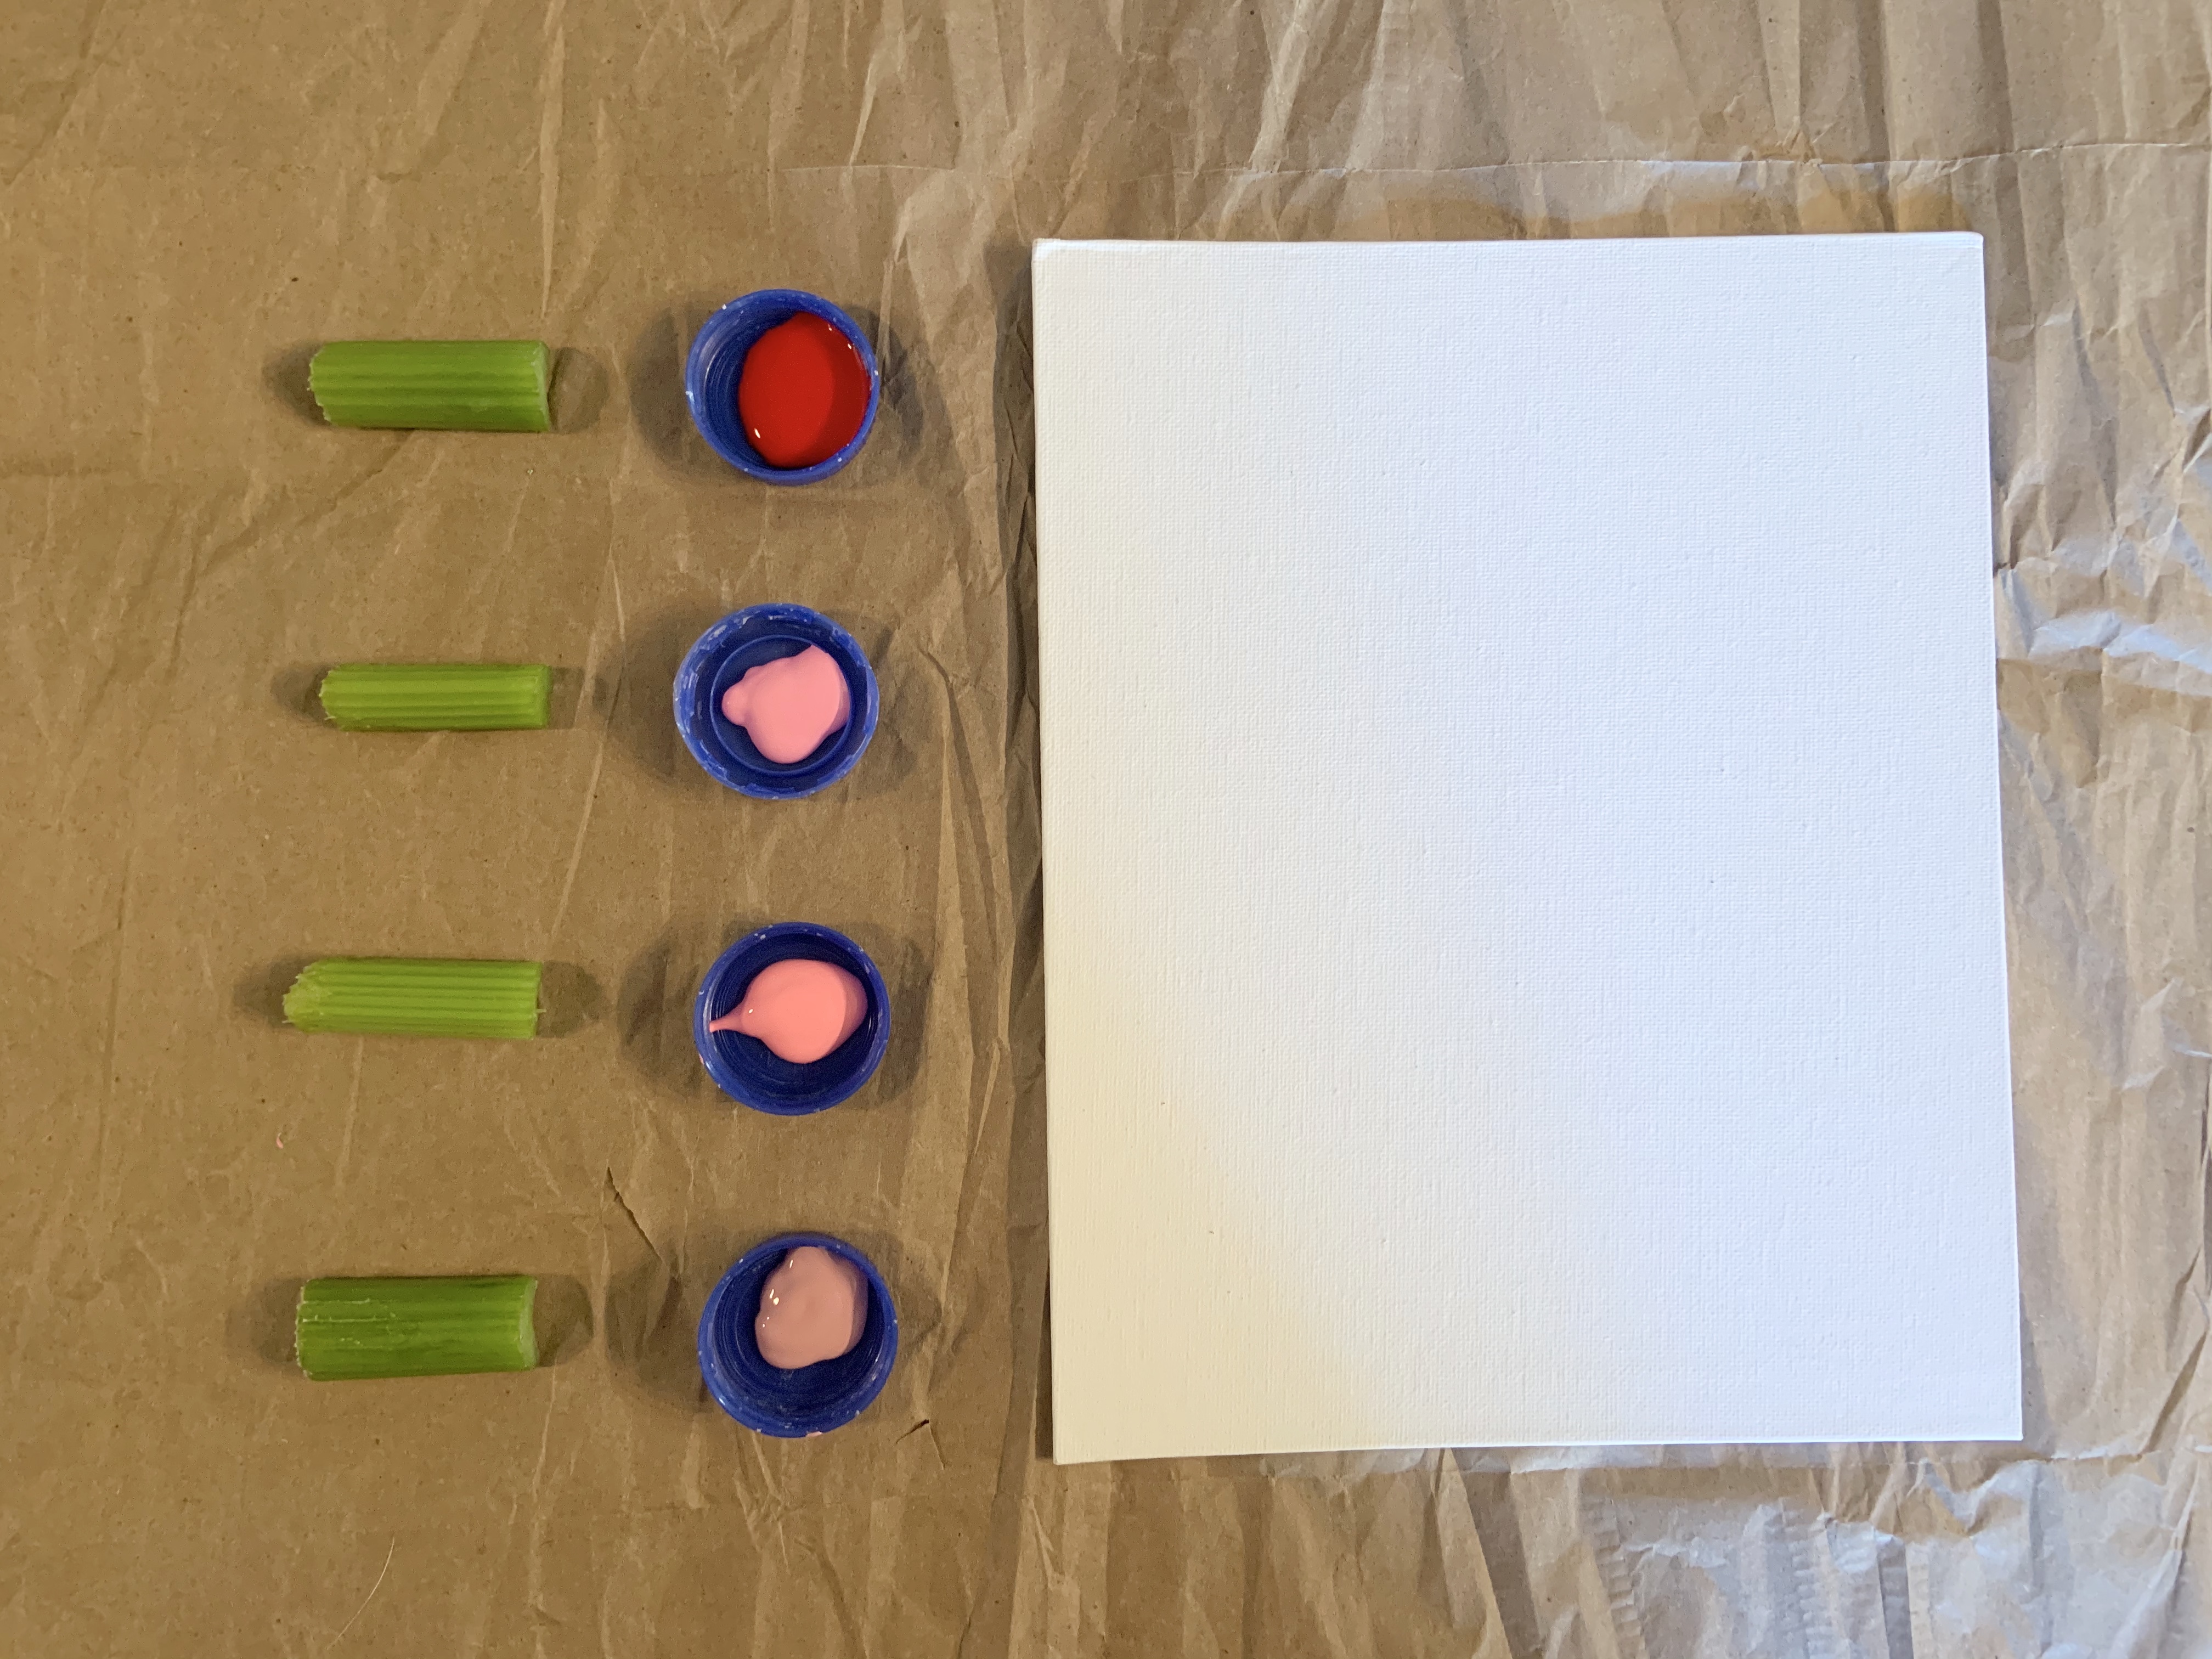
This is all you need for this activity:
Canvas or something to paint on (craft paper makes amazing wrapping paper!)
Paint
Celery
Something to put paint on (I used recycled milk jug lids.)
That’s seriously it! We obviously used different shades of pink and red. You can use whatever colors your child picks.
All they have to do is use their celery sticks like a paint brush. Dip the celery into the paint. Then press it down on the canvas.
At first, Mila wanted to move the celery like a brush. I showed her how to use it like a stamp to clear that confusion. She immediately recognized they were hearts.
Celery transfers the paint MUCH easier than potatoes. That means they don’t have to push down as hard.
Mila had so much fun playing with her food, while eating the same type.
When she would switch to snacking, I had a rule that all four celery paint sticks had to be in the upright position. That made me feel a little more comfortable when she kept switching back and forth!
No paint was consumed during this art project.
I love the way this process celery heARTwork turned out.
She just made the canvas and wrapping paper, but again, this can be used for anything you need hearts on!
The biggest thing to remember while kids do process art is there’s no end goal. This is their time to be as creative as they like.
I think the best part of process art is to see how your child grows with it. They get a better sense of composition, shapes, and colors the more they paint.
Their growth is truly the greatest gift.
As always, I hope if you do this activity, you let me know in the comments.
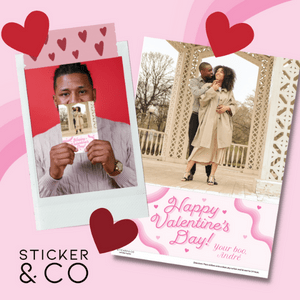
If you want to show off the cutest series of photos at the office, in your home, or even as a gift, you should definitely try this out!
‘I love you.’
We have an Instax camera and love snapping pictures. Mila likes how the film instantly come out and their aesthetic pleases me.
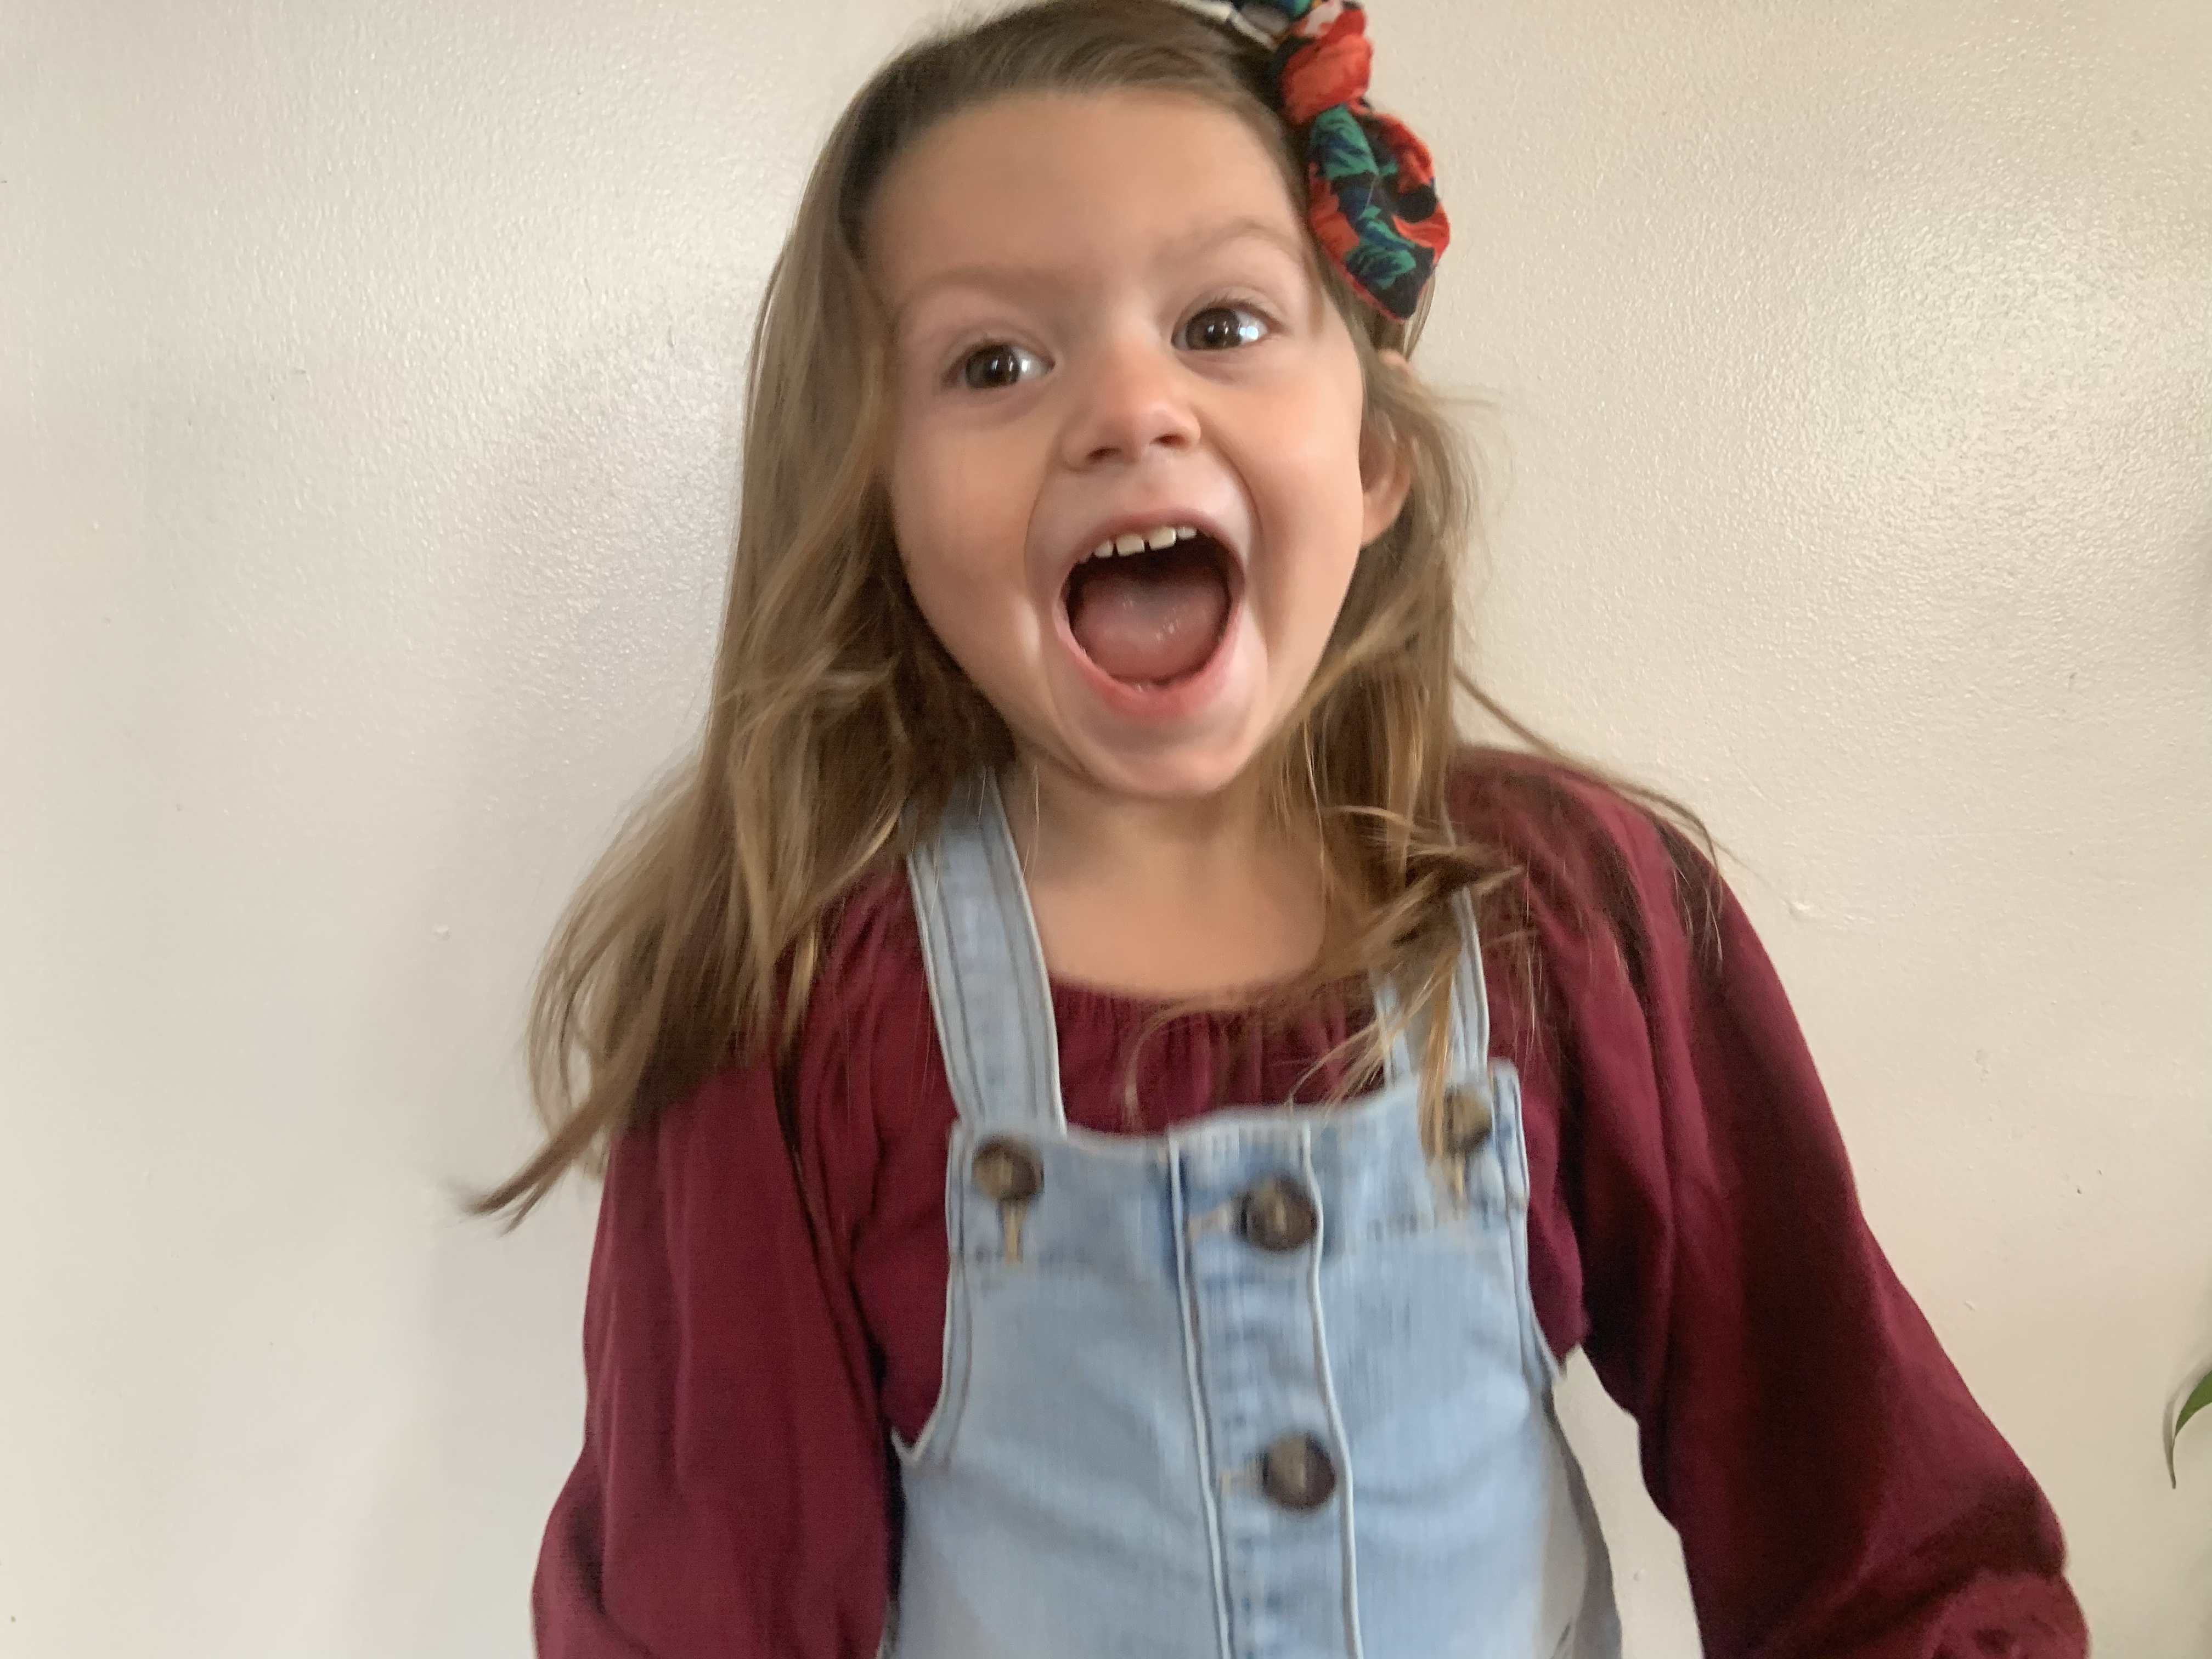
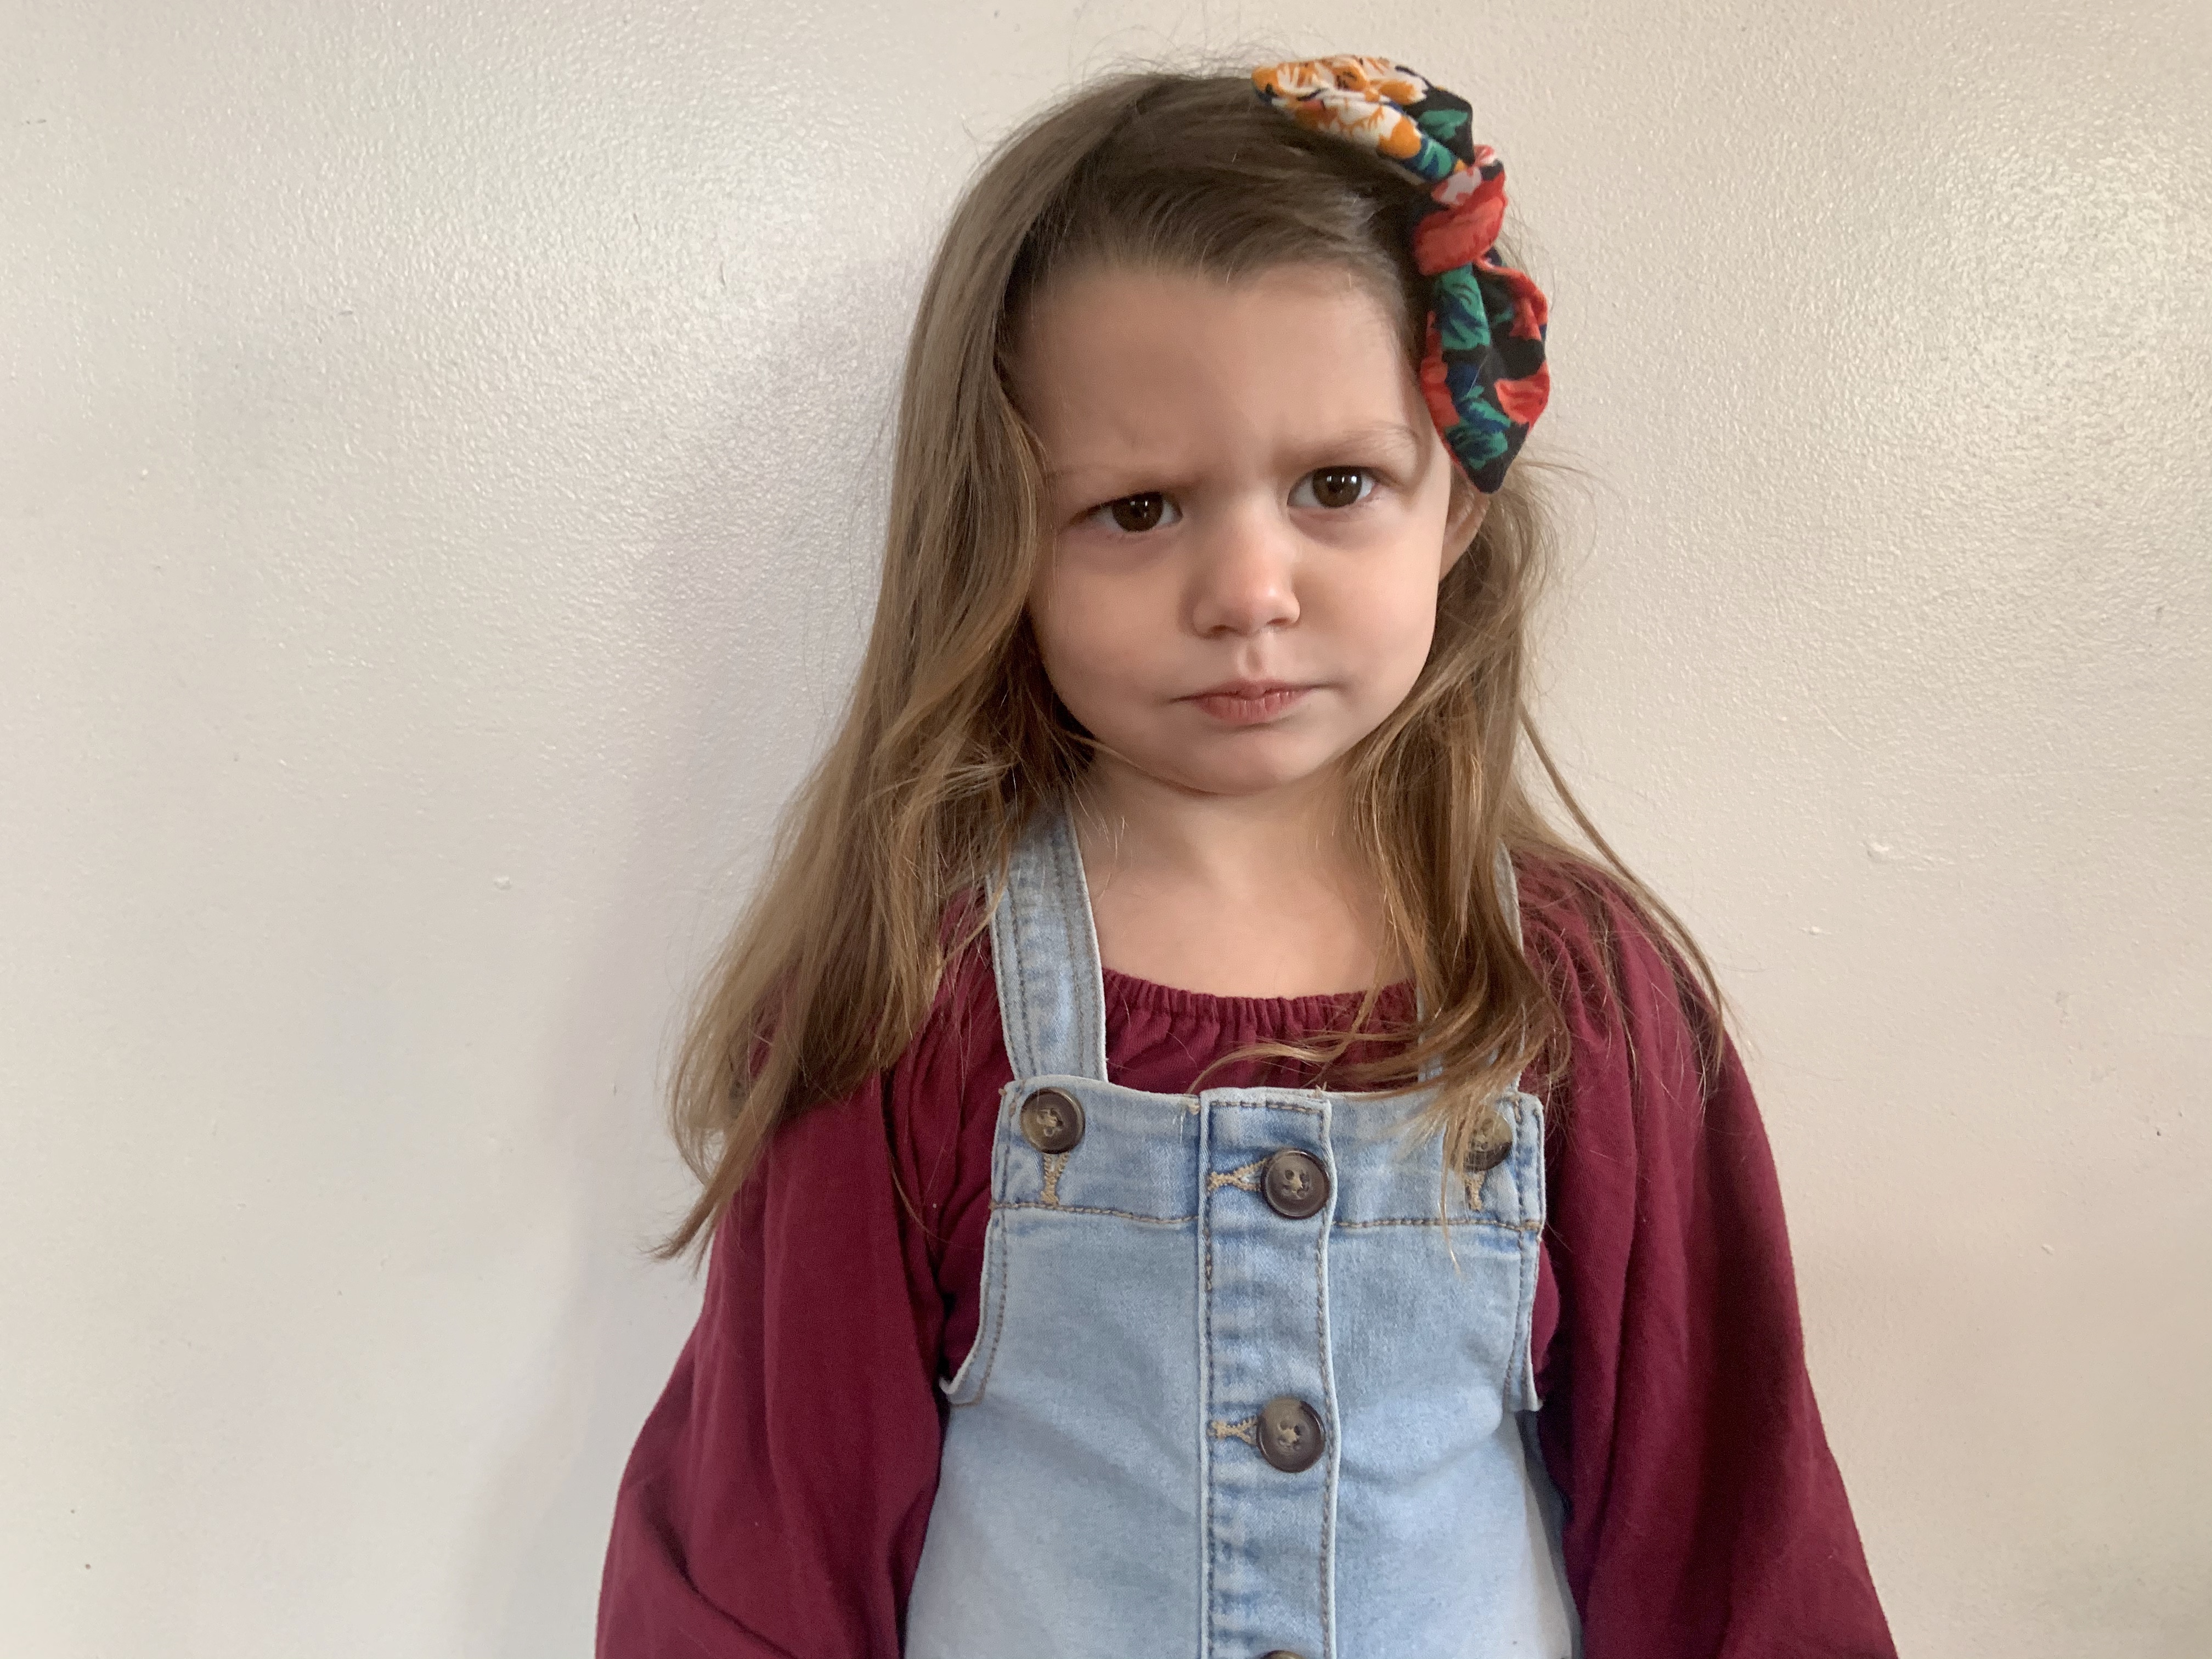
I got an idea to make myself (sorry not sorry) a Valentine’s Day present that I can always remember Mila at this time. So, we had a little photo shoot.
Obviously, she loved getting dressed up and making her hair ‘pretty.’ She was all for it!
Then it was time to shoot.
Since I can’t have Mila’s voice always telling me she loves me while I work, I thought of the next best thing… sign language.
In one of Mila’s dance songs, they sign ‘I love you,’ but a little reminder didn’t hurt.
After I got those first three pictures, she wanted to take more. So, so obviously I took the opportunity to take a few pictures of her.
Anyways, I found a perfect, Instax picture frame on Amazon! It’s pretty sturdy. The only issue I had with it was I had to tape the pictures in to stay, but that wasn’t a big deal.
Once I put it all together, it turned out so beautiful.
If you have more than one child, this frame also has a six opening frame too.
I think this would be an amazing gift to parents, grandparents, or anyone your child loves. It didn’t take too long to do either.
Your child will love seeing their pictures instantly and will be happy to give this as a present.
I hope if you decide to make this Valentine’s Day gift, you’ll let me know in the comments below.