Chicken Parmesan Sliders Recipe

One of the biggest sports days of the year is coming up. You’ll have your friends and family cheering for you when you bring these Chicken Parmesan Sliders to your Super Bowl party.

After you have these once, you’ll easily want to keep making them for easy week night dinners too.

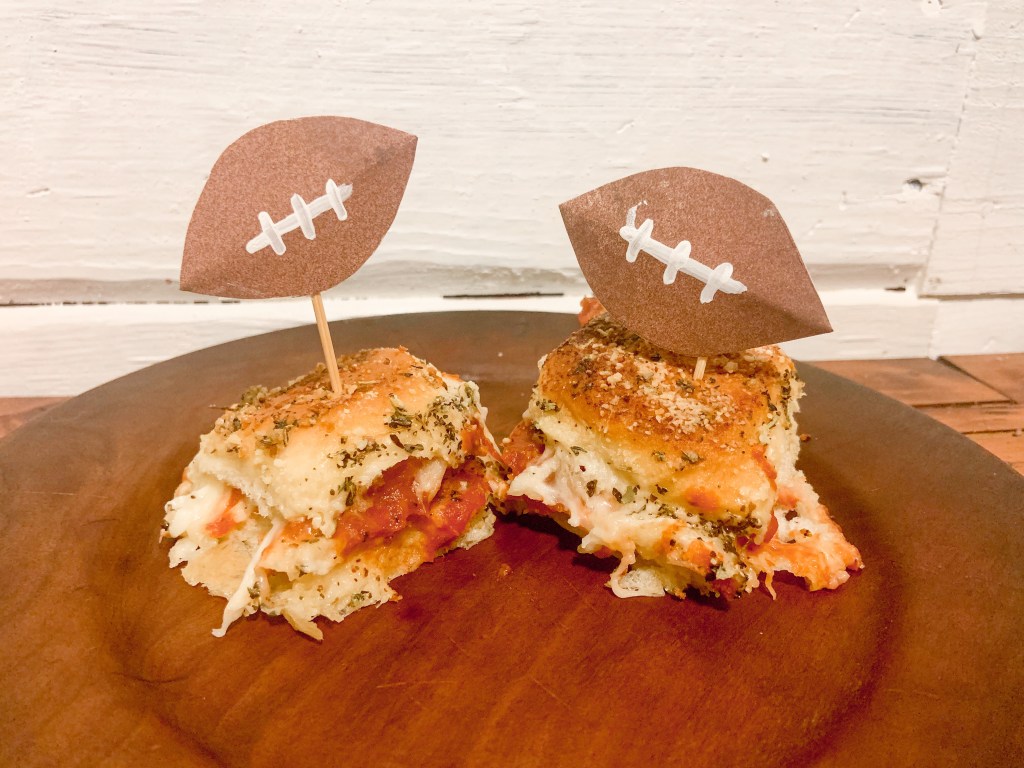
My family watches the Super Bowl every year. It’s a tradition that I love, even though I’m in it for the commercials and half time show now. Instead of just buying chips and drinks, I made one of my favorite meals into handheld sandwich.

Before I go into how to make this, I’d highly suggest doubling this recipe.

It goes FAST!

But, you’ll score a touchdown with this meal by getting these ingredients:

  • Chicken Nuggets
  • Hawaiian Rolls
  • Pasta or Pizza Sauce
  • Mozzarella Cheese (I used shredded)
  • Parmesan
  • Butter
  • Italian Seasoning

First, cook your chicken nuggets or tenders as directed on their bag or box.

While they are cooking, slice your Hawaiian rolls across the middle leaving a top and a bottom. You won’t want to pull the individual rolls apart.

Before putting the rolls on a cooking sheet, coat the bottom of the sheet with melted butter. After the chicken nuggets are cooked, put your oven to 350.

Place the bottoms of the rolls in the oven for around three minutes. This will toast them and not make the bottoms soggy when you’re eating. Trust me, it’s a much needed step!

When it’s toasted, it’s time to assemble the sliders.

Place a chicken nugget on each roll.

Then, coat them with pizza or pasta sauce. I personally like the taste of pizza sauce better so that’s what I chose to do!

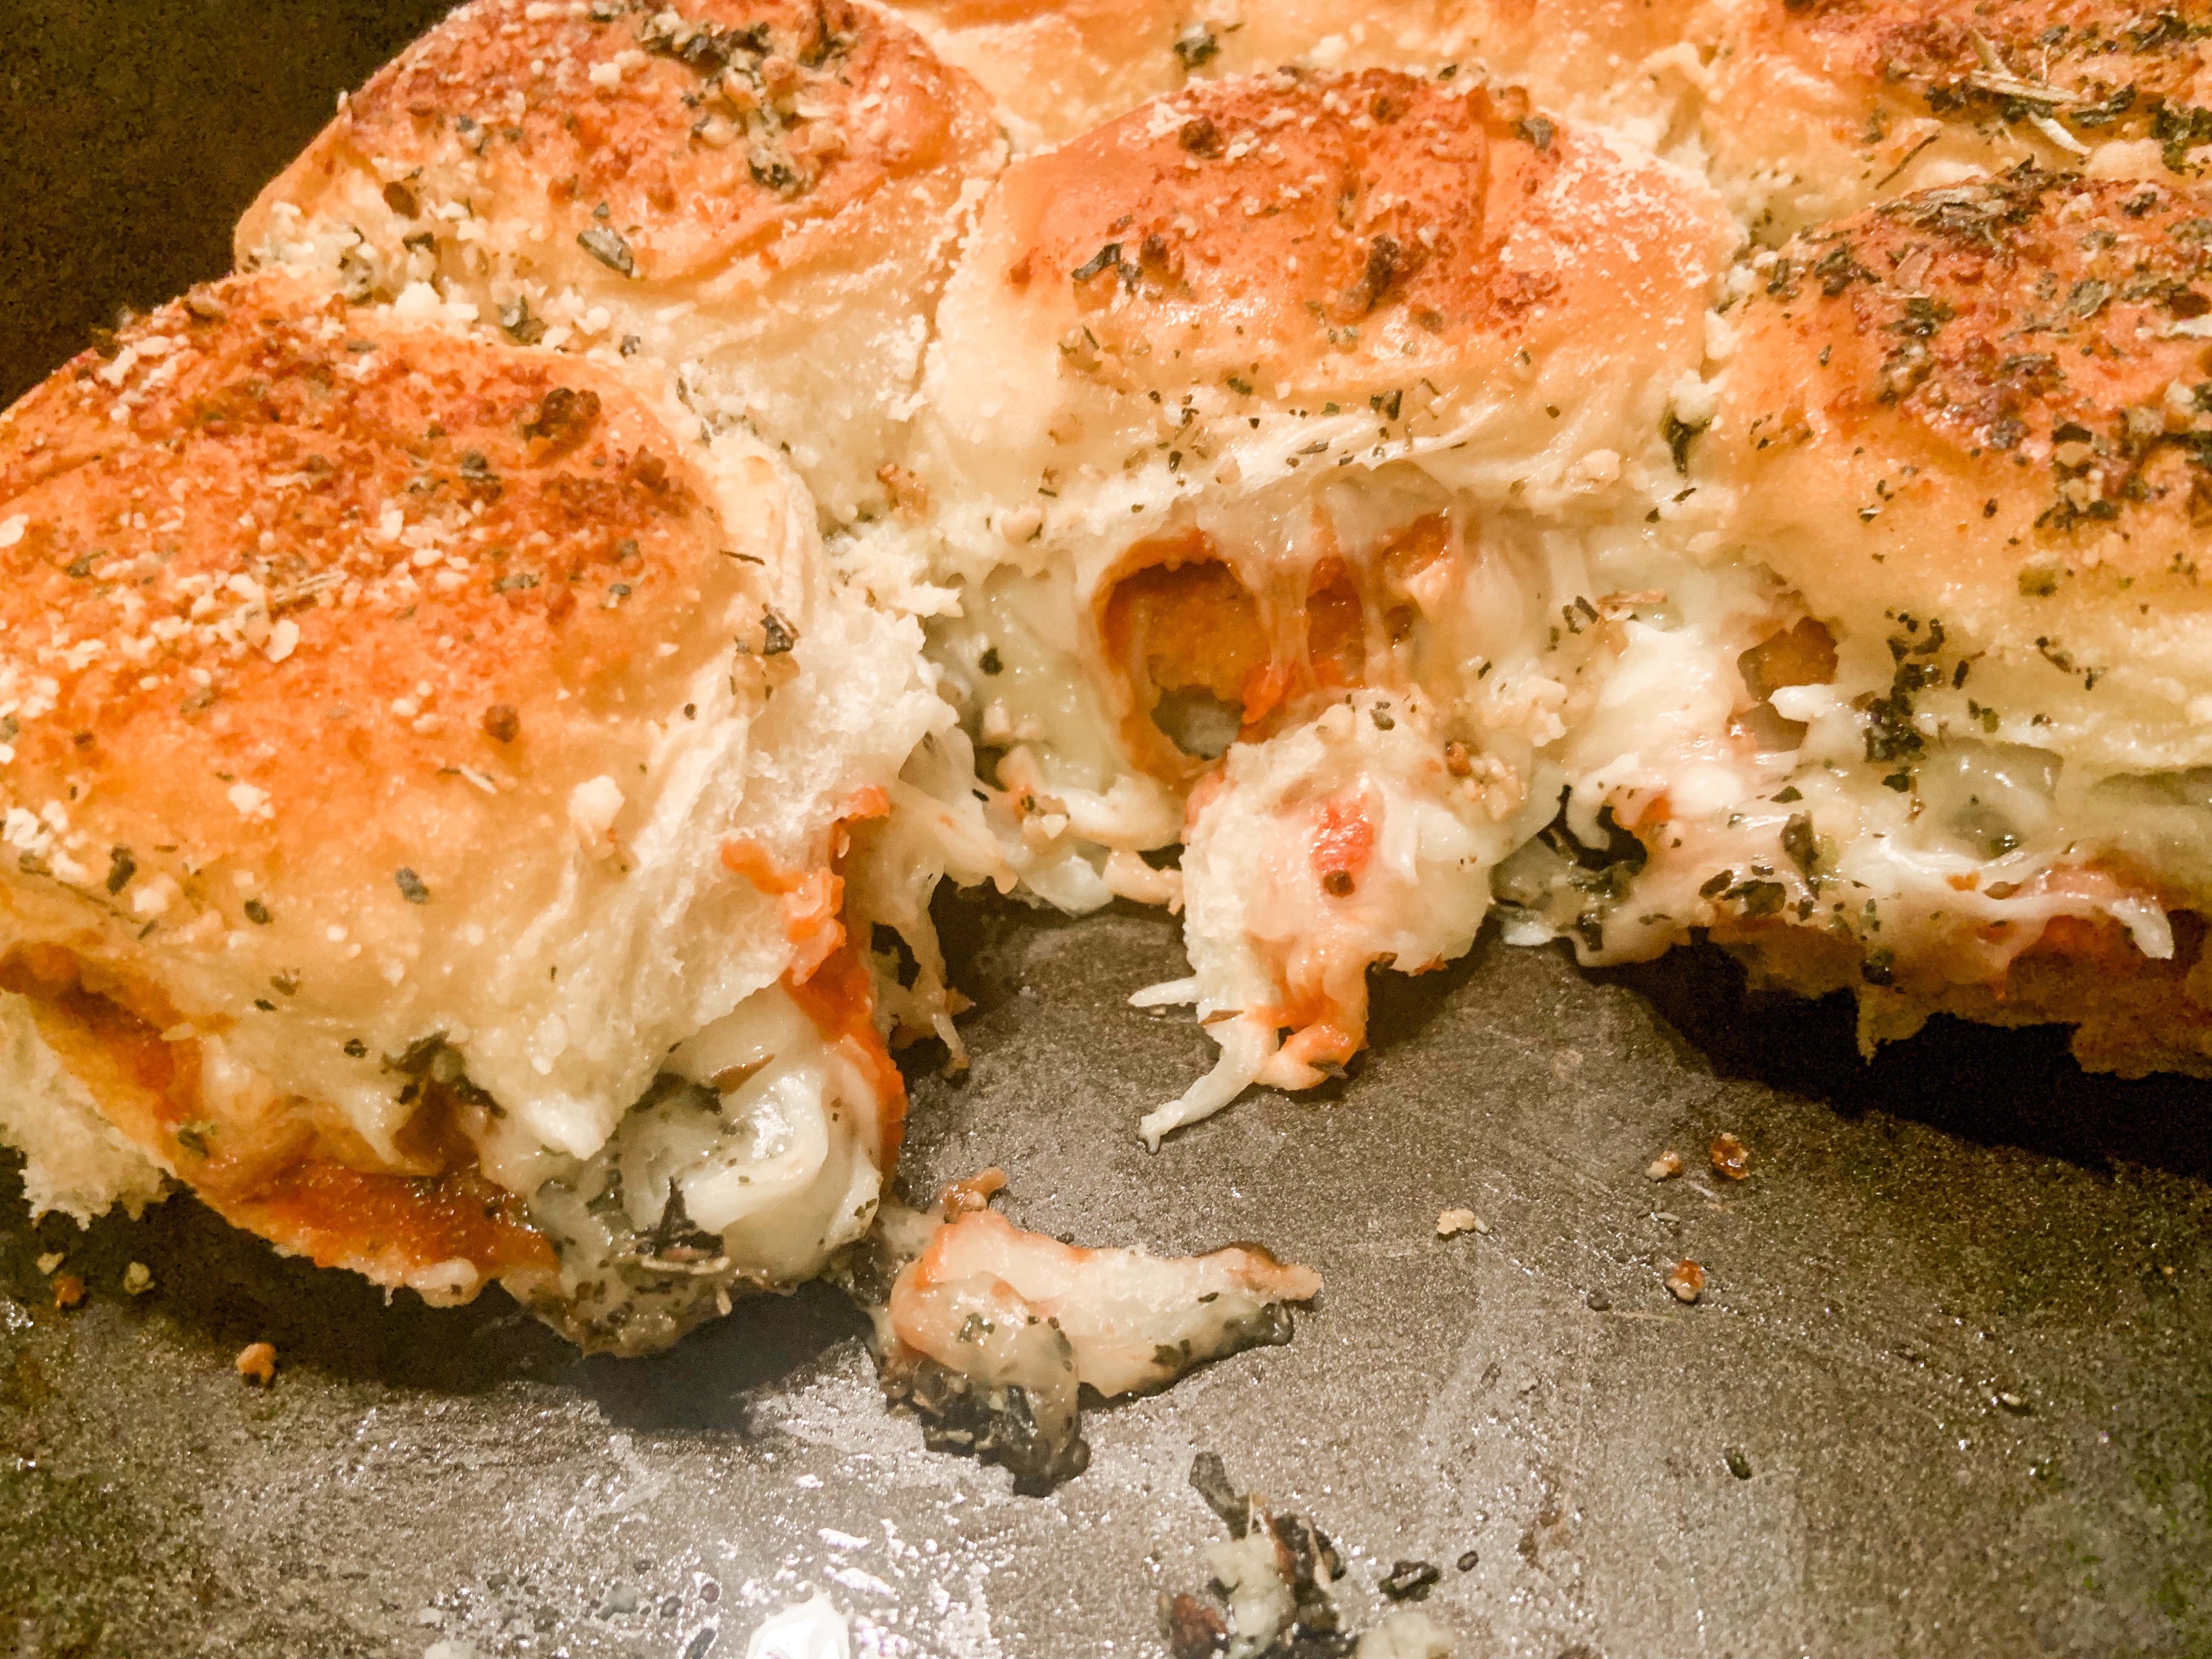
Next, either sprinkle shredded cheese or place mozzarella slices on your sliders. I probably put way too much cheese on mine, but that’s the way I like them! It makes it more satisfying to pull apart after they’re cooked too.

Place the top half of the rolls on top. Add melted butter mixed with Italian seasoning and garlic over the rolls.

Cook in the oven for 18-20 minutes.

Once they’re done, allow them five minutes to cool down before eating.

I love the simplicity and quickness of this recipe. Mila and I both loved it and I know the rest of my family will too.

If you have any left over, they taste great as leftovers!

These Chicken Parmesan Sliders will definitely be in our dinner rotation for a long time. I hope they will be for your family as well


What’s your go to Super Bowl food? Let me know in the comments.

Advertisement

Week Night Minestrone Soup Recipe

Looking to warm up on a chilly week night? This Minestrone Soup takes a little love, but worth every bite.

Whoever you’re making this delicious meal for, they’ll be sure to love it: especially you!

My favorite soup ay Olive Garden is their minestrone soup. It’s filled with fresh veggies and the broth is always spot on. I knew I had to try to make it at home.

Since I was recently gifted beef broth from Kettle and Fire, it felt like my sign to go get the other ingredients too. Kettle and Fire‘s broth was so easy to work with, tasted amazing, and has all whole food ingredients without any artificial flavors, hormones, or additives. All things I feel 100% happy with giving Mila.

Again, I took a TON of videos and not a lot of pictures. Thankfully the pictures I did get make it look as yummy as it tasted! You can see the video down below.

Here’s the other ingredients you’ll need for this Week Night Minestrone Soup:

  • Kettle and Fire Bone Broth
  • Zucchini
  • Carrot
  • Red beans
  • White beans (Cannellini)
  • Pasta (we used penne)
  • Diced tomatoes (in jar)
  • Onion
  • Garlic
  • Salt and Pepper
  • Italian Seasoning

First, chop up your vegetables and open the can to the tomatoes.

Then, heat olive oil in a pan and soften the onions and carrots (if you have celery, you’d add it here too). Once they’re translucent, add in garlic for a minute.

Next, add in the broth, a few cups of water, and the tomatoes. Bring this to a boil. Then turn down the heat. Let the broth simmer for an hour.

After the hour is up, add in the zucchini, beans, seasoning., and pasta to the pot. I also added two more cups of water too. The pasta soaks up all the juices and I like the broth!

Cook until the pasta is ready.

Once your noodles are all cooked, take the pot off the heat. Now it’s time to enjoy your soup.

I topped my soup off with parmesan cheese, just like they do at Olive Garden. You can always make bread sticks to enjoy with your soup as well.

We had salad to accompany our soup and it was a nice little meal. Since it’s been so cold, we love warming up with soup.

I know you’d love it too!


What’s your favorite week night recipe? Or let me know your favorite Sooo in the comments.

The BEST and EASIEST Jiffy Corn Casserole

Thanksgiving wouldn’t be Thanksgiving without tasty sides. Even though I love all the classics like stuffing and green bean casserole, this Jiffy Corn Casserole is a staple for our family’s Turkey Day!

Like the title of this post says, it’s so easy to make and will be the BEST Jiffy Corn Casserole you’ll ever have.

Intrigued to try? Here’s all you need to make it:

  • 1 can of corn
  • 1 can of creamed corn
  • 2 large eggs
  • 1 box of Jiffy corn muffin mix
  • 1 stick of butter
  • 8 ounces of sour cream
  • 1/4 cup of sugar

First, preheat your oven to 350 degrees Fahrenheit.

Then, in a large bowl or your greased/nonstick sprayed casserole dish, mix in all the ingredients. Just mix until it’s all together, minus the corn!

Afterwards, stick the uncovered casserole dish in the oven for 45-50 minutes and you’re done.

The first time I ever made this recipe, I was shocked! It tasted so good. It’s almost like corn bread, but softer and better? I’m unsure how to explain it. My best comparison is to Chi-Chi’s corn side.

Hello to that Chi-Chi’s throwback!

If you don’t like corn casserole sweet, just take out the sugar and you can still make it. My family usually likes cheese on top of it too. If I decide to make the casserole with cheese, I’ll sprinkle shredded cheese on, then put it in the over to melt it.

It just makes it even tastier!

Mila usually helps me mix everything together, but it doesn’t take any time at all. It’s so easy and tasty that your family and/or friends will ask you to make it for all your get-togethers!


What’s your go to side to make for Thanksgiving or any other type of gathering?

California Avocado Chicken Recipe

This isn’t your average chicken recipe. So, if that’s what you’re looking for get off the page now.

Just kidding, all are welcome! But, this recipe is so good and perfect for spring and summer. It’s light and full of flavor. There may be a few steps, but the outcome is totally worth it.

This recipe is a touch more complex than other recipes I share. Mostly because there’s one prep step that I normally don’t have time to do. But, it only takes thirty minutes, which is no time when you’re playing outside.

I’m going to break the ingredients down into the two steps. Here’s what you’ll need:

Marinade:

  • 4 chicken breasts
  • 3/4 cup of balsamic vinegar
  • 1/4 cup of honey
  • 3 cloves of minced garlic
  • 2 tablespoons of olive oil
  • 2 teaspoons of Italian seasoning
  • Salt and pepper

Topping:

  • 2 avocados
  • 3 Roma tomatoes
  • Salt and pepper
  • Mozzarella cheese (optional)

The first thing you should do is make the marinade. Combine the balsamic vinegar, honest, garlic, olive oil, Italian seasoning, salt, and pepper together.

Once it’s mixed up, put the chicken breasts in the marinade and put in the fridge for at least 30 minutes.

While the marinade is working it’s magic, start making the topping.

Dice the avocados and tomatoes. Then add them to a bowl and top with salt and pepper. I also added some Italian seasoning too!

After this, heat your grill or griddle.

Pull out your marinated chicken and get to cooking. Usually, it only takes 5-7 minutes per side to cook chicken. When they’re done, melt mozzarella cheese over it then plant.

Before serving, add the avocado and tomato topping. I also drizzled more balsamic vinegar over if too.

The chicken in this recipe tastes so good; thanks to the marinade!

There were no leftovers since Mila and I both loved it. I’m so glad she loves these flavors. Actually, I had to cut another avocado while waiting for the chicken. She just eats it by the bowl.

Anyways, I think this recipe will be a great addition to your spring and summer rotation.

If you try it out, let me know in the comments!

5 Ingredient Cheesy Chicken Roll Up Recipe

If you’re looking for another easy week night dinner, this one is great to add in. It reminds me of the Chicken Pot Pie Recipe. Yet, this meal has a completely different flavor profile.

You might have noticed, I love cooking with rotisserie chicken! It’s a simple way to add chicken in our meals. Plus, it tastes good!

Although this isn’t technically, ‘one pot’ the clean up is easy too.

Now that I’ve sold you on the recipe, here’s all the ingredients you’ll need:

  • Rotisserie chicken
  • Crescent rolls
  • 1 cup of shredded cheese
  • Cream of mushroom soup
  • 1/4 cup of milk

There’s not a ton of steps for this recipe, but it’s oh so yummy.

The first thing you should do is preheat your oven to 350 degrees.

Then, in a casserole dish, mix together the cream of mushroom soup, milk, and 1/2 cup of shredded cheese.

After it’s mixed together, pull apart your chicken. Then add the remaining cheese with it.

Next, unroll the crescent rolls. Place a small amount of the chicken and cheese mixture in the big part of the crescent roll triangle.

Now comes the fun part. Roll the crescent roll. Mila had a blast helping me with this beautiful part.

After you have your crescent rolls filled, place them on top of the soup and cheese mix.

I added some garlic and butter on top of the crescent rolls at this point, but this is totally optional.

Then, place them in the oven until the crescent rolls are golden brown. This takes about twenty-five minutes to do.

These cheesy chicken roll ups are so good. We didn’t even have left overs! I served them with green beans and it made for a perfect dinner.

As with all my recipes, let me know in the comments if you try it out.

One Pot Sausage Gnocchi Recipe

Since last week’s one pot recipe went so well, I figured I’d share another delicious one. It’s another Italian inspired recipe, but with a different taste.

Gnocchi is one of my favorite foods and I love how easy it is to cook with. You’ll love it too.

Here’s the ingredients you’ll need:

  • 1 lb mild ground sausage
  • 1 16 oz package gnocchi
  • 1 onion diced
  • Minced garlic
  • 1 can garlic and olive oil petite diced tomatoes
  • 3/4 cup heavy cream
  • 3 cups spinach
  • Shredded mozzarella cheese
  • Salt and pepper
  • Italian seasoning
  • Garlic powder

Honestly, there’s more ingredients than there are steps with this recipe. That’s how you know it’s good and easy to clean up.

First, over medium heat, brown the sausage, onion, garlic, and seasonings.

After, add in the tomatoes, cream, gnocchi, and spinach. Keep cooking until the gnocchi is done, spinach is wilted, the sauce has reduced.

Then, stir in the cheese. I ended up adding extra cheese after putting it in the bowl.

This recipe is so easy to make and it warmed us up. I loved the different textures in the meal too. Plus, you can sneak in some extra veggies, which we all need.

As always, if you try out this recipe, let me know how it goes in the comments.

One Pot Ground Beef and Zucchini Recipe

What’s better than a tasty meal? Not having a ton of dishes to clean up afterwards! This one pot dinner will be a family favorite and one you’ll love making.

Here’s what you’ll need;

  • One pound of hamburger
  • One medium sized zucchini
  • Small bell pepper (I used red)
  • One can of Hunt’s Diced Tomatoes with Basil, Garlic & Oregano
  • 1/4 of onion
  • One cup of rice
  • Two cups of beef broth
  • Spices (I used salt, pepper, onion powder, garlic powder, paprika, and oregano)
  • Half a block of cream cheese
  • Cheese

First, heat up your pan. While you’re waiting, cut your onion, pepper, and zucchini.

Once it’s heated up add the ground beef, onion, and pepper. I added some of the spice blend. When it’s browned, drain the oil.

Next, add the zucchini, tomatoes, rice, and beef broth. Don’t drain the tomatoes because the rice will soak up that juice too! Add the rest of your spice blend here.

Cover and stir every couple minutes.

Once the rice starts to soften, add in the cream cheese. Mix it until it blends throughout.

When the rice is done, take off heat and add in cheese. You can use any type of cheese. We used shredded colby jack!

Mila is also obsessed with eggs right now, so I put an over-medium egg over top of hers and and an easy-over egg on mine. I personally love the taste of egg yolk. It pulled the meal together.

Make sure to let me know in the comments if you tried this recipe!

Italian Chicken Dinner Recipe

I know I say this with almost all my recipes, but this is truly an easy recipe. This Italian chicken dinner recipe comes with potatoes, green beans, and a lot of Italian seasoning.

It’s be perfect to make for a romantic dinner or putting it in your meal rotation.

Either way, you won’t be disappointed.

Here’s all you need:

  • Chicken breasts (I used four for lunch leftovers)
  • Green beans (I used frozen)
  • Russet potatoes (2)
  • Zesty Italian dressing mix
  • Salt and pepper
  • Butter

Preheat your oven to 350.

Then peel your potatoes and cut them and the chicken into bite sized pieces. You can leave the chicken as whole breasts, but it gets more seasoned when cut before.

If you have fresh green beans, you’ll also want to cut them into smaller pieces.

Place the chicken in the middle of a pan with the potatoes and green beans sandwiching it. This way the chicken gets the most flavor.

Next, evenly pour over a packed of zesty Italian seasoning, leave some behind to season the other side. Then top with salt and pepper.

Grab a stick of butter and evenly cut slices of it. Place over top the chicken, green beans, and potatoes.

Put the dish in the oven for forty-five minutes.

Then take out your dish to mix or flip (whatever’s easier for you) each section and add the rest of the seasoning too.

Pop your dish back in the oven for fifteen more minutes.

When it’s all done, it’s ready to serve.

I seriously was pleasantly surprised with how this turned out! If you’ve read my recipe posts before, I’m not super confident with chicken. Yet, this meal gave me the chicken confidence boost I needed.

Mila loved it and I loved being able to have amazing tasting leftovers for work.

As always, let me know if you try this recipe!

Philly Cheese Steak Cheesy Bread Recipe

Thinking about what to make for the big game this coming weekend? Or are you just a philly cheese steak fan? Either way, you’re going to want to make this.

This take on cheesy bread adds some meaty bites with some freshness with the bell peppers and onions.

It’s extra cheesy, which is my favorite part, and perfect to share.

Here’s all you’ll need:

  • French bread
  • Mayonnaise
  • Bell pepper (I used red and yellow because it’s what I had on hand)
  • Yellow onion
  • Mushrooms
  • Provolone cheese
  • Worcestershire sauce
  • Philly Gourmet Sliced Steaks (you can use whatever steak you want)
  • Salt and Pepper
  • Olive oil
  • Butter

Yes, to those who are wondering about my bread, those are Mila bite marks! She attacked it while I was getting everything ready. Life with a toddler is always fun. It’s also why I didn’t get a ton of preparation pictures.

This recipe is not hard. It took under thirty minutes to do in all… including wrestling the bread away from her.

First, cook your steaks and preheat your oven to 400 degrees.

I’ve used the Philly Gourmet brand a few times. It’s easy and gives me that classic vibe. I can imagine ribeye would work really well too!

For this, all I did was put the meat on the pan with some oil. I added salt and pepper and let it all cook through. If you’re using this brand, I used the entire box.

After that’s cooked, transfer is into a bowl. Then take your chopped peppers, onion, and mushroom to the pan. Add a little butter and cook.

While that’s on the pan, slice your bread. I lost the entire bottom half to Mila and and Max, but still had plenty.

Put mayonnaise on the bread, then a provolone layer. Next, add the cheesesteak on top and another layer of cheese.

After your veggies are done cooking, layer them on too.

Once everything is placed, stick it in the oven for 10-15 minutes, or until browned.

Take it out of the oven. When it cools off, cut it how you please and enjoy!

It’s seriously so tasty and cheesy! I can see it being a hit for a Super Bowl party or for a quick weekday dinner.

If you give it a try, let me know in the comments!

Grilled Caprese Chicken Recipe

This is going to sound silly, but I’m so intimidated by cooking chicken.

I have this fear it’s going to be REALLY raw and it gives me the creeps. So, when I do make it, I usually bake it for a few more minutes than what a recipe calls. Any recipe that says to put it on the grill or pan, I just skip it.

Until I came across this one.

This grilled caprese chicken made me feel like I was back in Italy.

Not only was I able to grill it on the stove top, it was so good and not raw. I think this is a culinary win on my part! You should try it too.

Here’s what you’ll need:

  • 4 chicken breasts
  • 2 teaspoons of Italian seasoning
  • 2 teaspoons of salt
  • 1 teaspoon of garlic powder
  • 1 teaspoon of onion powder
  • 1 teaspoon of black pepper
  • Olive oil
  • Fresh mozzarella
  • Tomatoes (I used roma, but you could use other kinds too)
  • Basil
  • Balsamic glaze
  • Parchment paper
  • Grill or griddle
  • Rolling pin

That list seems huge, but it all comes together and you probably already have a lot of the ingredients. This recipe is also a little more in depth than what I usually share, but it’s pretty easy to follow along.

First, turn on your grill or griddle to a medium heat. This way it’s warmed up after you’ve prepped.

The, beat your chicken. No really. Wrap your chicken in parchment paper and hit it with a rolling pin. You’re trying to make your chicken have an even thickness.

After it’s evened out, brush on olive oil.

Next, it’s time to season. You can either mix your seasonings together in a separate bowl (what I did) or put it on top of the chicken. I always add extra salt and pepper too. Place on the grill or griddle and let it cook for five minutes. Then flip it over for five more minutes.

Pro tip… I used a griddle. To get the grill effect, I placed a baking sheet over my chicken to keep the heat in.

While your chicken is cooking. Slice your tomatoes and mozzarella if it isn’t pre-sliced. This is also a great time to chop your basil too.

Once your chicken is finished cooking on the second side, flip it over again. Place two pieces of mozzarella on top of each chicken. Cover them back up and let the cheese melt for about two to three minutes.

After it’s melted, plate them and put the tomatoes, basil, and balsamic glaze over top.

Then enjoy!

For sides, I made broccoli and garlic-butter noodles. It tasted great and Mila even enjoyed a few bites of the chicken too. She was way more into the noodles though.

I hope you enjoy this recipe and if you give it a try, let me know in the comments!