Explore Dundee Falls in Dundee, Ohio.

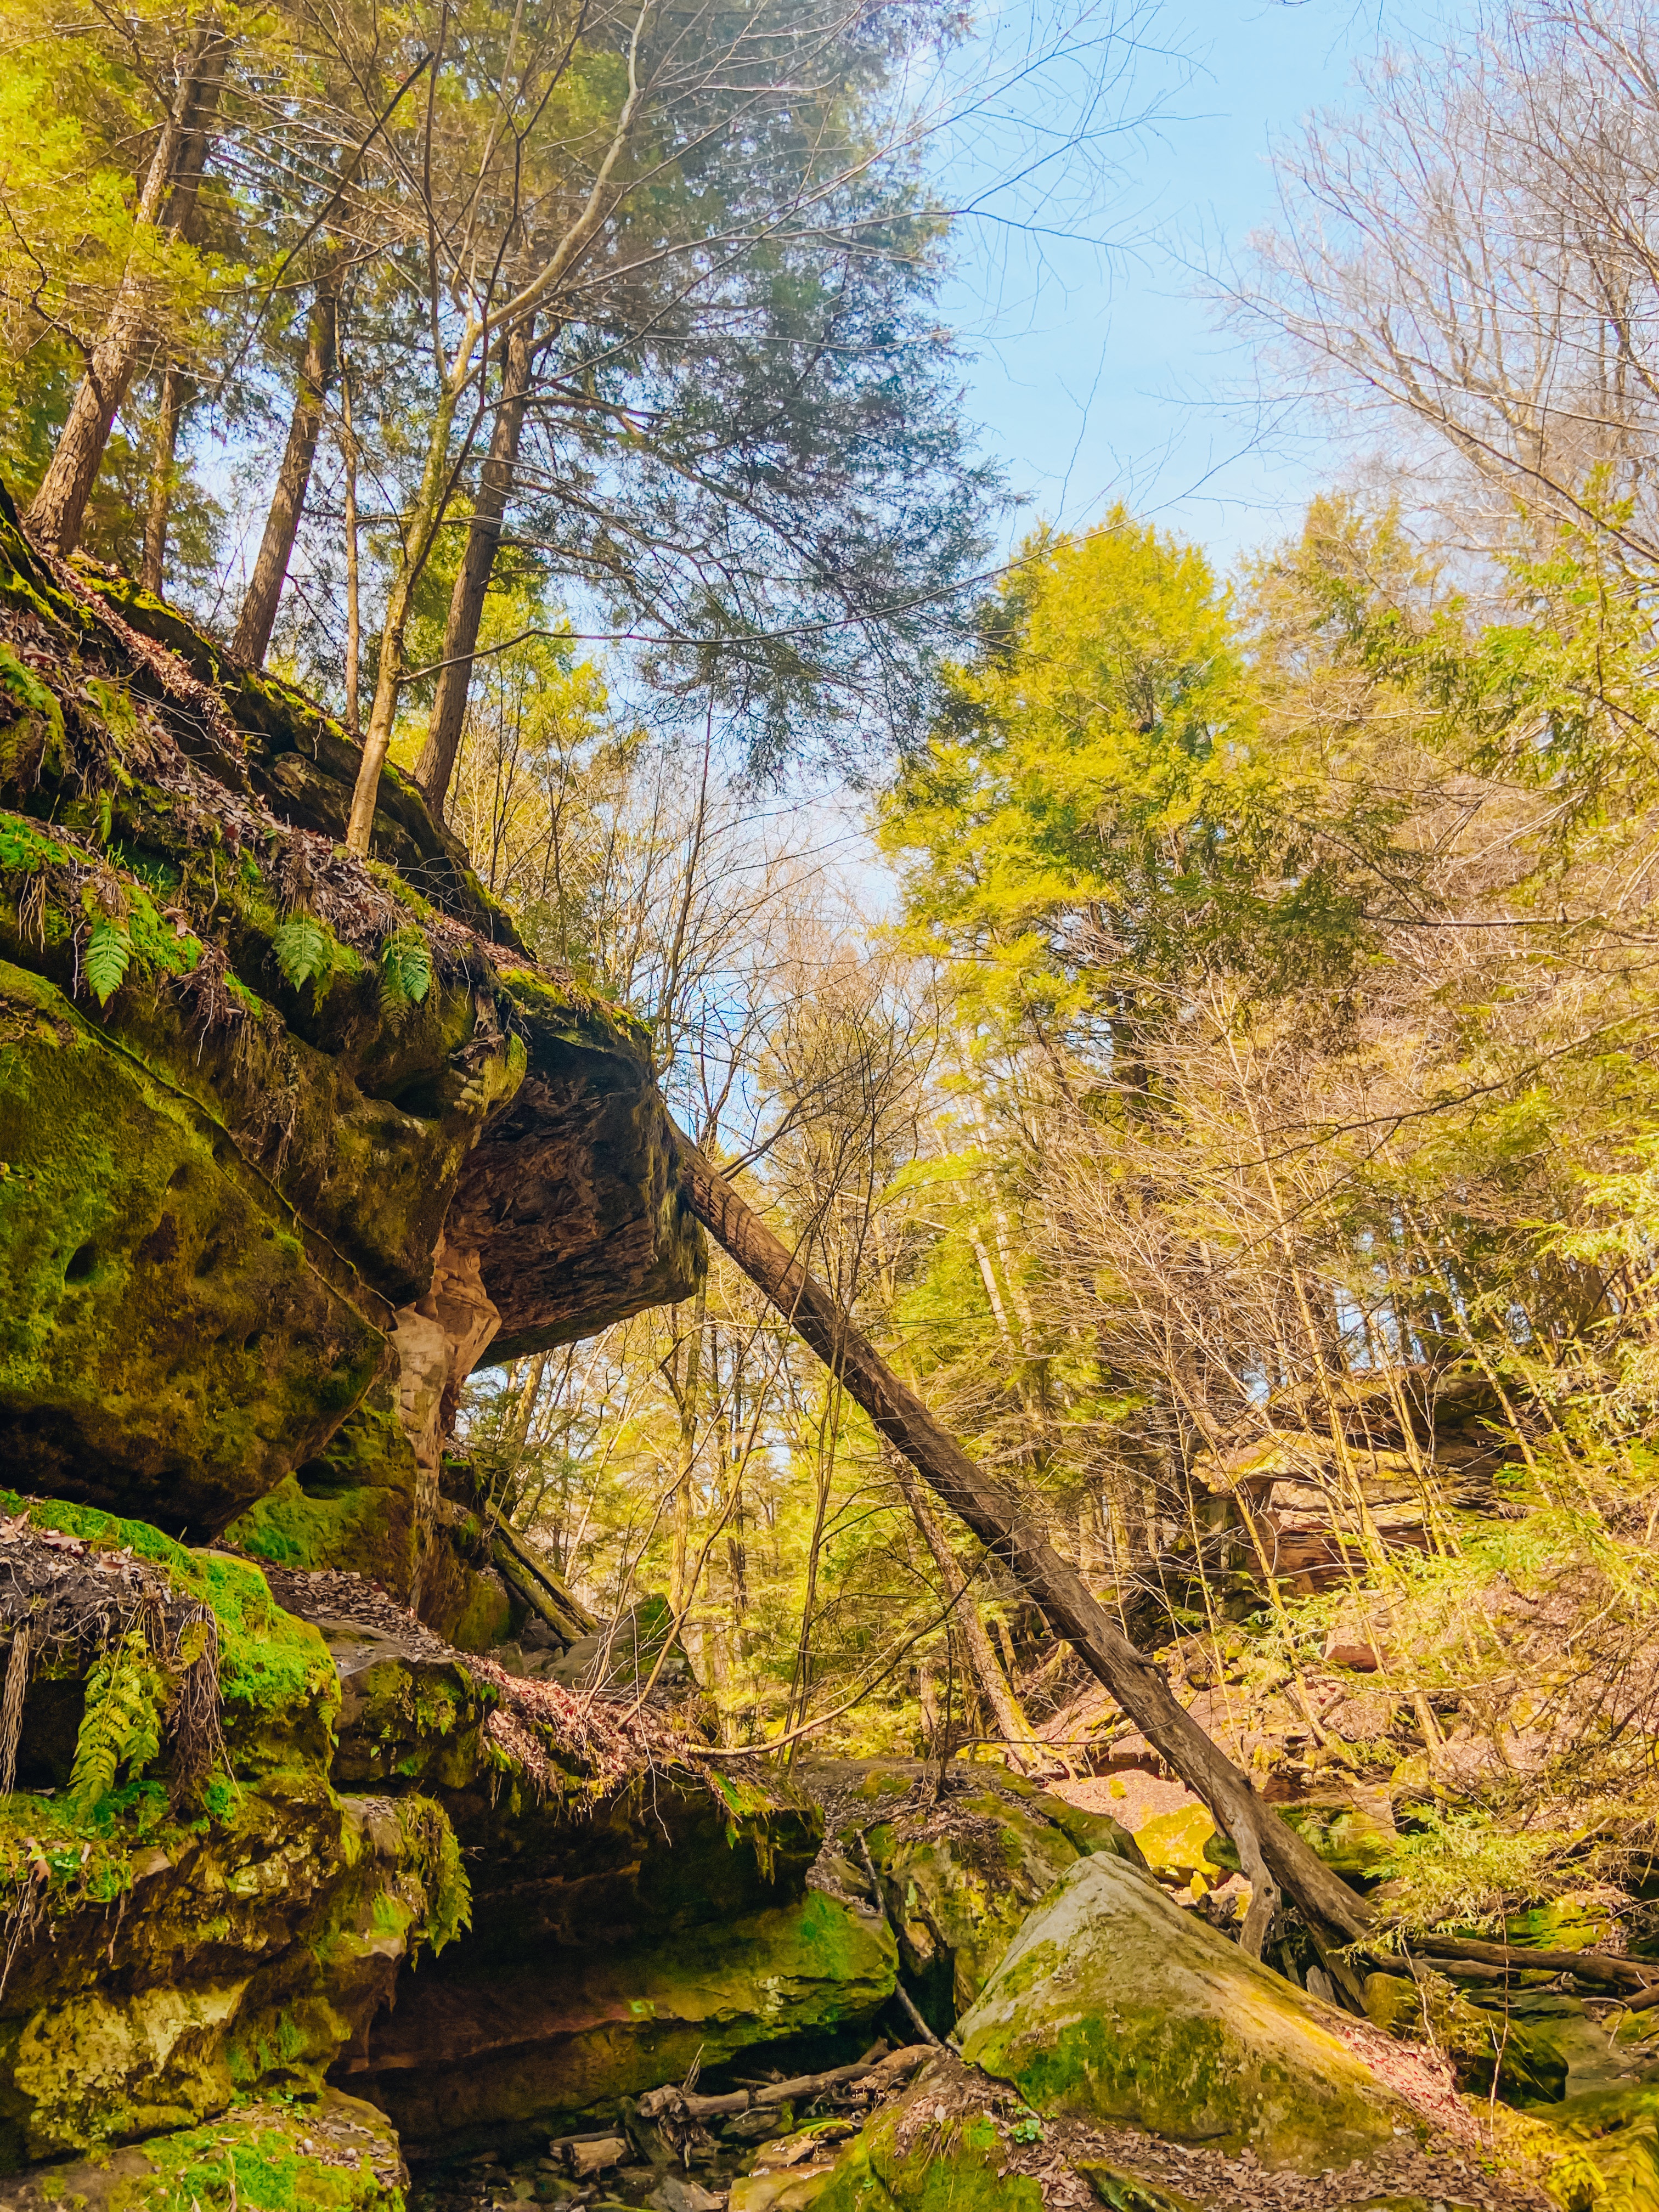
Ohio is a state full of hidden gems. Our favorite local one is Dundee Falls in Dundee, Ohio. With a short hike, you’ll find a beautiful waterfall and peaceful scene.

Besides the view, I love that Dundee Falls is perfect to explore for people of all ages.

For our first adventure of the season, Mila, Josh, and I all went to Dundee Falls. Mila and I have been there quite a few times, but it was Josh’s first. My family has taken Mila since she’s been one and she’s always loved it!

It’s only about a mile hike from the start to the falls. Then another mile back. It’s not long at all and it’s shaded by trees. That makes it so nice for a hot summer day.

Some things I would suggest people to bring when they come to Dundee Falls are a change of clothes, water bottle, and sunscreen.

Since it’s the first time Mila and I’ve went so early in the year, I did not expect it to be as muddy as it was. If you’re planning on visiting in the spring, prepare for the slippery mud! It’s sort of everywhere.

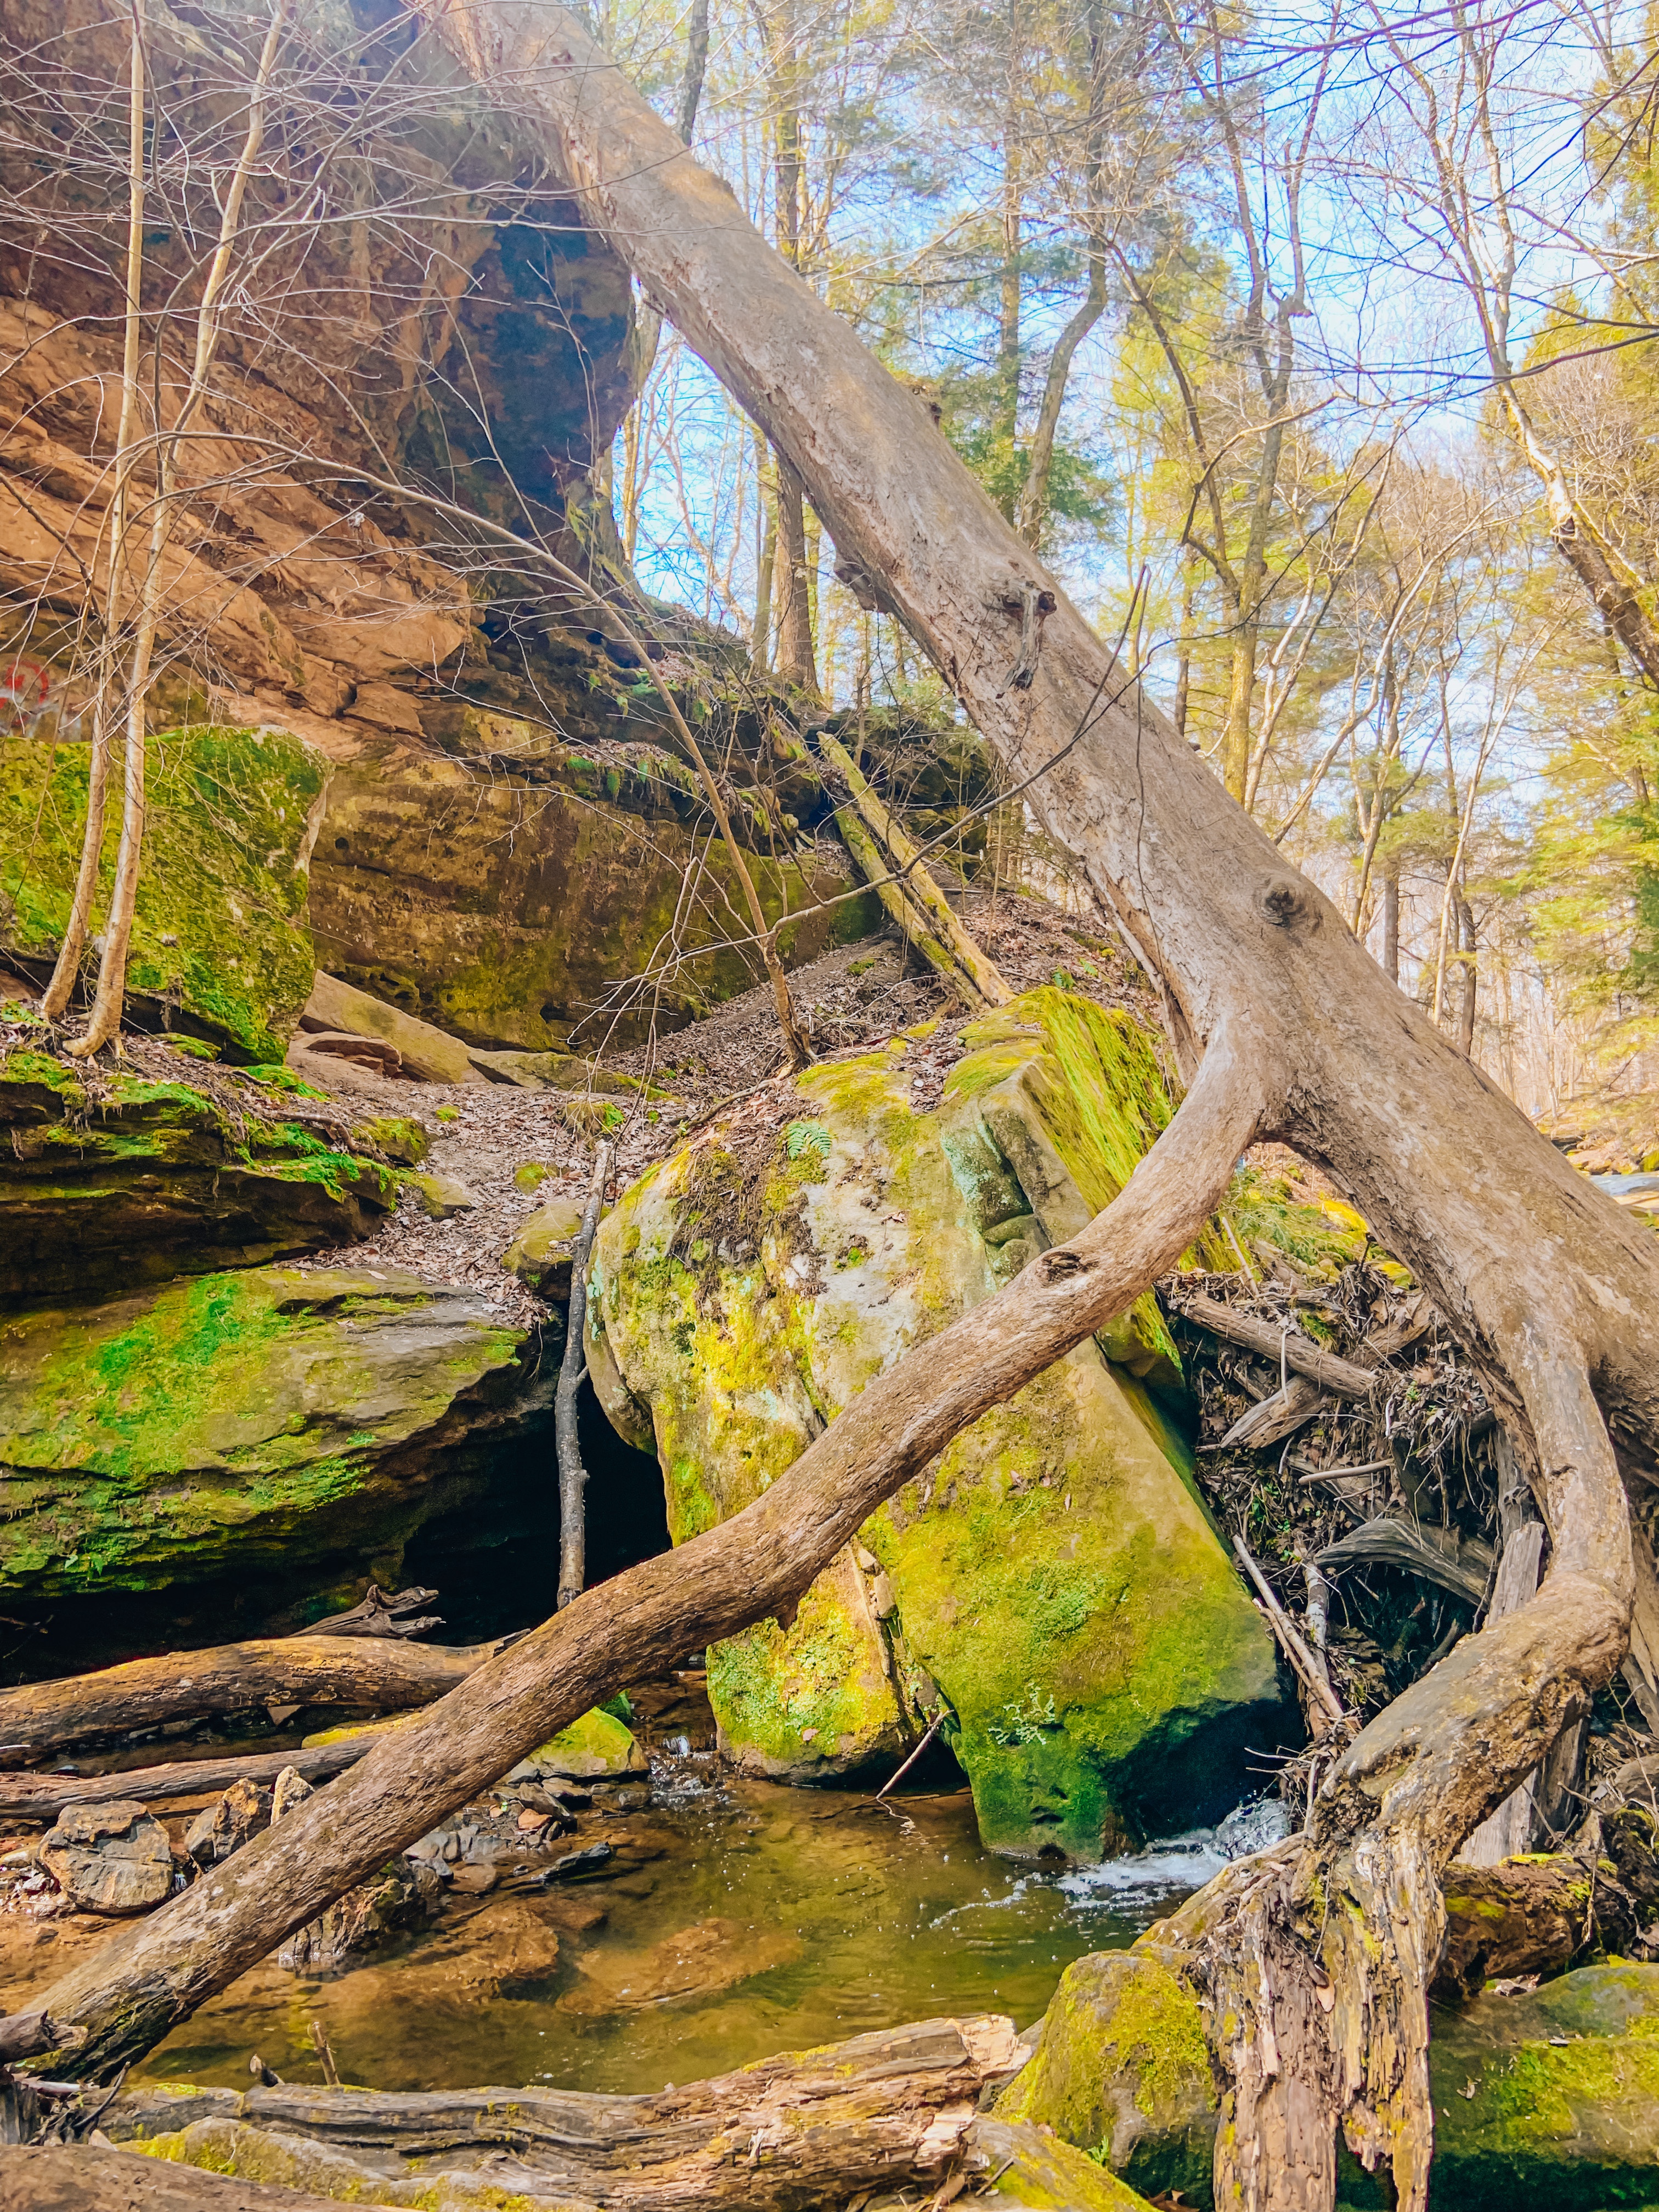
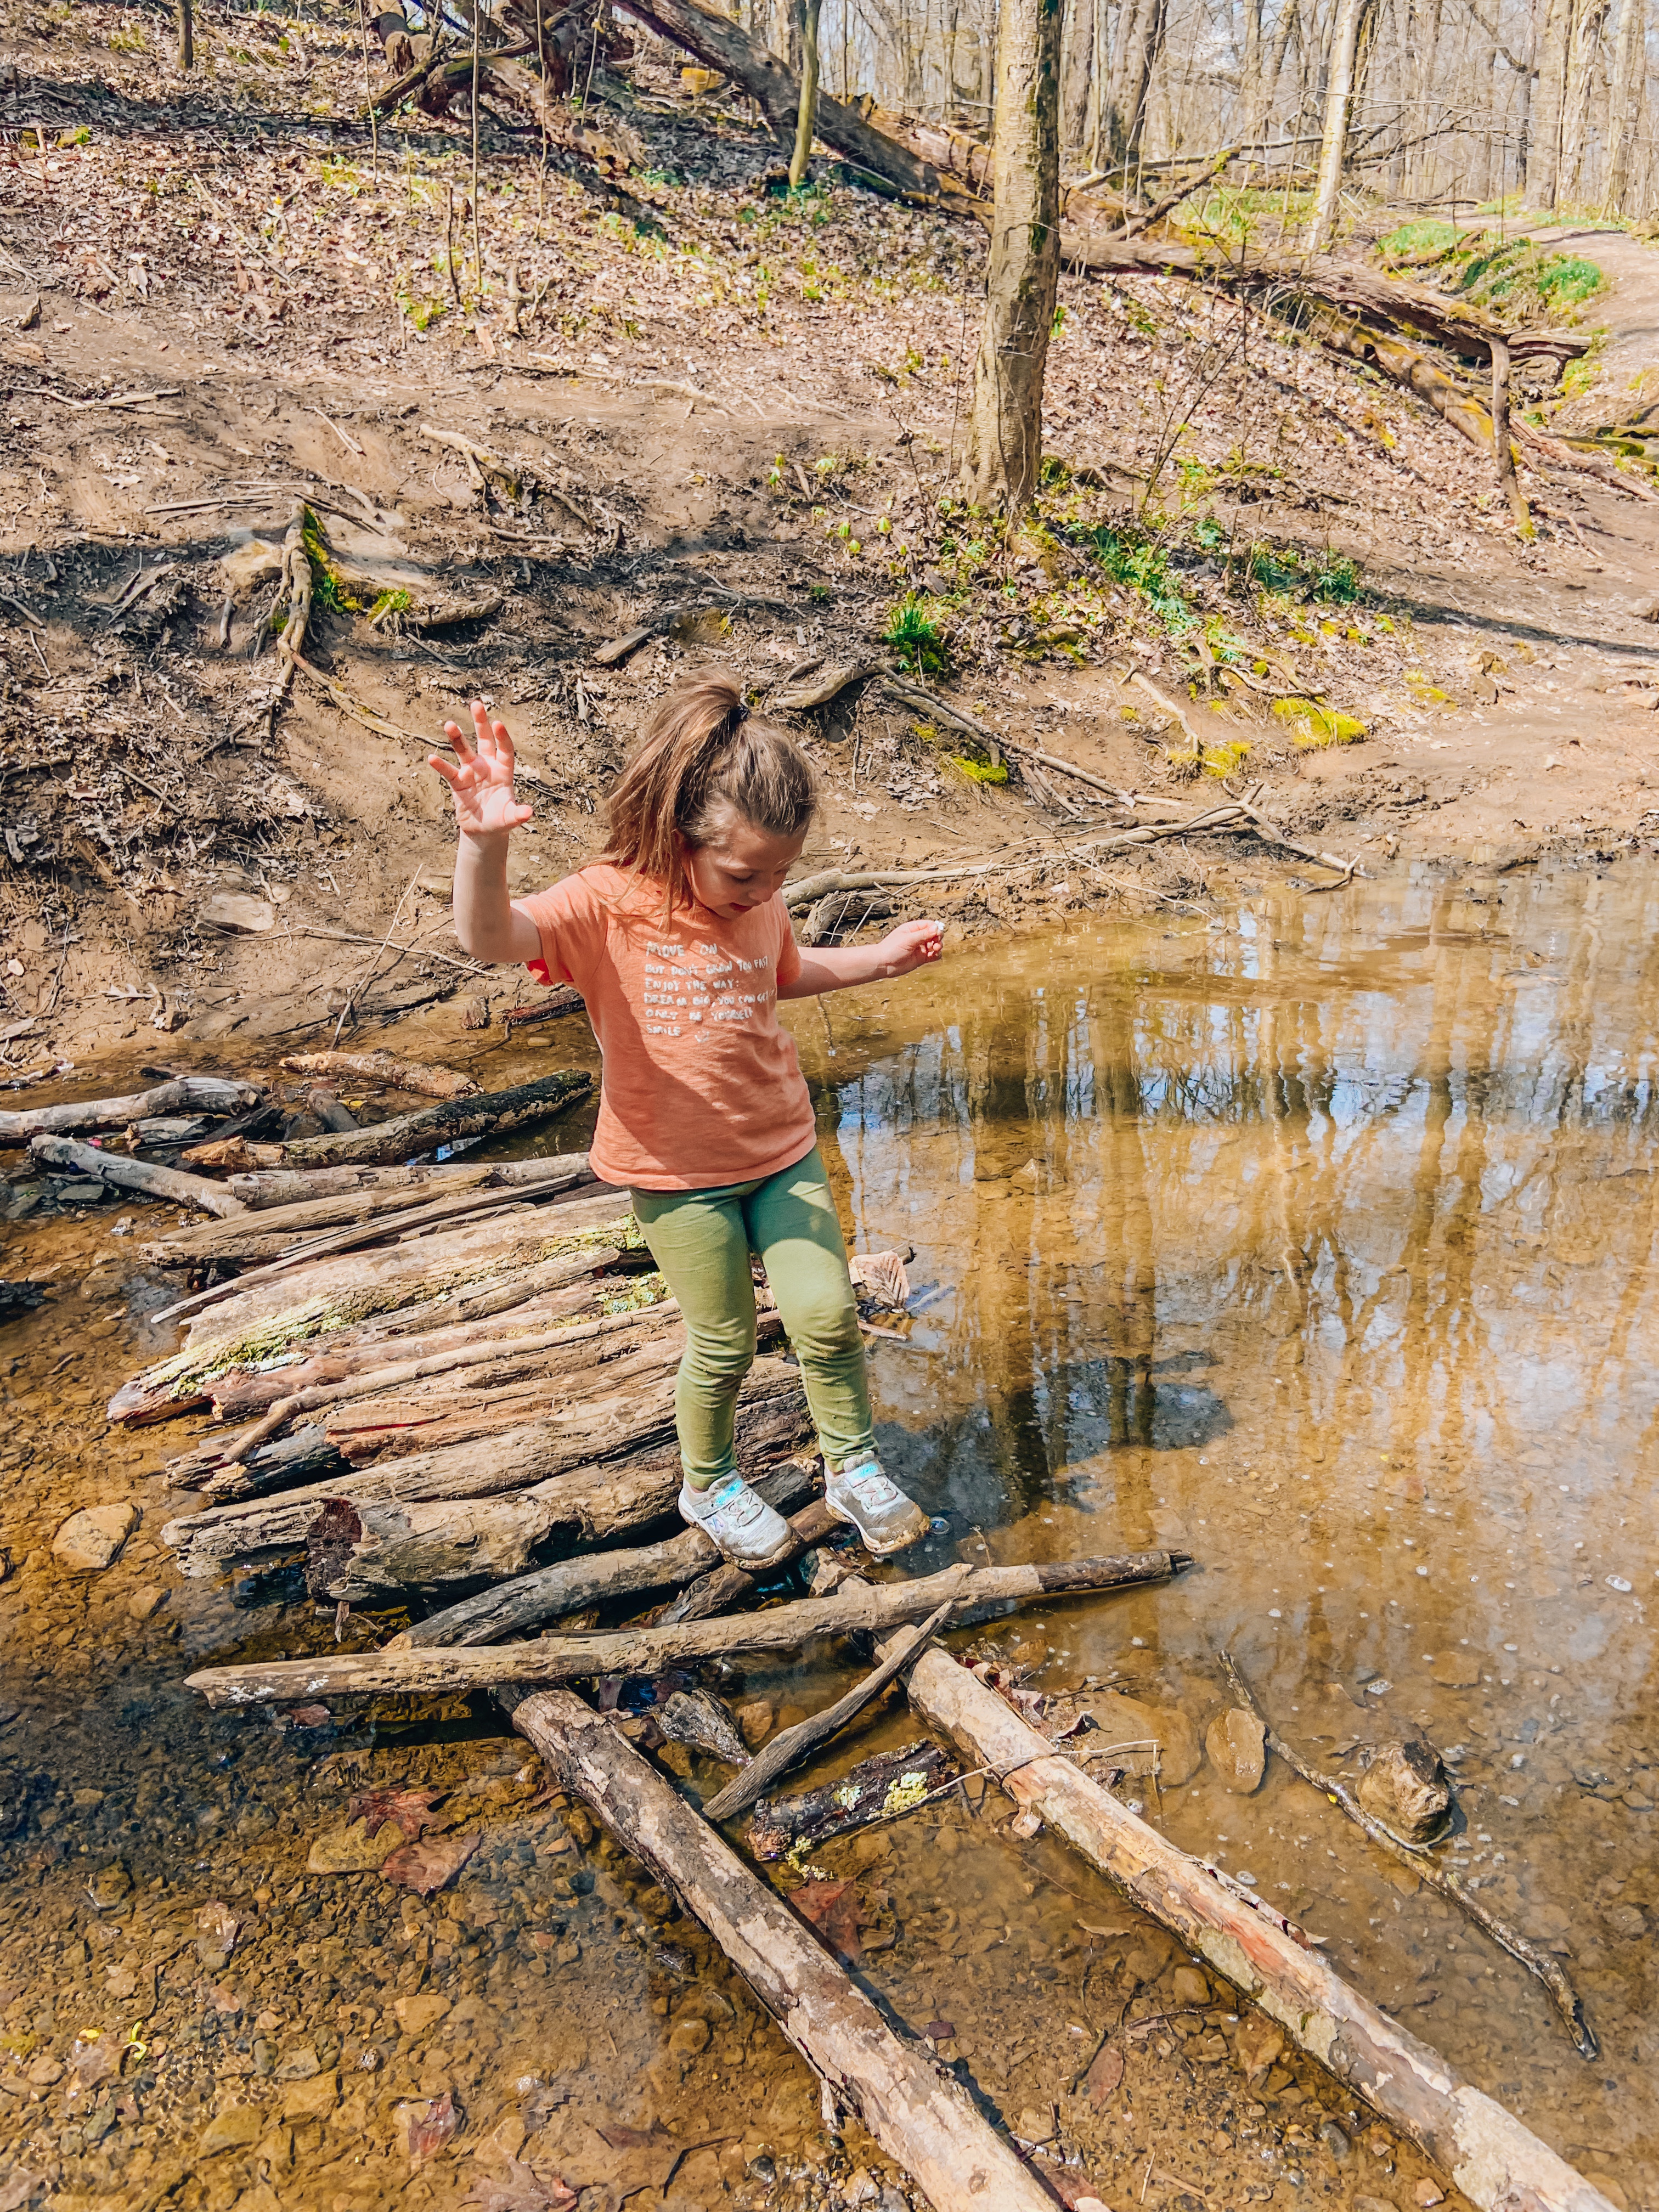
This time, we went a different path from normal. We crossed the stream before the falls and went the long way around.

It was fun seeing them from a different view and just getting to explore. I did fall like ten times, but it was still a blast. We also got to climb over the river rocks and just get completely immersed in nature.

If you go the regular way to get to the falls, you do have to climb down a little rock way. This is normally somewhat slippery, but it was even more muddy which made it a little difficult to get up. I can imagine it was tricky to get down too. BUT there were so many people able to get up and down of all ages and ability levels. Just know it’s not accessible for those in wheelchairs or other limiting abilities.

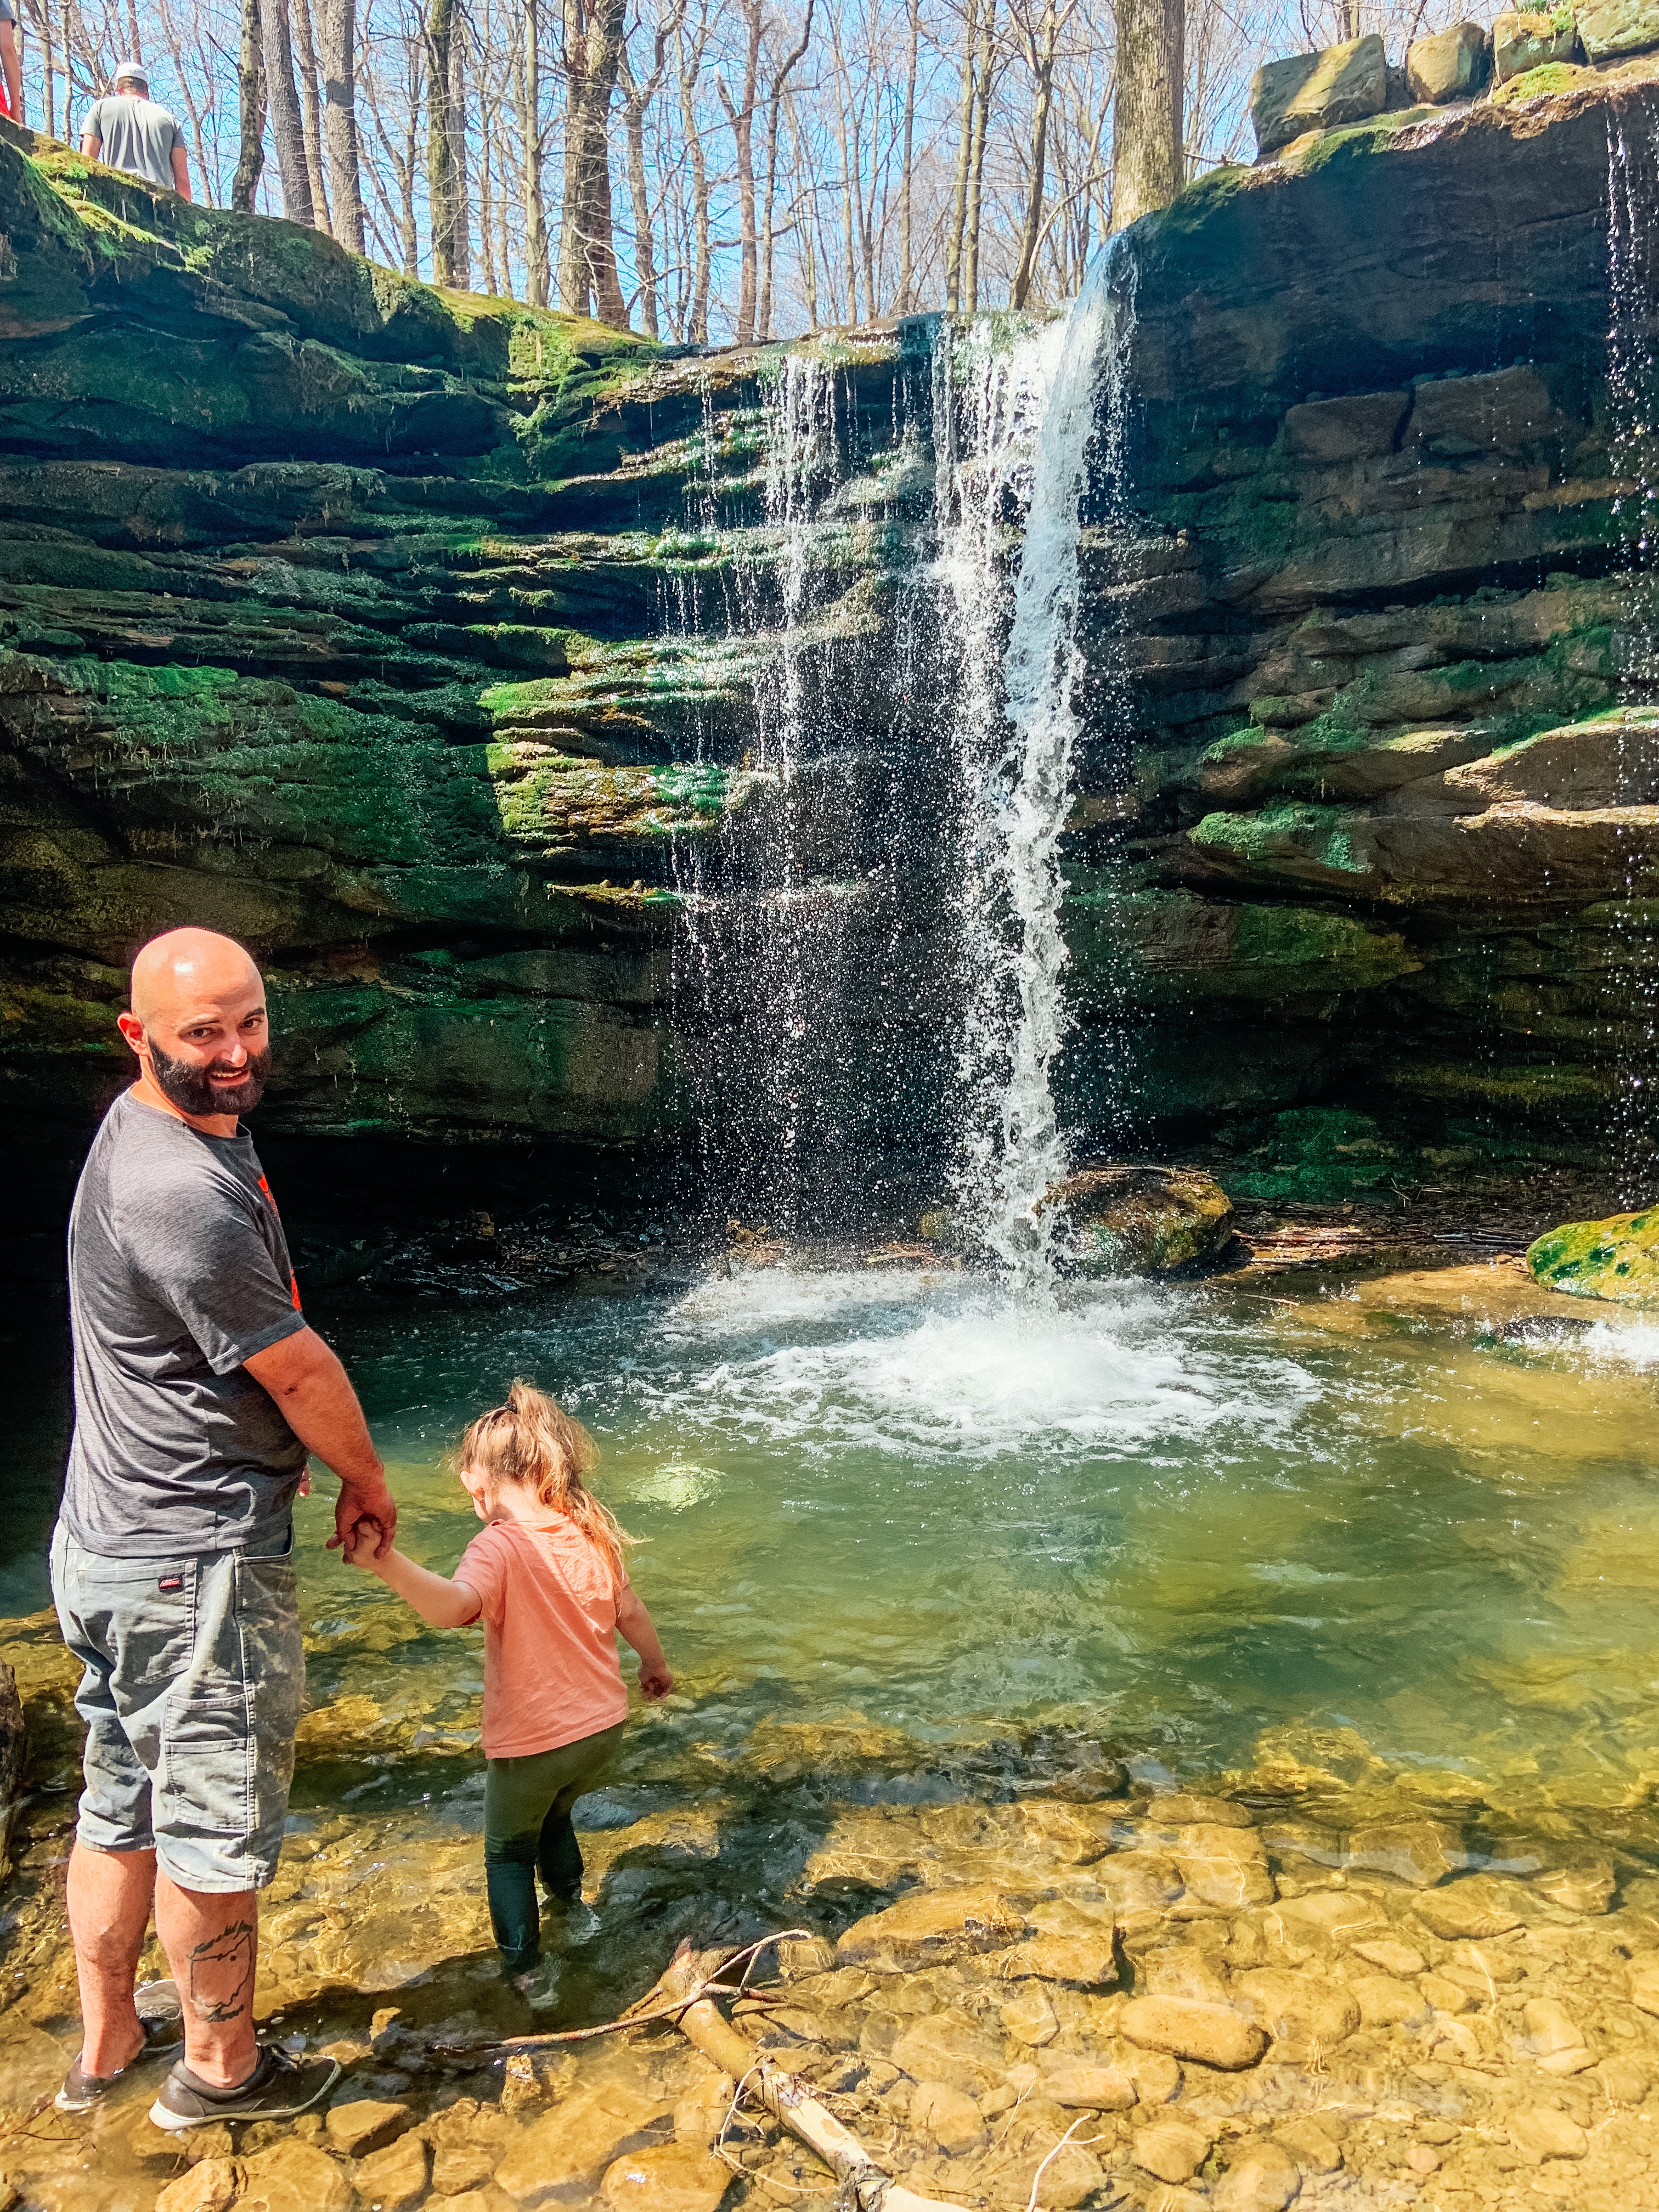
Mila’s favorite part is actually getting into the water at the falls. She just loves to play and jump in it. She always looking for fish, frogs, and whatever else she can find too. At this time of the year, the water felt nice. I fell in the deeper water under the falls and was soaked. It wasn’t too cold for me to get back.

Our trips to Dundee Falls are so informative and an amazing sensory experience for Mila too. We loved pointing out wildlife and talking about cleaning up our Earth.

Speaking of… the trail and park in all is really clean. People who visit are mindful of their trash if they bring a picnic. They’re also really nice too. I’ve always had positive experiences visiting Dundee Falls. Some people even bring their dogs, which is always so cute!

The three of us had an amazing time Exploring Dundee Falls. Mila and I might have ended the trail completely muddy and soaked with water, but the adventure was worth every second.


Once you’re done visiting Dundee Falls, I would suggest making a short drive to the World’s Largest Cuckoo Clock. We go every time we’re near Sugarcreek! It’s Mila’s favorite.

Another place you have to visit is The Wallhouse. They have such great ice cream. It ends the day perfectly.

If you’re from Ohio, let us know some trails or places we should visit next! Or let me know your favorite place to go to where you live. Maybe we’ll have to go too.

Advertisement

DIY Leprechaun Trap

Are you looking for a little luck until next St. Patricks’s Day? Then it’s time to make a DIY Leprechaun Trap.

This fun trap was made out of items around the house and printables from Whimsically Wonderful. It also was fun to creatively collaborate with Mila and keep the magic of St. Patrick’s Day going.

If there was a classified ad for this DIY Leprechaun Trap, I think it would read something like this…

If you’re a weary leprechaun looking for a comfy place to rest for the night… or next year… You have to stay at The Rainbow Hotel!

Filled with a comfy bed, free gold, and magical decor, you’ll love your stay. You won’t miss The Rainbow Hotel because all you have to do is follow the rainbow exterior and the shamrock on the door.

Plus, it’ll only cost you a little luck.

Honestly, I’d want to stay in The Rainbow Hotel too. I just don’t have too much luck to give.

Anyways, here’s what we used for our DIY Leprechaun Trap:

Putting this together was really easy, but took some time.

It was a lot of cutting, gluing, and making sure everything looked cute in the right place.

It took us about an hour to cut and glue everything on, but it looked so cute. The best part of making leprechaun traps is everyone’s is going to look different and unique. I think this one celebrates how Mila and I are and view life.

Now it’s time to catch our leprechaun. You can only catch them on St. Patrick’s Day, so make sure you have yours ready!


Do you ever make leprechaun traps? If you do let me know how you made the next day special in the comments.

Lucky Charms Dipped Oreos

What’s better than regular gold? Gold you can eat and you’ll love the taste of these Lucky Charms Dipped Oreos.

This simple recipe can easily be done for an after school snack or whenever you have a quick five minutes to make some magic. You can even enjoy it with yummy leprechaun milk, which your kids will love even more.

Mila and I have still not saw the leprechaun playing tricks in our house. Our Pete the Cat book told us the only day you can catch one is on St. Patrick’s Day so we’re getting all our leprechaun bait ready.

We’re working on our leprechaun trap to set out the night before St. Patrick’s Day too! Hopefully that’ll do the trick.

This little recipe here was supposed to be leprechaun bait, but Mila decided it would be better suited for little girls. So, she just ate them instead. I can’t say I blame her!

For another magically delicious treat, you’ll need:

  • Golden Oreos
  • Lucky Charms
  • White Chocolate

The first thing you need to do is melt your white chocolate. I used the microwaveable kind because it’s way easier and quicker for us. Just make sure you microwave in small increments and stir frequently.

After it’s all melted, dip your Golden Oreos in the white chocolate and set them on wax paper.

Before the chocolate is cooled, place Lucky Charms on them. I did it randomly and in between coating the Oreos. The chocolate seemed to cool off pretty quickly!

While you wait, you can make some leprechaun milk to enjoy with your Lucky Charms Dipped Oreos.

All you need to do is add some green food coloring to milk and enjoy!

Mila was very pleased with these and did not seem to want to share with the leprechaun in our house. It was a fun little snack that only took a few minutes to make.


What has been your favorite St. Patrick’s Day recipe I’ve shared so far?

DIY Color Changing Shamrock Sign

The magic of St. Patrick’s Day keeps flowing, especially with this DIY Coloring Changing Shamrock Sign.

Littles will be amazed watching blue and yellow make green! You can also use this sign to help trap those pesky leprechauns. They’ll be attracted to the magic.

Mila has been super curious in two different things: leprechauns and how to make colors.

To be able to give her both in one day, we did a magical craft that we’ll use to bait leprechauns. It’s really been fun to hear all her ideas of how to catch a leprechaun. She had fun making magic like them!

Plus, we love an activity with a simple set up! This one gives you just that with some leprechaun magic too! Here’s what you’ll need:

  • Blue Paint
  • Yellow Paint
  • Black Paint
  • Gold Paint
  • Canvas
  • Plastic Wrap

All you need to do is pour some blue and yellow paint on a blank canvas. I actually had the canvas in a sensory bin to keep the mess at bay.

Then, I had Mila place plastic wrap on top and told her to mix all the colors.

For that part, I really had to tell her it was okay to get messy. She was really moving the plastic wrap around which mixed it up quicker. At first I think she was afraid of the messy paint!

Once it’s combined, take the plastic wrap off and let it dry.

To add a little more magic, I painted on a shamrock, ‘lucky,’ and splattered gold paint. I think it turned out as magical as a leprechaun would like.


What’s your favorite St. Patrick’s Day saying to put on signs?

Wooden Rainbow Stacker Play

If there’s one toy purchase I’m happy to have made, it’s this Wooden Rainbow Stacker. Not only is it colorful and meaningful to us, it’s a lot of fun for Mila to play with.

Packed with so many different ways to play, Mila spends hours with this toy.

I discovered this Wooden Rainbow Stacker in 2019. That was when I started buying more wooden toys instead of plastic ones. They’re so much better for our environment and they’ll last for generations.

When researching these toys, I found out so many different benefits to having kids just use their imaginations when playing. Since plain rainbow arches don’t give specific directions of how to play, kids can come up with their own ideas. Parents can also help guide play.

It’s also so beautiful. When Mila isn’t playing with it, it makes a perfect decoration in our playroom. Rainbows are so symbolic for us, so it has many purposes.

I figured I’d let you all know how we play with ours!

Learning Colors

When Mila was little, we used these arches to learn the different colors. It was nice that she could actually pick up the colors of the rainbow when she didn’t have the right words. We sang the Mickey Mouse Clubhouse rainbow song with this so many times to learn the colors. It was always a ton of fun.

As she grew older, I would have her find different objects that were the same color. She really liked this idea! It became a little scavenger hunt around the house for her.

We also would do matching or patterns with the arches too. Since there’s two of every color it made it fun to show her a combination, then she repeated!

Imaginative Play

Since these arches are so big, they make fabulous houses. Mila is always playing with her little dolls on these. I think it’s so cute to listen and see how her brain makes these wonderful play scenarios.

She also makes different shapes with them. It’s incredible to see what she comes up with and how she explains it.

One of my favorite times she used imaginative play is with her unicorns. They all raced through the different arches and even on top of them. It was like Mila came up with her own little world just out of this toy and her My Little Pony’s.

This is what’s so amazing about these plain play items; your child’s imagination will make them what they need to be at that time.

Stacking

Stacking is probably our favorite activity to do with this rainbow stacker now.

As I stated above, we LOVE to make different shapes with our rainbow. Mila loves to do ‘hearts.’ This is where we stack out rainbow like the picture below. We see how far they can balance until they all fall down.

It also is really cool (as an adult) to see how they fall too. It’s really satisfying to har the nose as they go down and just watching it too.

There are so many different shapes kids can make with this. While they’re figuring it out, they’re able to learn! It takes Mila a few times to stack up the shape just as she likes it, but she’s always proud of herself when she finally does it!

Extended Learning

Lately, Mila is at the age where she is learning how to spell her name and simple words. We use resin letters to balance her words on top of the rainbow.

We do little challenges of who can place the most letters on the rainbow arches or who can get their words to stay up the longest. It really helps Mila learn while she’s having fun. That’s really all that it’s about too!

I’m sure as she gets older there will be more and more ways to play with this stacker. It truly has been an investment in her future.


Do you have a rainbow stacker? What games does your kiddo like playing with it?

If you’d like to get a wooden rainbow stacker, you can find it here on Amazon.

DIY Ice Cube Painting

If your child (or you) love to paint and want to try a cool new way to do so, try this DIY Ice Cube Painting.

Mila paints all the time. Usually with acrylic paints on canvas, but a switch was needed. With a little prep, this ice cube painting activity was a morning full of fun and creativity.

Here’s all you’ll need:

Prepping for this activity was really easy. All I did was pick out a few of her go to colors. Then I painted them inside the resin mold.

I tried my best to get a lot in there. It’s be easier if it was squeezable paint bottle.

Before you put water in the mold, set on a baking sheet to freeze. It is near impossible to move a mold full of water without spilling it. This won’t be an issue if you’re using and ice cube tray.

When all the letters are painted, pour water in each of them. I would suggest using something that isn’t going to overflow the mold easy and mix colors. Honestly, I reused an old Starbucks iced coffee glass to pour.

Then, when they’re all filled, place it in the freezer.

When they’re done, you can place them in a tray for your child to paint. We personally used thick stock paper for this painting.

To warm up the ice, Mila dipped her brush in salt. Not only is this activity creative, she learned a little science as well. I just explained to her that salt melts ice and she thought it was so much fun.

The best part of this activity was it was easy to clean up.

I just threw the left over letters back in the tray. Then I put them in the freezer so we can use as after school activities this week! That means I only had to prep once for days of fun!

Using frozen letter cubes is a fun way to introduce more learning too. I used ‘lucky one’ since St. Patrick’s Day is coming. BUT you can spell out whatever to help them learn.

I’ll use the letters in her name to give her some more practice seeing and writing it.

This activity would be perfect in the summer too. You can battle the heat and see if the sun or your child ends up getting done with the ice first.

Either way, this Ice Cube Painting activity is a cool way to create.


What are some fun spring activities your child likes to do? Let me know in the comments.

10 Random Acts of Kindness You Can Do With Your Child.

It’s Random Acts of Kindness Week! There are so many ways to spread kindness and make others smiles. This has been something special to me since I had Jensen.

Now I get to pass it to Mila!

I believe by letting her know it’s important to share happiness, she’ll continue it in the future. Always striving to make her a great human.

Wondering where to start? Here are 10 Random Acts of Kindness you can do with your child and toddler.

Share a gift of love.

This year, Mila and I made these cute little notes for her dance friends. I found them on Sierra L Miller’s Blog and added a scrunchie. They turned out to be a cute little gift and helpful for a little dancer’s hair.

Last year, we made Lollipop Flowers that were a complete hit.

Write a thank you note.

I’m ALL about a classic thank you note. Writing a small note to someone you care about can mean the world. Anytime I send cards or notes now, I have Mila write a little something and sign her name.

Give someone flowers.

One of my favorite ways to spread kindness is being very random. In 2017, I started buying random bouquets of flowers and setting them on cars in parking lots. I never stuck around to see them get their flowers, but would leave a note of Jensen’s story so they could see the reasoning behind the kindness.

It was a fun way to make someone smile and share my Jensen too.

Send a nice video.

Mila LOVES making videos and sending them to our friends and family. One way to make someone smile is to do just this.

You and your child can tell someone how much you love them. It’s guaranteed to be a random act of kindness that they’ll love to receive. The best part, you don’t have to leave your home!

Leave a gift card as a surprise.

This goes along along with the flowers… but leaving random gift cards is a cute way to surprise someone.

Mila and I have left them in books at book stores or just sent them to others when we’re out to eat. You could even leave them at gas station pumps to help someone out.

Paint a rock.

Rock painting was so big and so many people still do it. Mila loves to paint rocks or just find them to give to her grandpa. Painting kind words on a rock and giving them to someone could be a small way to brighten their day.

Tip nicely.

I know a lot of people pay it forward, but it can cause some chaos. Instead of doing this, why not tip your barista or waitress nicely.

Mila loves tipping and this is a fun way to pretend she’s paying!

Make a craft.

Just like getting a thank you card, I love receiving crafts. When I’m making different things, I try to make three extra to give to family and friends. They always smile when seeing Mila’s artwork or something special we made together.

It’s a fun way to share the love when you’re already creating!

Cook someone a meal.

There are so many families that could use the extra help with meals. One friend of ours ordered us pizza one night and it made the whole night (and week) go a lot more smoothly with having it done for us already.

If you usually have leftovers, it would be a beautiful idea to share. I know this has been my favorite on the receiving end.

Kids love cooking and baking too! A perfect way to get them involved as well.

Smile.

The smallest thing you can do with a BIG impact is smile. You never know… it could be their first smile they have seen all day.


I hope you can find something on this list to do with your child for someone you love. Let me know in the comments some acts of kindness you’ve performed.

Toddler DIY: Rainbow Heart Bird Feeders

Looking for ways to spread love and enjoy your local wildlife? Try making these Rainbow Heart Bird Feeders. They’re a great way to have fun with your child and show them the importance of the world around us.

Plus, they turn out really cute AND it doubles as a snack time for your little. A total win-win for every being involved!

This easy DIY Rainbow Heart Bird Feeders only need three items to make create. Here’s what they are:

  • Pipe Cleaners
  • Fruit Loops or Cheerios
  • Yarn

To begin making these, there’s just a simple prep that won’t take too much time at all. All you need to do is pour some fruit loops in a little bowl. Then, twist the pipe cleaners into v’s. Once you do this, your child will be ready to start threading.

Mila and I had talked about making bird feeders before we started this activity. So, she knew what she was supposed to do. We also have threaded with pipe cleaners before too.

If your toddler has never threaded with looped cereal before, I would suggest showing them, thread together, and then they’ll be able to pick it up by themselves. It’s such a good skill for them to have and tremendously helps with their fine motor development; which is beneficial for so many reasons.

Once they have threading down, you can challenge them to do different patterns too.

For Mila, I lined up the Fruit Loops in the order I wanted her to thread. We just did a simple rainbow patter for one of the hearts. This challenged her to find specific colors and to keep the pattern.

When the pipe cleaners are filled with cereal (or your child has snacked on the rest of it), all you need to do is twist the ends of the pipe cleaner together. Then, pinch where the two heart bumps would be at the top. I had to move the cereal around so I could do this and form it into the shape it needed.

After, we just tied yarn to the tops of the heart. We headed outside to find the most perfect tree that our birds fly too.

Mila was very proud to see her Rainbow Heart Bird Feeders on the tree. Then she played out in the snow afterwards too. We love connecting with nature and being outside as much as we can. Thank goodness spring will be here soon!

This bird feeder was a fun way to play and help the animals we love so much. We hope that you’d love to make one too for Valentine’s Day or spring.


Have you ever fed birds before? What’s your favorite way to do so? Let me know in the comments.

Snow Globe Sensory Bin

There’s so much magic when a person gets to shake a snow globe. It’s a whole work in your hands. Snow Globe Sensory Bins are even more magical and fun to explore.

If your child loves snow globes, they’re going to love this play idea.

Mila has a slight obsession with snow globes.

On her first Christmas, she got multiple ones from different people. We still have all (but one), that are all set up in her room. My parents also get her snow globes from every place they visit. To say we have a mini snow globe collection is an understatement.

No matter the time of the year, she loves to shake and look at them. To continue that love, I thought this sensory bin would be a perfect fit.

I was right!

As with a lot of my sensory bins and play ideas, I used elements I had around the house or from past bins. Here’s what we used for this one:

  • Fake snow
  • Sensory bin
  • Rainbow bottle brush trees
  • Different sized jars
  • Extra accessories
  • Spoon or mini shovel

This sensory bin is full of fun activities. All I did was set it up like this and Mila made it her own.

She filled up the jars with snow and saw how many trees she could fit in each jar. I watched her make the snow globes pretty too.

We talked about the colors of the tree, had them count, and we did small to big comparisons with the jars. Learning has no boundaries. You can talk about whatever with your child. They’ll soak up all that information.

Even though I originally just set up the mini trees, Mila brought in mini toys to play with and put in the snow globes too.

I can easily see opening up play with her by making the snow globes more themed or adding different seasonal elements in the future. Again, the opportunities are endless when it comes to sensory bins!


Hopefully you and your child enjoy this sensory bin as much as we did. We want to make snow globes sometime this winter and need all the tips we can get! I’ll update when we make them.

Have you ever made a snow globe before? What liquid do you use for the inside?


Then… check out these other fun indoor winter activities too!

DIY NYE Time Capsule

What’s more fun than reflecting on the last year? Going back to that year ten years down the road with a DIY NYE Time Capsule.

In my DIY Mini Cardboard Memory Book post, I shared that I was going to do something special with it. I’ve decided to make another new NYE tradition by doing a time capsule every year. We’re gong to fill it up with a lot of things that made the last year so special. Then, in ten years, we’ll open it up and walk down memory road.

Sometimes I can’t believe how fast time has went since Mila has been born. She is ALWAYS asking what she was like when she was a baby. I feel like she just was a baby and I blinked and there’s a little girl in front of me. Plus, this year has seemed like the fastest yet. She has grown so much and I want to treasure how little she is with what goes in our NYE time capsule. Hopefully she won’t be too embarrassed by her answers when she’s thirteen… let’s get real, she’ll be annoyed with everything then.

Almost everything was easy to put together and I found the worksheets online! Everything else is easy to make at home and it’ll bring up fun conversations amongst your family.

Here’s what we’ll be seeing on NYE 2031!

Year in Review Worksheets

I found the worksheets we used in our time capsule at @whimsicallywonderful on Instagram. Her printables are adorable (and free). I’m pretty sure I’ve shared them on the blog before. Anyways, I was planning on making our own sheets to write on, until I saw the ones I printed off.

Even though these sheets are girly, she also has ones with blues and greens in them. They’re so cute, just a different color scheme. You can find them at Whimsically Wonderful under the Whimsical Prints. It’s the last section on the page. Trust me, if you’re planning on doing a time capsule, these are such a great option!

I printed off:

  • My Magical Year
  • Top 5 Best Moments
  • My Feelings about 2021

There are more options on there too; like handprints and a letter to a future self.

Mila Drawings and Glitter Handprint

Mila loves to draw and always draws our family. Remember the person she drew and I got a tattoo of it earlier this year? So, I definitely asked her to do a drawing of all of us and labeled it too. I think this will be precious to see in ten years. Her drawing skills might be a little better then, but I think these will always be my favorite.

She also chose to do a glitter handprint. We made a little craft with her hand being the 0 in 2022. We traced it out, added glue, and then a bunch of glitter! It’s still drying after twelve hours, but I’ll make sure to update about it on one of my socials.

If it never dries, she also traced her hand on the back of the family drawing too!

A Letter from Mama to Mila

Letter writing is so therapeutic and if you’ve followed my story for a little while, you know I write a lot of them (you can search letters if you’re interested). I actually used to write letters to Jensen every day when I was pregnant with him up until Mila was born. So, it sort of makes sense that I would include a letter in here too.

Honestly, one of my biggest fears is something happening to me and her being without a mom. I want to make sure she knows how much she means to me and maybe I can throw some wisdom in there too. It sounds cheesy, but maybe it’s the last letter or words she would ever get to me. That thought alone makes it important to me to write about this year and how much her at three or in 2021 meant to me.

Again, we’re also going to be opening this up when she turns thirteen, I may need that extra support… I’m joking.

If you do do a time capsule, this would make a precious memory for your child.

Ribbon Height

On Mila’s papers, it asks to write her weight and height. Even though I can easily write that down, I want to be able to visually see it.

Although I’m not going to add bags of rice in her memory box, we collected her height in a ribbon. I just placed one end of the ribbon on her head and then cut it at her feet. Then, I made a little tag saying what the ribbon was for and connected it with a clip.

I love this idea because I can unravel it and actually see how tall she was.

Again, this is a super simple and easy idea you could do too! It wouldn’t even have to be a ribbon, yard or string work well too!

Pictures and Miscellaneous

Since we take thousands of pictures each year, we had to add a few in the time capsule.

The DIY Mini Cardboard Memory Book is snuggled tightly in there. I’m still obsessed with how it turned out. We’ll also be taking Instax pictures on NYE to add to the capsule as well. Maybe I’ll even let her take whatever pictures she wants. This way we can check out how her photography skills have changed too.

Some other items we’re adding are a New Years necklace, a craft, and maybe a toy or trinket. I haven’t totally nailed that last part down.

When we open it, I just want to be blasted back to 2021 and have this magical feeling.

As pretty as everything is out of the time capsule, it’s perfect inside too. We added a ‘Do NOT Open Until NYE 2031’ on the lid too. Just in case I need some motivation to wait!

Even though I bought a pretty jar for this time capsule, you can easily upcycle items you have around the house. I’m thinking mason jars, pringle cans, or even old tupperware containers you don’t know what to do with anymore. You could be as creative as you want to be and even make this a fun part of you time capsule too. For some reason, I’m thinking of a VHS or DVD case. It would have been so clever 30 and 20 years ago.

Anyways, I’m really happy to be starting this tradition with Mila and see how it evolve over the next few years. I hope you enjoyed it too and maybe want to start this with your family.

If you do this tradition or plan to, let me know what other things Mila and I should add.