Blueberry Crumble Recipe

Want to be the talk of your backyard bbq? Make and bring this Blueberry Crumble Recipe. It’s easy to throw together and tastes delicious too!

We recently went blueberry pickings, which I have to blog about. Since then, I have a ton of blueberries, but not a ton of different recipes. When talking about what to make, I knew I had to try a crumble.

Believe me… I’m happy I did!

This dessert was so easy to make and tasted so fresh. We picked them one day and made this the next. It was amazing.

I have a feeling this will be another staple dessert I bring to parties in the future.

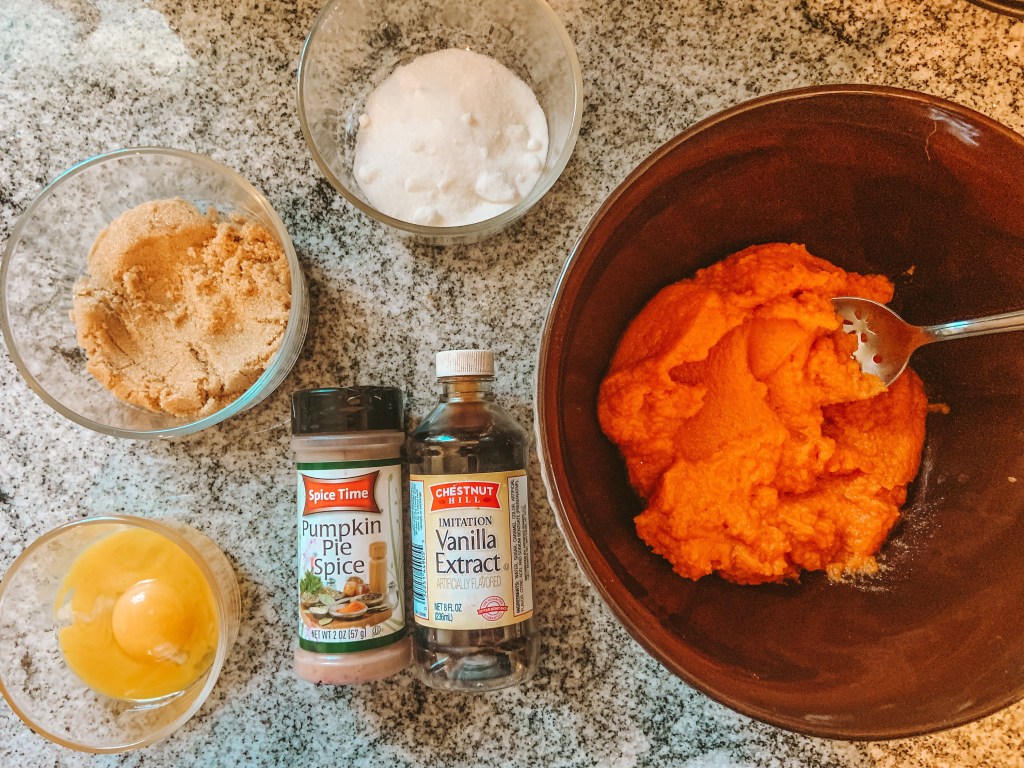
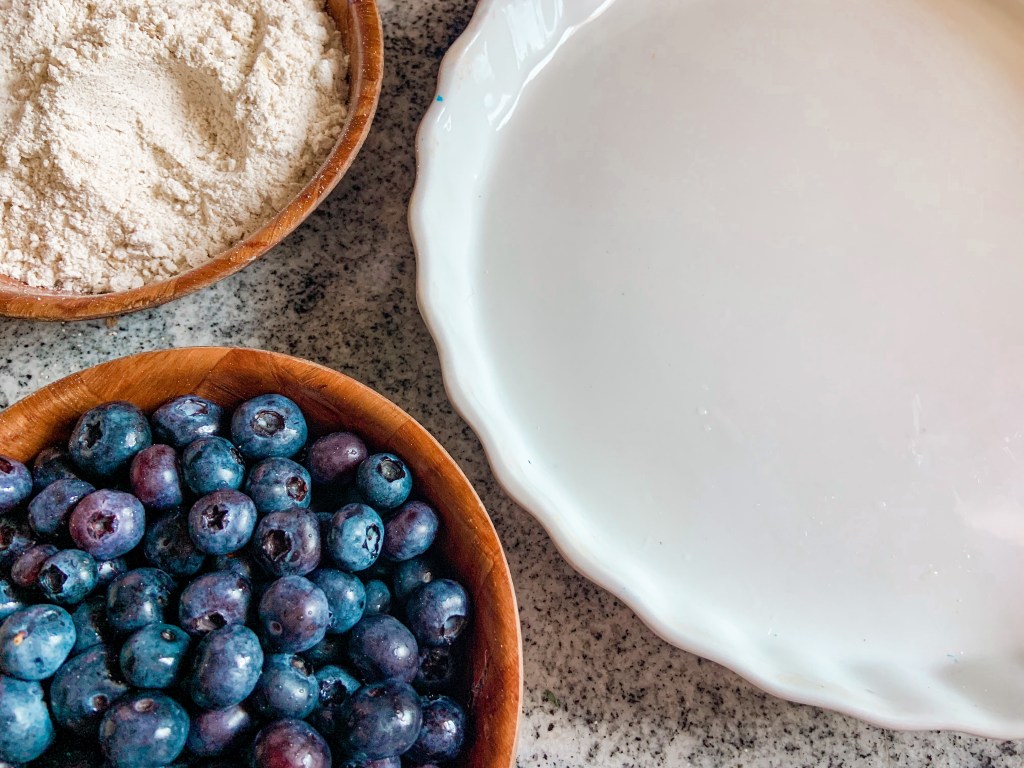
Here’s what you’ll need to make this Blueberry Crumble:

  • 2 cups of blueberries
  • sugar
  • ½ cup light brown sugar, packed
  • ½ cup all-purpose flour
  • ½ cup quick cook oats
  • ¼ cup unsalted butter, softened
  • 1 teaspoon cinnamon

First, preheat your oven to 375 F.

While it’s heating up, spray your crumble pan with cooking spray or spread water. Then, add the layer of blueberries at the bottom. Sprinkle sugar on top of the blueberries.

We used red colored sugar for ours!

Then, mix the crumble topping (sugar, flour, oats, cinnamon, and butter) in a bowl. When it’s all combined, spread on top of the sugared blueberries. To give it some extra flair, you can sprinkle some extra cinnamon sugar on top.

When the oven is preheated, place the blueberry crumble in for 25-30 minutes.

We took ours out at the 25 minute mark and added festive sprinkles. Then baked for an extra five minutes.

Serve this delicious dish warm with whipped cream or ice cream!


What’s your favorite food item to bring to a cookout?

Advertisement

Simple No Bake Funfetti Dip

If you want to bring the best dip to holidays and parties, you’re going to want to make this Simple No Bake Funfetti Dip. With only four ingredients, it’s easy to make and so tasty.

The best part about this dip is it can be festive for every holiday and party.

This week is a big one for Mila and me. Not only is Easter on Sunday, Mila turns FOUR on the fourteenth! That means we have a lot of places to be to celebrate. We actually just had her birthday… which I want to write a post about…where this dip was a huge hit. This Simple No Bake Funfetti Dip is definitely worth celebrating!

Here’s the only four ingredients you need:

  • Funfetti Cake Mix
  • 8oz Cool Whip
  • 1 Vanilla Pudding Snack Pack
  • Sprinkles (I use different ones depending on the event)

Another awesome part of this dip… you only need one bowl. Add all of these ingredients in a bowl and then mix them together. Once it gets to a creamy consistency, it’s ready.

I always add extra sprinkles on top. For Easter and Mila’s birthday, I added a spring sprinkle mix. When I made it for Valentine’s Day, we put heart sprinkles in the dip too! Whatever you’re celebrating, you can add so many different sprinkles in and it changed the whole mood of the dip. Plus, who doesn’t love sprinkles?

Then, you can either spoon to your serving bowl or keep it in the mixing one. Just make sure to put it in the refrigerator for about twenty minutes. In that twenty minutes, it will really fluff up and become extra delicious.

While you’re waiting for the Funfetti Dip to cool, get your dipping items ready.

Our favorites for this dip are vanilla wafers, graham crackers, strawberries, grapes, and green apples. Actually, green apples are our number one, but it’s good to mix with the others too. I’m definitely excited to trying more dippers.

If you try this Simple No Bake Funfetti Dip, comment your favorite dipper or what holiday you used made it on. I love this recipe so much and know you all will too!


What’s your favorite food to make for parties? Let me know in the comments.

Baked Reuben Sliders Recipe

If you’re looking for something easy and delicious to make for St. Patrick’s Day, you HAVE to try these Baked Reuben Sliders.

The one food I always crave around St. Patrick’s Day are reuben sandwiches. They have so many good flavors and are such a comfort food.

Last year was the first time I’ve made them at home. Usually I’ll order out, but they were easy enough to make. Since we always like to change it up and everyone loved the Chicken Parmesan Sliders Recipe, I knew these classic reuben sandwiches needed a twist.

Let’s just say… it was another instant hit in our house. I think this means we’ll have Baked Reuben Sliders all year long. A total win for me and my cooking time!

I’m sure I’ve convinced you enough to try with just the picture. Here’s what you’ll need to make them for your family:

  • Corned Beef
  • Baby Swiss Cheese
  • Thousand Island Dressing
  • King’s Hawaiian Original Sweet Rolls
  • Sauerkraut
  • Butter
  • Italian Seasoning

Before I begin… I did not add the amount I used becuase it will probably be different for your family. For Mila and me, I bought a half pound of corned beef, a pack of baby Swiss cheese, a can of sauerkraut, and one pack of King’s Hawaiian Rolls. We had enough for leftovers, but that’s what worked for us!

First, preheat your oven to 350° F.

While that’s preheating, slice your Hawaiian rolls across the middle leaving a top and a bottom. You won’t want to pull the individual rolls apart. Before putting the rolls on a cooking sheet, coat the bottom of the sheet with melted butter.

Then, put some butter on the bottom rolls. Place the bottoms of the rolls in the oven for around three minutes. This will toast them and not make the bottoms soggy when you’re eating.

After it’s toasted, pull them out and start assembling.

First, put thousand island dressing on the rolls. Then add the corned beef, sauerkraut, and baby Swiss. Before putting on the top part of the buns, I added an extra layer of thousand island dressing.

Next, add the top of the buns. Brush melted butter and Italian seasoning to the top.

Place in the oven to bake for 15-20 minutes. You’ll know when they’re done when the buns are golden brown and the cheese is all melted.

Then enjoy all the goodness!

These Baked Reuben Sliders are so good. The sweetness of the King’s Hawaiian Rolls just elevates the taste. Plus, it makes them so much more shareable too.

You can pair these with different sides like French fries or a salad (since we always eat salads here). But make sure to pair with a tasty St. Patrick’s Day treat or drink. I’ve shared a few that you can choose from:


Do you make Reuben sandwiches for St. Patrick’s Day? If you don’t, what’s another Irish meal that you crave?

Chicken Parmesan Sliders Recipe

One of the biggest sports days of the year is coming up. You’ll have your friends and family cheering for you when you bring these Chicken Parmesan Sliders to your Super Bowl party.

After you have these once, you’ll easily want to keep making them for easy week night dinners too.

My family watches the Super Bowl every year. It’s a tradition that I love, even though I’m in it for the commercials and half time show now. Instead of just buying chips and drinks, I made one of my favorite meals into handheld sandwich.

Before I go into how to make this, I’d highly suggest doubling this recipe.

It goes FAST!

But, you’ll score a touchdown with this meal by getting these ingredients:

  • Chicken Nuggets
  • Hawaiian Rolls
  • Pasta or Pizza Sauce
  • Mozzarella Cheese (I used shredded)
  • Parmesan
  • Butter
  • Italian Seasoning

First, cook your chicken nuggets or tenders as directed on their bag or box.

While they are cooking, slice your Hawaiian rolls across the middle leaving a top and a bottom. You won’t want to pull the individual rolls apart.

Before putting the rolls on a cooking sheet, coat the bottom of the sheet with melted butter. After the chicken nuggets are cooked, put your oven to 350.

Place the bottoms of the rolls in the oven for around three minutes. This will toast them and not make the bottoms soggy when you’re eating. Trust me, it’s a much needed step!

When it’s toasted, it’s time to assemble the sliders.

Place a chicken nugget on each roll.

Then, coat them with pizza or pasta sauce. I personally like the taste of pizza sauce better so that’s what I chose to do!

Next, either sprinkle shredded cheese or place mozzarella slices on your sliders. I probably put way too much cheese on mine, but that’s the way I like them! It makes it more satisfying to pull apart after they’re cooked too.

Place the top half of the rolls on top. Add melted butter mixed with Italian seasoning and garlic over the rolls.

Cook in the oven for 18-20 minutes.

Once they’re done, allow them five minutes to cool down before eating.

I love the simplicity and quickness of this recipe. Mila and I both loved it and I know the rest of my family will too.

If you have any left over, they taste great as leftovers!

These Chicken Parmesan Sliders will definitely be in our dinner rotation for a long time. I hope they will be for your family as well


What’s your go to Super Bowl food? Let me know in the comments.

Valentine’s Day Drink: Sweetheart Punch

Whether your spending your Valentine’s Day weekend with your partner or throwing a party for your child, this Sweetheart Punch will be a hit.

Perfectly sweet, you can easily transform this into an adult drink too.

Mila has loved making pink lemonade lately. I think she likes pouring everything in and stirring it up. So, when I was thinking of a fun Valentine’s Day drink, I knew I had to incorporate those elements to make it fun for her.

This Sweetheart Punch has the typical punch ingredients, but elevated with what gives it some color. Here’s what you’ll need:

  • Sprite
  • Raspberry Sherbet
  • Strawberry Kool-Aid Packet
  • Pink Lemonade
  • Sugar
  • Lemon Juice
  • Water
  • Pink Whitney Vodka (optional for adults)

First, Mila and I made the strawberry lemonade. We mixed one strawberry Kool-Aid packed with pink lemonade mix. We followed the instructions on the container to make all of it. You could also just buy premade pink lemonade and add a packet to it too.

At first, it was really sweet. To make it a little more tart, I added lemon juice in it. This made it taste really good to me and Mila didn’t mind cutting out the sweetness either.

When that’s mixed up really good, it’s time to add in the punch elements.

I start off with putting the raspberry sherbet in a glass. Usually, I just do 1/2 of whatever cup of the sherbet.

Then, I filled up until 3/4 of the cup with the strawberry lemonade. The rest of the cup should be topped off with Sprite. When it’s all filled, I usually give it a little spin.

If you’d want to make this an adult drink, add a shot (or two) of Pink Whitney Vodka when you pour the lemonade in. I love this Vodka and it’s perfect with lemonade. I’ve used this in other recipes I’ve shared on the blog.

This drink turned out tasting amazing. Mila and I both enjoyed it and it was easy to make. I’ll definitely be using this again for Mila’s Valentine’s Day party.

I hope you like it too and update me with your thoughts on it.


Let me know in the comments what your favorite type of punch is or what you’ll be drinking on Valentine’s Day.

Week Night Minestrone Soup Recipe

Looking to warm up on a chilly week night? This Minestrone Soup takes a little love, but worth every bite.

Whoever you’re making this delicious meal for, they’ll be sure to love it: especially you!

My favorite soup ay Olive Garden is their minestrone soup. It’s filled with fresh veggies and the broth is always spot on. I knew I had to try to make it at home.

Since I was recently gifted beef broth from Kettle and Fire, it felt like my sign to go get the other ingredients too. Kettle and Fire‘s broth was so easy to work with, tasted amazing, and has all whole food ingredients without any artificial flavors, hormones, or additives. All things I feel 100% happy with giving Mila.

Again, I took a TON of videos and not a lot of pictures. Thankfully the pictures I did get make it look as yummy as it tasted! You can see the video down below.

Here’s the other ingredients you’ll need for this Week Night Minestrone Soup:

  • Kettle and Fire Bone Broth
  • Zucchini
  • Carrot
  • Red beans
  • White beans (Cannellini)
  • Pasta (we used penne)
  • Diced tomatoes (in jar)
  • Onion
  • Garlic
  • Salt and Pepper
  • Italian Seasoning

First, chop up your vegetables and open the can to the tomatoes.

Then, heat olive oil in a pan and soften the onions and carrots (if you have celery, you’d add it here too). Once they’re translucent, add in garlic for a minute.

Next, add in the broth, a few cups of water, and the tomatoes. Bring this to a boil. Then turn down the heat. Let the broth simmer for an hour.

After the hour is up, add in the zucchini, beans, seasoning., and pasta to the pot. I also added two more cups of water too. The pasta soaks up all the juices and I like the broth!

Cook until the pasta is ready.

Once your noodles are all cooked, take the pot off the heat. Now it’s time to enjoy your soup.

I topped my soup off with parmesan cheese, just like they do at Olive Garden. You can always make bread sticks to enjoy with your soup as well.

We had salad to accompany our soup and it was a nice little meal. Since it’s been so cold, we love warming up with soup.

I know you’d love it too!


What’s your favorite week night recipe? Or let me know your favorite Sooo in the comments.

The BEST and EASIEST Jiffy Corn Casserole

Thanksgiving wouldn’t be Thanksgiving without tasty sides. Even though I love all the classics like stuffing and green bean casserole, this Jiffy Corn Casserole is a staple for our family’s Turkey Day!

Like the title of this post says, it’s so easy to make and will be the BEST Jiffy Corn Casserole you’ll ever have.

Intrigued to try? Here’s all you need to make it:

  • 1 can of corn
  • 1 can of creamed corn
  • 2 large eggs
  • 1 box of Jiffy corn muffin mix
  • 1 stick of butter
  • 8 ounces of sour cream
  • 1/4 cup of sugar

First, preheat your oven to 350 degrees Fahrenheit.

Then, in a large bowl or your greased/nonstick sprayed casserole dish, mix in all the ingredients. Just mix until it’s all together, minus the corn!

Afterwards, stick the uncovered casserole dish in the oven for 45-50 minutes and you’re done.

The first time I ever made this recipe, I was shocked! It tasted so good. It’s almost like corn bread, but softer and better? I’m unsure how to explain it. My best comparison is to Chi-Chi’s corn side.

Hello to that Chi-Chi’s throwback!

If you don’t like corn casserole sweet, just take out the sugar and you can still make it. My family usually likes cheese on top of it too. If I decide to make the casserole with cheese, I’ll sprinkle shredded cheese on, then put it in the over to melt it.

It just makes it even tastier!

Mila usually helps me mix everything together, but it doesn’t take any time at all. It’s so easy and tasty that your family and/or friends will ask you to make it for all your get-togethers!


What’s your go to side to make for Thanksgiving or any other type of gathering?

Pumpkin Pie Crescent Rolls

Want to know my favorite part of Thanksgiving dinner? The desserts! I think it’s a lot of people’s favorite part too. Pumpkin pie, in my opinion, is the best pie of the day.

This year, I’ve taken this classic dessert and out a little twist to it and made: Pumpkin Pie Crescent Rolls.

Even though I love pumpkin pie, these Pumpkin Pie Crescent Rolls taste even better!

Here what you’ll need to make them:

  • 2 crescent roll tubes
  • 1 cup of pumpkin purée
  • 2 egg yolks
  • 1/4 cup packed brown sugar
  • 1/4 cup granulated sugar
  • 1 tablespoon pumpkin spice
  • 1 teaspoon vanilla

First, preheat your oven to 375 F. Then you can line your baking sheet with parchment paper or spray your sheet with nonstick spray.

I used nonstick spray and they turned out great.

Then, mix the pumpkin purée, sugar, brown sugar, egg yolks, pumpkin spice, and vanilla in a bowl.

Next, unroll your crescent rolls. You can cut them in half, but I just went with how they were packaged instead of making smaller rolls.

After unrolling the rolls, spoon one tablespoon (or make your best judgment) of pumpkin pie filling on to the crescent roll. I liked putting a little extra so some of the filling came out.

Next, put them in the oven for 10-12 minutes and they’re done!

I ended up putting sugar and pumpkin spice on them when they were finished. It just made the flavoring pop more.

And who doesn’t love extra pumpkin spice.

Although we ate them as is, I think they’d be delicious with whipped cream or ice cream. Maybe even some caramel drizzle over them too! Either way, you’ll want to take these to your Thanksgiving dinner!


What’s your favorite Thanksgiving dessert?

Thanksgiving Treat: Rice Krispie Turkeys

The holiday season goes so quick! I’ve been thinking of Thanksgiving Treats and how to make them festive. Eventually, I came up with these Rice Krispie Turkeys.

All made from leftover Halloween candy, these turkeys are cute and perfect for Thanksgiving.

All I used to make these turkeys are:

  • Rice Krispies
  • Candy corn
  • Eye sprinkles
  • Twizzlers
  • Feathers

As I mentioned above, everything I used to make these came from Mila’s candy stash. We got a ton of mini Rice Krispie treats and this seemed like a fun way to use them. There was always an abundance of candy corn left from the Fall Scarecrow Snack Mix.

I ended up cutting little slices of a twizzler to make the turkey’s wattle. Yes, that’s what it’s called.

Then, of course, we used eye sprinkles to complete the look.

To assemble, you simple just press everything into the Rice Krispie. It’s not too difficult. One tip I’d give you is to use your hands to hold the shape of the Rice Krispie while pressing everything else in.

That way none of the ‘feathers’ or eyes fall out.

To complete the look, I added a craft feather to the back. I think it looked adorable. I’d suggest wrapping washi tape around the feather so it doesn’t stick to the Rice Krispie.

Another added bonus of this fun Thanksgiving treat is that Mila loved helping make the faces too! This could end up being a really fun activity for Thanksgiving day with the family. Im always looking for kids activities to keep them busy and smiling.

Either way, these Rice Krispie Turkeys are tasty, easy to make, and will be perfect for your Thanksgiving Day.


What foods or treats do you make for Thanksgiving or Friendsgiving? Let me know in the comments.

Fall Scarecrow Snack Mix

This week was my first time ever sending in a preschool snack with Mila. It was an exciting mom moment for me! Of course, I made sure it was a nut free mix that everyone would enjoy. Then we came up with the Fall Scarecrow Snack Mix.

Here’s everything I used to make this nut free Scarecrow Snack Mix:

  • Pretzels
  • Chex Cereal
  • Caramel Corn
  • m&m’s
  • Candy Corn
  • Candy Pumpkins
  • Rollos

The best part of this mix is it’s super easy to put together. All you have to do is find a big bowl and pour everything in.

Unfortunately, my big bowls weren’t big enough, so I had to keep making the mix over and over again. Good thing it’s easy and doesn’t take a lot of time to do it!

One thing I wish I would have gotten more of was the caramel corn. When I went to Target, they were almost sold out of the ‘monster mix.’ The monster mix just have chocolate drizzle and sprinkles. Some of the other caramel corn had pecans and other nuts. Obviously, I didn’t want to send any type of nuts to a preschool classroom in case of allergies.

Mila loved this mix, but she was definitely picking out all of the chocolate and Chex cereal!

I loved making this Fall Scarecrow Mix for Mila’s preschool party… and keeping the extras at home for us to share too. Here’s the little Tik Tok video I made to show how I made it all. Even though it’s pretty self explanatory, I loved how it all came together.

The end result is beautiful too!


What is your favorite snack or food item to share at classroom parties? I’d love some Christmas suggestions.