Simple No Bake Funfetti Dip

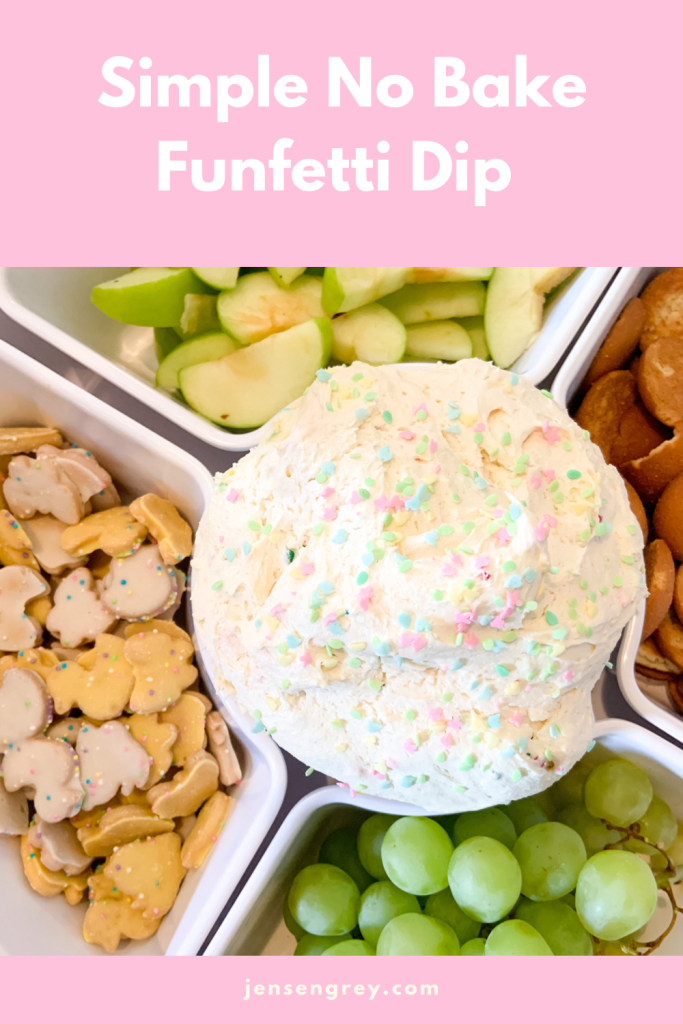
If you want to bring the best dip to holidays and parties, you’re going to want to make this Simple No Bake Funfetti Dip. With only four ingredients, it’s easy to make and so tasty.

The best part about this dip is it can be festive for every holiday and party.

This week is a big one for Mila and me. Not only is Easter on Sunday, Mila turns FOUR on the fourteenth! That means we have a lot of places to be to celebrate. We actually just had her birthday… which I want to write a post about…where this dip was a huge hit. This Simple No Bake Funfetti Dip is definitely worth celebrating!

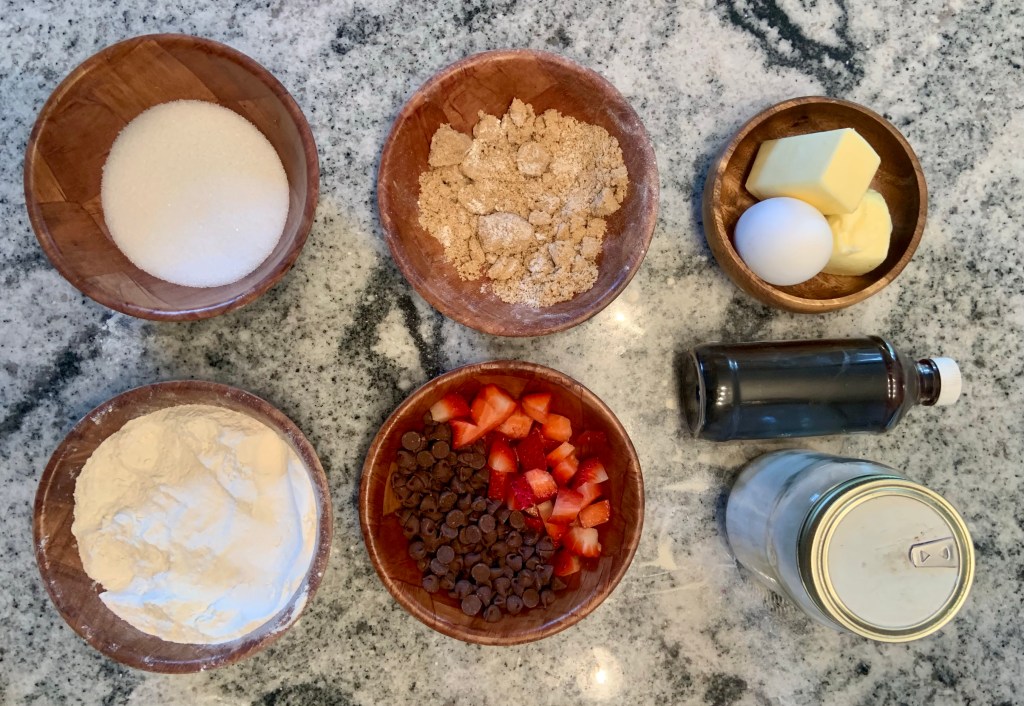
Here’s the only four ingredients you need:

  • Funfetti Cake Mix
  • 8oz Cool Whip
  • 1 Vanilla Pudding Snack Pack
  • Sprinkles (I use different ones depending on the event)

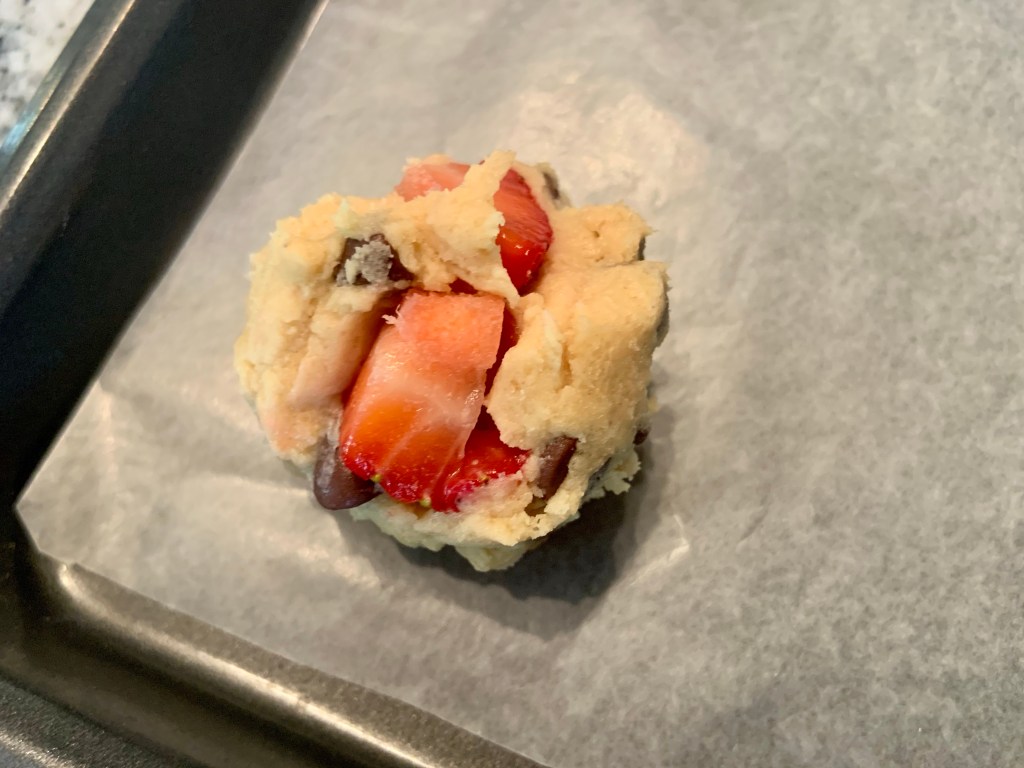
Another awesome part of this dip… you only need one bowl. Add all of these ingredients in a bowl and then mix them together. Once it gets to a creamy consistency, it’s ready.

I always add extra sprinkles on top. For Easter and Mila’s birthday, I added a spring sprinkle mix. When I made it for Valentine’s Day, we put heart sprinkles in the dip too! Whatever you’re celebrating, you can add so many different sprinkles in and it changed the whole mood of the dip. Plus, who doesn’t love sprinkles?

Then, you can either spoon to your serving bowl or keep it in the mixing one. Just make sure to put it in the refrigerator for about twenty minutes. In that twenty minutes, it will really fluff up and become extra delicious.

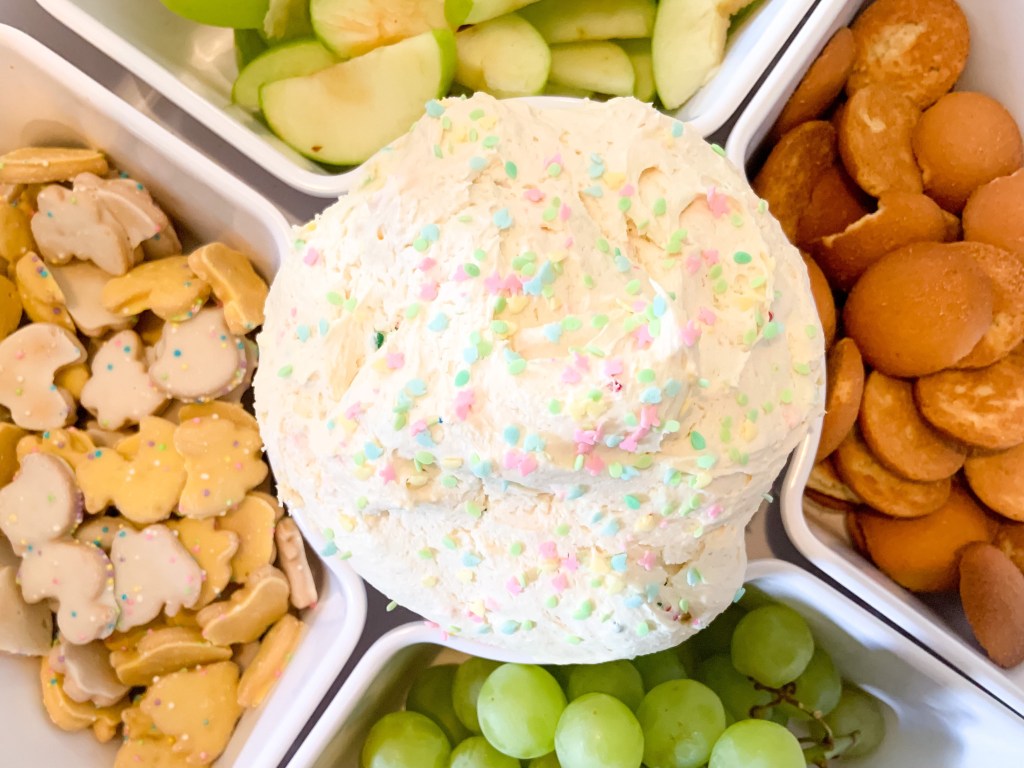
While you’re waiting for the Funfetti Dip to cool, get your dipping items ready.

Our favorites for this dip are vanilla wafers, graham crackers, strawberries, grapes, and green apples. Actually, green apples are our number one, but it’s good to mix with the others too. I’m definitely excited to trying more dippers.

If you try this Simple No Bake Funfetti Dip, comment your favorite dipper or what holiday you used made it on. I love this recipe so much and know you all will too!


What’s your favorite food to make for parties? Let me know in the comments.

Advertisement

Strawberry Chocolate Chip Cookies Recipe

One of the best and most classic desserts are chocolate chip cookies. They’re gooey and make you feel all warm inside. Up until now, I didn’t think they could get any better, until we added one ingredient: strawberries.

This new to us recipe is one I HAD to share with everyone, especially before National Chocolate Chip Day. Not only did we enjoy the finished results, Mila had a blast making these too.

Maybe a little too much fun with the extra flour!

Anyways, here’s what you’ll need to make these delicious cookies:

  • 2 1/4 cups of flour
  • 1 teaspoon of baking soda
  • 1/2 teaspoon of salt
  • 1 stick of unsalted butter
  • 1/2 cup of sugar
  • 3/4 cup of brown sugar
  • 1 tablespoon of vanilla extract
  • 2 large eggs
  • 1/2 cup of chopped strawberries
  • 1 cup of chocolate chips

Before making the cookie dough, preheat the oven to 370 F. Then line two large baking sheets with wax or parchment paper.

In a medium size bowl, whisk together the flour, baking soda, and salt. Set aside.

Next, in a large mixing bowl, use your mixer to cream the butter, sugar, brown sugar, and vanilla extract. I let my butter warm up a little bit to help it cream. Honestly, I just popped it in the microwave for 20 seconds.

Then, add eggs in one at a time. Mix in between eggs.

After it’s mixed, slowly add the flour mixture in. Just mix it until combined and don’t over mix.

Once you get a good dough consistency, fold in strawberries and chocolate chips. I used a spatula for this.

Now it’s time to place them on the cooking sheet. You can use an ice cream or cookie scoop to help with this part. I just used my hands and made little balls. It was way easier for me this way than using a spoon or anything.

Then, place in the oven and bake for 10 minutes. Rotate the cookie sheet after and place back in the oven for 4-6 more minutes. Your cookies should have holden brown on their edges.

Once it’s done, remove from the oven and let them cool down… or not.

We enjoyed these cookies a little too much. I have a feeling it’ll be a recipe we make over and over again.

Let me know in the comments if you end up trying this recipe… you most definitely should!

Check out these other chocolate chip creations too:

Toddler Activity and Snack: National Pizza Day

Today is National Pizza Day.

I love that it feels like everyday is a holiday. It makes not being able to do things like normal feel a little more special.

Anyways, since Mila is learning to count, I decided to make a fun counting activity and a pizza wrap for the occasion. Of course, her friend, Pizza, had to be involved too.

All I used for this little activity was construction paper, a crayon, scissors, and tape!

I divided the pizza up into eight slices. Then cut out enough square pepperonis for them all the have the correct number on them.

If your child is working on scissor skills, this would be great for them too.

This is a simple activity, but the repetitiveness helps solidify their counting skills. Mila has a hard time with four and five and likes to skip them. By doing this activity, it made her see four and five and do it eight times in a row.

I also love that she’s using her fine motor skills to pick up and place the small pieces on the pizza.

After she went through the activity once, she had time just playing with the little pieces. Pizza and her Barbie dog enjoyed it as well.

Even though this is a simple game to put together, it really does help with counting. It’s always such a good feeling to see them put their knowledge to use. Not just repeating numbers. Plus it gave me time to make food too.

Of course, we had to make something pizza inspired for the day!

Using the same wrap style as I did for the Cheesy Beef Quesadilla, Mila and I had cheesy, pizza wraps.

All you need are these things:

  • Tortilla
  • Pizza Sauce
  • Cheese
  • Any toppings you’d like!

Make a cut halfway through and down the center. Then add pizza sauce and cheese all over it.

Next fold the tortilla and place it on a hot pan.

Once it’s brown on both sides, you can take it off and serve it. I turned the pan on a lower setting so the cheese could melt more.

We love having handheld food, especially when it tastes so yummy.

We had a blast celebrating National Pizza Day!

One funny thing that did happen was Mila thought it was Pizza the Sloths birthday. So, it was just a day of being happy for all types of pizzas.

I hope you can make or order some pizza in really soon!

If you do the counting activity, let me know how your child likes it.

Also, check out these two AMAZING pizza recipes from my friends Erica and Irma. Erica did an amazing Rainbow Veggie Pizza that I want to immediately make. Irma made a yummy bubble pizza too. Another recipe I’ll try soon too!

Grilled Caprese Chicken Recipe

This is going to sound silly, but I’m so intimidated by cooking chicken.

I have this fear it’s going to be REALLY raw and it gives me the creeps. So, when I do make it, I usually bake it for a few more minutes than what a recipe calls. Any recipe that says to put it on the grill or pan, I just skip it.

Until I came across this one.

This grilled caprese chicken made me feel like I was back in Italy.

Not only was I able to grill it on the stove top, it was so good and not raw. I think this is a culinary win on my part! You should try it too.

Here’s what you’ll need:

  • 4 chicken breasts
  • 2 teaspoons of Italian seasoning
  • 2 teaspoons of salt
  • 1 teaspoon of garlic powder
  • 1 teaspoon of onion powder
  • 1 teaspoon of black pepper
  • Olive oil
  • Fresh mozzarella
  • Tomatoes (I used roma, but you could use other kinds too)
  • Basil
  • Balsamic glaze
  • Parchment paper
  • Grill or griddle
  • Rolling pin

That list seems huge, but it all comes together and you probably already have a lot of the ingredients. This recipe is also a little more in depth than what I usually share, but it’s pretty easy to follow along.

First, turn on your grill or griddle to a medium heat. This way it’s warmed up after you’ve prepped.

The, beat your chicken. No really. Wrap your chicken in parchment paper and hit it with a rolling pin. You’re trying to make your chicken have an even thickness.

After it’s evened out, brush on olive oil.

Next, it’s time to season. You can either mix your seasonings together in a separate bowl (what I did) or put it on top of the chicken. I always add extra salt and pepper too. Place on the grill or griddle and let it cook for five minutes. Then flip it over for five more minutes.

Pro tip… I used a griddle. To get the grill effect, I placed a baking sheet over my chicken to keep the heat in.

While your chicken is cooking. Slice your tomatoes and mozzarella if it isn’t pre-sliced. This is also a great time to chop your basil too.

Once your chicken is finished cooking on the second side, flip it over again. Place two pieces of mozzarella on top of each chicken. Cover them back up and let the cheese melt for about two to three minutes.

After it’s melted, plate them and put the tomatoes, basil, and balsamic glaze over top.

Then enjoy!

For sides, I made broccoli and garlic-butter noodles. It tasted great and Mila even enjoyed a few bites of the chicken too. She was way more into the noodles though.

I hope you enjoy this recipe and if you give it a try, let me know in the comments!

Chicken Pot Pie Casserole Recipe

Okay everyone, I originally had another meal planned for today, but knew this one had to go out first. You’re going to want to make this as soon as possible.

This casserole is easy to throw together and tastes GREAT! Mila ate a whole bowl full.

Here’s all you need:

  • 4 cups of shredded chicken (any cooked chicken will do, I used rotisserie chicken)
  • 2 cans of Cream of Chicken soup
  • Salt and Pepper
  • Garlic and Onion Powder
  • Butter
  • 2 cups milk
  • 1 can Grand Biscuits
  • 4 cups of frozen veggies (I used carrots, green beans, corn, and peas)
  • Cheese (optional)

First, preheat your oven to 375 degrees.

While oven is preheating, take large skillet and put it on medium heat. Melt 2 tablespoons butter and add frozen veggies to cook for 10-15 minutes. Then, place biscuits on a baking sheet.

When oven is preheated, Place the biscuits pan in the oven to prebake them for 8 minutes. They’ll finish baking when you put the whole casserole in. When they’re done, take out of the oven, but don’t shut the oven off.

Add the chicken, milk, cream of chicken soup, and spices to the frozen veggies. Stir for 5 minutes, until it’s bubbly hot.

After it’s mixed and heated, pour into a 9×13 dish. Then take the prebaked biscuits and put them on top of the mixture, baked side down and raw side up.

Before placing into the oven, melt 2 tablespoons of butter, mix in garlic powder, and pour over the biscuits. This will make your biscuits tastes extra delicious. At this point, I also sprinkled cheese over top of them too.

Then, bake for 12 minutes or until the biscuits are golden brown.

This meal is mouthwatering.

It feels great to find some meals that aren’t Mexican that Mila loves. This tastes like home and makes me feel all warm inside. I’m glad it made her happy too!

I’ll make sure to share the other recipe next week. Spoiler alert, it’s Mexican inspired, but just as yummy.

If you make this recipe, let me know what you think!

Meatless Monday: Spicy Grilled Cheese

Another week brings you another recipe and yes, it’s Mexican inspired again. I can’t help it!

Lately, I’ve been wanting super spicy foods, but hold off with Mila. She tends to like what I’m eating more than what’s on her plate. I wish I could understand her toddler brain. Anyways, during her nap one day this week, I thought I’d experiment. I’ve had a spicy grilled cheese in mind, but haven’t had a chance to make one.

At first I was skeptical and didn’t know if I was going to share, but after tasting it and knowing how simple it was to make, I knew you guys needed it in your lives.

Spicy Grilled Cheese:

  • Pepper Jack Cheese
  • Green Peppers
  • Taco Seasoning
  • Bread
  • Butter

Yes! That’s all the ingredients I used. If I had red onion, I probably would have thrown some in too.

Directions:

First, cut and sauté your green peppers. I like mine to have a little crunch, so use your judgement here. While they’re cooking. Shred your cheese and butter your bread. I always use extra cheese, so again, do what you like best. After you’ve buttered your bread, sprinkle taco seasoning on the buttered sides. I’m probably the worst recipe maker, but I just eyed up how much I put on. Next, lay your bread butter/seasoning side down on the pan. Layer the cheese and peppers, then put the other slice on top. Cook like normal grilled cheese after!

I ended up putting sour cream on top of the sandwich and a little avocado ranch.

You guys, this was SO good. It would’ve been a little too spicy doe Mila at the moment, but maybe when she’s a little older. Normal grilled cheese is one of our go to’s though, so I could easily sneak making both and she’d never know!

I’m going to try really hard this week to make something more complicated or a dinner meatless. I usually just roast veggies, make rice, and add chickpeas for meatless dinners. We’ll see what I can come up with this week.

Meatless Monday: Spanish Rice

This is a tiny bit of false advertisement. I’m going to give you two recipes because when I made my Spanish Rice, I also added some chicken thighs with it too. It tasted amazing! Mila loved it as well.

So Mila and I LOVE different types of food. Last week, with Cinco de Mayo, we made different Mexican food and this Spanish Rice dish. I will admit, we did order out for Cinco de Mayo, which was…. interesting to say the least. Turns out, you should call waaaaay beforehand when ordering Mexican on Cinco de Mayo, during a worldwide pandemic. Who would’ve known?

Anyways, so this recipe was given to me a couple weeks ago and I figured I’d try it. I love recipes that are easy to make and that are tasty. It’s something I could throw together and walk away from while attending Mila’s daily dinner crisis. This recipe would have worked great without the chicken thighs I added, they needed cooked, so don’t blame me. I also added black beans, which could have just been the protein for the meal. Without going on forever, here’s the recipes.

Without me chatting too much, here’s the good stuff…

Spanish Rice Ingredients:

  • 1 cup uncooked brown rice
  • 1 1/2 cups water
  • 1 can of diced tomatoes and chilies
  • 2 tapblespoons of taco seasoning mix
  • Shredded cheese (optional)
  • 1 avocados (optional)
  • 1 can of black beans (optional

Combine rice, water, tomatoes, and taco seasoning in a large saucepan or pot (like I did). Bring it to a boil. Then reduce the heat to low and cover, simmering for 45 minutes. Remove from heat and let it stand for 5 minutes. If you’re adding beans to your rice, I’d do it before the 5 minute warning so they can get nice and heated up. Fluff the rice up with a fork and add in your extras if you choose so. If not, enjoy as is!

Taco Chicken Thighs:

  • 3 chicken thighs, skinless and boneless (use as many as you need and adjust accordingly, this is what I had left)
  • Olive oil (I didn’t measure. I’ve never claimed to be a top chef, guys!)
  • Salt and Pepper
  • Taco Seasoning Packet (what you didn’t use with the Spanish Rice)

Preheat your oven to 400. While it’s preheating, rinse your chicken thighs and pat them dry. Once they’re dried throw them in a bowl with the olive oil, salt and pepper, and the taco seasoning. Make sure there’s seasoning covering the thighs and place them on a baking sheet. Once the oven is preheated, cook them for about 20-25 minutes. Once they’re done, you could shred them or cut them in strips. I did the latter, which was amazing for us.

This really is a quick and simple recipe you can make if you’re busy. Just set timers for everything and it’ll cook itself, really. Mila really enjoyed the chicken thighs (it’s not fun to convince her to eat chicken breasts) and rice is one of her favorite meals. Yes, rice is considered a meal for Mila. Some days are just a win when she’ll eat anything. It’s a toddler world and I’m just living in it.

So, although I didn’t completely go meatless for this meatless Monday recipe, there’s a lot of options to take the core of this meal and make it a meatless one.

Meatless Recipe: Tomato and Mozzarella Grilled Cheese

Another week in isolation means another recipe I’m going to share.

I’ve been low-key obsessed with grilled cheese lately. It’s to the point where different cheeses aren’t even cutting it. In my head, I’ve been coming up with different ingredients to add in my routine quarantine grilled cheese. Sure, there’s probably a recipe like this on Pinterest, but this time… it’s all me (totally hyping myself up at this moment).

Without making my head too big, enjoy this quick, easy, and delicious recipe that I know you’ll love too.

Tomato and Mozzarella Grilled Cheese

Ingredients for two sandwiches:

  • Roma Tomato (2)
  • Fresh Mozzarella
  • Bread (4 slices)
  • Butter
  • Italian Seasoning (to taste)
  • Salt and Pepper (to taste)
  • Balsamic Vinegar (Optional, but highly recommended)

First things first heat up the pan you’re using while cutting up your mozzarella and tomatoes. I made two sandwiches and used two tomatoes and one ball of fresh mozzarella. Salt and pepper the tomato and cheese for extra taste. Butter one side of each piece of bread (normal with any grilled cheese, obviously right?). To elevate this sandwich, put Italian seasoning on the butter side. That way the flavor sticks to the bread and butter. It just seeps into the bread and might be one of the best parts. Place your bread, butter side down on your pan, and layer your cheese and tomatoes too. I did like three little layers: mozzarella, tomato, mozzarella. It stacked up a little high, but after the first flip, I smashed it down a little bit to make it more manageable. At this point, I did think there might be a melting issue, so I turned my oven on 350 F and took out a baking sheet. After the other piece of bread was grilled, I personally didn’t think my cheese was melted enough, so I popped it into the oven for about five minutes until I thought it was melted to my liking. This is a total preference though, but I felt like it made my sandwich way better. After, I diagonally cut my sandwich and drizzled balsamic vinegar over it.

Mila and I ate these way too fast. She’s not a huge bread person, but she made sure to eat her fair share of tomatoes, cheese, and all the balsamic drizzle. We will definitely make this again in the future and I’m planning on trying it with shredded mozzarella cheese. BUT, I’m going to play around with another grilled cheese recipe in the next few days. Think a little spicier, but (hopefully) just as yummy!

I hope you’re able to try this recipe! I’m so proud of how it turned out and was excited to share it with you guys. Before my next grilled cheese recipe comes out, I have another recipe that I didn’t make meatless, but is adaptable to be meatless. So I’ll be sharing that this coming week. Anyways, let me know if you tried to make this and how you liked it!

Meatless Meals: French Onion Grilled Cheese

Scrambling about what to make for dinner tonight? How about a meatless option that doesn’t lack any taste? Well, I’ve found the perfect recipe for you.

On Instagram, I found a guy named @nishcooks. He makes videos of all kinds of different meals that are pretty simple to make. He provides the recipes and the videos shows how he quickly makes them. One video that jumped out to me was his French Onion Grilled Cheese.

The ingredients he uses are :

  • Whole onion
  • Sour dough bread
  • Cheddar (preferably Swiss)
  • Provolone
  • Butter

Well, I didn’t have everything he had specifically so I modified mine a bit. I used one yellow onion, Gouda cheese, and regular wheat bread. It’s what I had on hand, so I figured it’d be fine. I also used salt and pepper to spice the onion.

These were my ingredients after I sautéd the onions. That part took a little while, like forty minutes and lots of butter… so worth it in the end. I grated the Gouda and honestly, I know traditional French onion soup uses Swiss, but the cheese paired so well the the onions and everything.

All you need to do for this recipe is cut and sauté the onions. While that’s happening, grate your cheese, like what’s done above.

Then, take you bread and spread butter or mayonnaise on it. Mayo makes a crunchy layer.

After your onions are sautéed, construct the sandwich. For this step, I put one bread (mayo or butter side down) on a medium-hot pan. Next, layer the cheese than onions down.

To make it even more cheesier, I added more cheese to the top too!

Place the other piece of bread (mayo or butter side up) on top and continue cooking like you normally would with a grilled cheese sandwich.

If I knew how good it was going to taste, I probably would have made way more. Mila had soup, her favorite lately, but stole a few bites of my sandwich. When I last went to the grocery store, I grabbed extra onions to make this sandwich again.

Just looking at the pictures again makes me want to make it right now. I love grilled cheese normally, but the onions just elevated it to the next level.

You guys should definitely try it and let me know how you liked it. If you’re looking for some dinner inspiration and are on Instagram, check out @nishcooks.

Let me know in the comments if you tried this sandwich and how you liked it. Happy making!