Valentine’s Day Painting Activities

Pinks, hearts, and love all around. Valentine’s Day is the perfect holiday to craft and create. To start off the fun, we played around with Valentine’s Day Painting Activities that will be helpful for our crafts all February long.

Even if you’re not ‘crafty,’ you’ll love these easy painting ideas and your kids will have fun with it too.

I think it’s a little obvious that Mila (and I) love painting and being creative. Usually Mila’s go-to colors are pinks and purples, so it just makes Valentine’s Day prep a little more fun.

Since we’ve had a lot of snow days lately, we’ve been experimenting with different ideas of how to express ourselves. All of these listed are simple, BUT they can get really messy. I just like to state that beforehand. I highly suggest putting something down underneath your painting area and putting old clothes on your kids.

That way everything stays safe and clean.

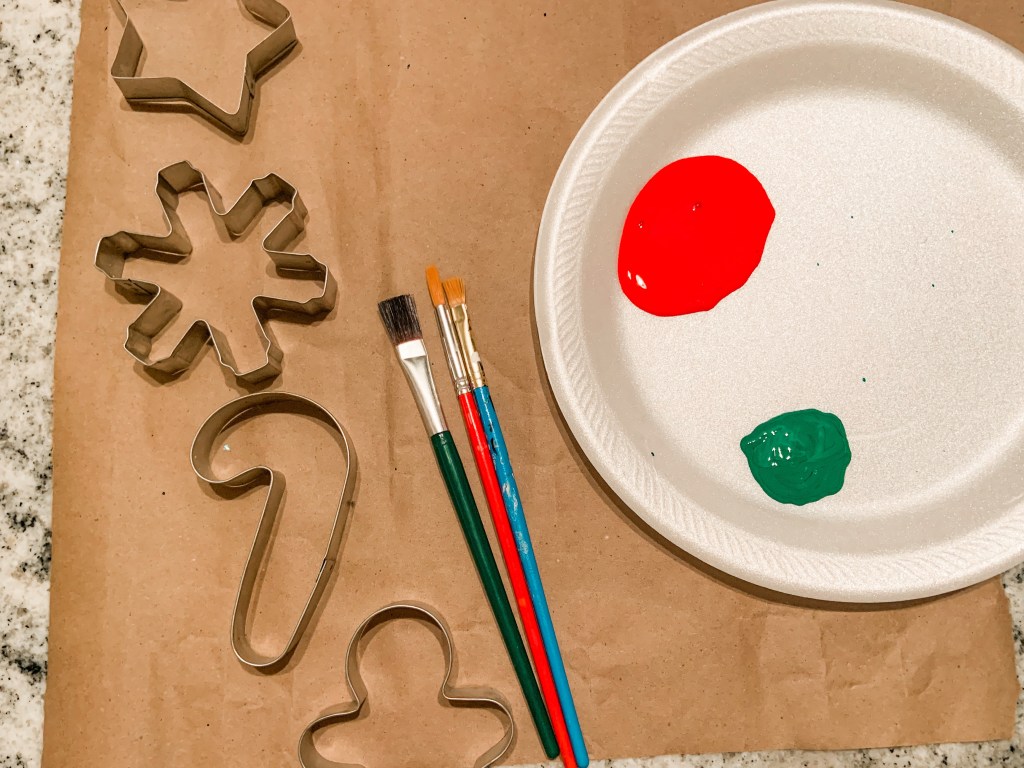
We used four different types of painting styles and I’m going to save our favorite for last. Here’s all the supplies we used for the entire day:

  • Stock paper
  • Paint
  • Bubble wrap
  • Cotton Balls
  • Toilet paper rolls
  • Shaving cream
  • Kraft paper
  • Tray

Bubble Wrap Painting

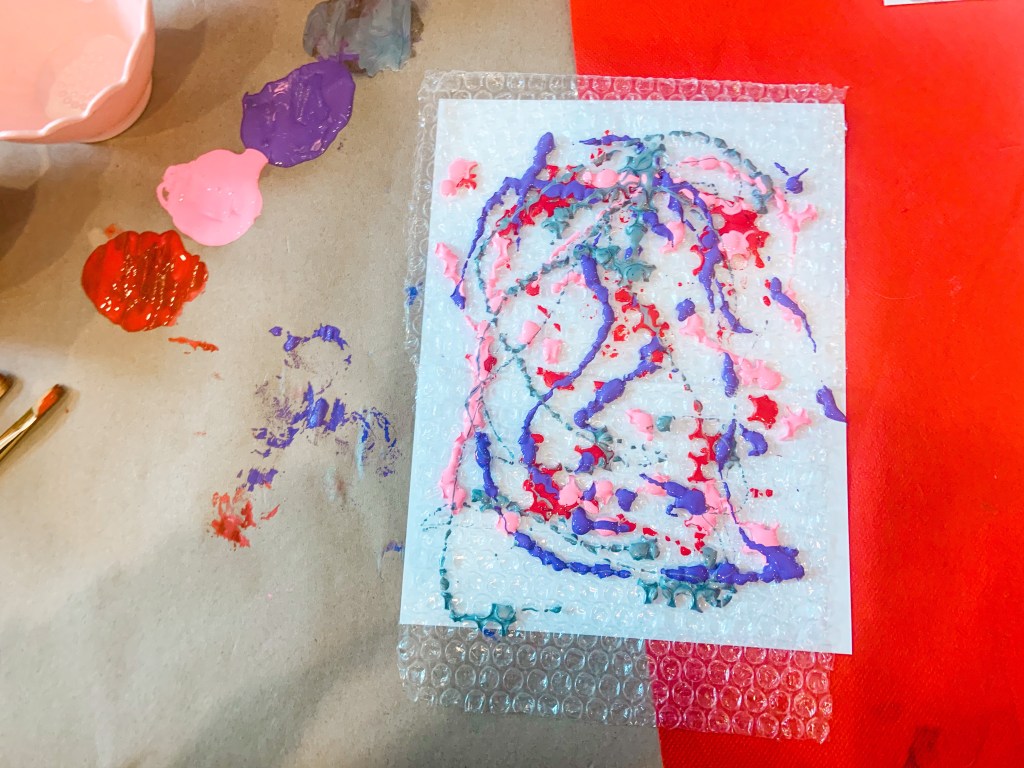
One fun way to add texture in painting is to use different supplies. Mila and I used bubble wrap last year for a heart garland, so we wanted to redo it again. I actually loved the little dots it creates. It sort of reminds me of honeycombs.

This year, we used WAY too much paint and didn’t get the honeycomb effect. I love the way it did turn out though.We also popped the bubbles too, which was fun for Mila. It made the paint explode out, so beware of that. I think it just looks like a big swirl, but we had the most fun using this method.

With the extra paint, I put it on another piece of craft paper. We’ll use that for wrapping paper.

It’s also a great way to reuse bubble wrap instead of just throwing it away. Always looking for ways to reuse, reduce, and recycle.

Cotton Ball Painting

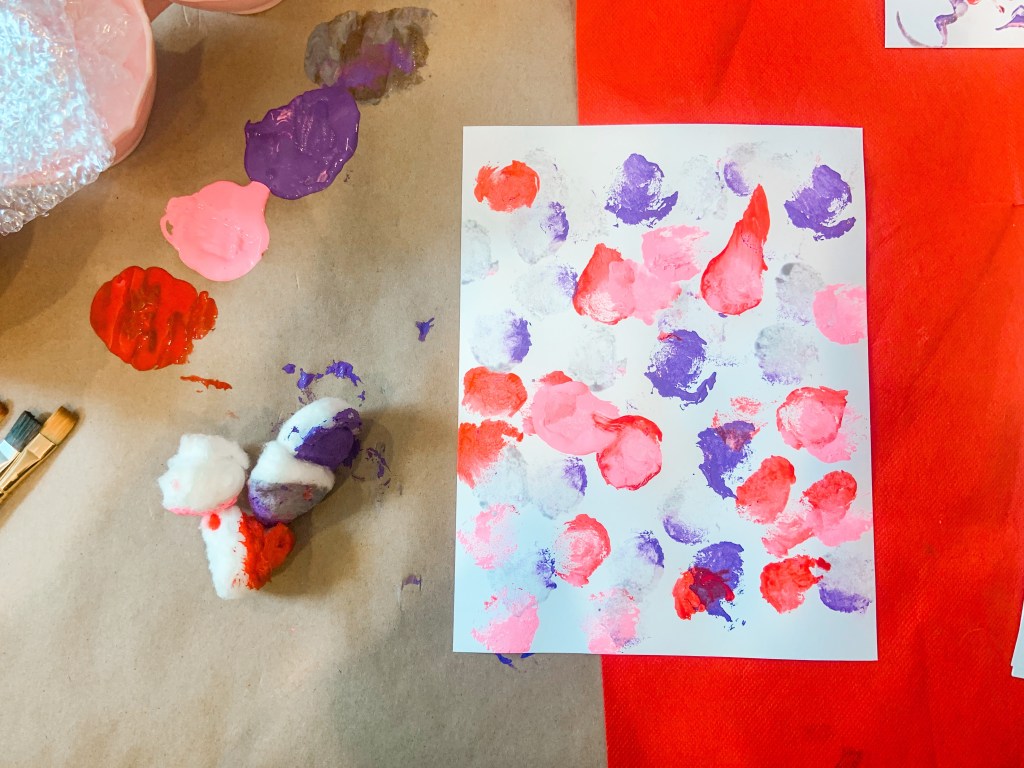
With toddlers and preschoolers, using anything but paint brushes makes painting way more fun. Cotton balls are a perfect stepping stone for them. Although Mila just used her hands, you can easily add them on clips to make it less messy and easier for kids to grab.

This one seems a little typical to add, but I want to share the reasons I love using cotton balls for painting.

The circle shape is so cute and stays consistent. Mila talked the entire time how she was making circles and was very proud of them. It also holds the paint really neat. It soaks it up and if you mix colors, it gives a cool ombre pattern. Usually I don’t let Mila mix her paint to avoid making brown, but you can do it with cotton balls. You can tell which colors she mixed together.

Even though this is simple, kids activities do not have to be extravagant to get a cute outcome filled with fun.

Toilet Paper Roll Stamp

I promise I won’t go on and on about reusing things around the house, but here’s another example of it. Most people have empty rolls so they’re accessible to use for Valentine’s Day crafts.

The best part, you can easily shape them into little hearts. All you have to do is push down in the middle to get the indent in the top of the heart and press the sides in. It’s super simple to do! I think they’re the cutest little hearts as well.

This was definitely Mila’s favorite painting. She’s obsessed with hearts and draws them constantly. Being able to paint them just made it a little sweeter.

One issue that we ran into is the heart not being even when you press down. If you don’t get them just right, you have to show your child how to get the stamp fully down. For us this time, we just had to rock it from the bottom point then tilt it to the top arches. I only had to show Mila one time how to get a complete heart and then she was all over it.

We’ll 100% be using this technique for a future craft. I’ll make sure to share and link back here just in case you’d like to keep up and see.

Shaving Cream Marbling Art

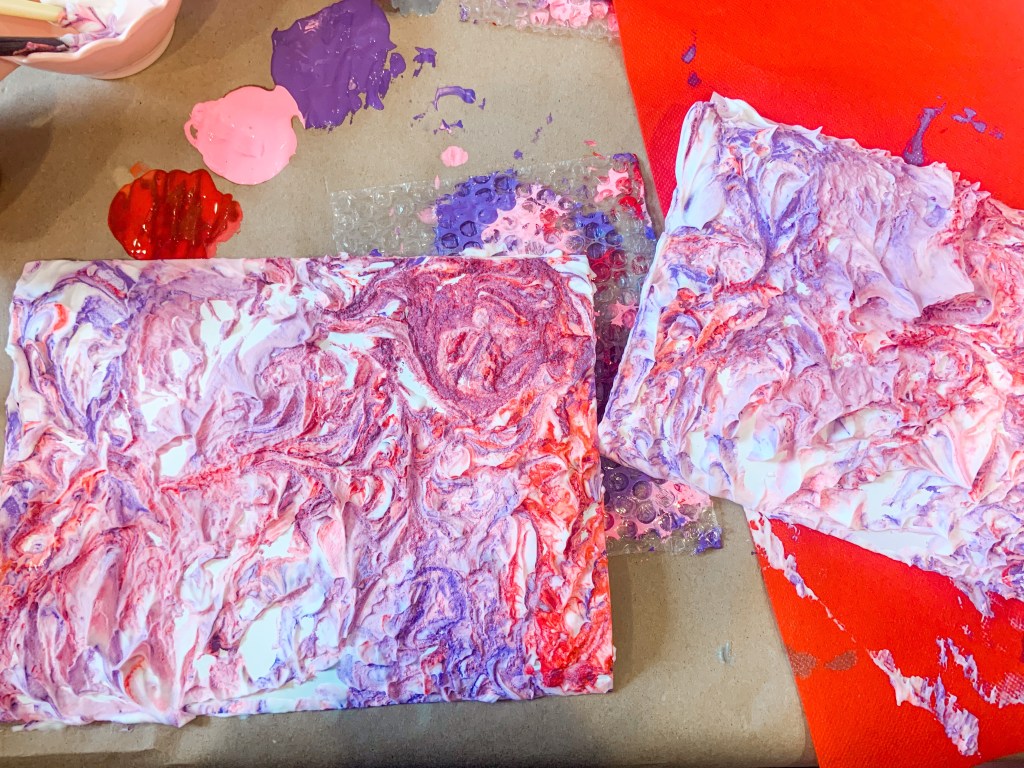
Out of all of these methods, this is the only one we’ve done for the first time. I’ve been eyeing this technique for a long time, but didn’t think Mila was ready for it. Now we have peaked in our painting. The outcome of this is my favorite, but it was the messiest of the bunch.

For this, all you have to do is put shaving cream in a tray. I used Mila’s sensory one. Then, Mila poured acrylic paint on top of the shaving cream and mixed it around with a paint brush. She might have swirled it a little too much, but the pattern was perfect no matter how she did it. After you have it the way you like, you push the paper in it. Make sure all of it is covered or you’ll have blank spaces. Peel it off the top and use a popsicle stick or old card to scrape off the remaining shaving cream on top. After, let it dry.

We ended up using the same pattern for three sheets of paper and could have easily done more! It was the quickest way to paint and is so unique.

I personally got a ton of shaving cream and paint on my hands through this. Mila saw how messy it was and dipped pretty quick. I would just suggest having wipes close to you or doing this technique by the sink.


Painting with these different styles was a lot of fun and gives us so many opportunities for future projects too. I can’t wait for you all to see what we’re making with these sheets too! Try to guess in the comments what you think we’re making.

Also, I want to say I know I’ve been a little quiet on the blog this month. I’ve been posting more on Instagram and Facebook the last few weeks, but it’s been nice to have a little writing break. We have a ton of fun recipes, activities, and crafts for the rest of this month and February to bring you though! One of them is about our trip to Florida and DISNEY! Let’s just say Mila keeps asking to go back.

For now, I’d love to hear what your favorite crafts and activities you do for Valentine’s Day are in the comments… and again, let me know what you think we’re doing with these sheets too.

Looking for other fun Valentine’s Day activities? Check these out:

Advertisement

MLK Day Craft: Hand and Heart Sign

It’s Martin Luther King Jr. Day and we created a Hand and Heart Sign to celebrate this great man.

This MLK Day craft also gave Mila and me the time to sit and talk about the importance of MLK’s mission. We’re always in the lookout to talk about diversity, antiracism, and love.

With my parenting, I make it a point to talk about big issues with Mila. Civil rights for everyone no matter their race, gender, or socioeconomic standing is something I believe Mila should grow up understanding. Making sure I keep the conversation age appropriate is just as important too.

To begin our conversation this year about MLK, I had her watch MLK’s ‘I have a dream’ speech. She loved watching him talk and it gave her a sense of knowing him.

Then she did a MLK coloring page from The Letter Vee. She had a picture of him up while she colored it in.

Also pictured is our MLK artwork from last year. It’s one of my favorite canvases she’s done.

Then, we talked about what word describes MLK’s message and overall feeling. Mila said, “LOVE!” I’m so glad she picked up on that while listening and talking about him.

“If you are seeking the highest good, I think you can find it through love.”

MLK

This year, I wanted to combine aspects from last years artwork and the word love. Here’s what we used to create this adorable piece.

  • Heart sign (from the dollar store!)
  • Skin toned paints
  • Yarn
  • Hot glue

With Mila’s help, I painted her hand with the skin toned paint and had her put her hand wherever she wanted to on the sign. We let the paint dry in between colors so it didn’t get muddled.

After it was all dry, I wrote ‘love’ in the middle. Next, I used my hot glue gun to trace the word and around the heart. Carefully, I tapped the yarn on the glue so it’d stick.

For the bow on top, I took different colored yarn and tied it on the top.

I actually love how it turned out. To me it says, we need everyone to work together and create love for humans to move forward.

It’s also one of those crafts that can stay in your house way beyond MLK Day too.

Again, I forgot to take pictures during the making of this piece, but I did video. I promise I’ll start doing better with this! The videos are cute, but I feel like pictures work better on here.

I hope you enjoyed Mila’s creation for MLK Day. I’d totally recommend showing your child some speeches by him or even talking about MLK. There’s so many beautiful quotes that are so meaningful too.

Here’s some other ways Mila and I have talked about MLK and antiracism.


How do you talk to your kids about MLK? Do you do any fun crafts or read specific books? Let me know in the comments.

Winter Craft: Popsicle Stick Snowflakes

Winter is here and for us, it’s time to stay inside when the temps are so low. To bring the magic of snow inside, we created these adorable Popsicle Stick Snowflakes

They’re easy for toddlers and preschoolers to create and make for an adorable craft as well.

If you’ve read any of my recent posts, you can tell I’m trying to get better at taking videos. They’re fun to make and post as reels too. It gives people who don’t have a lot of time to read a quick glimpse into the crafts and activities we do.

With that said, I forgot to take pictures while making this craft… oops. No fear though, I posted the video below.

Here’s what you’ll need to make these adorable glitter snowflakes.

  • Popsicle sticks
  • Paint
  • Glitter
  • Modge Podge )you can DIY this with glue and water)
  • Hot glue

For the first part of this craft, snowflake assembly is required. I would suggest an adult to do this. Personally, I used hot glue for this to be sure the snowflake will stick together. You could use other glue, but I’m unsure how it would hold up in the long run. If your child is comfortable using a hot glue gun, then they can go for it.

The actual snowflake uses four popsicle sticks. Just keep layering them so you can see the ends of the popsicle sticks. The video shows this really well.

After the glue is dried, your child can paint the snowflakes.

Mila chose the colors of her snowflakes. Of course she went for pink, light blue, and silver. She wishes that there were pink snowflakes. Wouldn’t that just be magical?

While they’re painting, I put a little tray underneath so nothing got on our countertop. These snowflakes get a little messy, so protect your area if you need! Mila couldn’t really hold and paint, so her brush kept going on the tray. Just a little heads up.

Now on to the best part: GLITTER!

Before the paint dries, sprinkle glitter over top of the snowflake. This way it gets stuck in the paint. If the paint dries beforehand, you can use modge podge to get it to stick too. I think it takes away an extra step just putting the glitter on the paint. You get similar results.

After the paint and the glitter is dry, use modge podge to seal in the paint and the glitter. If you don’t seal it, you’ll have glitter everywhere.

Once everything is dry, you have your beautiful, popsicle stick snowflakes!

They’re a lot of fun to do and easy to assemble. As you saw in the first picture, I attached them a shelf, but we want to make more to create a snowflake garland. You can potentially make and show these off in a variety of ways.

I also think they’d look cute as a car mirror decoration, but we’re definitely doing garland!


What ways would you show off these Popsicle Stick Snowflakes? Or let me know what snow or winter inspired crafts and activities you do during winter in the comments.

Christmas Activity: DIY Wrapping Paper

Looking for a different way to make your Christmas gifts even more special? Try this DIY Wrapping Paper. I promise your family and friends will love getting their gifts wrapped in paper that’s made with love. And… your kids will be really proud of themselves when they show it off to them too.

Making our own wrapping paper is a big Christmas Bucket List item for us. We did it her first Christmas and now it’s become a fun tradition. I know my parents always look forward to seeing her wrapping paper. This year, she made it for her friends at preschool. I’m sure we’ll be doing this Christmas Activity more than once this year.

Maybe this can become a fun tradition for your family too! Here’s what you’ll need to make your own wrapping paper:

  • Brown craft paper
  • Paint
  • Paint brushes
  • Cookie cutters

This activity is super simple in the best way. You get to let your child be as creative as they want to be. PLUS, they get to be messy too! I think all kids like that aspect of that.

To set up, all I did was lay out brown kraft paper, pour paint on a separate paper plate, and laid out her tools (paint brushes, cookie cutters, bingo daubers). She did everything else all by herself. I would also suggest laying trash bags down if you want to keep your surface clean.

I played Christmas music and had Mila explain to me what she was drawing. The one section was a whole scene with people. It’s fun to hear their thought process.

After they’re done creating, just let your wrapping paper dry.

Then, just wrap your presents like normal. I tried to get Mila to paint more in the middle so you could see the design. We also love to add yarn and ribbon to make presents even more special.

Mila was super proud of her wrapping paper. It’s so unique. We’ve done it every year and each year it looks so different. It’s a great way to capture her growth. It also feels like a present within a present when you give to others. I love gifting her artwork and this is a fun way to do that while being useful too!

Even though we normally do this for Christmas, I’d love to do it for different birthdays or holidays.


Let me know in the comments…

Have you ever made your own wrapping paper? OR what recycled products do you use for wrapping paper?

Bingo Marker Turkey Craft

Quirky Turkeys don’t always have feathers, sometimes they have spots. At least that’s what Mila says. This easy craft is perfect if you run out of feathers or just want to give your child a simple turkey craft.

Plus, It turns out really abstract, which makes this one of my favorite turkeys of the year!

As I’ve said over and over again, I try to find crafts and activities that are easy for Mila to do by herself. This gives me time to clean or cook a dish for Thanksgiving. It also promotes her being independent and in turn it helps her with her confidence. Little ones need all the confidence to get by in the world.

For this activity, we only used a few things. That means it was SUPER simple to set up for her… and me!

Here’s the things we used:

To start off, I made a turkey head and face. I used cardboard from a box, googly eyes, and random scrapbook/construction paper that I had leftover. Your child could have also made a turkey face too.

Then, I unscrewed the tops of the bingo markers and told her to make the turkey’s feathers with them.

I actually love using bingo markers in crafts and activities. They aren’t very messy, unless your child goes wld with them. They also are pretty cheap. I found these at the dollar store and we’ve had them for quite a while. Plus, there’s a lot of different colors you can find!

The only other thing I instructed Mila to do was to fill up the background. You could also have your kids sort the colors or do different numbers of dots for more learning.

When I look at her last quirky turkey of the year, I keep seeing a rainbow in the background. I don’t think she meant to do it like this, it just feels really symbolic. All her turkeys this year have been so great. As always, I’m just so proud of her.

This is another activity you can easily do before Thanksgiving or on Thanksgiving Day. I hope if you do, your child loves it as much as Mila did!


What are your favorite turkey or Thanksgiving inspired crafts? If you have any links, please feel free to post them in the comments. I’d love to share and maybe do them next year too!

If you’re looking for more crafts that Mila and I have done for Thanksgiving, here they are:

As always, I hope everyone has a Happy Thanksgiving and are able to spend time with their family and friends!