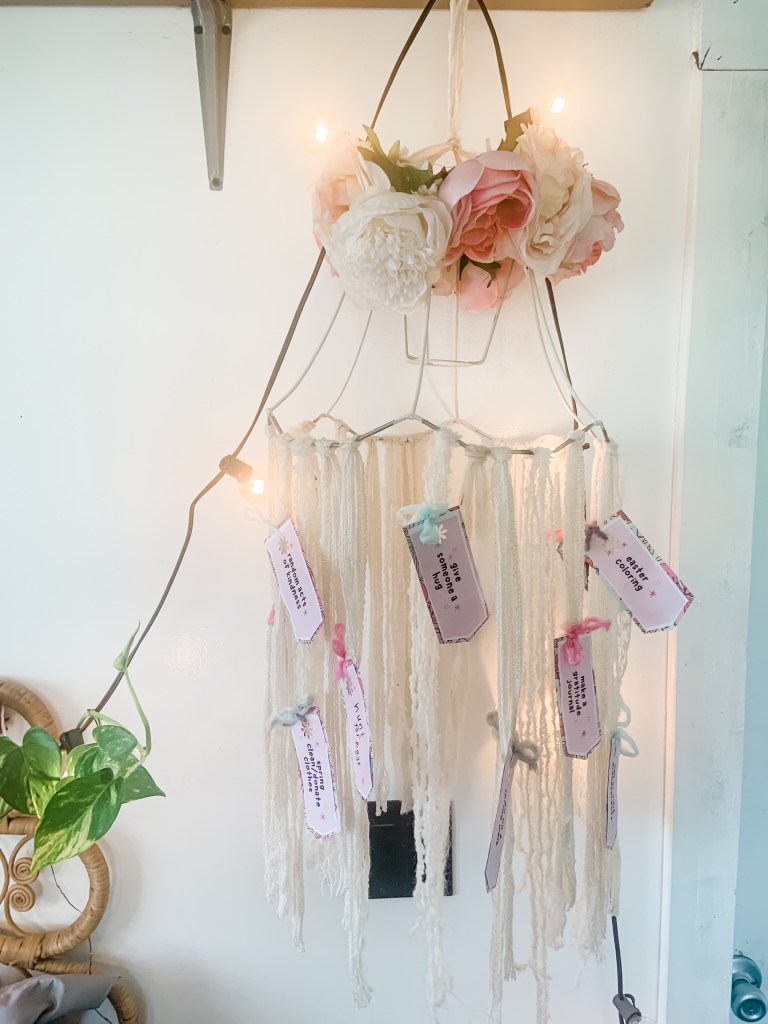
If you’re wanting to help plan on getting the most out of spring this year, this DIY Spring Bucket List can help! Not only will it motivate you to get everything you want done, it’ll look great in your home.
We usually just make ours out of craft paper, but when I saw the tags from The Letter Vee, I wanted to do something a little different. I used an existing floral mobile I had and gave it another use!
Wall hanging (message me if you’d like me to make you one)
First things first… it’s time for a family meeting. Have a talk with your family about what you would all like to do this spring. This will look different for every family.
Once you figure this out, it’s time to print.
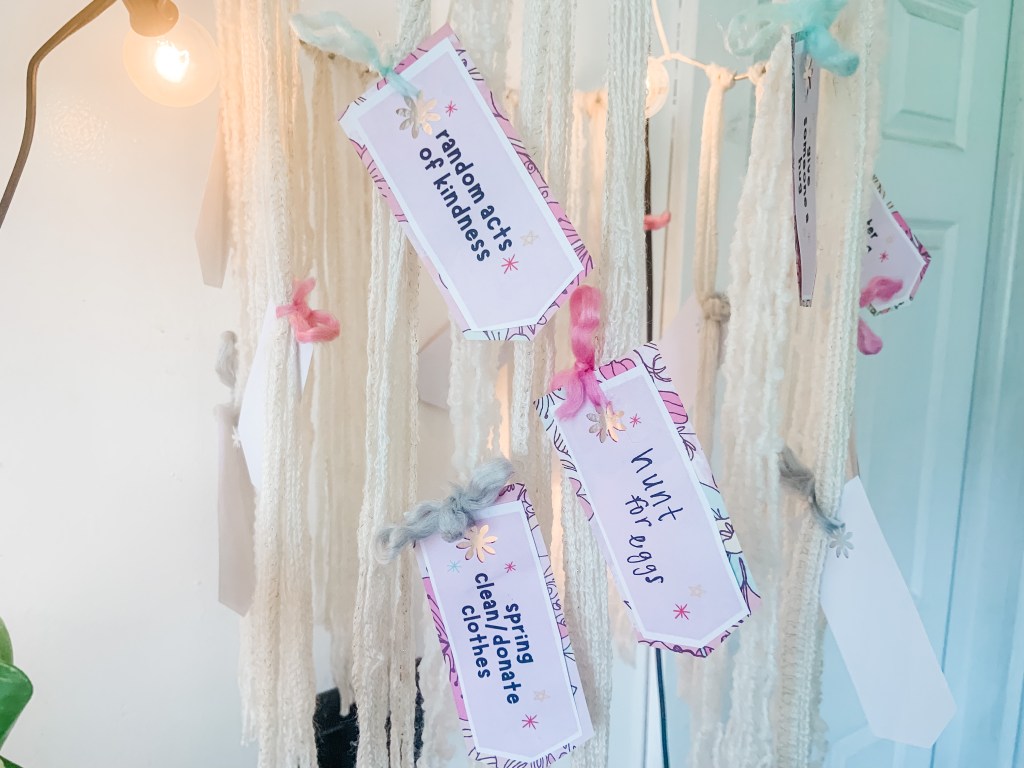
The Letter Vee has some bucket list items already on their site, but also gives blank cards too! This way you can easily write down what you’d like. For our ‘other’ items, I just used a normal pen and you could easily see my writing.
Next cut them out and use a hole puncher for each tag.
I actually taped the tags on spring scrapbook paper to give it an extra pop and used a daisy hole punch. The extra details made it so cute.
We also decided to use pink, grey, purple, and light blue yarn to connect our tags.
All you have to do is a light tie on a piece of the yarn or ribbon on your wall hanging. I just shuffled them around so we could easily see them.
You can add as many bucket list items you’d like.
Our plan is to take pictures with each bucket list item. When we do it, we’ll pull it off and make a little scrapbook of our spring.
It’ll be a fun way to record what we do and reflect on it at the end of the year.
Either way, we’re super ready for springtime and to start pulling items off of our bucket list. We can wait to keep you all updated.
In the comments, let me know what’s on your spring bucket list.
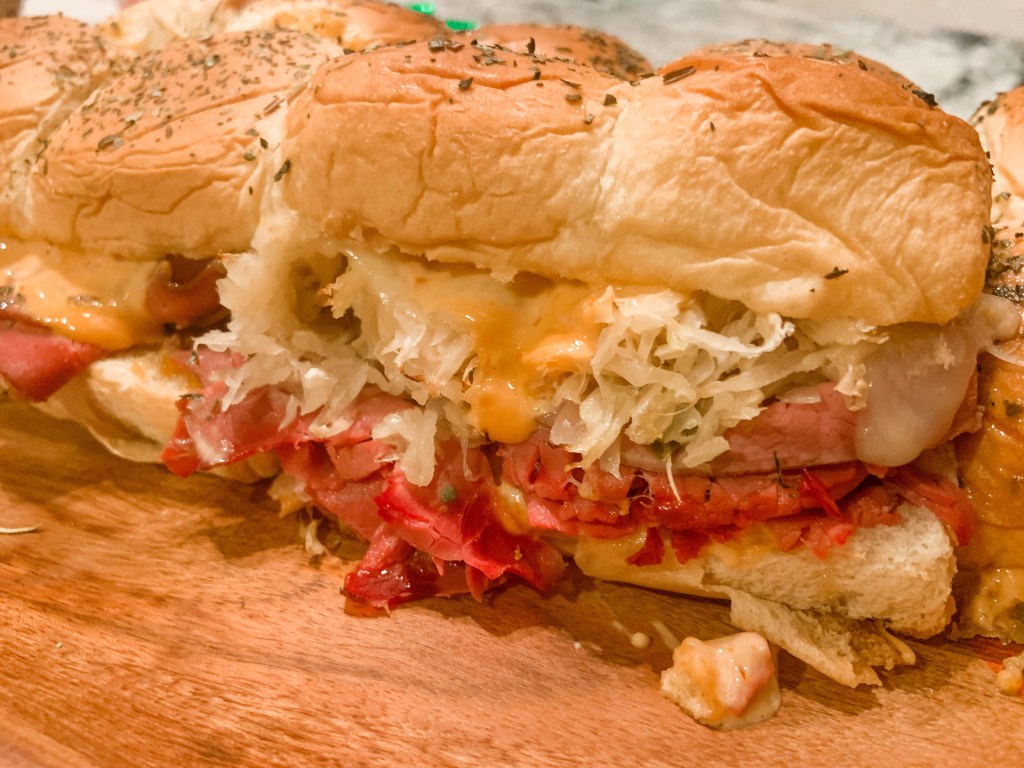
If you’re looking for something easy and delicious to make for St. Patrick’s Day, you HAVE to try these Baked Reuben Sliders.
The one food I always crave around St. Patrick’s Day are reuben sandwiches. They have so many good flavors and are such a comfort food.
Last year was the first time I’ve made them at home. Usually I’ll order out, but they were easy enough to make. Since we always like to change it up and everyone loved the Chicken Parmesan Sliders Recipe, I knew these classic reuben sandwiches needed a twist.
Let’s just say… it was another instant hit in our house. I think this means we’ll have Baked Reuben Sliders all year long. A total win for me and my cooking time!
I’m sure I’ve convinced you enough to try with just the picture. Here’s what you’ll need to make them for your family:
Corned Beef
Baby Swiss Cheese
Thousand Island Dressing
King’s Hawaiian Original Sweet Rolls
Sauerkraut
Butter
Italian Seasoning
Before I begin… I did not add the amount I used becuase it will probably be different for your family. For Mila and me, I bought a half pound of corned beef, a pack of baby Swiss cheese, a can of sauerkraut, and one pack of King’s Hawaiian Rolls. We had enough for leftovers, but that’s what worked for us!
First, preheat your oven to 350° F.
While that’s preheating, slice your Hawaiian rolls across the middle leaving a top and a bottom. You won’t want to pull the individual rolls apart. Before putting the rolls on a cooking sheet, coat the bottom of the sheet with melted butter.
Then, put some butter on the bottom rolls. Place the bottoms of the rolls in the oven for around three minutes. This will toast them and not make the bottoms soggy when you’re eating.
After it’s toasted, pull them out and start assembling.
First, put thousand island dressing on the rolls. Then add the corned beef, sauerkraut, and baby Swiss. Before putting on the top part of the buns, I added an extra layer of thousand island dressing.
Next, add the top of the buns. Brush melted butter and Italian seasoning to the top.
Place in the oven to bake for 15-20 minutes. You’ll know when they’re done when the buns are golden brown and the cheese is all melted.
Then enjoy all the goodness!
These Baked Reuben Sliders are so good. The sweetness of the King’s Hawaiian Rolls just elevates the taste. Plus, it makes them so much more shareable too.
You can pair these with different sides like French fries or a salad (since we always eat salads here). But make sure to pair with a tasty St. Patrick’s Day treat or drink. I’ve shared a few that you can choose from:
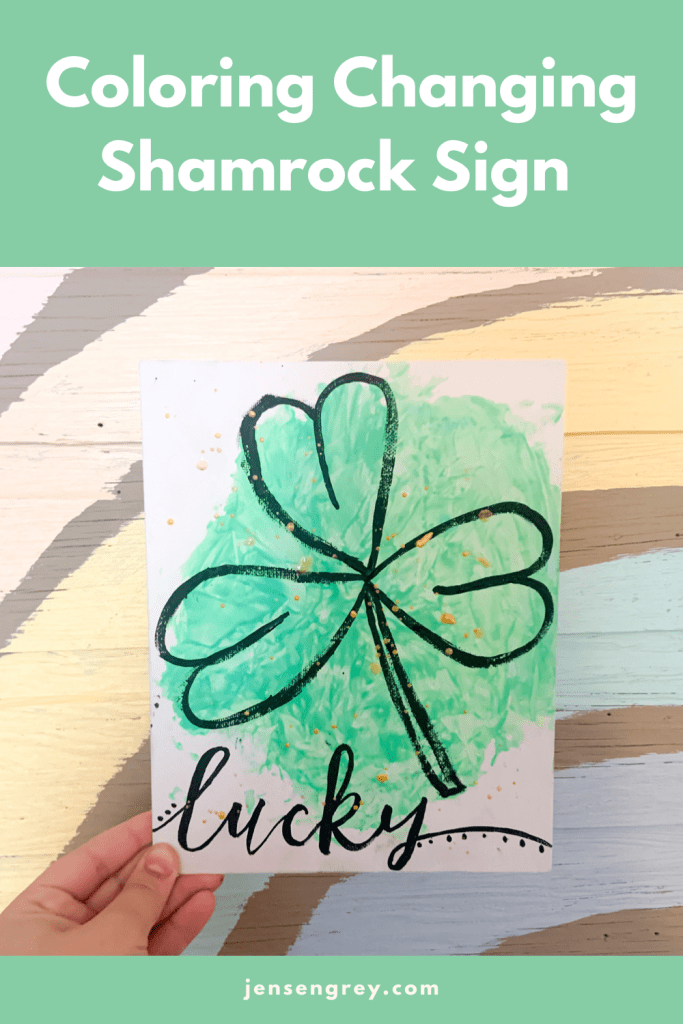
The magic of St. Patrick’s Day keeps flowing, especially with this DIY Coloring Changing Shamrock Sign.
Littles will be amazed watching blue and yellow make green! You can also use this sign to help trap those pesky leprechauns. They’ll be attracted to the magic.
Mila has been super curious in two different things: leprechauns and how to make colors.
To be able to give her both in one day, we did a magical craft that we’ll use to bait leprechauns. It’s really been fun to hear all her ideas of how to catch a leprechaun. She had fun making magic like them!
Plus, we love an activity with a simple set up! This one gives you just that with some leprechaun magic too! Here’s what you’ll need:
Blue Paint
Yellow Paint
Black Paint
Gold Paint
Canvas
Plastic Wrap
All you need to do is pour some blue and yellow paint on a blank canvas. I actually had the canvas in a sensory bin to keep the mess at bay.
Then, I had Mila place plastic wrap on top and told her to mix all the colors.
For that part, I really had to tell her it was okay to get messy. She was really moving the plastic wrap around which mixed it up quicker. At first I think she was afraid of the messy paint!
Once it’s combined, take the plastic wrap off and let it dry.
To add a little more magic, I painted on a shamrock, ‘lucky,’ and splattered gold paint. I think it turned out as magical as a leprechaun would like.
What’s your favorite St. Patrick’s Day saying to put on signs?
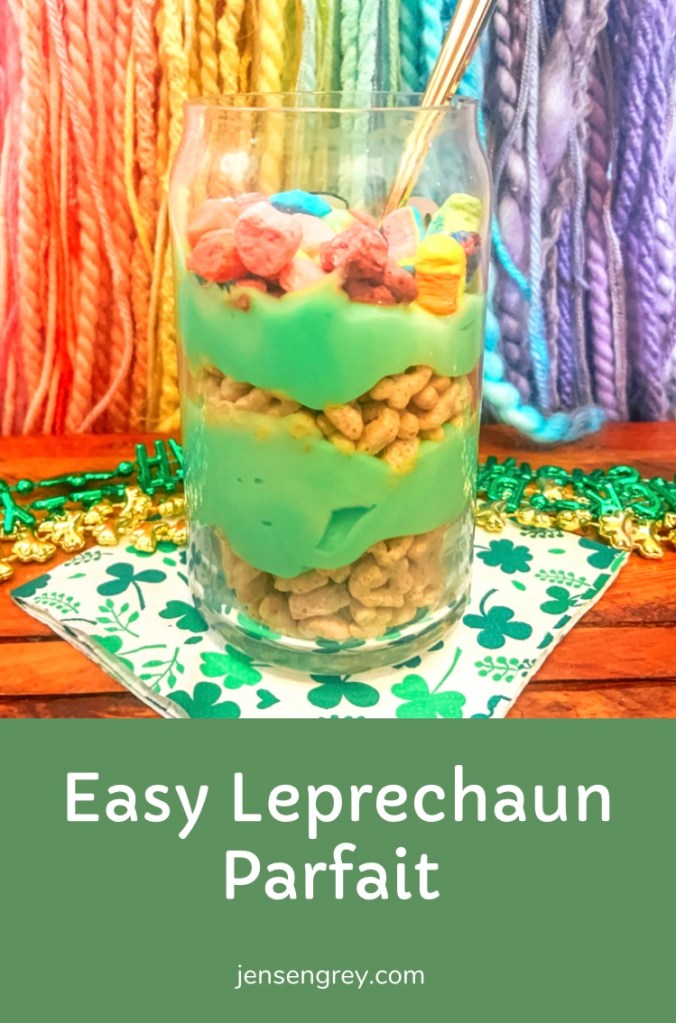
If you’re in the midst of leprechaun hunting this year, you might be able to tempt one with this Easy Leprechaun Parfait.
With only a few tasty ingredients, your little ones won’t be able to resist the temptation of trying this magically delicious treat.
Mila is on a full fledge hunt for a leprechaun before St. Patrick’s Day. The one in our house has already turned all our milk green and is hiding things of her’s. We have a few tricks up our sleeve to capture him.
One tasty way we came up with was getting our leprechaun to try a tasty parfait. Of course filled with all a leprechaun’s favorite things…
Here’s what you’ll need to charm a leprechaun with this treat:
Lucky Charm Cereal
Vanilla Pudding
Food Coloring
The first thing for the sweet treat is to have littles separate the Lucky Charm’s cereal and marshmallows. Mila loves doing this and sneaking a few to eat too!
While they’re doing that, put green food coloring in the vanilla pudding. Of course leprechauns LOVE the color green. Mix it up until it’s consistently green. I tried to make it a lighter green, but it all depends on the amount of food coloring you put in.
Once you and your little are done, it’s time to start layering.
Our layering went like this: cereal, pudding, cereal, pudding, marshmallows. Personally, I think it was a pretty good decision.
The best part was, Mila was super excited to try this since it was for the leprechaun. She ate SO much for it, but left a little bit to catch one. They’re small anyways!
We’ll keep you updated on our catching adventure… until then, you have to try this sweet treat.
What are your tips and tricks to catch one of those sneaky leprechauns? Let me know in the comments.
If there’s one toy purchase I’m happy to have made, it’s this Wooden Rainbow Stacker. Not only is it colorful and meaningful to us, it’s a lot of fun for Mila to play with.
Packed with so many different ways to play, Mila spends hours with this toy.
I discovered this Wooden Rainbow Stacker in 2019. That was when I started buying more wooden toys instead of plastic ones. They’re so much better for our environment and they’ll last for generations.
When researching these toys, I found out so many different benefits to having kids just use their imaginations when playing. Since plain rainbow arches don’t give specific directions of how to play, kids can come up with their own ideas. Parents can also help guide play.
It’s also so beautiful. When Mila isn’t playing with it, it makes a perfect decoration in our playroom. Rainbows are so symbolic for us, so it has many purposes.
I figured I’d let you all know how we play with ours!
Learning Colors
When Mila was little, we used these arches to learn the different colors. It was nice that she could actually pick up the colors of the rainbow when she didn’t have the right words. We sang the Mickey Mouse Clubhouse rainbow song with this so many times to learn the colors. It was always a ton of fun.
As she grew older, I would have her find different objects that were the same color. She really liked this idea! It became a little scavenger hunt around the house for her.
We also would do matching or patterns with the arches too. Since there’s two of every color it made it fun to show her a combination, then she repeated!
Imaginative Play
Since these arches are so big, they make fabulous houses. Mila is always playing with her little dolls on these. I think it’s so cute to listen and see how her brain makes these wonderful play scenarios.
She also makes different shapes with them. It’s incredible to see what she comes up with and how she explains it.
One of my favorite times she used imaginative play is with her unicorns. They all raced through the different arches and even on top of them. It was like Mila came up with her own little world just out of this toy and her My Little Pony’s.
This is what’s so amazing about these plain play items; your child’s imagination will make them what they need to be at that time.
Stacking
Stacking is probably our favorite activity to do with this rainbow stacker now.
As I stated above, we LOVE to make different shapes with our rainbow. Mila loves to do ‘hearts.’ This is where we stack out rainbow like the picture below. We see how far they can balance until they all fall down.
It also is really cool (as an adult) to see how they fall too. It’s really satisfying to har the nose as they go down and just watching it too.
There are so many different shapes kids can make with this. While they’re figuring it out, they’re able to learn! It takes Mila a few times to stack up the shape just as she likes it, but she’s always proud of herself when she finally does it!
Extended Learning
Lately, Mila is at the age where she is learning how to spell her name and simple words. We use resin letters to balance her words on top of the rainbow.
We do little challenges of who can place the most letters on the rainbow arches or who can get their words to stay up the longest. It really helps Mila learn while she’s having fun. That’s really all that it’s about too!
I’m sure as she gets older there will be more and more ways to play with this stacker. It truly has been an investment in her future.
Do you have a rainbow stacker? What games does your kiddo like playing with it?
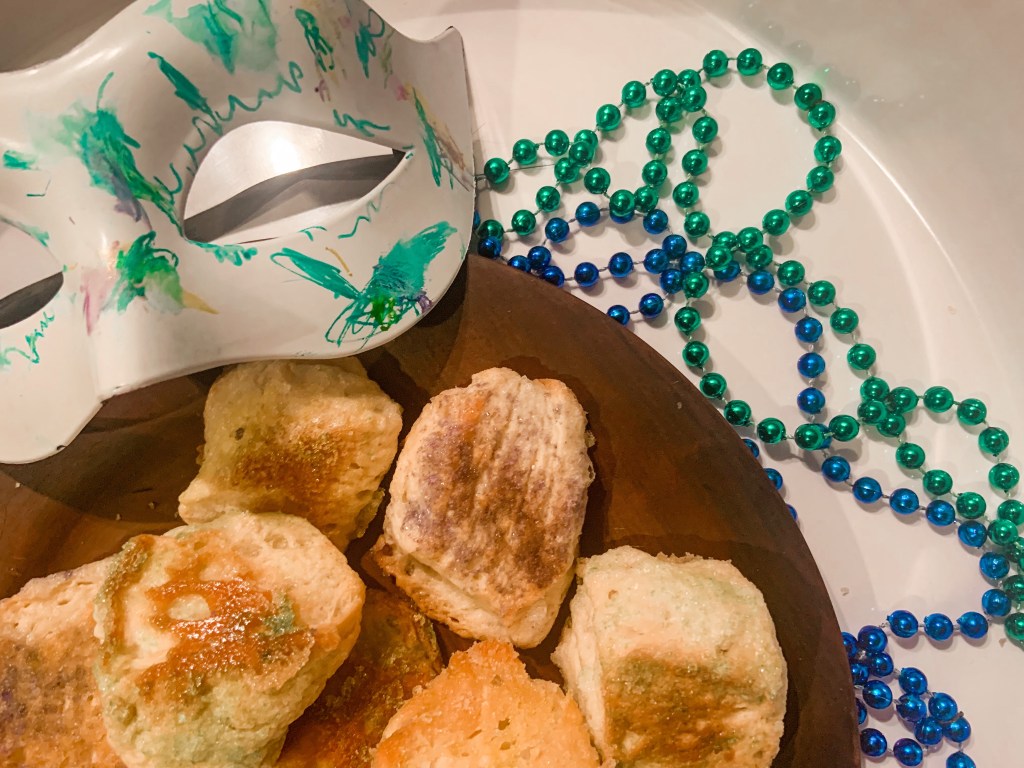
If you’re looking for a fun and tasty was to celebrate Mardi Gras, try this Easy 3 Ingredient Beignets Recipe.
You’ll have the taste of New Orleans in twenty minutes.
We like to celebrate everything in my household. It just makes life a little more fun. In this case, it made it a little more sweet too!
Before I go on, I want to share that I originally saw this recipe on Instagram: @lorafied. It looks like a fun and recipe I knew I needed to try with Mila. I’m so glad I did that I had to share with all of you.
Here’s the three ingredients you’ll need to let the good times roll:
1 can of biscuits
3 tablespoons of melted butter
1/2 cup of sugar
First, you’ll need to preheat your oven to 375 F.
While your oven is warming up, get out your canned biscuits. I always love the way it pops and just expands instantly. It brings make so many childhood memories!
Then, cut your biscuits in small pieces. I just did a cross section in mine to make four bites per biscuit.
Next, melt your butter. Put biscuit bites in a bowl and coat them with butter.
After they’re covered, pour the sugar all over them. I took my hands to mix them up and make sure all sides were covered. Move them to a plan after they’re all good.
At this point, I added some colored sugar to make them a little more festive for Mardi Gras.
Place them in your oven for 10-15 minutes. Make sure to flip your little beignets half way through too! You’ll know they’re done when they’re a beautiful, golden brown.
You can either dust with powder sugar or enjoy them as is!
We loved how our sweet treat tasted. Plus, it was such a fun way to talk about Mardi Gras with Mika while she did a mini activity too.
Hopefully you can get to make and enjoy these beignets for Fat Tuesday!
If your child (or you) love to paint and want to try a cool new way to do so, try this DIY Ice Cube Painting.
Mila paints all the time. Usually with acrylic paints on canvas, but a switch was needed. With a little prep, this ice cube painting activity was a morning full of fun and creativity.
Prepping for this activity was really easy. All I did was pick out a few of her go to colors. Then I painted them inside the resin mold.
I tried my best to get a lot in there. It’s be easier if it was squeezable paint bottle.
Before you put water in the mold, set on a baking sheet to freeze. It is near impossible to move a mold full of water without spilling it. This won’t be an issue if you’re using and ice cube tray.
When all the letters are painted, pour water in each of them. I would suggest using something that isn’t going to overflow the mold easy and mix colors. Honestly, I reused an old Starbucks iced coffee glass to pour.
Then, when they’re all filled, place it in the freezer.
When they’re done, you can place them in a tray for your child to paint. We personally used thick stock paper for this painting.
To warm up the ice, Mila dipped her brush in salt. Not only is this activity creative, she learned a little science as well. I just explained to her that salt melts ice and she thought it was so much fun.
The best part of this activity was it was easy to clean up.
I just threw the left over letters back in the tray. Then I put them in the freezer so we can use as after school activities this week! That means I only had to prep once for days of fun!
Using frozen letter cubes is a fun way to introduce more learning too. I used ‘lucky one’ since St. Patrick’s Day is coming. BUT you can spell out whatever to help them learn.
I’ll use the letters in her name to give her some more practice seeing and writing it.
This activity would be perfect in the summer too. You can battle the heat and see if the sun or your child ends up getting done with the ice first.
Either way, this Ice Cube Painting activity is a cool way to create.
What are some fun spring activities your child likes to do? Let me know in the comments.
It’s Random Acts of Kindness Week! There are so many ways to spread kindness and make others smiles. This has been something special to me since I had Jensen.
Now I get to pass it to Mila!
I believe by letting her know it’s important to share happiness, she’ll continue it in the future. Always striving to make her a great human.
Wondering where to start? Here are 10 Random Acts of Kindness you can do with your child and toddler.
Share a gift of love.
This year, Mila and I made these cute little notes for her dance friends. I found them on Sierra L Miller’s Blog and added a scrunchie. They turned out to be a cute little gift and helpful for a little dancer’s hair.
Last year, we made Lollipop Flowers that were a complete hit.
Write a thank you note.
I’m ALL about a classic thank you note. Writing a small note to someone you care about can mean the world. Anytime I send cards or notes now, I have Mila write a little something and sign her name.
It was a fun way to make someone smile and share my Jensen too.
Send a nice video.
Mila LOVES making videos and sending them to our friends and family. One way to make someone smile is to do just this.
You and your child can tell someone how much you love them. It’s guaranteed to be a random act of kindness that they’ll love to receive. The best part, you don’t have to leave your home!
Leave a gift card as a surprise.
This goes along along with the flowers… but leaving random gift cards is a cute way to surprise someone.
Mila and I have left them in books at book stores or just sent them to others when we’re out to eat. You could even leave them at gas station pumps to help someone out.
Paint a rock.
Rock painting was so big and so many people still do it. Mila loves to paint rocks or just find them to give to her grandpa. Painting kind words on a rock and giving them to someone could be a small way to brighten their day.
Tip nicely.
I know a lot of people pay it forward, but it can cause some chaos. Instead of doing this, why not tip your barista or waitress nicely.
Mila loves tipping and this is a fun way to pretend she’s paying!
Make a craft.
Just like getting a thank you card, I love receiving crafts. When I’m making different things, I try to make three extra to give to family and friends. They always smile when seeing Mila’s artwork or something special we made together.
It’s a fun way to share the love when you’re already creating!
Cook someone a meal.
There are so many families that could use the extra help with meals. One friend of ours ordered us pizza one night and it made the whole night (and week) go a lot more smoothly with having it done for us already.
If you usually have leftovers, it would be a beautiful idea to share. I know this has been my favorite on the receiving end.
Kids love cooking and baking too! A perfect way to get them involved as well.
Smile.
The smallest thing you can do with a BIG impact is smile. You never know… it could be their first smile they have seen all day.
I hope you can find something on this list to do with your child for someone you love. Let me know in the comments some acts of kindness you’ve performed.
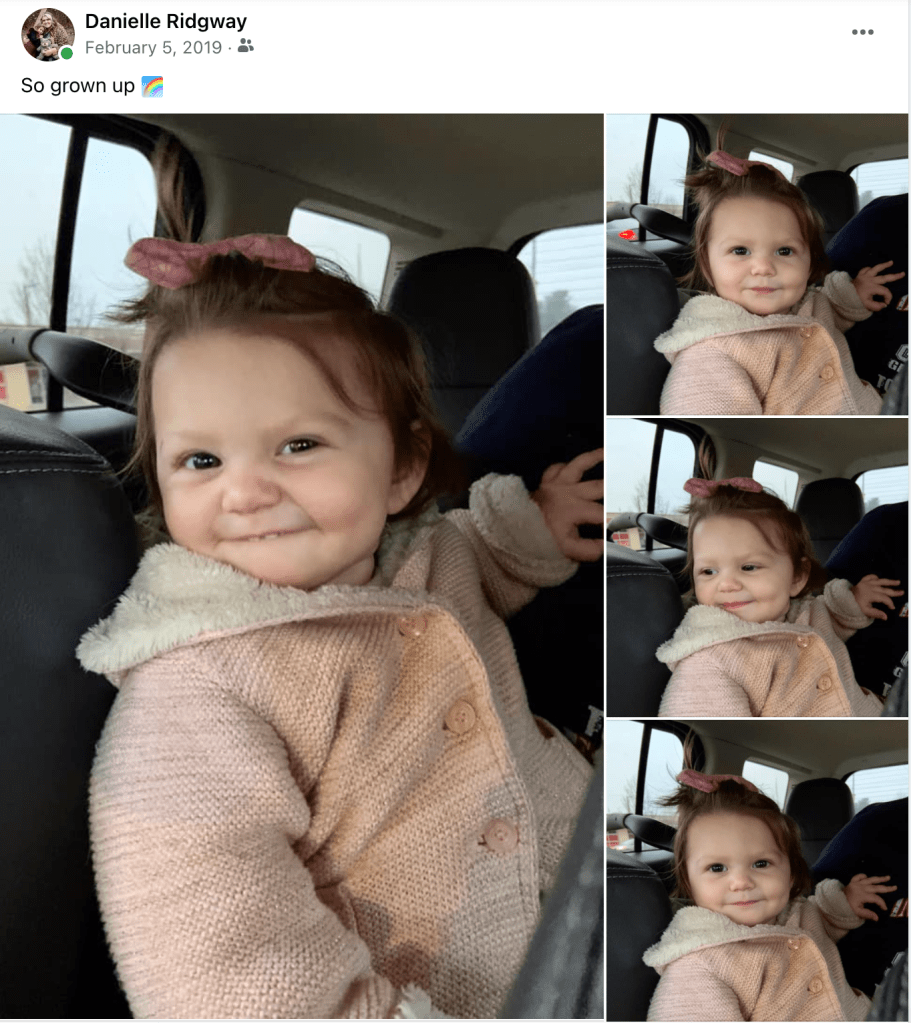
It’s Mila from three years ago. She wasn’t even a year old yet and she had already mastered the orneriest smile. At the same time, she could look right in your eyes and it felt like she could read all of your thoughts. There was so much going on in her head at such a young age — and if you are around her now, you’d still agree to that.
Honestly, it’s been a while since I’ve done one of these blogs. Something that I need to talk about, but pushing it in the back of my head. I keep working on different things, but anytime I go to write anything else, this wants to get out first.
I have a hard time looking at my memories from early 2019. Even when it’s this beautiful little face smiling on my screen, I get a knot in my stomach.
Seriously, there were two before this that almost made me throw up.
During this time, I was fighting so many mental battles after all the nasty things he (her whatever you want to call him) had said about me and her. I was in such a cloud of anger and heartbreak, I know I missed so many small moments during this time of Mila’s life. Even though I was there every single day, the mental take over that was going on clouded what was going on right in front of me.
I’ll never forget when he asked why I sent a picture to him because, “she means nothing to me.” This wasn’t a normal response, it was to hurt me. Now, it hurts to see those pictures and think someone could ever say that about a child, my child. After that, I stopped sharing her with him.
Instead, I shared her with all of you.
I’m unsure if I needed the validation of someone else seeing her the way I did or what was going on there. She deserves to be shared. I know she’s always been important and just… Mila. She’s always loved her picture taken and asks me to do it now. Some part of me wonders if it was rooted during this time in our lives though.
Still… these memories are hard for me. My brain still blocks a lot of this time out. A mix of postpartum depression, grief from Jensen, and heartbreak tugs at my heart in all of them.
The hardest part is knowing I should have been a better mom at this time. I had to take care of myself and she deserved a happy mom. Like in other moments of my life, I wish I could go back and just take over for me. I would go back and birth Jensen for that Danielle and I would go back and take over for 2019 Danielle too.
I just see those pictures and wish I would have soaked them up more. Instead, I knew I had to snap those pictures, even if they brought up bad memories. I had to be able to look back at her toothy smile, those waves hello, and the chunky leg rolls. Believe me, I’m so happy I did and that Facebook has me see them every year.
One day I’ll be able to look back at all those moments and not be clouded by the hurt I felt while taking them. Every day I’m healing through so much trauma I face in such a short time. It takes time. One day I won’t skip over them or remember those hurtful words.
Today I get to say thank you for everyone that let me share her with them. You don’t know how much that helped save me. I am so thankful that Mila is surrounded by love and support from so many people. When she gets older, she’ll know her impact in our little space. Hopefully she decides to keep spreading the love that shines every time she smiles.
I also get to make a promise to myself. I promise to keep healing and to give myself grace. If I would have known better, I would have done better. Every day I try to keep bettering myself and realizing that smile isn’t so toothy, those waves are getting shorter, and the chunky legs aren’t so chunky anymore. Even when being a mom is hard, I try to remember that I’m still learning and growing just like Mila. Instead of taking in all the negative emotions and feelings, I promise to have a positive outlook on our life and always look back at this time as magical.
Deep down, I know I’ll be able to look back at those pictures and remember all the good emotions and things first. Because even though I had to take care of me, I’ve always been a good mom.
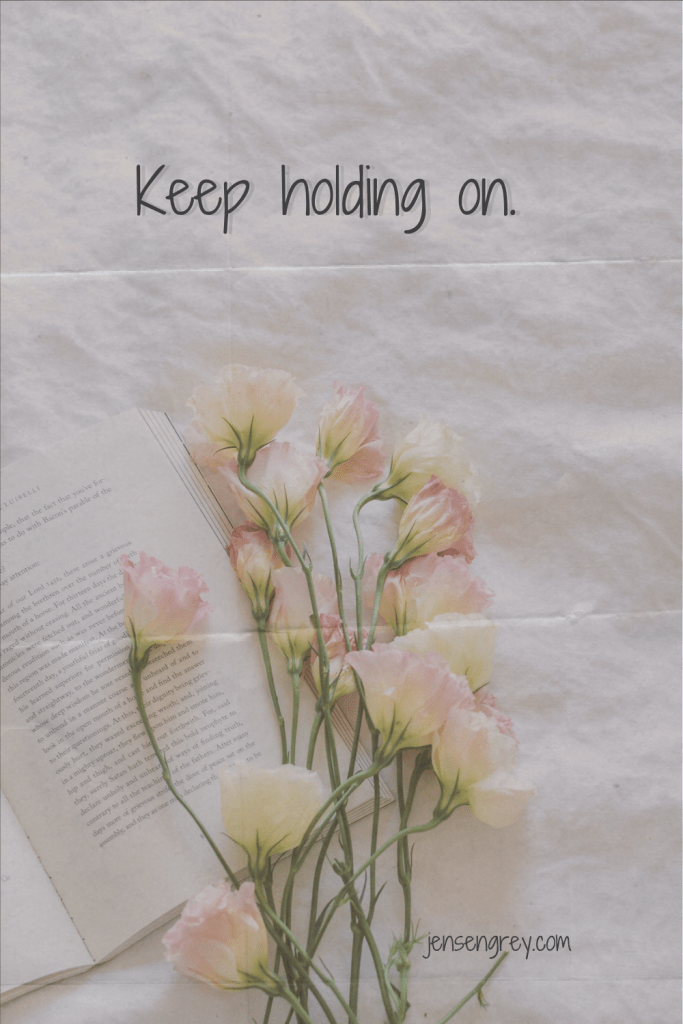
To every mom going through a trying or difficult time, you will make it through this. I promise you just have to keep holding on. There are so many people rooting for you.
Is there anything more nostalgic than a school Valentine’s Day Party? The rush of having a cute card box and picking out the perfect Valentine’s Day card for your friends. They’re little reminders to show your friends that they are loved.
Since this is Mila’s first year at school for the big event, we decided to make a DIY Valentine’s Day Cards.
It’s been so much fun creating for Valentine’s Day. If we hadn’t had so many snow days, I’m unsure whether or not DIY cards would be in the picture, but I’m happy they are.
Mila and I talked about different Valentine’s Day cards and gifts. We decided we liked the phrase, “You Color My World.” Mostly because I pushed it really hard because I was already thinking about crayons
A lot of the elements in these Valentine’s Day cards should look familiar!
On the front of the cards, if you can remember to a few blog posts ago, Mila had already painted the tops of her cards. All I did was take the dry pages and cut them out into small rectangles. Then, I wrote “You Color My World” with glitter markers over it.
For the back, I cut the same size rectangle with white card stock and taped them together. If the back of the painted paper wasn’t messy, I would have skipped this step.
Next, I wrote “to” and the name of Mila’s classmate. Then, I had Mila write her name under the “from.” I think it’s important she keeps writing her name and actively participates in helping with these DIYs.
On the back of the card, I made space either on the side of their names or above for a little gift. Since we were doing “You Color My World,” we had to make personalized crayons.