Toddler Activity: DIY Countdown to Midnight Clock

To make the New Year’s Eve day a little more special, I made a countdown clock for Mila. It took a little bit of time, which is why I’m posting today.

You can definitely get help from your kids with this activity, but it’s mostly for adults or older kids to make. Kids of all ages can enjoy when it’s done.

Like most of our activities, I had everything at home. If you don’t, all of these items can be easily bought at a variety of stores.

The supplies:

  • Poster board or craft paper
  • Marker
  • Balloons
  • Confetti (I used scrap paper)
  • Tape
  • Candy or other fillings

The idea of this activity is to celebrate NYE all throughout the day. As each hour passes, kids can pop the balloon and have confetti and whatever else you stuff it with.

If they don’t stay up until midnight, then at least they get some excitement throughout the day!

This project was a little more longer and in depth than our usual ones, but I think she’ll love it when the day comes.

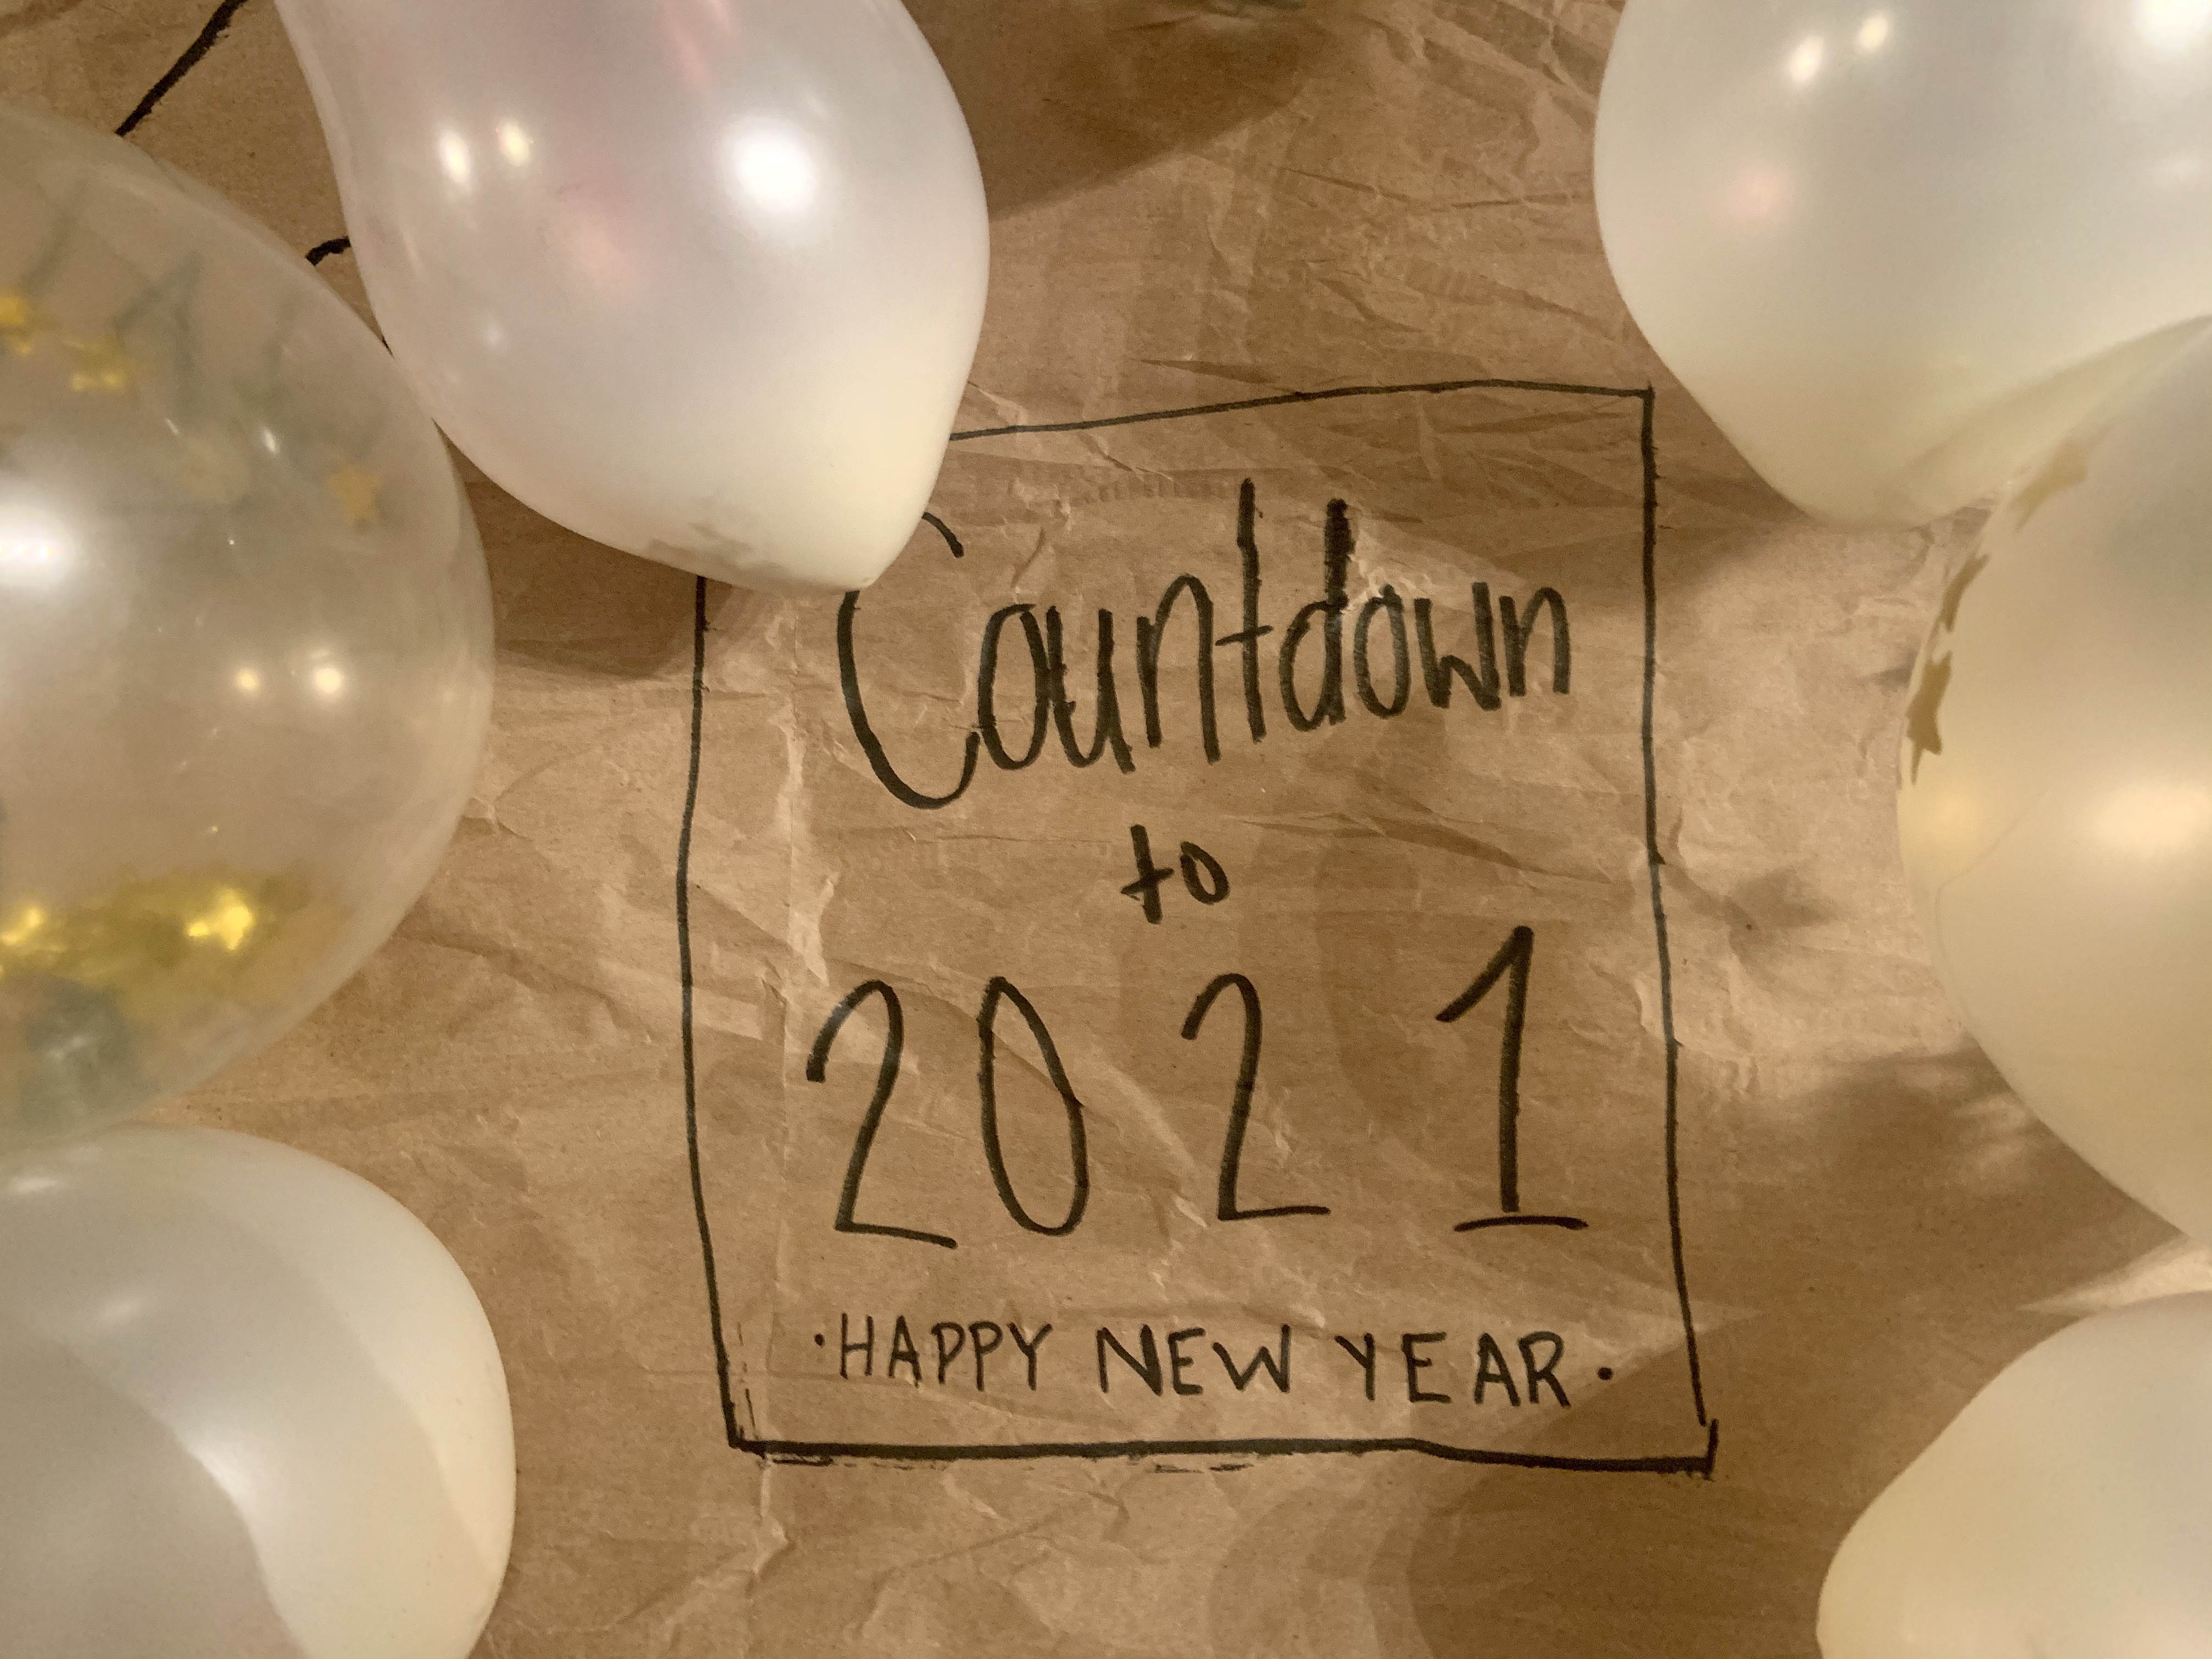
First, draw a big circle on your poster board or craft paper. Then, add the numbers around the circle like a clock. I wrote in the middle of it, but you can personalize it however.

Once that’s done, it’s time to stuff and blow up balloons.

You’ll only need twelve balloons and some come with confetti already in them. That would have been way easier, but I just made confetti by cutting up scrap pieces of paper. This takes a little time, but it looks cute all mixed.

If you are making your own confetti, have your child practice their cutting skills and help you out!

Next, stuff the balloons!

This can be a tricky task. I used a funnel, but there are others ways to do it too.

In addition to the confetti, I added chocolate hearts to the balloons. Mila loves them and she’ll be shocked by the surprise.

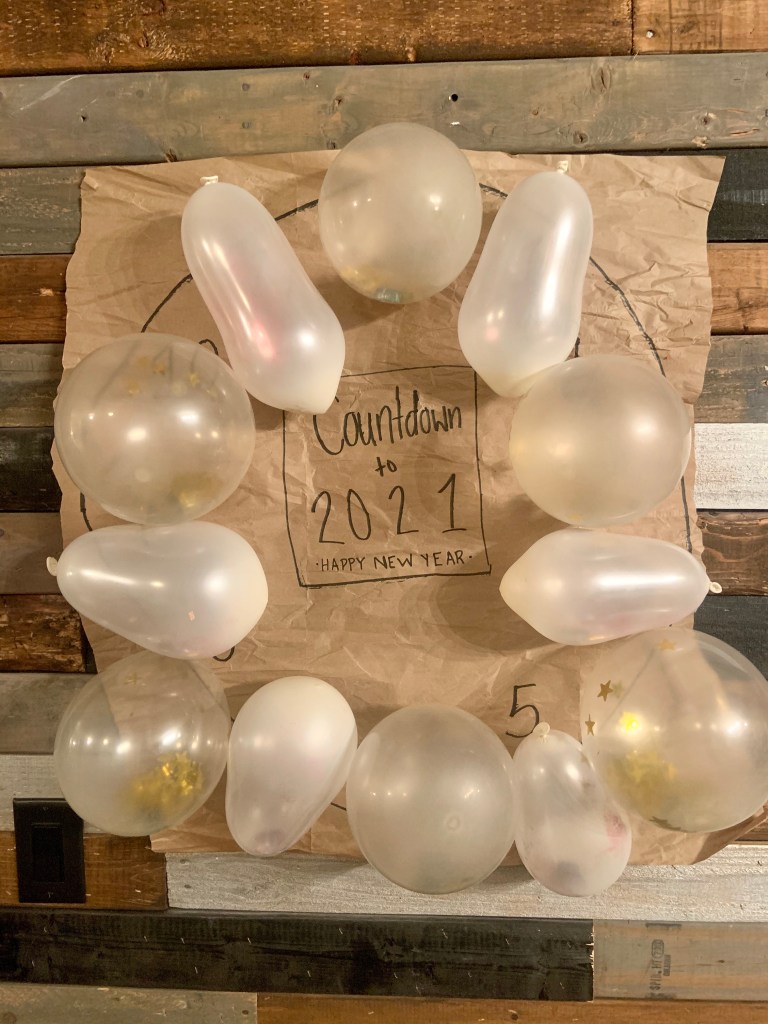
After this is done, blow your balloons up and tape them to your clock.

Hang your clock to a wall and enjoy popping them on New Years Eve! Kids who love messes will be excited to make one every hour.

I hope you enjoy this way to celebrate bringing the new year in! If you decide to do this activity, comment your experience. I’d love to hear from you and see pictures.

Toddler Activity: NYE Firework Painting

If you enjoyed last weeks Christmas activities, I have a few New Years ones too!

This first one is a firework painting. Mila loves to paint and experiment with how brushes work. That makes these DIY paint brushes even more interesting for her and toddlers.

Here’s what you’ll need:

  • Toilet paper or paper towel tubes
  • Scissors (kid and adult)
  • Paint
  • Canvas
  • Paper plates

I had all of these supplies at home, but most everything can be easily purchased. Feel free to use whatever color of paint. Mila just picked these three and I added the silver in.

First, you’ll want to cut the paper tubes to make the brush. If your child is learning how to use scissors, guide and help them with this. You can also get this step done beforehand.

We did three different firework shapes to get different looks.

Then, we put our paint on paper plates. Mila poured the red, which might have been a mistake. One recommendation is to spread the paint around. This way when your child pushes down with their brushes, all the bristles get paint on it.

After you get all your desired paint ready, it’s time to start painting.

I let Mila know we were making fireworks because that’s how we celebrate the new year. She’s seen fireworks before, so she understood what they were.

Of course she doesn’t grasp the concept of a new year, but it’s fun to begin those conversations with her.

I did have to show her how to push down on the brush. She got the hang of it pretty quick!

It helped when I really pushed the bristles down to make them more flexible. They are quite stiff at first!

With their finished project, you can either write over top of it or just leave it. Mila ended up making two. The canvas will have ‘2021’ written on it and the paper version will be untouched.

I’ll update this post with a finished picture after her artwork is all dried.

This activity is pretty quick, but a lot of fun. Toddlers and young kids will love making their own brushes. Plus, what kid doesn’t like fireworks without all the noise.

If you try this activity out, let me know in the comments below!

Toddler Activity: Christmas Lava Lamp Experiment

Since I’m on a roll this week, here’s another quick and easy holiday project you can do with your child. Mila loved this activity, but I messed up with it. Oops!

We did this a few days ago, but it’s a DIY lava lamp. The white was supposed to look like a snowstorm and the red is just festive.

I’ll tell you the correct way to do it and how I messed up. Who doesn’t love learning from their mistakes.

Here’s what you’ll need:

  • Oil (you can use any kind, but I used vegetable)
  • Water
  • Alka Seltzer Tabs
  • Food coloring
  • Jars

I had everyone on hand, other than the Alka Seltzer tabs. You can find them about anywhere if you don’t have them.

The first part is where I messed up. You’re supposed to fill the jar up 2/3 of the way. I filled 2/3 of the jar with water. We make mistakes. Mine was just a big one for this experiment. It still worked though!

So, fill 2/3 of the jar with oil. Then combine your food coloring and water together to fill up the rest of the jar. Obviously, kids love to help, so they can definitely pour the oil and water into the jars.

Next, get your alka seltzer tabs out. Don’t let your child eat them! But, break them up in smaller pieces for them to put in the jar.

I personally did different sizes and let Mila put a full tab in there as well. I thought it was fun for her to see the difference in the reactions. You could even do this beforehand too.

Next, have them start putting pieces in.

In my one time experience, Mila thought this was cool. She wanted to put all of them in at once. I tried to tell her to do one at a time, but she’d sneak some when I wasn’t looking.

In the future, I’ll definitely do this experiment again… and do it the right way. It was fun to ask Mila what she was noticing. She immediately understood the tabs were making the bubbles. As she gets older, there will be more questions and observations I could ask her too.

As you can see, it is pretty cool! The red turned out way better than the white, but I think this is the oil/water issue that I had.

I hope you can do this fun experiment with your child this week. It’s always great to mix science in your routine at home.

Happy experimenting!

DIY Ornament: Salt Dough Santa

Okay, okay. I know it seems like we’ve been making a lot of ornaments around here, but they’re fun!

These salt dough ornaments are easy to do and make great, last minute DIY gifts.

Here’s what you’ll need for these:

  • 2 cups flour
  • 1 cup salt
  • Water (no set amount. I’ll explain!)
  • Paint
  • Glue *optional
  • Glitter *optional
  • Yarn/Ribbon
  • Knife

Admittedly, I have not had the best track record with salt dough. I think I’ve added too much water in the past. This time, they turned out great though.

First, preheat your oven to 250°.

Then, if your child likes to help mix ingredients, they’ll think this is really cool. Add the flour, salt, and a little bit of water together. Then start mixing with a spoon or your hand.

Here’s where the water ingredient is tricky. I just kept adding a little bit at a time until it got to a play-doh consistency.

Next, Mila and I rolled the salt dough out into circles. To get the Santa shape, I told her to keep her four fingers together and she kept her thumb held a little out.

For this part, just press their hands in there. It will imprint nicely. I trimmed around her hand to get more of the shape. All I used was a knife!

I ended up getting four hand Santa’s, a ‘snow globe’ with two of her hands, and two little circular ornaments so Mila could paint however she wants. Then I stuck them in the oven.

They’ll need to bake in the oven for two hours. Then take them out and let them completely cool before you start painting.

If you’re child is older, they’ll be able to paint the Santa’s on. Mila likes to paint crazy right now, so I did this for her. I used red, white, and tan paint.

After the paint was dried, I put glue and glitter down where I wanted it. Then, I used yarn to complete it. You could use ribbon too!

Honestly, I think they turned out so cute. They were simple to do and Mila just loves them.

Happy creating and making with your child.


Is your favorite ornament handmade, passed down, or store bought? Let me know in the comments.

Toddler Activity: Grinch Ornament

It’s finally Christmas break! That means packing Mila and I’s Christmas activities in a few short days.

Here’s a fun one that includes a movie and cuddles afterwards.

Mila absolutely loves the Grinch. We’ve watched the three different movies and I figured I needed to get her the book too. Thank goodness for Amazon Prime!

I came up with this activity after seeing a similar one on Pinterest. Obviously, I’m sure others have done this before, but I wanted to share what we did.

What I used:

  • ‘How the Grinch Stole Christmas’ by Dr. Seuss book
  • Craft Pom Poms (preferably green, but we used rainbow colors and it turned out adorable)
  • Clear plastic bulb
  • Red paint
  • Paint brush
  • Grinch movies – Netflix and YouTube

I started off the activity by talking to Mila about the Grinch. She told me he was mean. We then talked about how Christmas made us feel. Then I asked why Christmas would make the Grinch want to be mean.

Then, I read her the first page about the Grinch’s heart being too small. At this time, I took the bulb and drew a small heart in the middle.

With the empty bulb and small heart on it, I told her the Grinch is mean because his heart is this small and empty. BUT, we could help him out by filling it up with love and Christmas cheer.

After this, I asked her to fill the ‘heart’ with the pom poms every time she thought the Grinch needed some love.

I continued reading her the book and she filled the heart. The moment I flipped to the last page, she put the last pom pom in the bulb.

Then, I reread the part of the Grinch’s heart growing three times it’s size. With that, I painted a bigger heart over the smaller one to visualize this.

Mila and I talked about how Christmas isn’t about presents, but I still think she’s looking forward to that most of all. She hung the ornament up on the tree and we watched two of the Grinch movies to end our night.

It was a fun night and the activity could be modified by the questions and painting for older kids too!

I thought it was a fun and easy one to share, especially with Christmas right around the corner.

If you happen to do this activity, let me know on the comments!

Thanksgiving Turkey Hand Craft.

If you’re looking for an easy Thanksgiving craft to do, look no further.

Mila had a blast making these turkey day cards for family and one to keep. Most of the supplies I had on hand, minus the feathers and small canvas. I got both at the local dollar store.

Supplies:

  • Brown or copper paint
  • Red paint
  • Yellow paint
  • Orange paint
  • Feathers
  • Black marker
  • Tape
  • Computer paper
  • Scrapbook paper
  • Scissors

All you need to do is get your computer paper or canvas ready, paint your child’s hand like a turkey, and place it on the paper or canvas. It’s really as simple as that.

When you put paint in their hand, really put a lot on there or it’ll dry before you get everything painted. I painted the brown last and it seemed to help. With the one paint application, I was able to get four turkeys. One on canvas and the other three on paper.

After the turkeys dried a little, I glued on the feather and added the turkeys face and legs.

To make the three into a card, I taped them on scrapbook paper and wrote a little message on the back. Then it was done.

You can personalize these however you’d like or even add them to tea towels or plates with the right kind of plate. For us, it was easier to do this and they turned out adorable.

We all know this year is not a normal one, but it’s still nice to still make memories and send out cards to the ones we love.

If you give this Turkey Day craft a try, post in the comments so we can see. Lastly, Happy Thanksgiving!

The Next Stage of Toddlerhood.

Potty training… a journey that’s not for the weak.

Last year, I introduced Mila to her little potty. She did okay on it, but would rather go outside like Max. It’s okay. It’s funny and you can most definitely laugh. She’d sit on it through fall and most of winter, but she really was not interested.

Around when COVID hit and when she turned two, we really hit potty training hard. I bought her underwear and she did a good job of letting me know when she had to go. All summer, she’s been amazing with it. When I started working full time at the end of August, she had a few mishaps, but is back to no accidents. She can nap without having one and has slept through the night a few times too.

I’m so proud of her.

The last time I bought diapers, I told myself this was it. It’d be the last time I ever bought them and I’d only buy pull ups from then on. Honestly, I thought it was a lot of wishful thinking. Then, last night she wore her last diaper and were in the land of panties and pulls ups for night time and long periods away.

This is a huge deal. She got a coloring book today to celebrate and a popsicle after school. I tell her she’s my big, good girl so she knows how good of a job she’s doing.

Lasts of anything are hard, even the last diapers.

Ever since losing Jensen, the first and lasts with Mila have been monumental. I know they have a bigger meaning, but I try not to put it all on Mila. I just hope she knows how proud I am of her and all that she does.

Tonight, we’re celebrating being diaper free and the next stage of toddlerhood. I’m so happy to be her mom and can’t wait to see what she does next.

Mom Fail: Dream Edition.

I just want to start off by saying, I’m not exactly sure if this should be categorized as a mom fail, but I’ll leave it up to you at the end.

Mila has long, beautiful, thick hair. It’s always crazy to me to see how much hair she actually has. I think a lot of people dream about their daughters having nice hair, but, if you’re like me, you didn’t realize how much of a struggle it is. She’s had to have her hair brushed EVERY SINGLE DAY since she’s been a newborn and still hates it with a passion. Lately, it’s gotten worse because she doesn’t want to sit down and wait for me to do it.

Since it’s long, it gets a lot of knots and tangles. My mom always called them rats and that’s what I’m calling them for Mila too. Every night and morning, our routine is to get the rats out of her hair. I don’t even know if she knows what a rat looks like or whatever, but she knows it’s bad and needs out.

I wake up and go to sleep talking about these rats, but I didn’t know how much it was impacting me.

After our normal rat evacuation, I ended up falling asleep with her. That night, I had one of the most strangest dreams. There were actual rats everywhere chasing Mila and I had to shoo them away. It was like little faces and eyes constantly looking at me and I was trying to throw them out of the house. I felt like I was struggling through the dream to get them all away and Mila wanted no part of it in my dream either. Just the whole entire night/dream, I was getting rats away from her.

You can laugh. I would laugh too.

Let’s just say, the next day I went to go get detangling hair spray to add to our after bath routine. The less ‘rats’ I have to think of and deal with, the better.

I’ve yet had any other rat related dreams and plan on keeping it that way.

Again, maybe not a mothering fail in terms of not providing for Mila, but definitely a dream fail, to say the least. A little tip to not have rat nightmares, buy detangling spray before that’s what you think of before bed.

Weird Things My Toddler Does: Part Five.

I think we already know two things about toddlers: they’re weird and they love to snack.

Mila is no different.

Usually when she wakes up in the morning, she runs and gets a fruit snack to chomp on. It’s been our routine for weeks. So the other morning when she went to the kitchen to grab a snack, I thought I was going to have to open her fruit snacks up for her. Instead, I heard a dragging sound…

This girl brought a whole bucket of chicken to bed to eat. Not your usual morning snack, right?

After a good laugh, she ran out for something else. I’m partly blaming myself and laziness for not putting things away the night before…

Chicken and a coke. What more could a girl want when she first wakes up? Thankfully, all the coke was gone, but she did eat a bunch.

Toddlers are hungry and weird, but I wouldn’t have it any different.

What’s the weirdest thing you or your toddler has snacked on first thing in the morning?

Monday Recipe: Kielbasa Power Bowl

On Instagram, I noticed this hashtag: #quarantinerecipeswap. So many people are running out of ideas of what to cook next and want to revamp their meals for the month. Believe me, Mila and I are right there too!

Today, I figured I’d share one of the easiest and tastiest recipes I make frequently: a Kielbasa Power Bowl. It can be converted to what you have on hand AND made meatless. Honestly, it’s a pretty simple recipe and seems really basic. Sometimes, that’s all we need though!

Ingredients:

  • One Package of Kielbasa (or a can of chickpeas if you want it meatless)
  • Two Medium Sweet Potatoes
  • 1/2 Yellow Onion
  • Head of Broccoli
  • 2 Medium Peppers (whatever color you like best)
  • 1/4 cup Quinoa
  • Cheese – to sprinkle
  • Balsamic Glaze
  • Olive Oil
  • Spices: salt, pepper, onion powder, garlic powder, Italian seasoning

Feel free to use whatever veggies you have on hand. I typically have all of these at my house. Mila loves broccoli and peppers, so it works out for us. I’ve also made it with carrots, brussels sprouts, and zucchini!

First, preheat your over to 400. Then get to cutting. Everyone has their cutting preference, but this is how I do it. Everything is really ‘eatable’ and not too big. Then I take the veggies and put them in a bowl. I get a coating of olive oil and the mix of seasoning on there. Make sure everything’s covered and put it in a baking pan. After your oven is preheated, put the veggies in there for 10-15 minutes. Put the kielbasa in the same bowl with olive oil and seasoning and wait to add in later.

Then, start boiling water (or broth) for your quinoa. Rinse the quinoa off in a small strainer, or you can do what I do and rinse it off to the best of your abilities without one. It’s always a fun challenges You can follow the packaging directions, but I usually just double the amount of liquid to quinoa. Sometimes I add more, depending on how it cooks. When the water starts boiling, pour your rinsed quinoa in the pot, and turn down the heat some. Stir every so often. It doesn’t take too long to cook; maybe 15 minutes. While it’s cooking, I usually add some spices to taste! After that time, remove from heat, let it stand for about 5-10 minutes and fluff it with a fork.

In the middle of cooking quinoa, your timer will go off for the veggies. Take them out and add the kielbasa in. Give it all a good mix. Put it in for another ten minutes. I usually then take it out, mix everything up once more and stick it in the over another 5-10 minutes too.

Once everything’s cooked and cooled, assemble!

I usually start with the quinoa on the bottom, then lay the kielbasa and veggie mix on top. To add a little something with it, Mila asks for cheese on top (which makes it better, I’ll admit) and ill drizzle balsamic glaze on top. If I have avocados, I’ll slice some for on top as well.

It’s truly an easy meal that’s packed with veggies and taste so good! Mila, Miss Picky Eater lately, are her whole bowl.

I hope you enjoy this recipe and try it soon! This week I’ll make a new recipe and share how it goes with you guys. If you have any recipes to share for the swap, comment below and I’ll try them out!