Okay, okay. I know it seems like we’ve been making a lot of ornaments around here, but they’re fun!
These salt dough ornaments are easy to do and make great, last minute DIY gifts.
Here’s what you’ll need for these:
2 cups flour
1 cup salt
Water (no set amount. I’ll explain!)
Paint
Glue *optional
Glitter *optional
Yarn/Ribbon
Knife
Admittedly, I have not had the best track record with salt dough. I think I’ve added too much water in the past. This time, they turned out great though.
First, preheat your oven to 250°.
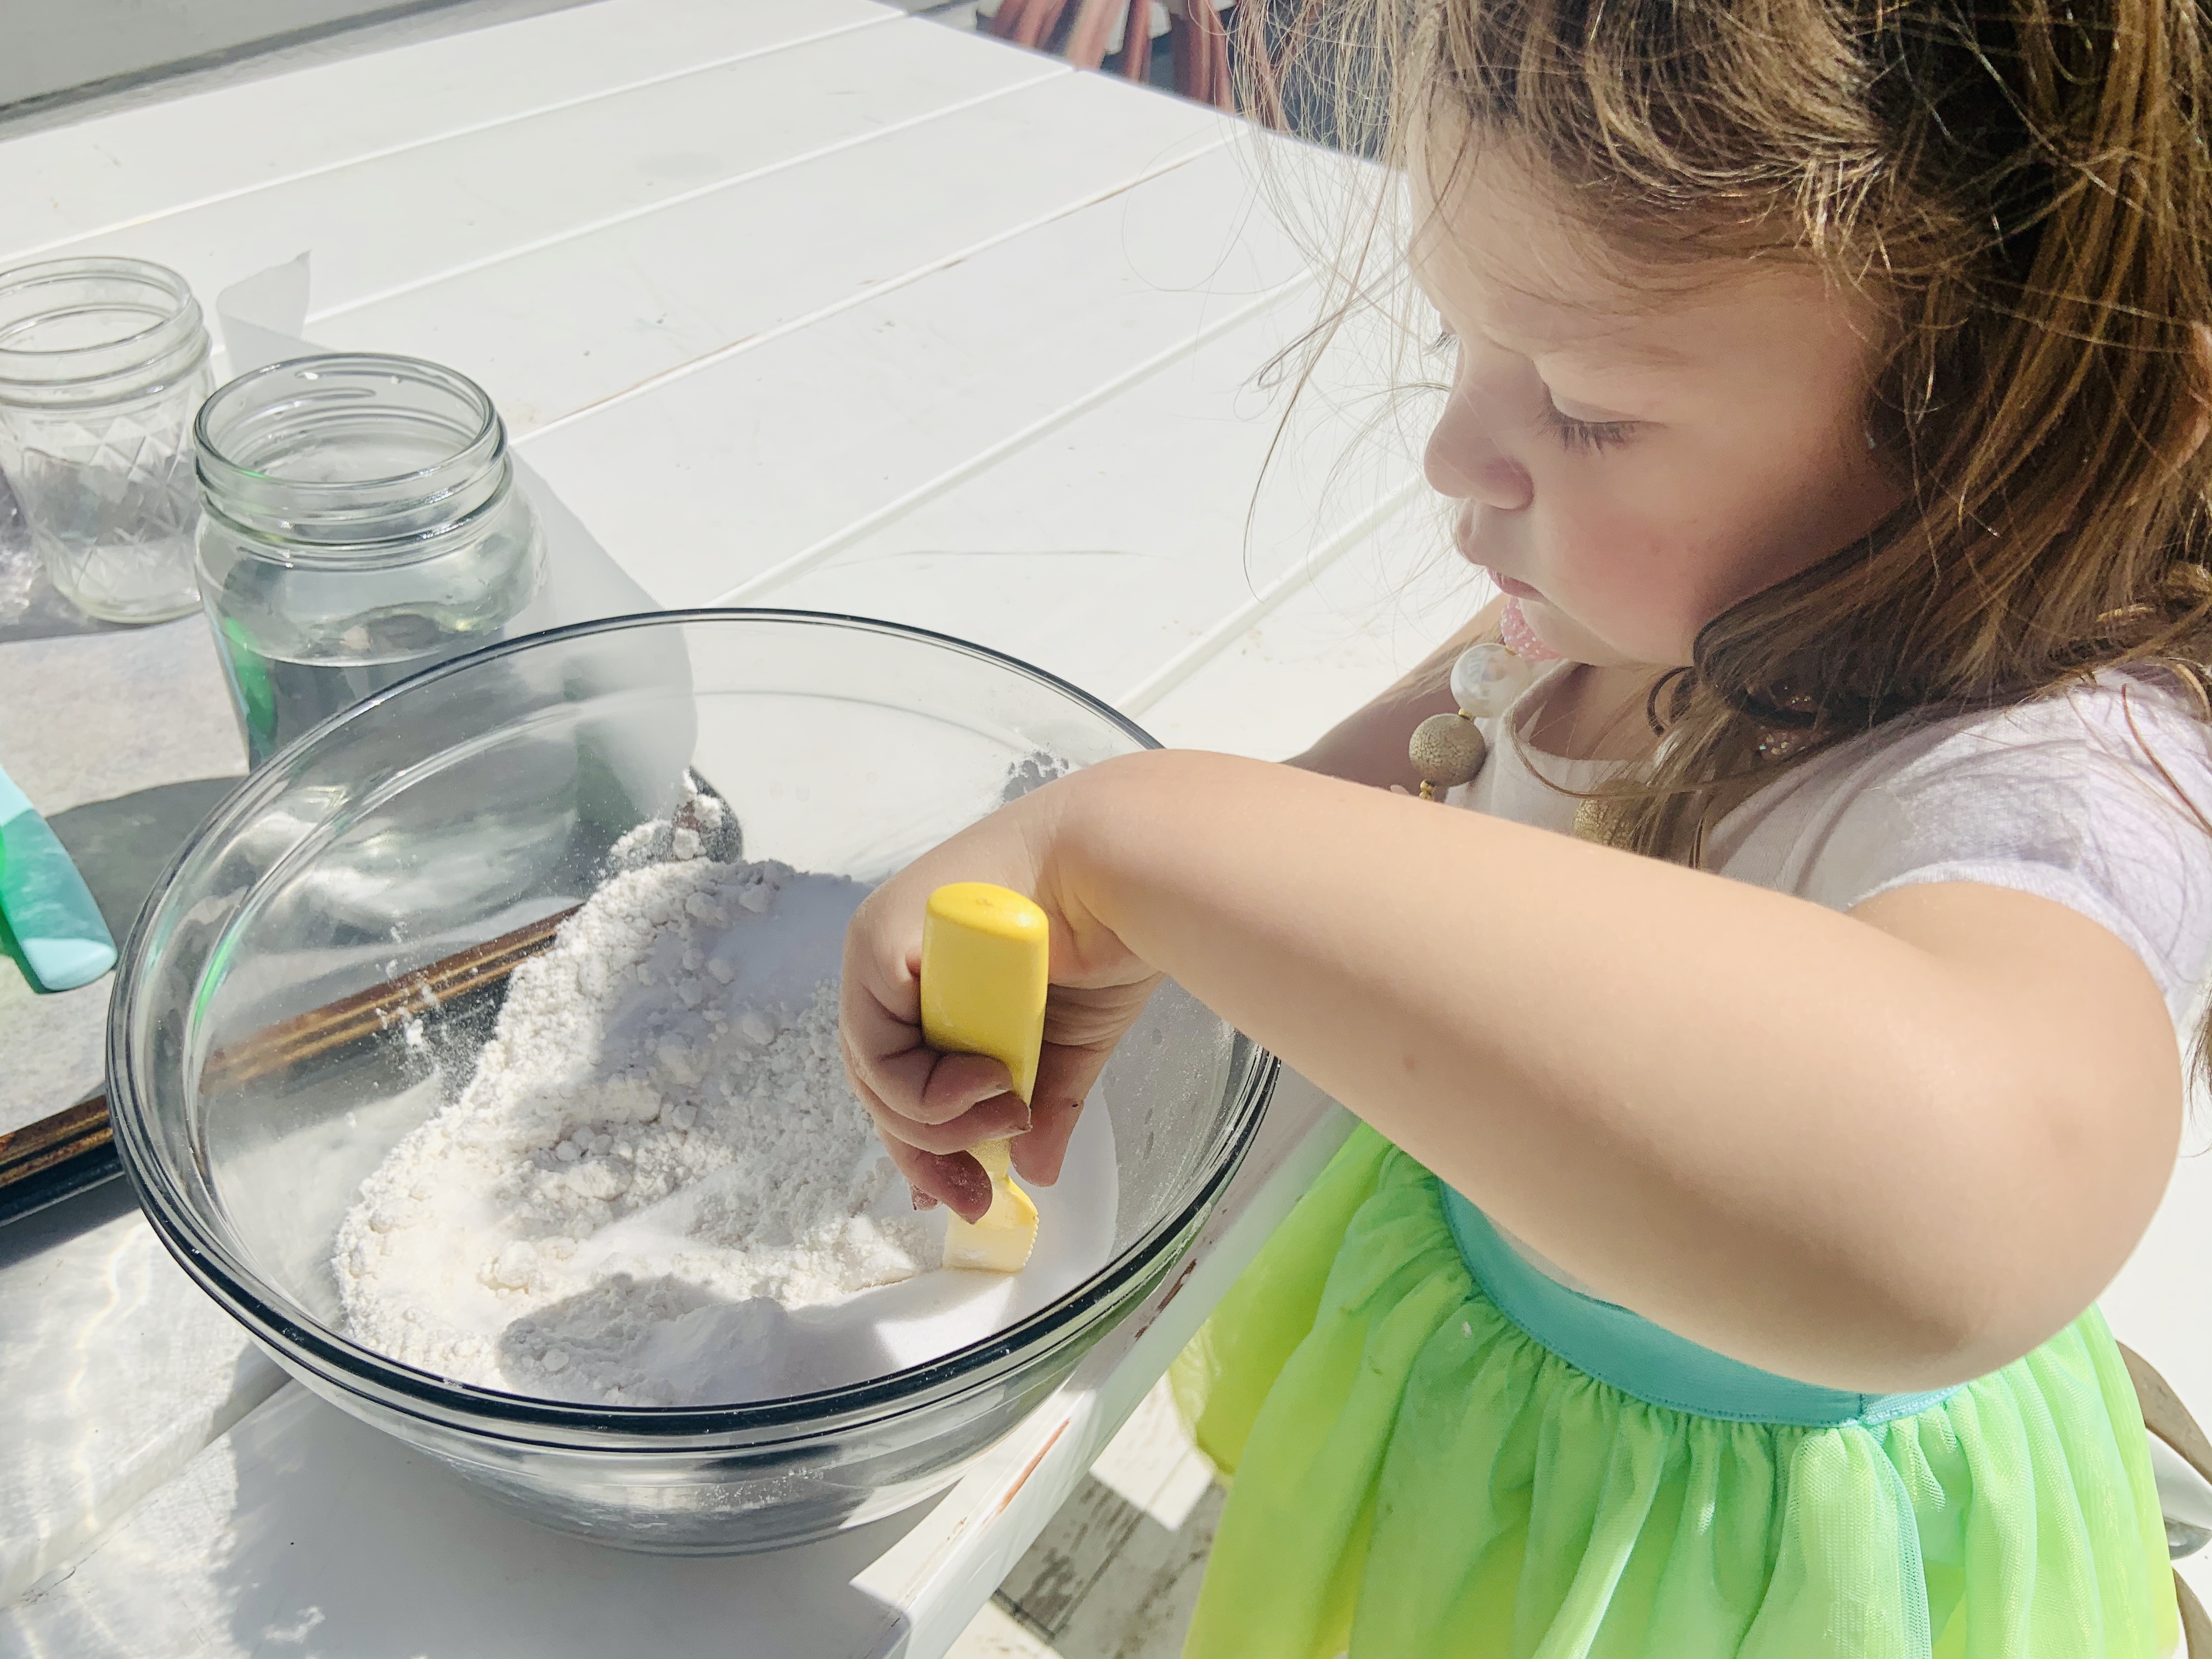
Then, if your child likes to help mix ingredients, they’ll think this is really cool. Add the flour, salt, and a little bit of water together. Then start mixing with a spoon or your hand.
Here’s where the water ingredient is tricky. I just kept adding a little bit at a time until it got to a play-doh consistency.
Next, Mila and I rolled the salt dough out into circles. To get the Santa shape, I told her to keep her four fingers together and she kept her thumb held a little out.
For this part, just press their hands in there. It will imprint nicely. I trimmed around her hand to get more of the shape. All I used was a knife!
I ended up getting four hand Santa’s, a ‘snow globe’ with two of her hands, and two little circular ornaments so Mila could paint however she wants. Then I stuck them in the oven.
They’ll need to bake in the oven for two hours. Then take them out and let them completely cool before you start painting.
If you’re child is older, they’ll be able to paint the Santa’s on. Mila likes to paint crazy right now, so I did this for her. I used red, white, and tan paint.
After the paint was dried, I put glue and glitter down where I wanted it. Then, I used yarn to complete it. You could use ribbon too!
Honestly, I think they turned out so cute. They were simple to do and Mila just loves them.
Happy creating and making with your child.
Is your favorite ornament handmade, passed down, or store bought? Let me know in the comments.
When I first thought about doing Easter crafts, I wanted to get wooden Easter eggs to paint. With everything going on, I didn’t want to leave my house with Mila and chance anything. Instead, I started seeing recipes for salt dough and knew I had everything on hand. I just didn’t realize they were going to be such a labor of love.
The salt dough recipe I used was:
1 cup flour
1/2 cup salt
1/4 to 1/2 cup of water
Then, preheat over to 200 and bake for hours*
Simple enough right? I measured out all the ingredients the night before we made the dough so it was ready to go for Mila and me.
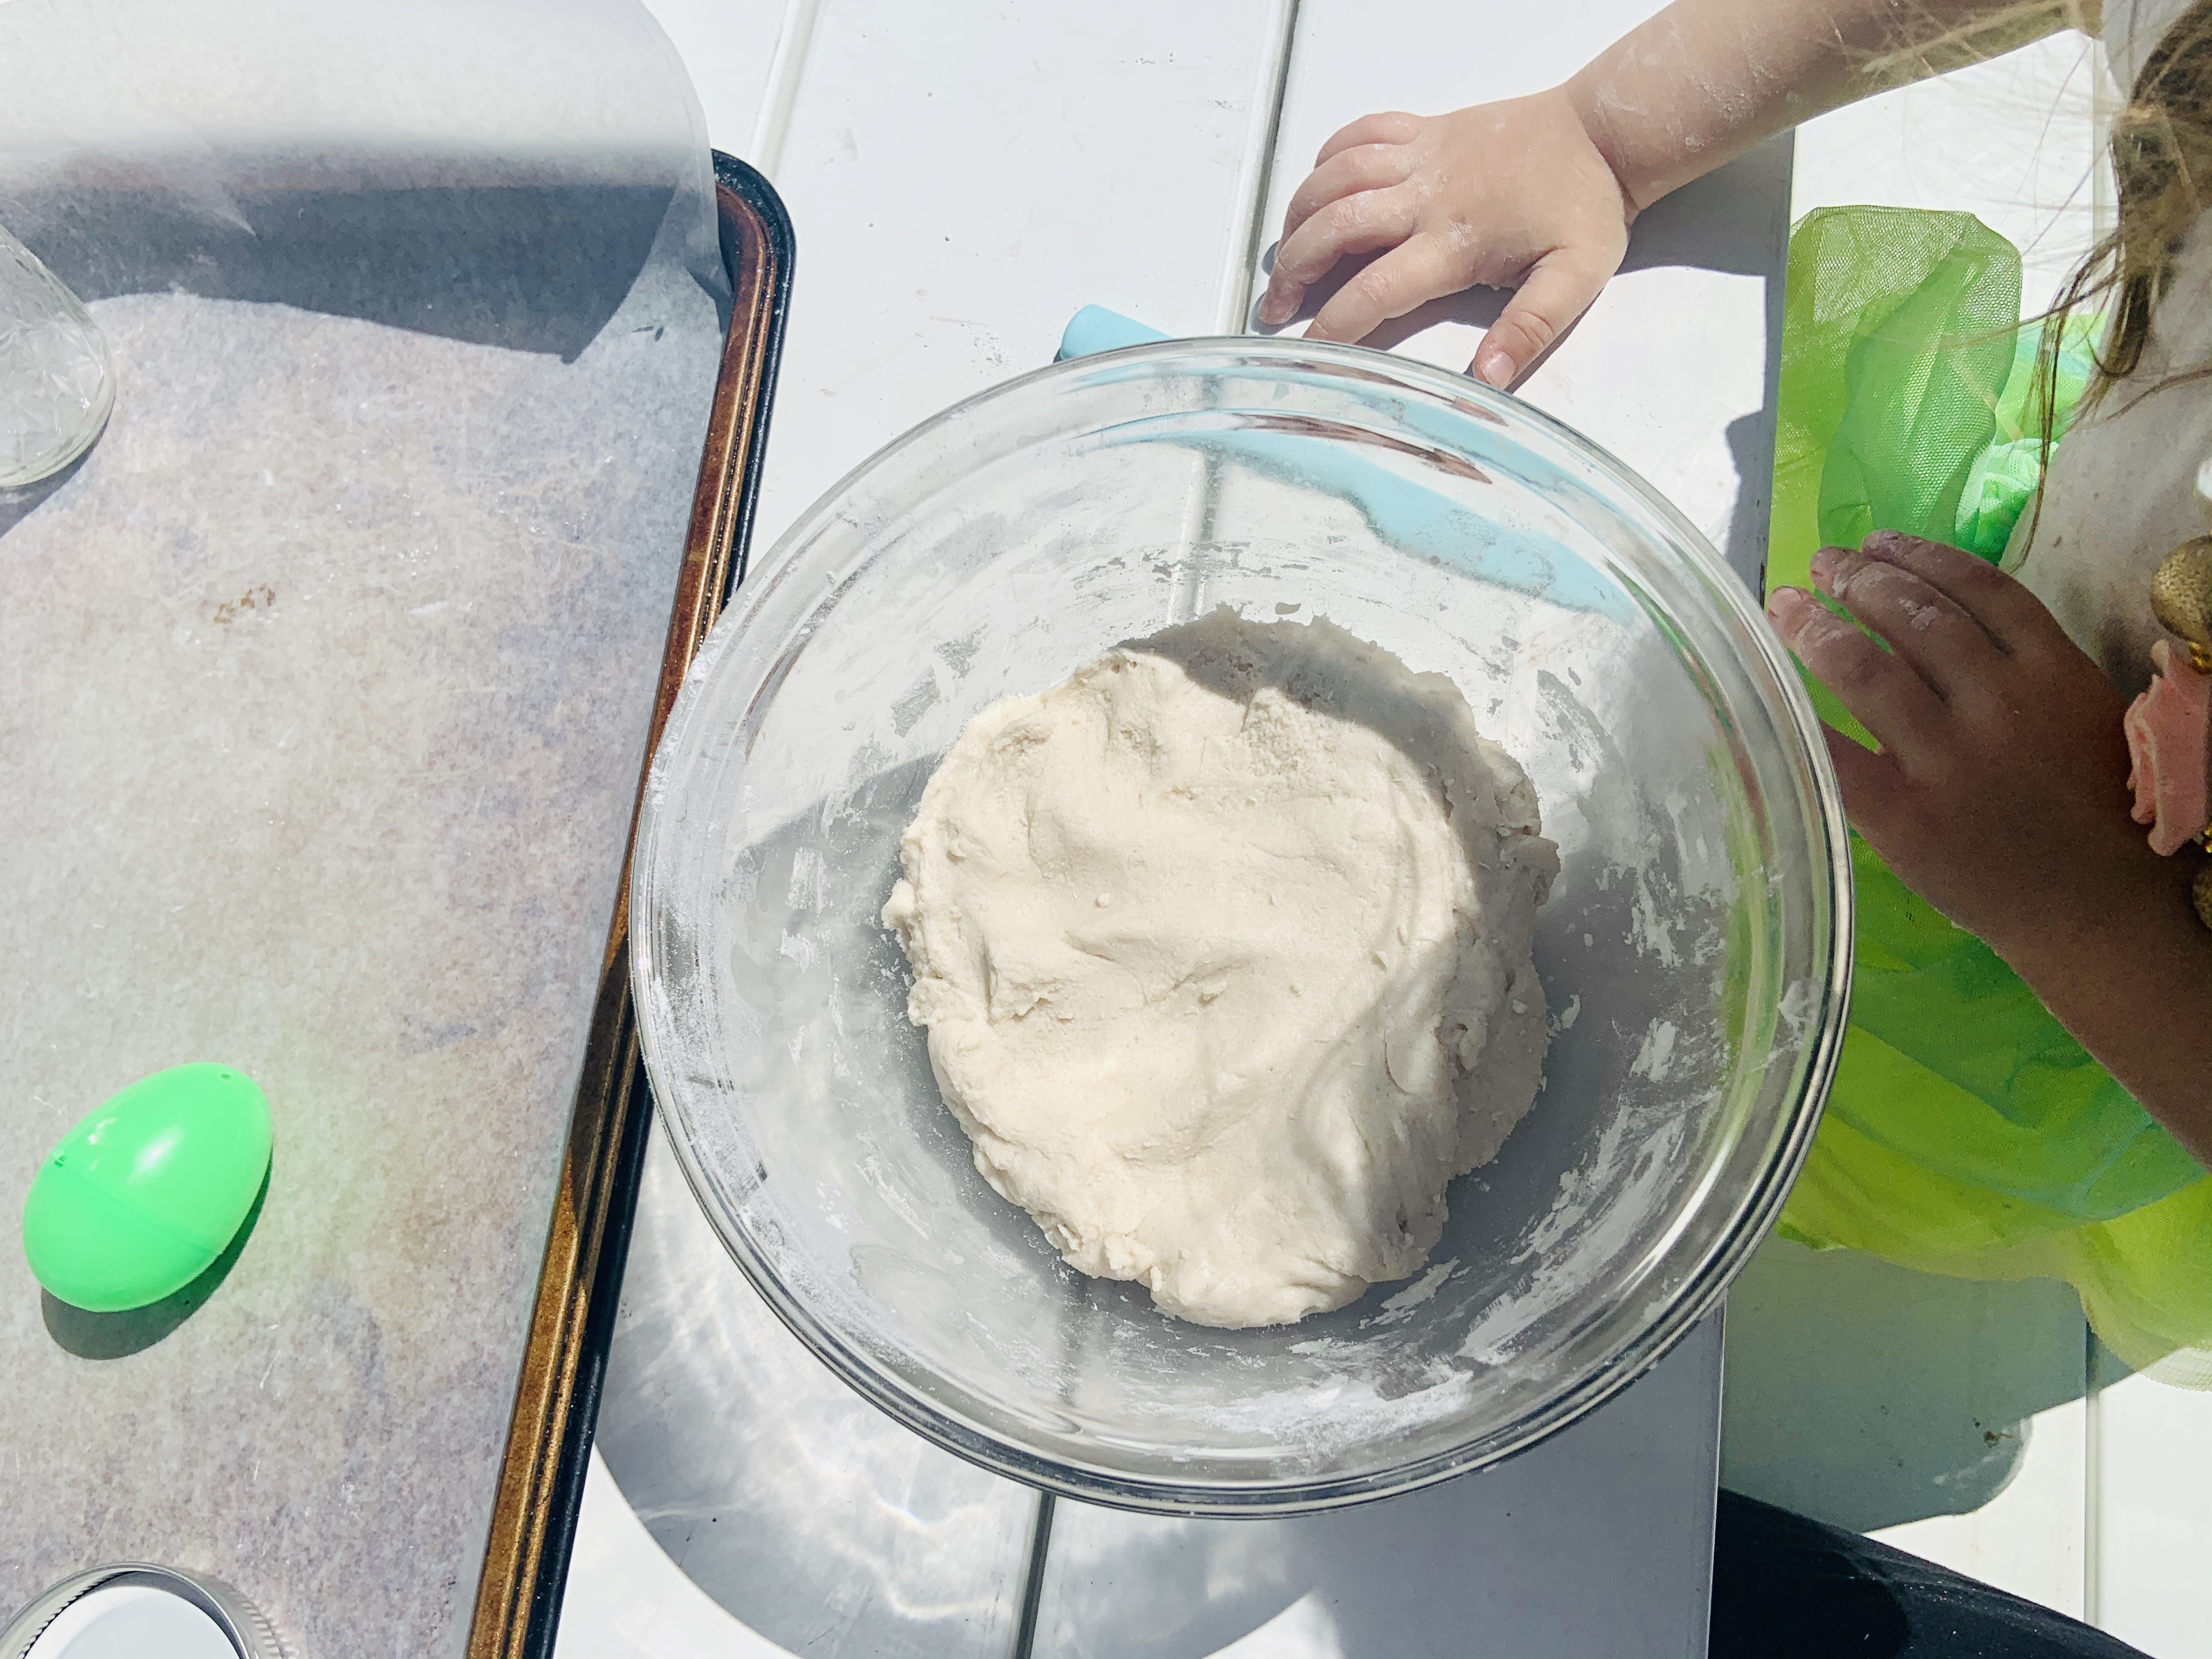
Mila loved mixing the ingredients together. She insisted on pouring everything in and using the spoon to mix it. When I told her to use her hands, she gave me a weird look and ran away. Funny enough, she went to put her hands in the dirt, which I guess is better in her eyes? Anyways, I kneaded the dough until I thought it was good enough. Since it was our first time, I wasn’t exactly sure how it needed to be, but we went with it. It reminded me of pizza dough.
After I had rolled it out and was ready to cut, dilemma there… mila was ready to help out again. I wanted to make eggs shapes, but it turns out I only have Christmas cookie cut outs and rainbow/unicorn/magic ones. I ended up using the top of a mason jar, grabbing the top of it to stretch the dough out in an egg-like shape. Obviously it wasn’t perfect, but it worked out for us.
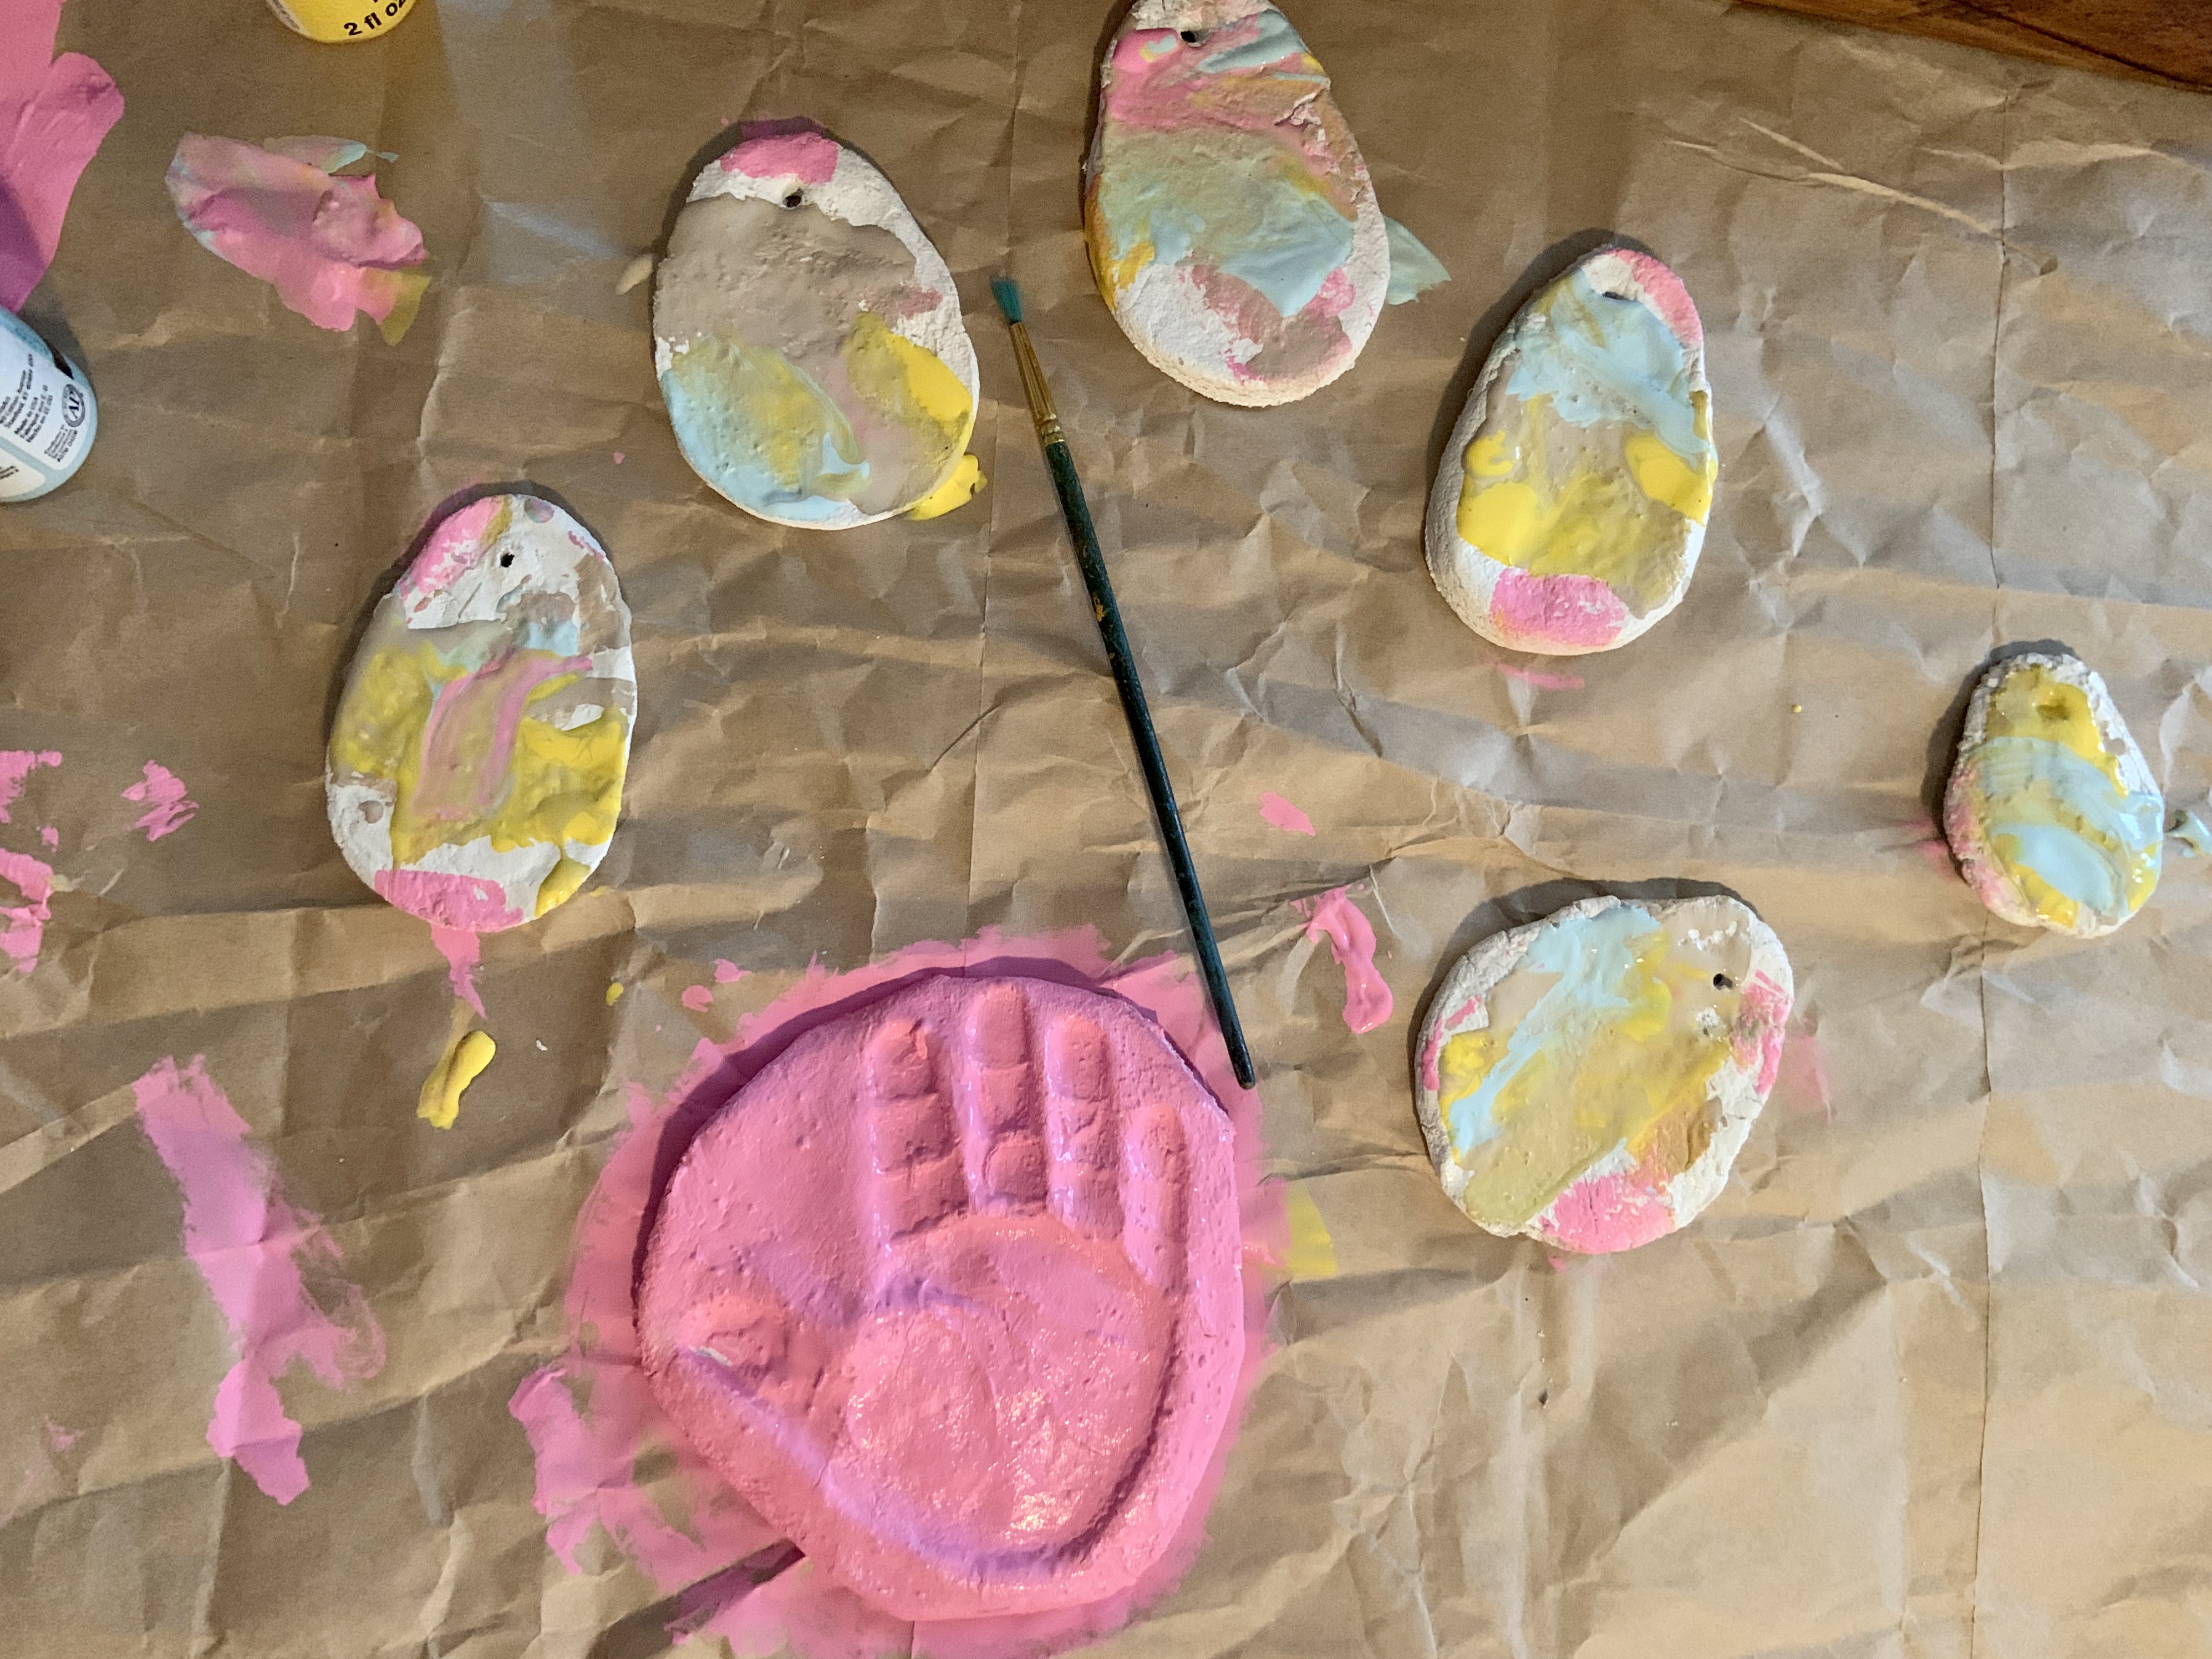
Along with a few weirdly, shaped eggs, I had Mila make two little handprints as well. I only have a few hand and foot prints of Mila since she’s been born. I thought it was a perfect time to do it for us, since she turns two here so soon. She kept saying ‘hand’ and wanted to make more prints. I do think I’ll try to make salt dough hand imprints every year since she enjoyed it and to mark her growth.
Anyways, the handprints and eggs were formed and ready for the oven. Up until this point, I thought it was all going really well.
I kept checking the ornaments every hour. After a couple hours, I still didn’t feel like they were done completely. They still felt mushy and maybe I just didn’t do it right? Or maybe they would’ve hardened up after I took them out of the oven? I’m really unsure where I messed up, but I had them in the oven for a crazy amount of time. Probably like seven hours in all. Next time I try to make something like this, I’m going to see if it was just a first time fluke or maybe I’m just bad at making them.
After they were finally done, I spray painted them white and let Mila paint most of the eggs and her hands, but one, because I really wanted to join the fun.
I think they turned out amazingly, especially after everything and all the time we put in them. Mila loves holding her hand. This Easter craft will be something Mila and I look back on in the future and smile about. I feel like it’ll always be excited to pull them out and see what she did when she was almost two!
Ever since she was born, I knew I wanted to make these type of memories with her. I missed so many with Jensen. Plus, Mila has fun with them so it’s not completely in vain.
Instead of just stringing them up in the house, I did something a little special. A few days ago, I read something about how communities are putting eggs in their windows for kids to go on ‘Easter egg hunts’ amidst social distancing. I thought this was so cute and I’m hoping some other people in our town have done the same! This is what I have strung in one of my windows.
If you live by me and are hunting for eggs, your kids will definitely be able to find them! I can’t wait to see everyone else’s.
So, although we had a little trouble with our baking, I love how everything came out. Mila had a blast and we were able to create some magic for Easter this year.
If anyone has made salt dough in the past, did it take ages for yours to bake? If not, do you have any tips or idea in what I did wrong? LOL. Just trying to get better for next time!