Mommy Recipe: Strawberry Lemonade Mimosa

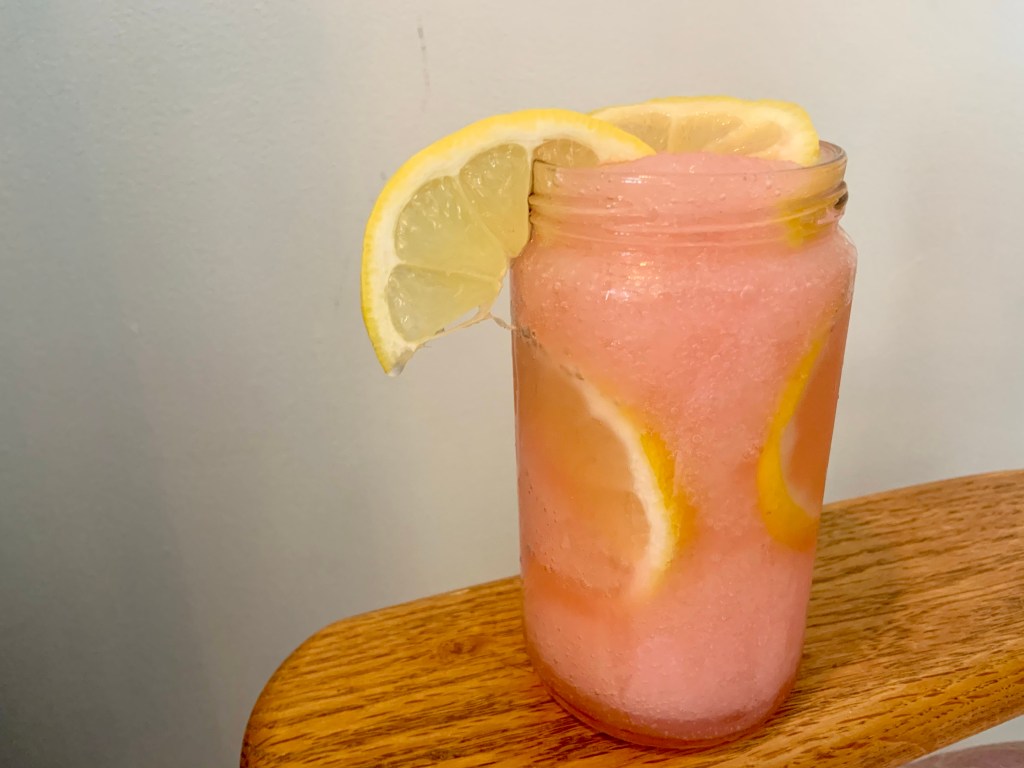
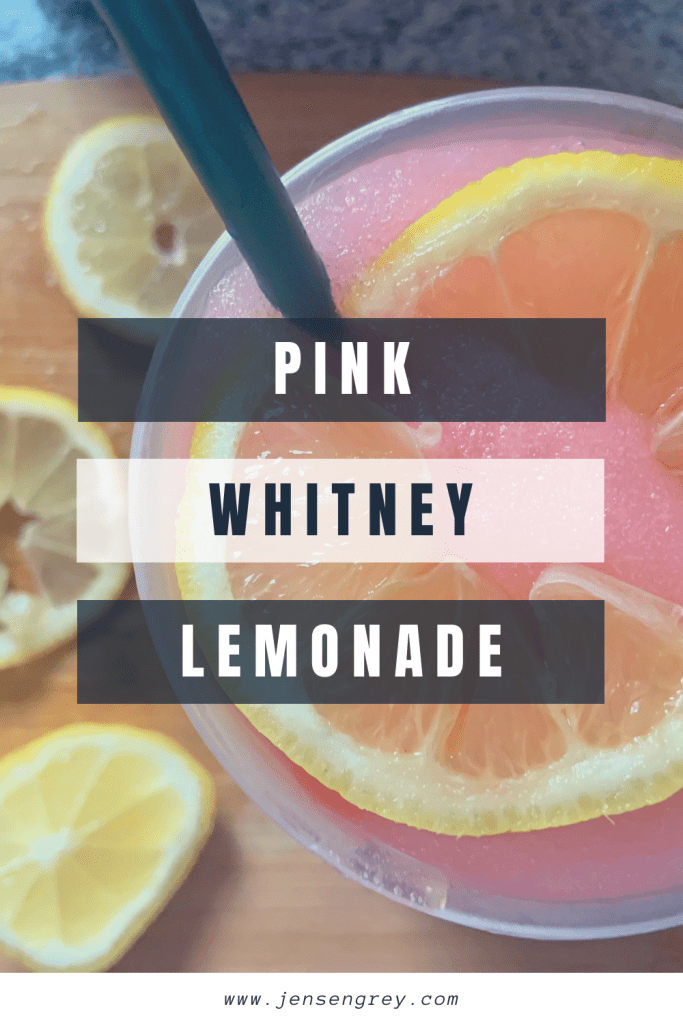
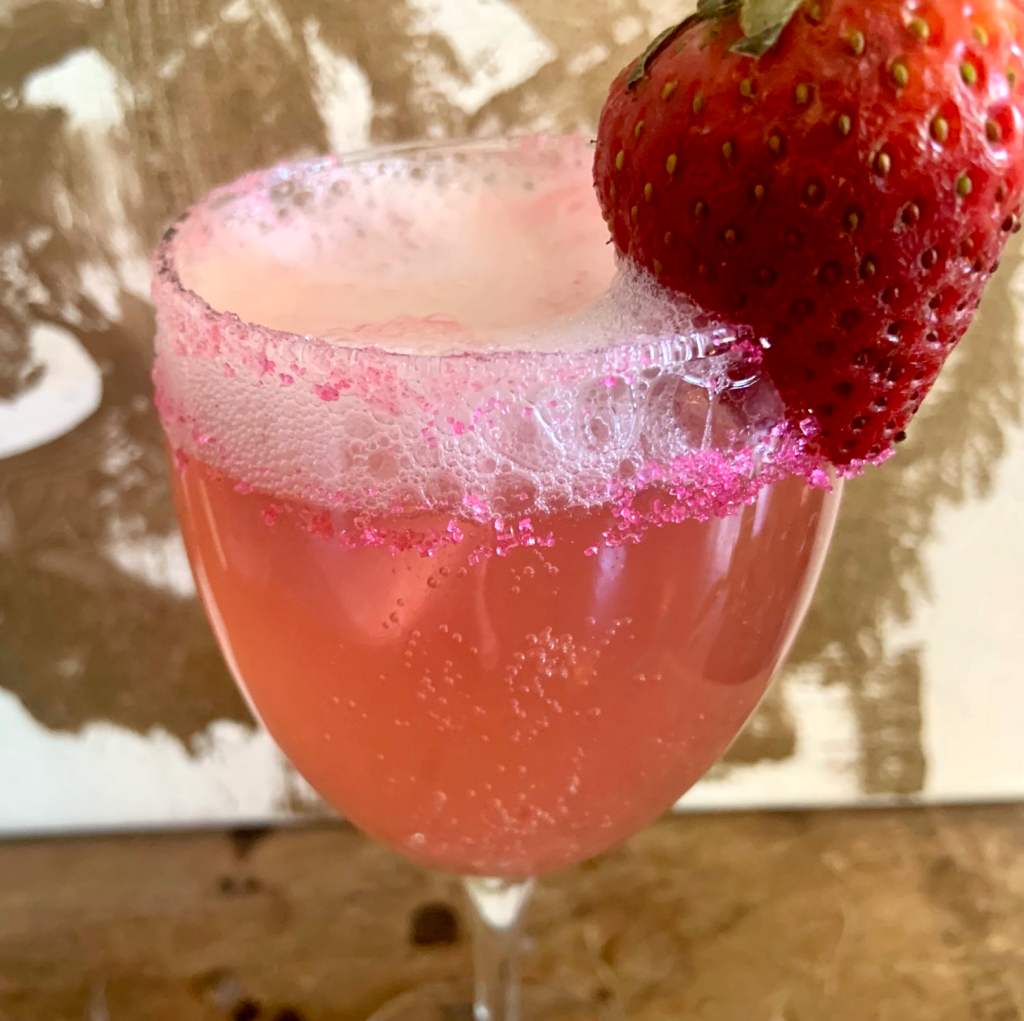
Summer is quickly approaching and so are weekend brunches. Change up your mimosa game with this Strawberry Lemonade Mimosa. It’ll cool you down, without the overbearing champagne taste.

I love this combination and figured I’d try to make a mimosa with it. It’s a light drink and the Italian ice elevates it even more.

This drink would be perfect for a mimosa bar or anything brunch!

Here’s what you’ll need:

  • Champagne
  • Strawberry Lemonade
  • Strawberry Italian Ice
  • Pink Sugar
  • Fresh Strawberry

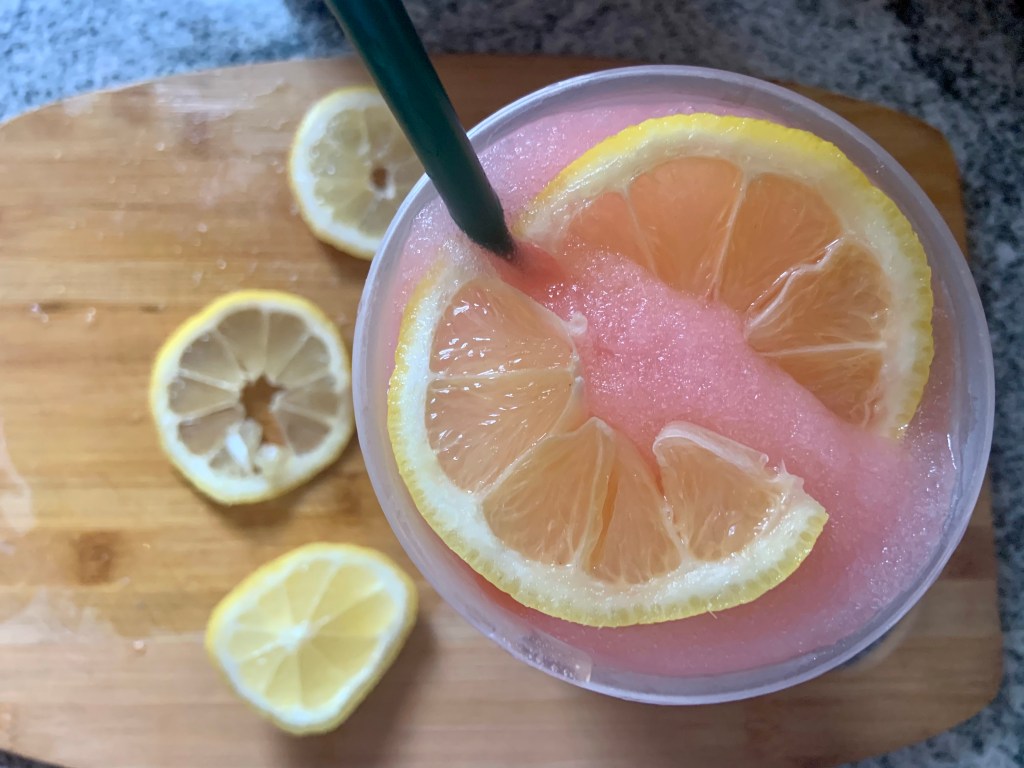
First, coat the rim of your flute by cutting a strawberry and putting it around the rim. Then, pour some sugar on a plate. To coat, just roll the rim around the sugar.

Next, put your Italian ice in the bottom of the cup.

Then, fill your flute to your discretion with champagne. It’s really up to you how much champagne you’d like. I’m not one to limit your drinking (haha). Then fill the rest up with the strawberry lemonade. Again, it’s up to you how much you want to drink.

While I was making this drink, Mila was obsessed with the pink salt and the bubbles. So, I threw together this little mix for her too. It’d be great for other littles too.

The Kid Version:

  • Strawberry Lemonade
  • Strawberry Italian Ice
  • Pink Salt
  • Fresh Strawberry
  • Carbonated water

This little spin on a classic mimosa is great for strawberry lemonade lovers and is just perfect for summer months too. The champagne taste isn’t too strong and it tastes really great. Being creative with drinks can be so much fun!

I absolutely loved making Mila one too. She felt like a ‘big kid’ and it was so easy to make her special drink.

Next time, I’d love to try a grapefruit mimosa. I’ll share when i do.

What’s your favorite type of mimosa?

Strawberry Chocolate Chip Cookies Recipe

One of the best and most classic desserts are chocolate chip cookies. They’re gooey and make you feel all warm inside. Up until now, I didn’t think they could get any better, until we added one ingredient: strawberries.

This new to us recipe is one I HAD to share with everyone, especially before National Chocolate Chip Day. Not only did we enjoy the finished results, Mila had a blast making these too.

Maybe a little too much fun with the extra flour!

Anyways, here’s what you’ll need to make these delicious cookies:

  • 2 1/4 cups of flour
  • 1 teaspoon of baking soda
  • 1/2 teaspoon of salt
  • 1 stick of unsalted butter
  • 1/2 cup of sugar
  • 3/4 cup of brown sugar
  • 1 tablespoon of vanilla extract
  • 2 large eggs
  • 1/2 cup of chopped strawberries
  • 1 cup of chocolate chips

Before making the cookie dough, preheat the oven to 370 F. Then line two large baking sheets with wax or parchment paper.

In a medium size bowl, whisk together the flour, baking soda, and salt. Set aside.

Next, in a large mixing bowl, use your mixer to cream the butter, sugar, brown sugar, and vanilla extract. I let my butter warm up a little bit to help it cream. Honestly, I just popped it in the microwave for 20 seconds.

Then, add eggs in one at a time. Mix in between eggs.

After it’s mixed, slowly add the flour mixture in. Just mix it until combined and don’t over mix.

Once you get a good dough consistency, fold in strawberries and chocolate chips. I used a spatula for this.

Now it’s time to place them on the cooking sheet. You can use an ice cream or cookie scoop to help with this part. I just used my hands and made little balls. It was way easier for me this way than using a spoon or anything.

Then, place in the oven and bake for 10 minutes. Rotate the cookie sheet after and place back in the oven for 4-6 more minutes. Your cookies should have holden brown on their edges.

Once it’s done, remove from the oven and let them cool down… or not.

We enjoyed these cookies a little too much. I have a feeling it’ll be a recipe we make over and over again.

Let me know in the comments if you end up trying this recipe… you most definitely should!

Check out these other chocolate chip creations too:

Mommy Recipe: Pink Whitney Lemonade

If you’re looking for a cool summer drink to enjoy during the hot months, you’ll love this Pink Whitney Lemonade.

Funny story, Mila calls any ‘drink’ I have ‘on my juice.’ It’s a really hilarious way for her to know not to drink what I’m drinking. I think it’s also nice that she thinks it’s just my juice and she has her juice.

Thankfully, she’s not that curious and respects that it’s mine. A little parenting win, right?

Anyways, back to the goods. You’ll love this mommy juice recipe that’s good for anyone who likes adult beverages that you can taste the alcohol.

Here’s what you’ll need:

  • 3/4 cup of Pink Whitney Vokda
  • Ice
  • 1 cup of Lemonade
  • 1 Pink lemonade Kool Aid mix pack
  • Lemon
  • Blender

Honestly guys, I pretty much eyeballed this drink so the measurements aren’t exact. When I make drinks, I do a lot of taste tests!

All you have to do is put a ton of ice in your blender, then all of the other ingredients.

Mix them all until they’re the consistency of a slushee. For extra tartness, I put lemon slices around the glass and to garnish.

This drink is easy to make and goes down smoothly. I feel like they will be DANGEROUS this summer while by the pool or around fires. It’s so yummy, I’ll take the chance though.

Let me know what your favorite parent juice or summer drink is in the comments.

But first, check out these other moms go to drink recipes:

Bacon and Avocado Egg Sliders Recipe

If you’re like me? You probably wonder what to do with all the hard boiled eggs every Easter. I have a simple recipe that you might solve your problems!

And… it’s not deviled eggs!

These bacon and avocado egg sliders are keto friendly. Plus, they pack a lot of big flavor in a little package!

Here’s all you need:

  • Hard boiled eggs
  • Avocado
  • Bacon
  • Salt and pepper
  • Quantities depend on how much you want to make!

The first step if you don’t have any leftover Easter eggs is to hard boil eggs. Everyone has different ways to doing this.

If you already have eggs made, start with your bacon. I like mine a little crispy, so I keep it on there for a while. Same as with the eggs, I won’t tell anyone how to cook their bacon either!

Next, cut your avocado up. Then mash it.

Usually, I add salt and pepper to the avocado to give it some spice. Make sure no one steals this mixture… like Mila.

When you’re bacon and hard boiled eggs have cooled down. It’s time to assemble these sliders

Then, slice your eggs in half, longways.

They can get a little slippery at this stage. Be careful of which plate you put them on! I’m speaking from experience if you couldn’t tell.

Then spoon avocado on top.

After, break the bacon up in smaller pieces. Then stick it on top of your egg slider.

If you have extra bacon left, you can add more to it too! I usually add one to the bottom to make a little sandwich.

This little bite-sized slider has amazing tastes. I love the saltiness of the bacon and the creaminess of the avocado. Plus, it’s a great mix of textures too.

Honestly, this is one of my favorite ways to eat hard boiled eggs. Mila loves them too!

There’s not a ton of steps to follow and kids can easily help making these. Bacon and avocado egg sliders are really great for the days following Easter.

If you liked and tried this recipe, let me know in the comments!

Before you go, check out these Easter recipes from other moms that blog:

California Avocado Chicken Recipe

This isn’t your average chicken recipe. So, if that’s what you’re looking for get off the page now.

Just kidding, all are welcome! But, this recipe is so good and perfect for spring and summer. It’s light and full of flavor. There may be a few steps, but the outcome is totally worth it.

This recipe is a touch more complex than other recipes I share. Mostly because there’s one prep step that I normally don’t have time to do. But, it only takes thirty minutes, which is no time when you’re playing outside.

I’m going to break the ingredients down into the two steps. Here’s what you’ll need:

Marinade:

  • 4 chicken breasts
  • 3/4 cup of balsamic vinegar
  • 1/4 cup of honey
  • 3 cloves of minced garlic
  • 2 tablespoons of olive oil
  • 2 teaspoons of Italian seasoning
  • Salt and pepper

Topping:

  • 2 avocados
  • 3 Roma tomatoes
  • Salt and pepper
  • Mozzarella cheese (optional)

The first thing you should do is make the marinade. Combine the balsamic vinegar, honest, garlic, olive oil, Italian seasoning, salt, and pepper together.

Once it’s mixed up, put the chicken breasts in the marinade and put in the fridge for at least 30 minutes.

While the marinade is working it’s magic, start making the topping.

Dice the avocados and tomatoes. Then add them to a bowl and top with salt and pepper. I also added some Italian seasoning too!

After this, heat your grill or griddle.

Pull out your marinated chicken and get to cooking. Usually, it only takes 5-7 minutes per side to cook chicken. When they’re done, melt mozzarella cheese over it then plant.

Before serving, add the avocado and tomato topping. I also drizzled more balsamic vinegar over if too.

The chicken in this recipe tastes so good; thanks to the marinade!

There were no leftovers since Mila and I both loved it. I’m so glad she loves these flavors. Actually, I had to cut another avocado while waiting for the chicken. She just eats it by the bowl.

Anyways, I think this recipe will be a great addition to your spring and summer rotation.

If you try it out, let me know in the comments!

3 Ingredient Lucky Charm Bars

If you’re looking to make St. Patrick’s Day magical or just want a tasty treat, try these Lucky Charm Bars. They’re just like Rice Krispy treats, but with the taste of Lucky Charms.

The best part is there are only 3 ingredients! Here’s what you’ll need:

  • 6 cups of Lucky Charms
  • 1 stick of unsalted butter
  • 16 oz of marshmallows

The process to making this treat can be a little messy, but it’s fairly easy to do.

First, start off melting the butter and marshmallows together. I used medium heat so it didn’t get too hot to burn the marshmallows. It took a little bit of time, but I made sure to stir to break them down too.

When it’s melted, take off the heat and add the Lucky Charms to it. Make sure it all gets coated. This can get messy quick!

Then, spray a nonstick spray to a baking pan.

Spread the mix evenly across the pan. Again, this is a little tricky to do because it is so sticky! Keep at it and it’ll work.

Before letting it cool, I picked out marshmallows from the bag, even though I tell Mila not to… oops. I thought it’d look cute to have some extra on top of the Lucky Charm Bars. If it’s not a leprechaun trap, it’s definitely a toddler trap!

After around 40 minutes, your bars will be cooled and set to take pictures.

Cut them into bars or try using cookie cutters for fun shapes. After they’re cut up, you can enjoy your Lucky Charms Bars!

To store them, keep them in an air tight container on the counter. If you put them in the fridge, they’ll just harden up and loose their chewy appeal.

As always, let me know if the comments what you think of this recipe or if you try it out!

Want more St. Patrick’s Day food and snacks? Check out these ideas:

5 Ingredient Cheesy Chicken Roll Up Recipe

If you’re looking for another easy week night dinner, this one is great to add in. It reminds me of the Chicken Pot Pie Recipe. Yet, this meal has a completely different flavor profile.

You might have noticed, I love cooking with rotisserie chicken! It’s a simple way to add chicken in our meals. Plus, it tastes good!

Although this isn’t technically, ‘one pot’ the clean up is easy too.

Now that I’ve sold you on the recipe, here’s all the ingredients you’ll need:

  • Rotisserie chicken
  • Crescent rolls
  • 1 cup of shredded cheese
  • Cream of mushroom soup
  • 1/4 cup of milk

There’s not a ton of steps for this recipe, but it’s oh so yummy.

The first thing you should do is preheat your oven to 350 degrees.

Then, in a casserole dish, mix together the cream of mushroom soup, milk, and 1/2 cup of shredded cheese.

After it’s mixed together, pull apart your chicken. Then add the remaining cheese with it.

Next, unroll the crescent rolls. Place a small amount of the chicken and cheese mixture in the big part of the crescent roll triangle.

Now comes the fun part. Roll the crescent roll. Mila had a blast helping me with this beautiful part.

After you have your crescent rolls filled, place them on top of the soup and cheese mix.

I added some garlic and butter on top of the crescent rolls at this point, but this is totally optional.

Then, place them in the oven until the crescent rolls are golden brown. This takes about twenty-five minutes to do.

These cheesy chicken roll ups are so good. We didn’t even have left overs! I served them with green beans and it made for a perfect dinner.

As with all my recipes, let me know in the comments if you try it out.

One Pot Sausage Gnocchi Recipe

Since last week’s one pot recipe went so well, I figured I’d share another delicious one. It’s another Italian inspired recipe, but with a different taste.

Gnocchi is one of my favorite foods and I love how easy it is to cook with. You’ll love it too.

Here’s the ingredients you’ll need:

  • 1 lb mild ground sausage
  • 1 16 oz package gnocchi
  • 1 onion diced
  • Minced garlic
  • 1 can garlic and olive oil petite diced tomatoes
  • 3/4 cup heavy cream
  • 3 cups spinach
  • Shredded mozzarella cheese
  • Salt and pepper
  • Italian seasoning
  • Garlic powder

Honestly, there’s more ingredients than there are steps with this recipe. That’s how you know it’s good and easy to clean up.

First, over medium heat, brown the sausage, onion, garlic, and seasonings.

After, add in the tomatoes, cream, gnocchi, and spinach. Keep cooking until the gnocchi is done, spinach is wilted, the sauce has reduced.

Then, stir in the cheese. I ended up adding extra cheese after putting it in the bowl.

This recipe is so easy to make and it warmed us up. I loved the different textures in the meal too. Plus, you can sneak in some extra veggies, which we all need.

As always, if you try out this recipe, let me know how it goes in the comments.

One Pot Ground Beef and Zucchini Recipe

What’s better than a tasty meal? Not having a ton of dishes to clean up afterwards! This one pot dinner will be a family favorite and one you’ll love making.

Here’s what you’ll need;

  • One pound of hamburger
  • One medium sized zucchini
  • Small bell pepper (I used red)
  • One can of Hunt’s Diced Tomatoes with Basil, Garlic & Oregano
  • 1/4 of onion
  • One cup of rice
  • Two cups of beef broth
  • Spices (I used salt, pepper, onion powder, garlic powder, paprika, and oregano)
  • Half a block of cream cheese
  • Cheese

First, heat up your pan. While you’re waiting, cut your onion, pepper, and zucchini.

Once it’s heated up add the ground beef, onion, and pepper. I added some of the spice blend. When it’s browned, drain the oil.

Next, add the zucchini, tomatoes, rice, and beef broth. Don’t drain the tomatoes because the rice will soak up that juice too! Add the rest of your spice blend here.

Cover and stir every couple minutes.

Once the rice starts to soften, add in the cream cheese. Mix it until it blends throughout.

When the rice is done, take off heat and add in cheese. You can use any type of cheese. We used shredded colby jack!

Mila is also obsessed with eggs right now, so I put an over-medium egg over top of hers and and an easy-over egg on mine. I personally love the taste of egg yolk. It pulled the meal together.

Make sure to let me know in the comments if you tried this recipe!

Red Velvet Cookie Recipe

If you need a last minute Valentine’s Day treat/present or are really craving something delicious, you’ll love these cookies.

They take about twenty minutes to make and everyone will want more. It’s easy too!

This recipe also reminds me of Jensen. I craved these throughout my pregnancy. They’re always fun to make and honor him too.

The best part of this recipe is there’s only FOUR ingredients:

  • Red Velvet Cake Box
  • Two Eggs
  • 1/3 Cup of Vegetable Oil
  • Powdered Sugar

First, preheat your over to 375.

Then mix the red velvet cake box, eggs, and oil together. It’ll get to a cookie dough consistency. When it does stop mixing.

Next, make the dough into little balls. I did one at a time and then coated them into powdered sugar. Without the powdered sugar, they’ll stick to a baking sheet. That makes it hard to pick them back up again.

Put them in the oven for ten minutes.

After you pull them out, you’ll notice they’ll fall. Don’t worry, they’re not supposed to stay risen. They still taste fluffy!

One little word of caution with the doughs stickiness… throw some flour or something on your hands.

Mila tried to help before I could cover her hands and…

She had fun helping roll little cookie balls, but it got messy quick!

This would definitely be a great and quick way to surprise your kids, partner, or whoever your celebrating Valentine’s Day with!

Let me know what you think of this recipe in the comments.