Toddler Activity: Fruit Flower Art

Two of our favorite parts of spring are the flowers and fresh fruit! Since we love playing with our food, we were inspired to paint our favorite spring things.

Mila has painted with different foods before. It’s always fun watching her experiment with how the paint works with random objects. Even more fun, is how it all turns out at the end.

For this project, we ate a fruit salad for breakfast and then used the tops for her artwork. It was a way to reduce waste and be creative all in one.

Try saving some of your fruit scraps and try this flower painting out.

Here’s all you’ll need:
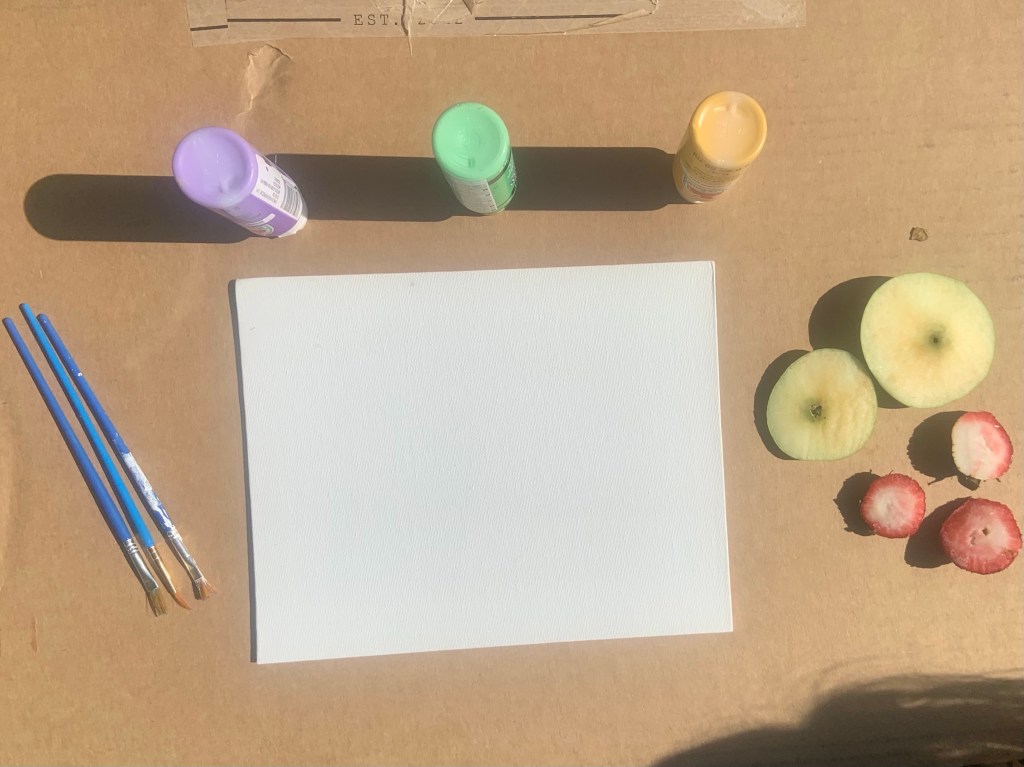
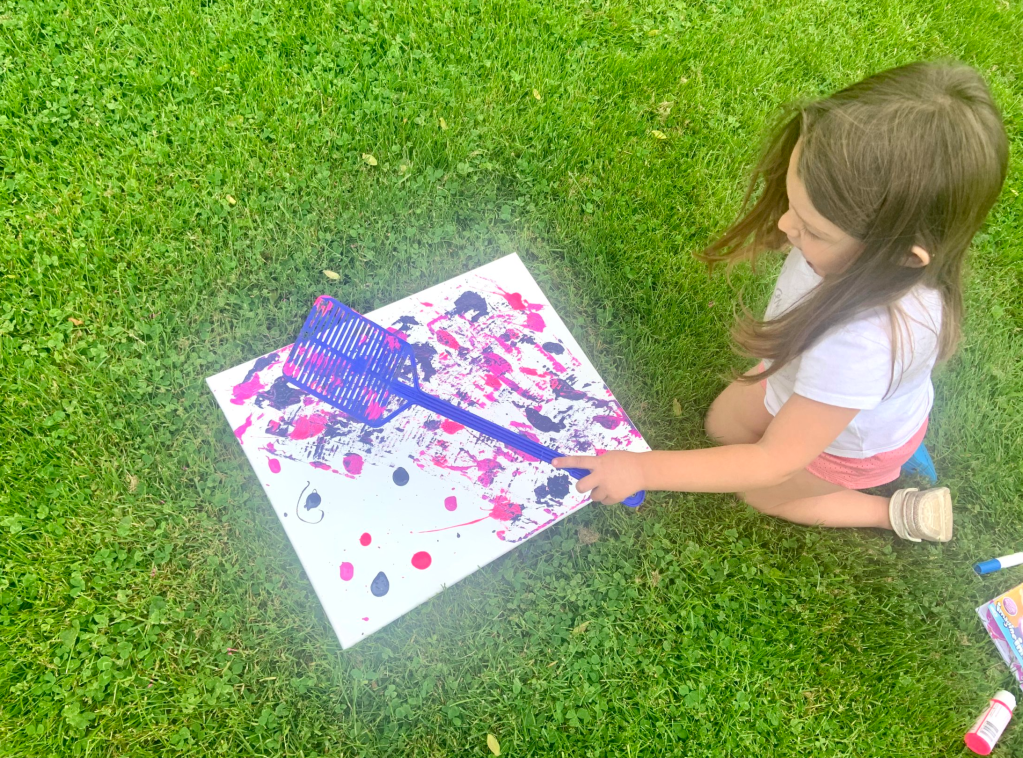
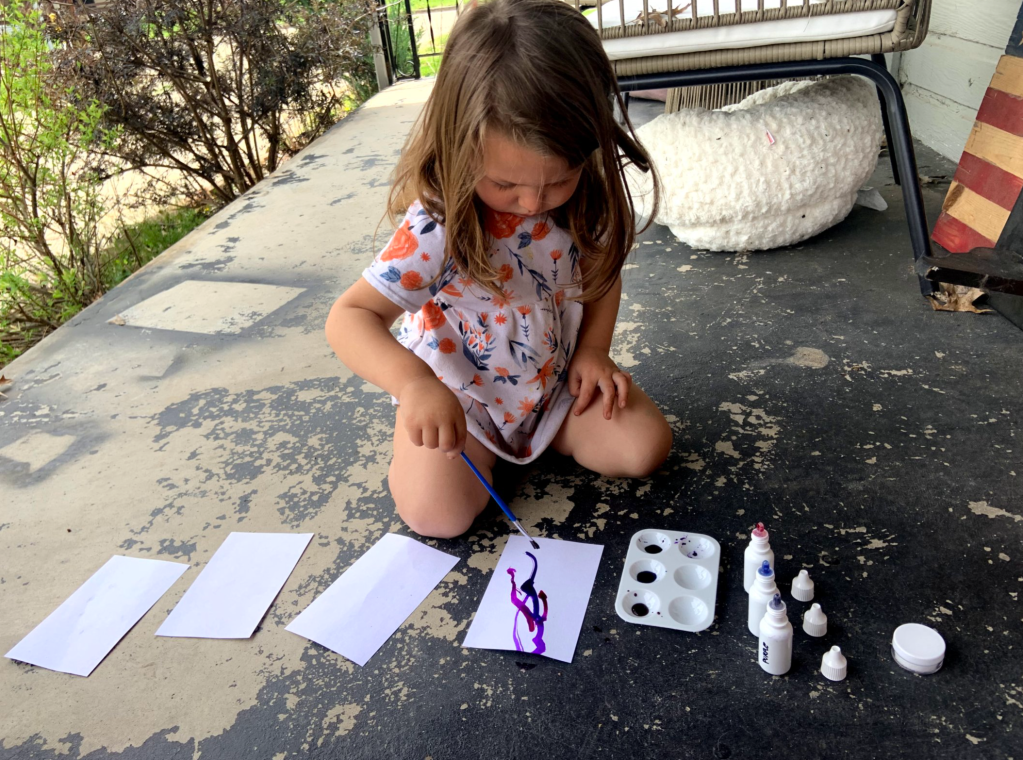
This activity is really simple to set up.

All you need to do is prep your fruits, get a painting space, and pour paint. Your child will figure out the rest as they paint.

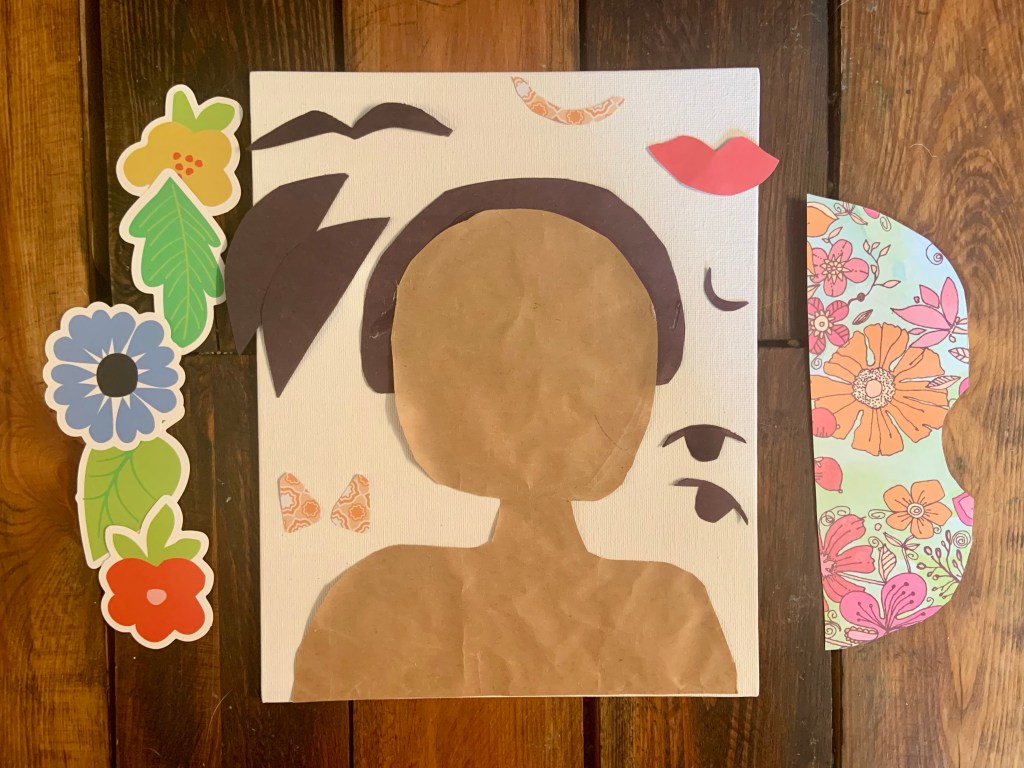
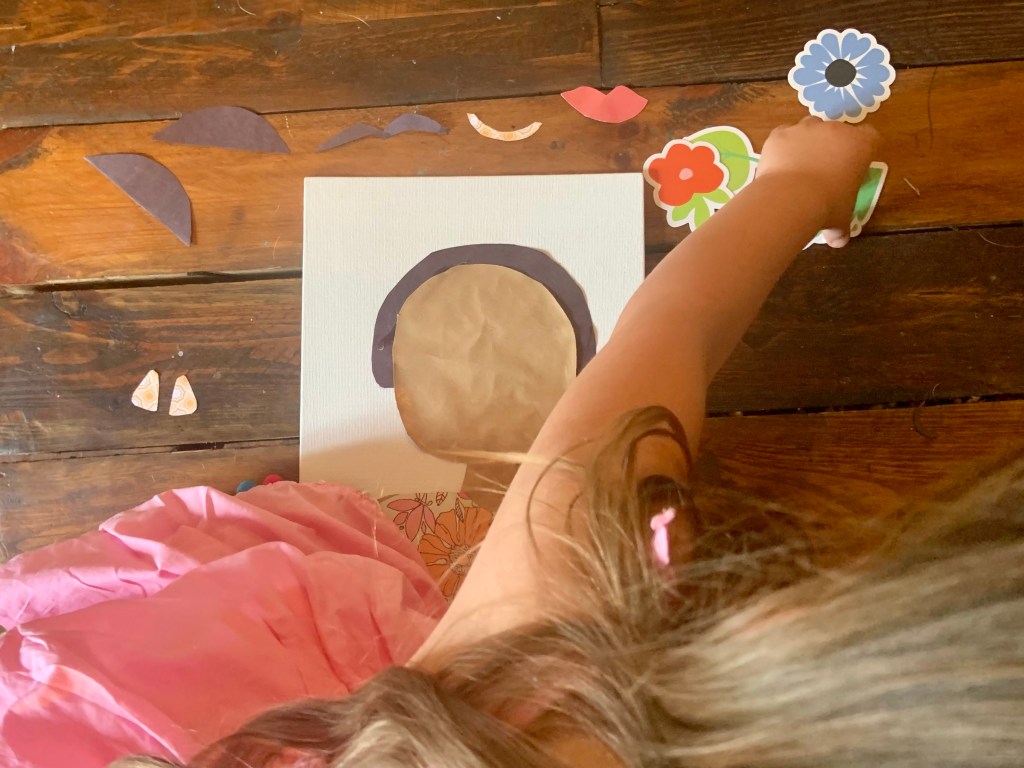
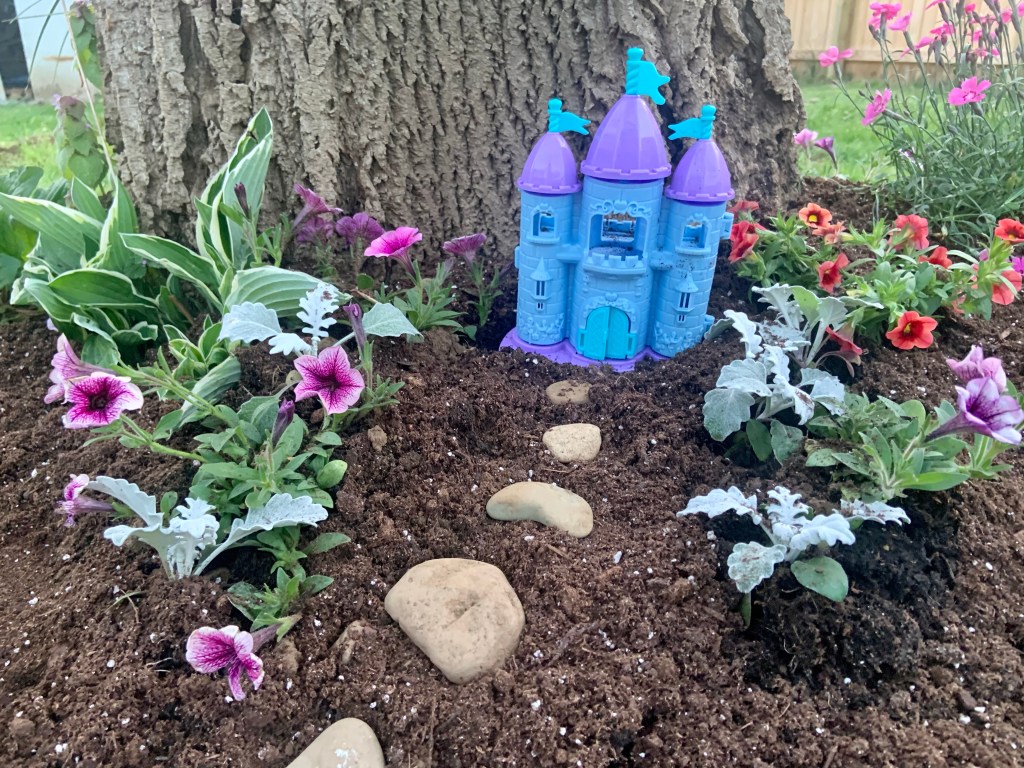
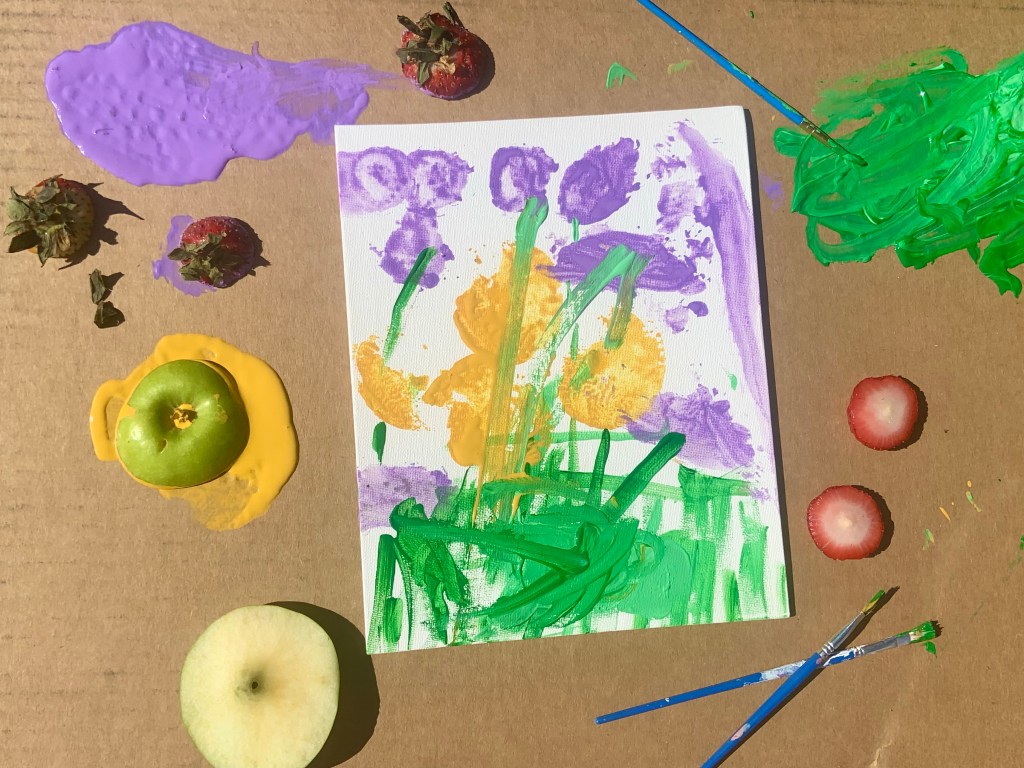
For Mila, I asked her if she wanted to paint flowers and we looked at the ones in our yard.

Since we practiced the parts of flowers, she kept telling me which part of the flower she was painting. It’s amazing how much little ones remember! She also kept telling me the apples made bigger flowers and the strawberries made smaller ones.

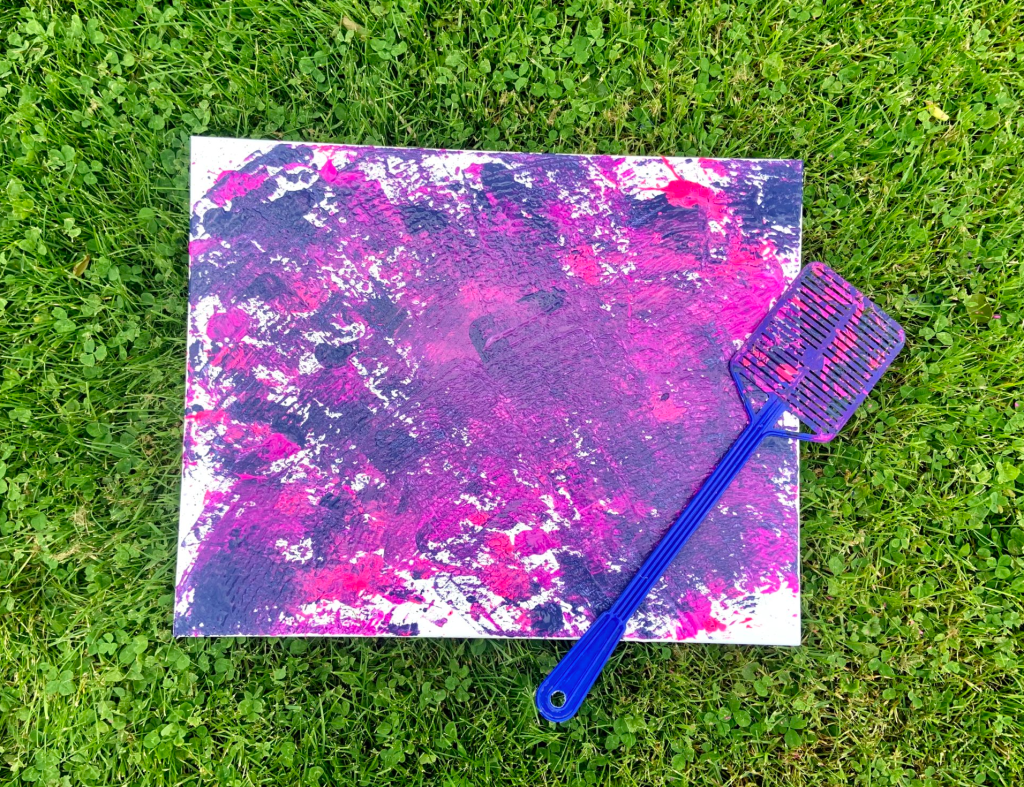
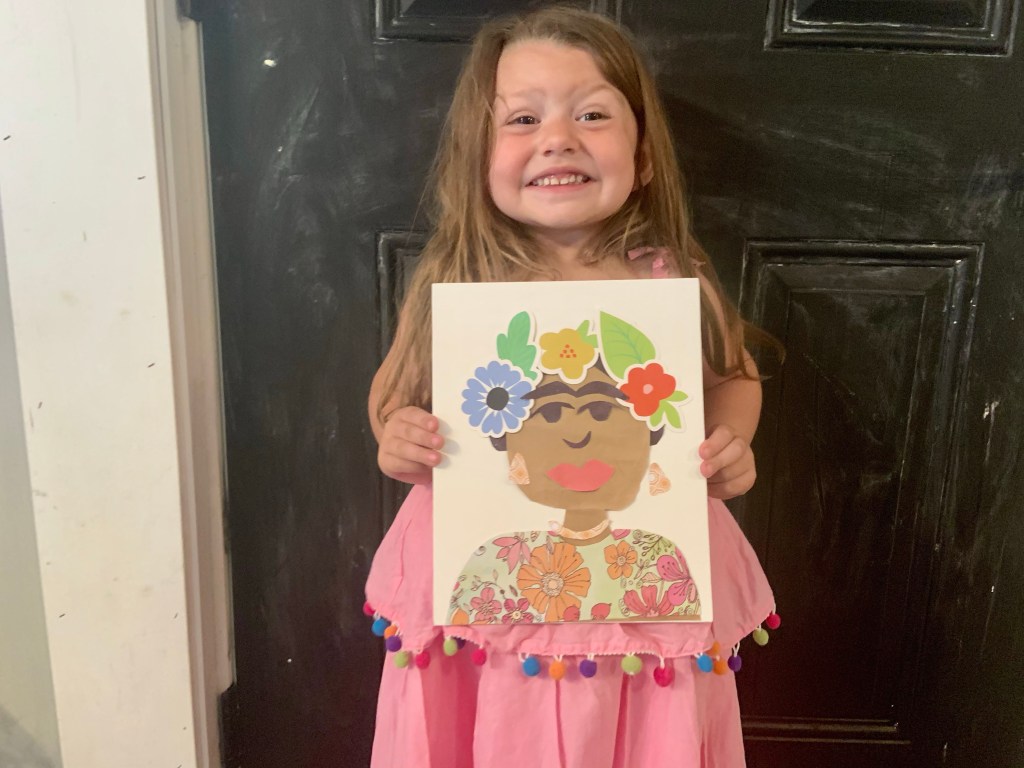
I absolutely love watching the world Thats in her head come alive on a canvas. She’s always telling a story when she paints too.

We make sure to ‘sign’ and date the back of every painting she does. One day I’ll need to get a huge storage box for all of her paintings. For now, they’re decorated all throughout my house.

With these paintings, you can have your child paint whatever they’d like. Mila just loves flowers and it’s perfect for springtime.

I think she did an amazing job!

What’s the craziest thing you’ve ever painted with and what do you think Mila and I should try next?

If you’re into playing with your food, but just prefer eating it, check out these recipes from other mamas. I’m sure you’ll love them!

Toddler Activity: Birdhouse Motel

Mila and I love watching birds in our backyard. After making DIY bird feeders, we thought it’d be fun to expand their spot on the tree. We created what I like to call a little birdhouse motel.

If you didn’t know, birds hold a special place in my heart. They remind me of Jensen and whenever I see a red or blue bird, I feel as if it’s him saying, “hello mom!” There are also birds on his urn. For some reason, his urn called out to me. It felt like it was a freeing image and after that, birds just felt right to celebrate him with. With that being said, we really welcome them in our backyard.

I’ve been looking at different birdhouses to purchase, but have been so busy I’ve forgotten to order one. Thanks mom brain! When I last went to the dollar store, I found two little kits, so I had to buy them. Then I figured we could reuse something at home too.

Not everything has to look perfect or expensive, it still turns out cute when made with love.

Here’s what we used for our birdhouse motel:

As I said before, if I could do this again, I probably would have ordered a different birdhouse kit. Yet, this one worked out perfectly because it wasn’t so big that Mila lost interest.

For the kits, I followed the instructions on the back of the package.

Honestly, I threw away the wood glue and went straight to my hot glue gun. It went a lot quicker! If you’re up for the challenge and have the patience, you could try the wood glue.

After the hot glue was dried, Mila and I each painted one of the mini birdhouses.

She wanted to pick out the colors and of course chose purple and pink. They’re truly her go to colors! It makes me laugh that most of the crafts and artwork in our house are bright and girly. Let’s hope the birds like it too!

While Mila continued to paint her birdhouse (which she did all by herself!), I cut out a big chunk of the juice carton and then washed it out. I also cut two holes across the top to pull string through to hang. It would have really helped if I had done this before I painted, but… I forgot!

Afterwards, I ended up painted it black (against Mila’s wishes) with a purple little heart on it. When it was dried, I pulled the string through and tied a knot.

When the kits were done, I also tied the string and hung them all together.

Mila went to find some grass, small sticks, and a little bit of bird seed to welcome in our new friends. It was so cute seeing which objects she thought the birds would like. If I were them, I’d feel right at home!

I can’t wait until we can get more birdhouses and maybe do another DIY.

These two were simple enough for us to do it in an evening. As she gets older, we can definitely do more complicated things. For now, she’s in love with our birdhouse motel. I am so proud of how well she painted and worked on her little project.

Now we get to wait to see who decides to move in and benefit from the motel. Hopefully different types of birds will visit and maybe even a bluebird or two. Fingers crossed!

What’s your favorite type of bird? Let me know in the comments.

If you love birdhouses and want some other inspiration to do a DIY one, check out what these moms have done.

Toddler Activity: Flyswatter Painting

We love process art! With spring here, as well as the bugs, we had to find a creative way to make a unique piece of art. This time, with a flyswatter and a hyper toddler!

Mila has a love hate with bugs. On one hand, she’s afraid of most of them. Then, on the other, she likes butterflies and the ‘pretty’ bugs. She despises flies and gnats, but was pretty impressed last year when she was introduced to the flyswatter. It’s like she’s on fly patrol whenever she sees one.

To get her creative and being active (which she loves), I thought this activity would be fun for her!

Not only is it fun for Mila to paint and have fun with it, the texture the flyswatter made was amazing to me. It turned out to be a great project.

Here’s what you’ll need:

  • Canvas or paper
  • Flyswatter
  • ‘Bugs’ (aka paint)

I love activities that have an easy set up. It works for Mila’s patience level and if I just need a quick activity, it’s so nice. This one was just like that.

The only real planning we did was picking out paint colors. Mila, of course, went for her normal colors: pink, blue, and purple. We had everything else already on hand, but you can find all of these materials almost anywhere.

Then, I just poured little dots of paint all over the canvas. I told Mila to pretend they were bugs and to smack them!

She had so much fun hitting all the different bugs. If I do this activity again, I’ll have her hit the certain colors to practice color matching. It would be fun seeing if she or any toddler would try their best not to hit any other colors too.

The patter the lines on the flyswatter made were perfect. When she asked for more bugs, the layered look was so cute. Somehow, the paints didn’t all muddle together and you could see all the different colors. I was worried they’d just become a huge purple blob!

I think this pattern would end up making great homemade wrapping paper too!

Mila had a ton of fun hitting the canvas and we ended up doing the same activity on a big wood board too.

I hope to finish her painting off with writing a quote on it in the near future. I love to combine her artwork with encouraging words! It just makes for a fun team project that I know we’ll enjoy for years to come.

Let me know in the comments if you like bugs or if you’re on Mila’s side of the flyswatter.

Check out how some other moms incorporated bugs and insects in their learning.

Toddler Activity: Dino Dance!

Happy National Dinosaur Day! To celebrate, Mila wanted to share her one of her favorite books and dinosaur activity: Dino Dance!

Mila has just now taken an interest in dinosaurs. Books about them have really helped broaden her imagination about them. We also have a few great dinosaur toys that she loves playing with. When we went to the zoo, there was a dinosaur there so she was able to understand they were huge. She’s been asking about them since.

Dino Dance! hands down is her favorite way to look at dinosaurs and think about movement. She loves to dance, so when she saw that dinosaurs danced too, it helped her connect.

Plus, it helped create a fun little activity too.

Normally, we read books over and over again (oh the toddler stage). Instead of just sitting and reading some, we find ways to act them out. Dino Dance! gives us the dance moves to do, while learning too!

We took our learning outside and Mila showed me her dino moves.

Her favorite was the ‘cha cha cha’ move and the t rex stomp! It was also so fun to watch her come up with her own interpretations of the dance moves. We ended up dancing and singing along with the book for a little while. While dancing their moves, I had her say the dinosaurs names too.

Mila asked me to show her how I would do certain dance moves too! It was great to mimic each other and see how we both were creative.

In one little book, there was a ton of learning! From dinosaur names to being creative, Dino Dance! is a great way to introduce your child to dinosaurs.

It also sparked other conversations about dinosaurs. We have other books that have more realistic descriptions and images of dinosaurs. To make a connection, I remind her of the dinosaurs dance moves in the one book and show her in the other. I can’t wait to take her to see the dinosaurs in the Columbus Zoo soon!

Another dinosaur song Mila loves right now is from Blippi. Whenever she has screen time, she asks to watch his channel. So, The Dinosaur Song has been a great way for her to learn about dinosaurs while dancing and watching her favorite show too.

If you’re looking for other fun activities from creative moms and their kids, check them out here:

Toddler Activity: Moon Rock Toss

Mila is a kinesthetic learner. So, when she learned about the Moon, we had to do a Moon Rock Toss.

This simple activity is fun for active toddlers who are curious about learning. Plus, it’s easy to set up for busy parents that keeps your child’s attention for a long time.

Lately, Mila has been into the moon and loves looking at the stars. For the longest time, she thought she could jump up to the moon and eat it. Thanks Sesame Street! We’ve done a few activities from Fluff Pieces Space Unit and I’d love to order some of the puzzles and items she used too.

Now she knows that the Moon isn’t a cookie! But it was cute when she did.

Anyways, here’s what you’ll need for this activity.

  • A basket
  • Aluminum foil
  • Construction paper
  • A ‘backboard’

Since we have a chalkboard door, we used that as a blackboard. You can use whatever you’d like. I can imagine a huge poster board or pieces of paper helping too.

I decorated our backboard to be like stars on the moon

Then all the other set up I needed to do was crumble up aluminum foil and paper. That’s it!

Mila’s been loving Blippi so his space song really hit home. She listened to that as I set up. It really set the activities mood.

We walked about the moon and how there are moon rocks there. I told her these were our moon rocks. Since there’s no gravity on the Moon, the rocks are lighter than Earth rocks. Obviously this isn’t how it works, but it’s okay.

I told her to try and make it in the basket and she had a blast. She kept refilling the moon rock bowl to start over the activity.

Since Mila is really into space, I plan on continuing teaching her more about it during summer. I have a feeling she’ll love stargazing and would love to talk about the constellations with her.

For now, she’s obsessed with her moon rocks and making them in the basket. Maybe she’ll be a basketball player too!

Let us know how you liked this activity in the comments below or let me know what your favorite planet.

Check out how these other moms introduced space to their kids.

Toddler Activity: Frida Kahlo Portrait

In celebration of Cinco de Mayo, femininity, and art, Mila learned more about one of my favorite historical woman: Frida Kahlo. Of course, we had to do a craft of a Frida portrait; just with a toddler spin.

If you don’t know about Frida, she’s truly an amazing woman. Her history was tragic, but her perseverance to keep going against all odds really speaks to me. Through everything, she became one of Mexico’s greatest artists. She did a ton of self portraits, which is why we honored her this way.

Now, I understand Frida has NOTHING to do with Cinco de Mayo. This holiday commemorates Mexico’s unlikely defeat over France in 1862. Since then, it’s turned into a huge celebration.

With Mila being three, I don’t feel completely comfortable talking about war with her yet. It’s still a great way to teach her about Mexican culture. Frida is a huge cultural icon and since we love learning about art, it felt perfect.

Anyways, you can look up all kinds of information about CInco de Mayo and Frida all over the internet. Now it’s time to get to our little craft.

Here’s what you’ll need:

Honestly, i wish I had a free printable for everyone to make this craft a little easier. The elements in this project are a little detailed, but the end result is worth it.

To prep for this craft, I drew the different elements of Frida’s face on the construction or craft paper. They don’t have to be perfect. I think the more unique it is with its imperfections, the more it connects with Frida and her work.

I drew Frida’s hair, nose, eyes, and unibrow on black construction paper. Her lips on red scrapbook paper. The accessories on yellow scrapbook paper. Her body is made out of brown construction paper and the dress out of floral scrapbook paper.

Once everything was drawn, I cut them out.

Since we used a canvas, I hot glued Frida’s body and part of her hair down. Then, it was all up to Mila.

She has seen Frida and her artwork for her entire life. We read books with her in them, but I showered her a picture before she started. After, I asked if she could make her face.

Honestly, she did a great job. She loved talking about the different parts of her face and was in love with the flowers. I think she said Frida about a thousand times too. It amazes me that she picks up on all these new words.

I think she did a really good job. She put it in a prime spot for all to see! I love that she loves all her hard work.

Plus, it was a fun way to celebrate Cinco de Mayo.

Tonight we’ll be enjoying tacos and I’ll have a margarita. We love to celebrate these holidays and learn all about new culture.

Let us know what you think about this Frida craft and how you celebrate Cinco de Mayo!

Before you go, check out how these moms celebrate Cinco de Mayo and Mexican heritage.

Toddler Activity: DIY Star Wars Slime

May the Fourth be with you… okay, Happy Star Wars Day! To celebrate this fun little holiday, Mila and I made slime for the first time. We had a blast with our little DIY and I loved introducing her to slime and the force.

If you’ve never made slime or hate how sticky some recipes are, this one was actually great. It was a few simple steps that’ll make you actually want to make slime with your kids.

Here’s what you’ll need:

The first thing to do is empty out the entire bottle of glue in a bowl. We did glow in the dark glue with sparkles in it. I thought it would be unique and it reminded me of Star Wars.

To get all of the glue out, I cut the bottle in half and spooned out what wouldn’t come out.

Then, add the baking soda to the glue. You’ll need to mix this up and it starts to get really thick. Mila loved helping mix it at this stage, as well as pouring everything into the bowl. I did end up having to help her at this point because it did get difficult.

After it’s mixed together, add food coloring to it. We chose purple because it’s on of Mila’s favorite colors, but it’s reminds us of space and galaxies. Of course, we added more sparkles too.

Next, add the contact solution.

This will make the slime almost impossible to mix. It immediately clung to the spoon when we started mixing it. After a minute, I ended up mixing the slime with my hands. It was way better kneading it with both of my hands.

Although our slime wasn’t sticky, you could add more contact solution if needed.

Mila was a part of the entire process, but it was still fun to present it to her with Star Wars stickers. She loved pressing the stickers into the slime and asking what all of their names were.

We talked about the characters being in space and that’s what the slimed looked like. It’s great because she knows that the moon and sun are in space. She might not grasp the entire concept of space yet, but it’s fun seeing her learn more about our universe each day.

As much as we had fun talking about Star Wars and space, Mila really just had a blast playing with the slime!

With how well our first slime making experience went, we will definitely be making more in the future too. It was also such a fun way to get Mila started with the Star Wars universe. I’ll love it when she is old enough to watch the series with me. If I had to guess, Princess Leia buns will be next.

What’s your favorite slime recipe and do you enjoy the Star Wars films?

Before you go, check out how strong the force is with these DIY moms and their kids.

DIY Fairy-Tale Garden

April shower bring May flowers. To celebrate just that, we’re welcoming May with our very own DIY Fairy-Tale Garden.

Mila is obsessed with fairy gardens. My parent’s neighbor has the little fairy figurines in their garden and Mila goes to play with them every day. I figured she should have one of her very own since she likes them so much.

Since we love our fairytales, I thought a little spin on the idea would be fun for Mila’s imagination.

One day after work, we went to our local Lowe’s and picked out flowers that made her smile. She loves pink and purple so all the flowers are just that. I also encouraged her to pick some non-flowering plants as well.

I also purchased filling snd too soil at Lowes’s. At our dollar store, Mila picked out a princess castle to place in her fairytale garden.

Then we started digging.

I most definitely should have taken before pictures, but we were too excited to start.

We picked the tree in our backyard to make the fairytale garden. It has a few hosta and wildflowers already there, so we left them. We did clean up the area by taken out the weeds.

The area also needed built up. We used a ton of fill dirt and top soil so our plants and flowers could thrive.

One word of advice for all toddler parents is to buy your toddler their own little shovel. Mila had so much fun digging holes and helping along the way.

She also found rocks to lead up the the castle. We’re going to try and get more to put around the circle too.

We brought out plastic toys that won’t be impacted by the weather out. Mila was also gifted a gnome set to place here too. It’s going to be a mixture of all things magical.

Just like a fairytale.

I’m so excited to see how the garden and Mila’s imagination grows this summer. We are constantly outside, so I know this little area will be well loved. She’s even already showed it off to her friend who lives close.

With a little hard work, there will be a summer full of fun.

Some key items we needed to make our fairytale garden were these:

I hope that if you want an outdoor place space like this, you’re able to make one. It could have easily been made into a big pot that could be brought inside for winter too!

If you end up making a fairy or fairy-take garden, I’d love to see or hear about it!

Do you have any gardening memories that you did with a parent, grandparent, or any other important individual in your life?

Before you go, check out how these moms incorporated fairytales in their children’s play:

Toddler Activity: DIY Mother’s Day Watercolor Cards

If you’re like me, you might be running a little behind getting Mother’s Day presents. One thing I always seem to forget is the card! This year, try these DIY watercolor cards!

These are a fun way to share your child’s creativity and a way for you to get involved too. Mila loved seeing our creations and I know they’ll be a hit. This could also be a great tradition to start with your children too. They could end up just making them for you as they get older.

All you need is:

This activity is pretty easy.

Go to an area or set up one that you’re okay with paint getting on. Then lay everything out. This specific water color paint was already mixed up. This made it easier for Mila so she didn’t have to dip her brushes in water first.

After, let them paint whatever they would like. There’s no right or wrong way for them to paint or create these.

Once they’re done with a specific card, have them sprinkle salt on the paint. Not only does this help it dry, it creates an amazing texture to the cards. Plus, it’s a little science experiment that your child will love!

They can continue with their painting and salt.

When the salt is dried, you and your child can rub it off. They’ll love seeing how it looks and Mila was in awe of how the salt was colored too.

The next part is up to you. If your child is older, you can instruct them to draw flowers or something that reminds them of the female figures in their lives. Mila wasn’t interested in this, so I personally drew flowers that flowed with her painting. It’s so much fun to take their creations and help make it even more special.

I ended up taping the paintings to cards. On the inside, I wrote a special note for each of Mila’s cards and had her sign it.

They turned out so cute and I really love them. Mila loved the outcome of her cards and was so proud of her painting. I think seeing it all come together helped complete her vision. As always, she will be so excited for her loved ones to receive them.

Honestly, I’m keeping one for myself so I can see how Mila’s art skills grow. Plus, I’m just as proud of her as she is of herself.

If you end up trying this activity, let me know in the comments. Make sure to tag me on Instagram if you share on there too.

What are your favorite types of Mother’s Day gifts?

Toddler DIY: Painted Flower Pots

Don’t scramble this Mother’s Day to come up with gift. Try these DIY painted flower pots to give to your loved ones.

Not only are they easy to make, it’s adorable watching your child pick out the plants for it.

Plants are great gifts to give because they keep growing! It’s extra special to get a personalized pot as well. The combo makes a beautiful present and you’ll toddler will be proud to gift it.

Here’s everything you’ll need:

Most of these items, you probably have at your house. If you don’t have any extra pots laying around, terracotta pots are inexpensive and can be found at most stores. Another option is to use plastic ones too.

To personalize the pots, I added stickers to it before we painted. This is completely up to you!

Then it was time to set up.

I laid a sheet of parchment paper down on my island. Just so there wasn’t paint everywhere like her Earth Day painting.

Next, I had her let me know what color paint she wanted to do. Another great way to practice her color recognition, which she has nailed! But, it’s always fun listening about her favorite color. I ended up putting all the colors on a plate.

After everything was set up, I instructed her to paint all over the pots.

It took her a little bit to get both of them done.

All of the colors got mixed together too. It made a beautiful green color, but it’s a good word of caution if you don’t want all the colors together.

We let the pots dry and took a nap. I should’ve tried to pull the stickers off before we fell asleep though!

When I removed them, the paint stuck. Of course.

To fix this, I ended up just using permanent markers to fix it. This happens with DIYs. Nothing will ever turn out perfect, but I just love them.

After everything’s dried and the way you’d like it, it’s time to pick the plant or flowers.

I have a ton of plants that need ‘real pots,’ not just nursery pots. Yes, yes. I’m most definitely a crazy plant lady at this point!

Honestly though, I think these turned out so cute. I love how mine turned into a rainbow, marble piece and my mom’s is a nice blue and green swirl. They’re both made with so much love.

You and your toddler can easily make these pots in an afternoon. They’ll make anyone smile to receive!

Let me know what you think about these pots in the comments. If you DIY them, tag me on Instagram: @greyskies.rainbowhighs. I can’t wait to see your and your toddler’s creativity.

Before you go, check out what these other moms are doing for Mother’s Day this year…