Rain Process Art

Happy Earth Week, friends! If you’re looking for a fun way to explore the rainy April season, this Rain Process Art is perfect for kiddos

It’s a great way for kids to show how they think of rain and to see their creativity too!

To celebrate and honor our planet this week, all our DIYs will be made with recycled products. We usually try to reuse items as much as we can, but this week it will be a priority that I’ll showcase.

Even though Mila and I aren’t particularly fond of rain, we can appreciate its beauty. Blue is a special color to us and we love that rain helps water our plants. It’s important that we celebrate our earth and all its weather.

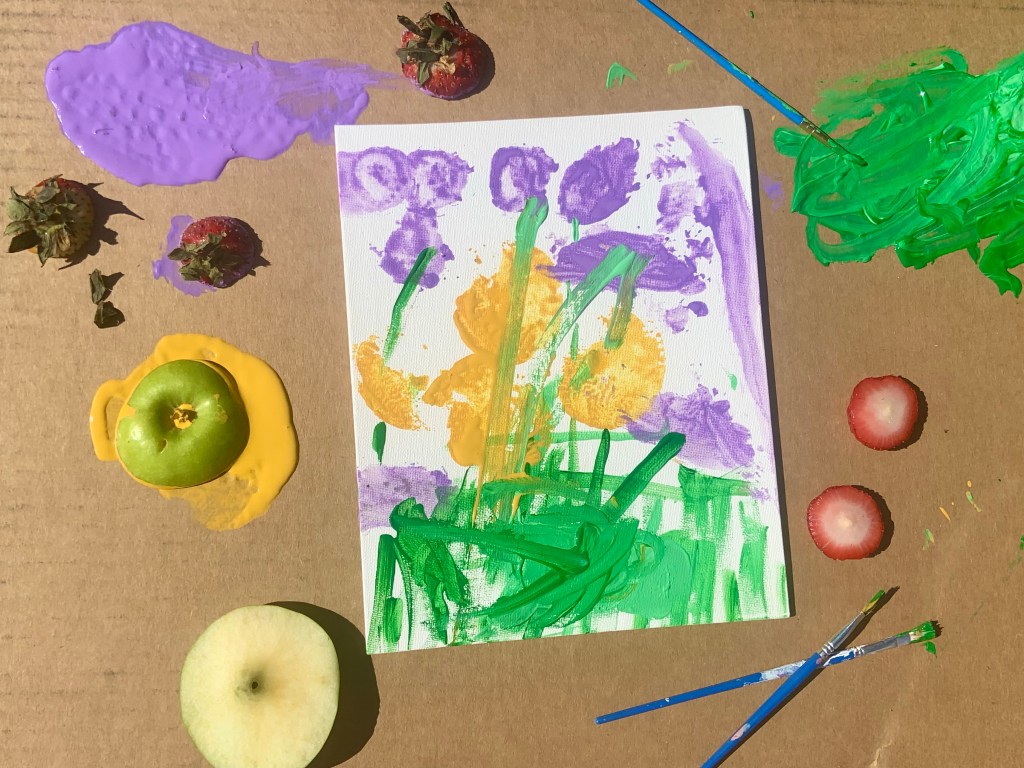
For this process art, I just found some items that reminded me of rain…

  • Shades of blue paint
  • Bubble wrap
  • Paint brushes
  • Stuffing
  • Cardboard
  • Pipe cleaner
  • Glue

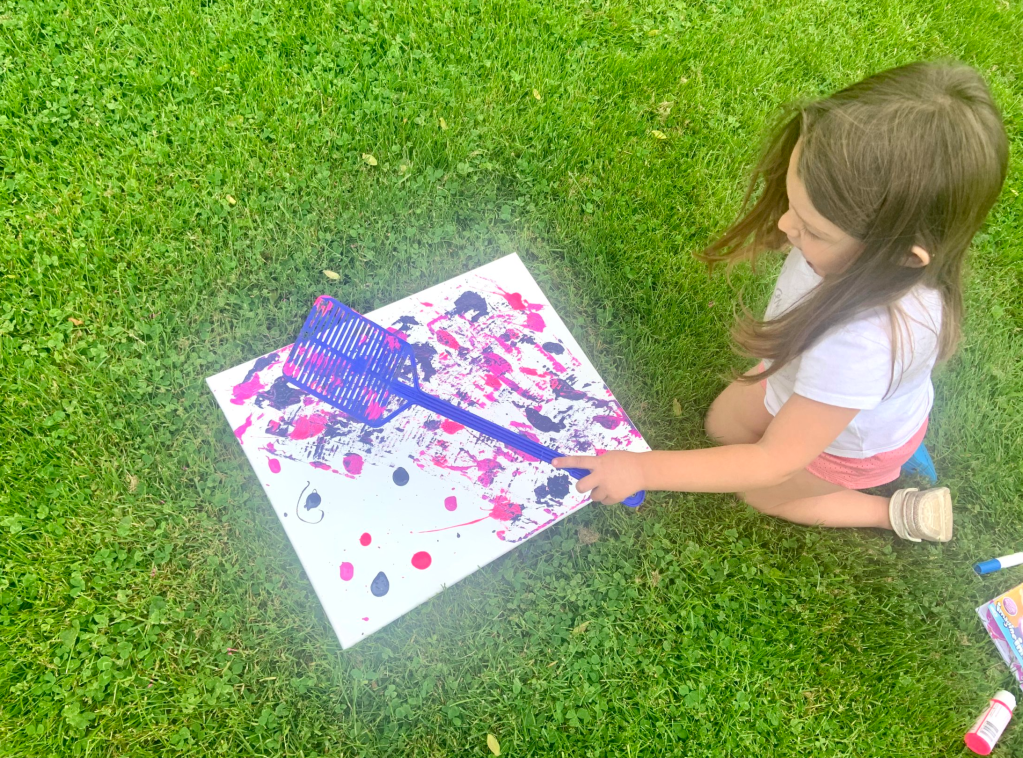
For all of this, I let Mila decide what she wanted to do. That’s the best part about process art.

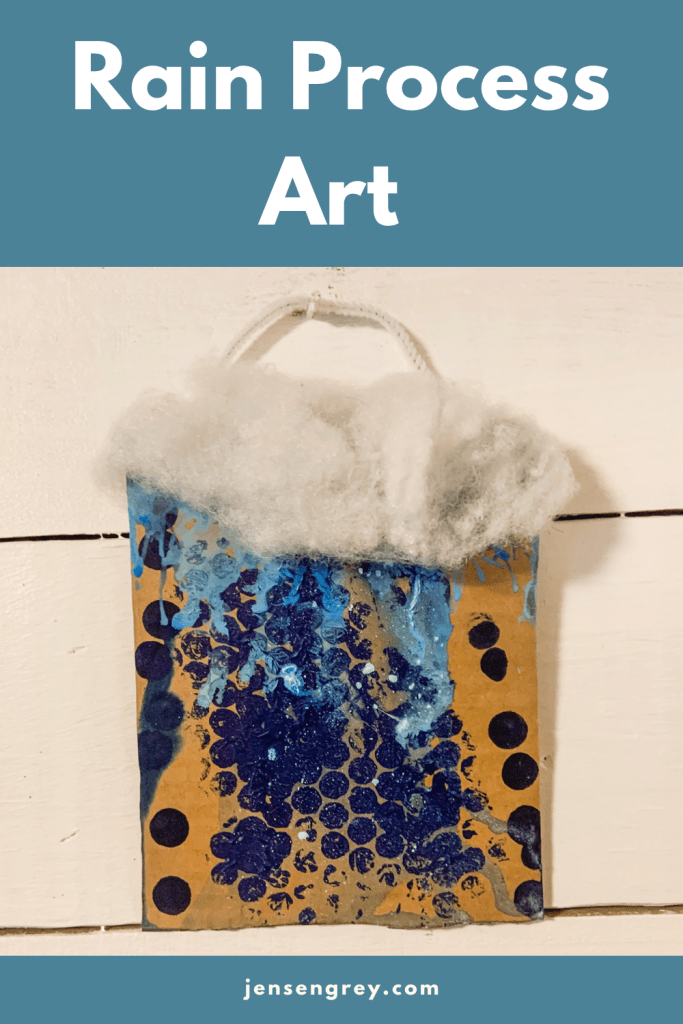
She started off painting bubble wrap dark blue. This makes such a cool effect on the cardboard that we love. Then she used the dark blue bingo dauber to make more blue dots.

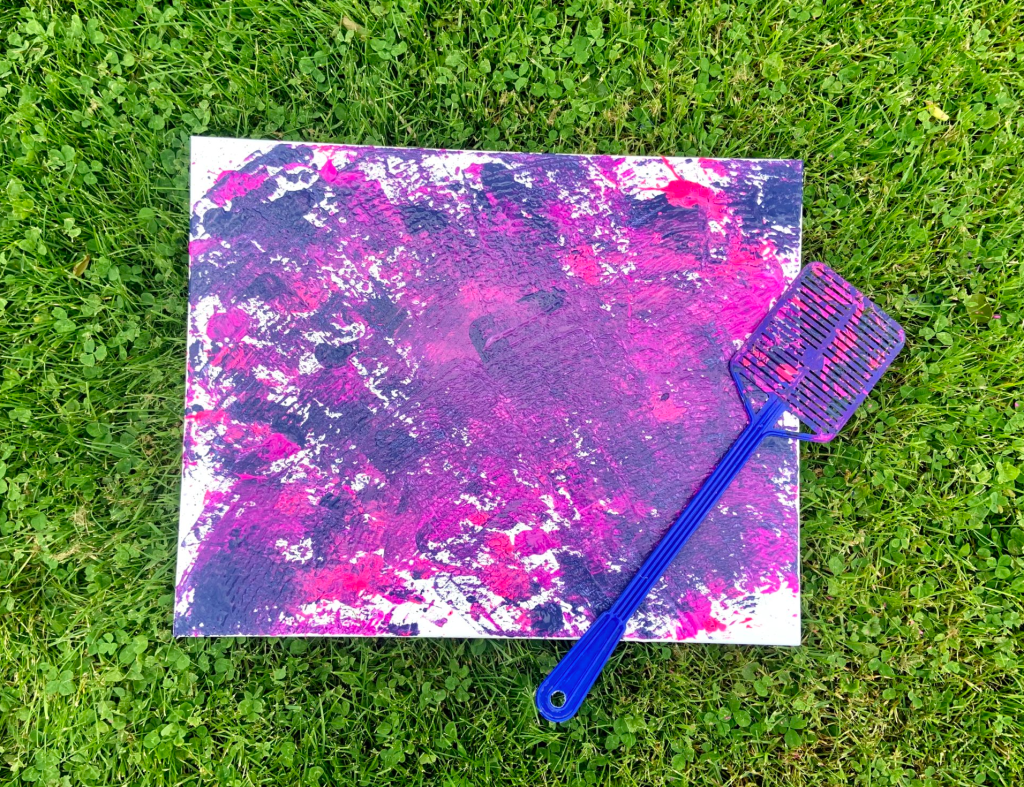
After we experimented a little.

I added water in the lighter blues. She tried squirting some on the cardboard. Then she used a straw to make the paint look like water dripping on the window.

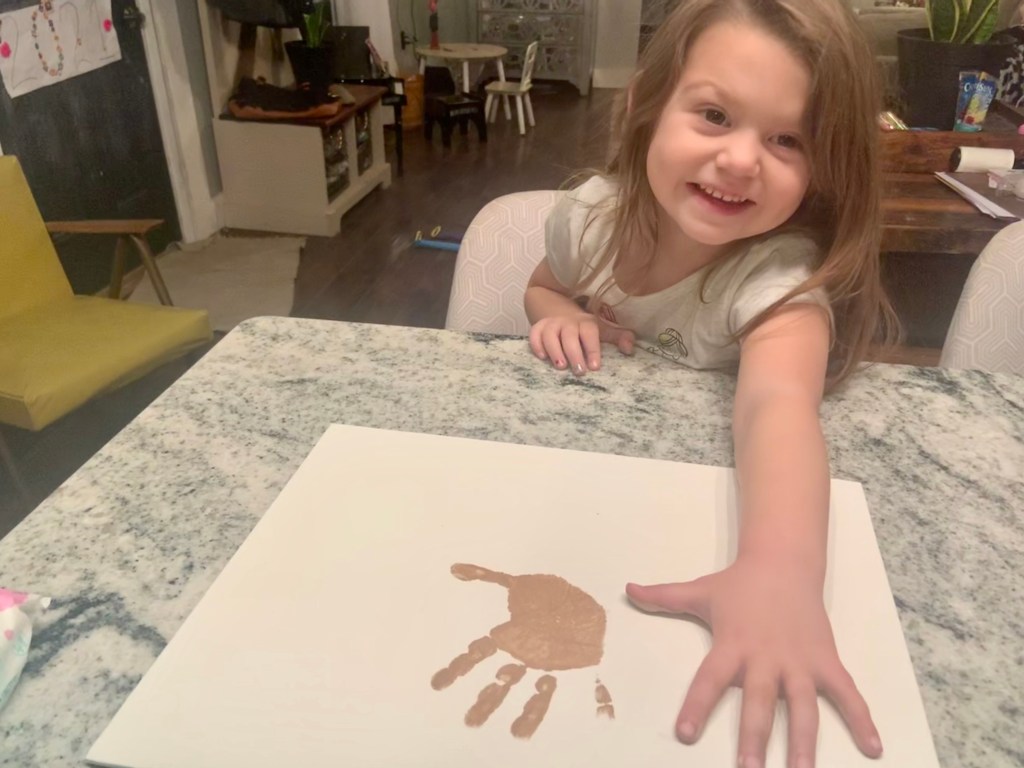
When she was done panting, I added left over stuffing to the top to make it look like a cloud. Then a pipe cleaner to hang it.

Like all of Mila’s artwork, I think it’s perfect. It looks like the most beautiful storm.

Keep checking in this week to see more ways we celebrate our earth. If you can’t wait until then, check out these fun Earth Day activities we’ve done in the past:


What’s your favorite type of weather? Mila and I love sunshine!

Advertisement

Halloween Craft: Googly Eyed Monsters

Halloween crafts and activities do not have to be complex. My preschooler’s favorite Halloween Craft are these Googly Eyed Monsters! Not only did she have a spook-tacular time making them, she loves making sure everyone sees them when they come in our home.

The best part about these monsters, you only really need to go buy googly eyes. Everything else are pretty common household items.

It looks pretty simple right? Here’s all we used:

To set up this craft for Mila, I cut some squares from old cardboard boxes. We love to upcycle and reuse items. If we can make memories by doing that, I’m all for it!

Then, I put out the colors of paint she wanted to use. I tried to persuade her to use more Halloween colors. She insisted on blue though, but I think it turned out super cute even though it’s not a traditional color.

I let her free paint and do whatever she wanted. They didn’t start off as monsters, just as big blobs.

If you have older kids, they’ll be able to do this next part on their own. I went in and drew outlines of monsters with her blobs. She might be able to do it now, but I just follow her interest and patience level with these types of activities. There’s no right or wrong ways to outline them. Just let their artwork speak to you!

When the monsters were finished and dried, Mila put the eyes where she wanted them to be. Let your child pick out how many eyes and the eye color they think they need. It’s so cute to see how they end up seeing their monsters.

Then, you can hot glue a pipe cleaner on the back of the cardboard pieces to hand them. This is an optional step, but I love it.

I love this little progression picture. This activity came out so adorable and I’ll definitely be hanging these up throughout future Halloweens. At first, Mila was afraid of some of her pictures. Now she thinks they’re cute. She’s really getting in the spooky mood!


Which is your favorite monster that she made?

Toddler Activity: Marshmallow Painting

S’mores are obviously a huge part of our summer. We have tons of fires and we’re always craving the gooey treat. Sometimes, you can have a ton of leftover marshmallows. Instead of just throwing them away before they get hard, try this Marshmallow painting.

It’s a fun way for kids to play with their food and wait for the s’mores to get done!

If you’re by the campfire making s’mores, you have almost everything you’ll need.

  • Marshmallows
  • Paint
  • Sticks
  • Canvas

To start this activity off, I had Mila go find sticks. It gave her some time to explore and find the perfect ones.

While she was doing that, I prepped the painting area. All you need to do is find a spot for your canvas, get a palette (I used old cardboard) to put the paint, and get out marshmallows.

Once Mila got back with the sticks, I stuck the sticks in the marshmallows to make a ‘brush.’

Before she started painting, I asked her to tell me a campfire story through her art. So, while she was painting, she was telling a big story. Everyone color represented something different.

The storytelling part of this activity is my favorite! People have been telling stories around the fire since the first humans.

I can’t remember exactly what Mila’s was about. There were a lot of details.

What I do recall is the story was about me, Mila, and Max. We rode on a bike to get plants and a tree. She was purple, I was pink, Max was orange, the plants and tree were green, the bike was blue, and there’s some colors she used again that I don’t remember why.

I should have been recording her tell the story, but I didn’t think about it until after. Either way, when I look at her little painting, I smile.

Afterwards, we enjoyed a little s’more and told more stories. It was such a fun activity to start our evening. Summer nights like these are my absolute favorite.

In the next week or so, I hope I can start writing down her stories. She’s been telling a lot of them and I want to make sure I always remember. When I do, I’ll make sure to write a post about it in case you’d like to do something similar.

Have you ever painted with marshmallows before? If not, what’s your favorite camping or summer craft you did as a child?

Here’s some other summer/camping crafts you might want to check out too!

Toddler Activity: Fruit Flower Art

Two of our favorite parts of spring are the flowers and fresh fruit! Since we love playing with our food, we were inspired to paint our favorite spring things.

Mila has painted with different foods before. It’s always fun watching her experiment with how the paint works with random objects. Even more fun, is how it all turns out at the end.

For this project, we ate a fruit salad for breakfast and then used the tops for her artwork. It was a way to reduce waste and be creative all in one.

Try saving some of your fruit scraps and try this flower painting out.

Here’s all you’ll need:

This activity is really simple to set up.

All you need to do is prep your fruits, get a painting space, and pour paint. Your child will figure out the rest as they paint.

For Mila, I asked her if she wanted to paint flowers and we looked at the ones in our yard.

Since we practiced the parts of flowers, she kept telling me which part of the flower she was painting. It’s amazing how much little ones remember! She also kept telling me the apples made bigger flowers and the strawberries made smaller ones.

I absolutely love watching the world Thats in her head come alive on a canvas. She’s always telling a story when she paints too.

We make sure to ‘sign’ and date the back of every painting she does. One day I’ll need to get a huge storage box for all of her paintings. For now, they’re decorated all throughout my house.

With these paintings, you can have your child paint whatever they’d like. Mila just loves flowers and it’s perfect for springtime.

I think she did an amazing job!

What’s the craziest thing you’ve ever painted with and what do you think Mila and I should try next?

If you’re into playing with your food, but just prefer eating it, check out these recipes from other mamas. I’m sure you’ll love them!

Toddler Activity: Flyswatter Painting

We love process art! With spring here, as well as the bugs, we had to find a creative way to make a unique piece of art. This time, with a flyswatter and a hyper toddler!

Mila has a love hate with bugs. On one hand, she’s afraid of most of them. Then, on the other, she likes butterflies and the ‘pretty’ bugs. She despises flies and gnats, but was pretty impressed last year when she was introduced to the flyswatter. It’s like she’s on fly patrol whenever she sees one.

To get her creative and being active (which she loves), I thought this activity would be fun for her!

Not only is it fun for Mila to paint and have fun with it, the texture the flyswatter made was amazing to me. It turned out to be a great project.

Here’s what you’ll need:

  • Canvas or paper
  • Flyswatter
  • ‘Bugs’ (aka paint)

I love activities that have an easy set up. It works for Mila’s patience level and if I just need a quick activity, it’s so nice. This one was just like that.

The only real planning we did was picking out paint colors. Mila, of course, went for her normal colors: pink, blue, and purple. We had everything else already on hand, but you can find all of these materials almost anywhere.

Then, I just poured little dots of paint all over the canvas. I told Mila to pretend they were bugs and to smack them!

She had so much fun hitting all the different bugs. If I do this activity again, I’ll have her hit the certain colors to practice color matching. It would be fun seeing if she or any toddler would try their best not to hit any other colors too.

The patter the lines on the flyswatter made were perfect. When she asked for more bugs, the layered look was so cute. Somehow, the paints didn’t all muddle together and you could see all the different colors. I was worried they’d just become a huge purple blob!

I think this pattern would end up making great homemade wrapping paper too!

Mila had a ton of fun hitting the canvas and we ended up doing the same activity on a big wood board too.

I hope to finish her painting off with writing a quote on it in the near future. I love to combine her artwork with encouraging words! It just makes for a fun team project that I know we’ll enjoy for years to come.

Let me know in the comments if you like bugs or if you’re on Mila’s side of the flyswatter.

Check out how some other moms incorporated bugs and insects in their learning.

Toddler Activity – MLK Day Artwork

With Martin Luther King Jr day quickly approaching, I knew I wanted to do an activity with Mila.

Plus, I thought it’d be fun to share beforehand in case you have your child home from school and want to do a productive activity with them.

Mila and I talk about race a lot. It’s important to me that she grows up anti-racist, especially in the world we live in now. It’s never too early to start those conversations. She has black barbies and dolls, books with diverse characters, and watches shows with people of all races.

Still, talking about MLK with her was a must. During this activity, I mentioned his name and talked about how people have different skin color. We also talked about how she would play with anyone, no matter what they looked like. She seemed shocked when I told her some people don’t like others because of the color of their skin.

Back to the project though!

This is an easy art project that actually took less than five minutes. The conversation we had before, during, and after spanned beyond that though.

Things you’ll need:

I started off by asking Mila what she thought her skin tone was between the three colors. She chose the middle color which was called “Territorial Beige.” It was interesting to see her perception of her skin tone.

This shade went in the middle because I wanted an ombre affect. Of course, you can do whatever color sequence you want.

I took a paint brush and painted her hand. Then we pressed it on the canvas. When pressing their hands down, make sure to get all of their fingers too. If not, it’ll be really faint. Finally, I cleaned her hand off and did the process two more times.

That part really is that easy.

After her handprints, or she calls them paw prints, dried, it’s time for the words. I ended up painting the phrase, “small hands change the world.’

You can use any quote or phrase here. There are a ton of MLK quotes that would work perfectly.

I have some more ideas to do for Black History Month that I want to share. They’ll be posted in the second half of the month. I have a few special activities for Valentine’s Day that I know you’ll love just as much!

If you like this activity or try it, let me know in the comments!