11 Earth Day Ideas To Do With Your Child

Happy Earth Day friends!

Although we believe Earth Day should be every day, here’s a few ways you can show your love for our earth with your child. There’s a mix of no cost, no prep ideas with more prep and some cost ideas. But they’re all ways to show some love to Mother Earth.
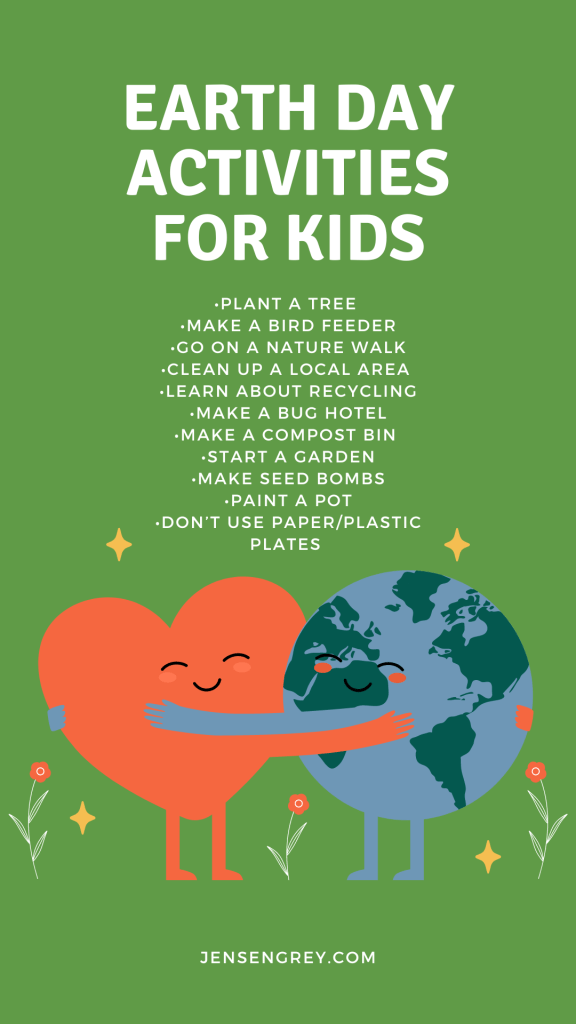
  • Plant a tree. 
  • Make a bird feeder. Birds are important pollinators, and they can also help to control pests. Making bird feeders can be really easy too! We’ve DIY’d a few bird feeders the last few years. Every time it’s so fun to make with Mila. Check them out here: Rainbow Heart Bird Feeder, Toilet Paper Roll Bird Feeder, Birdhouse Motel.
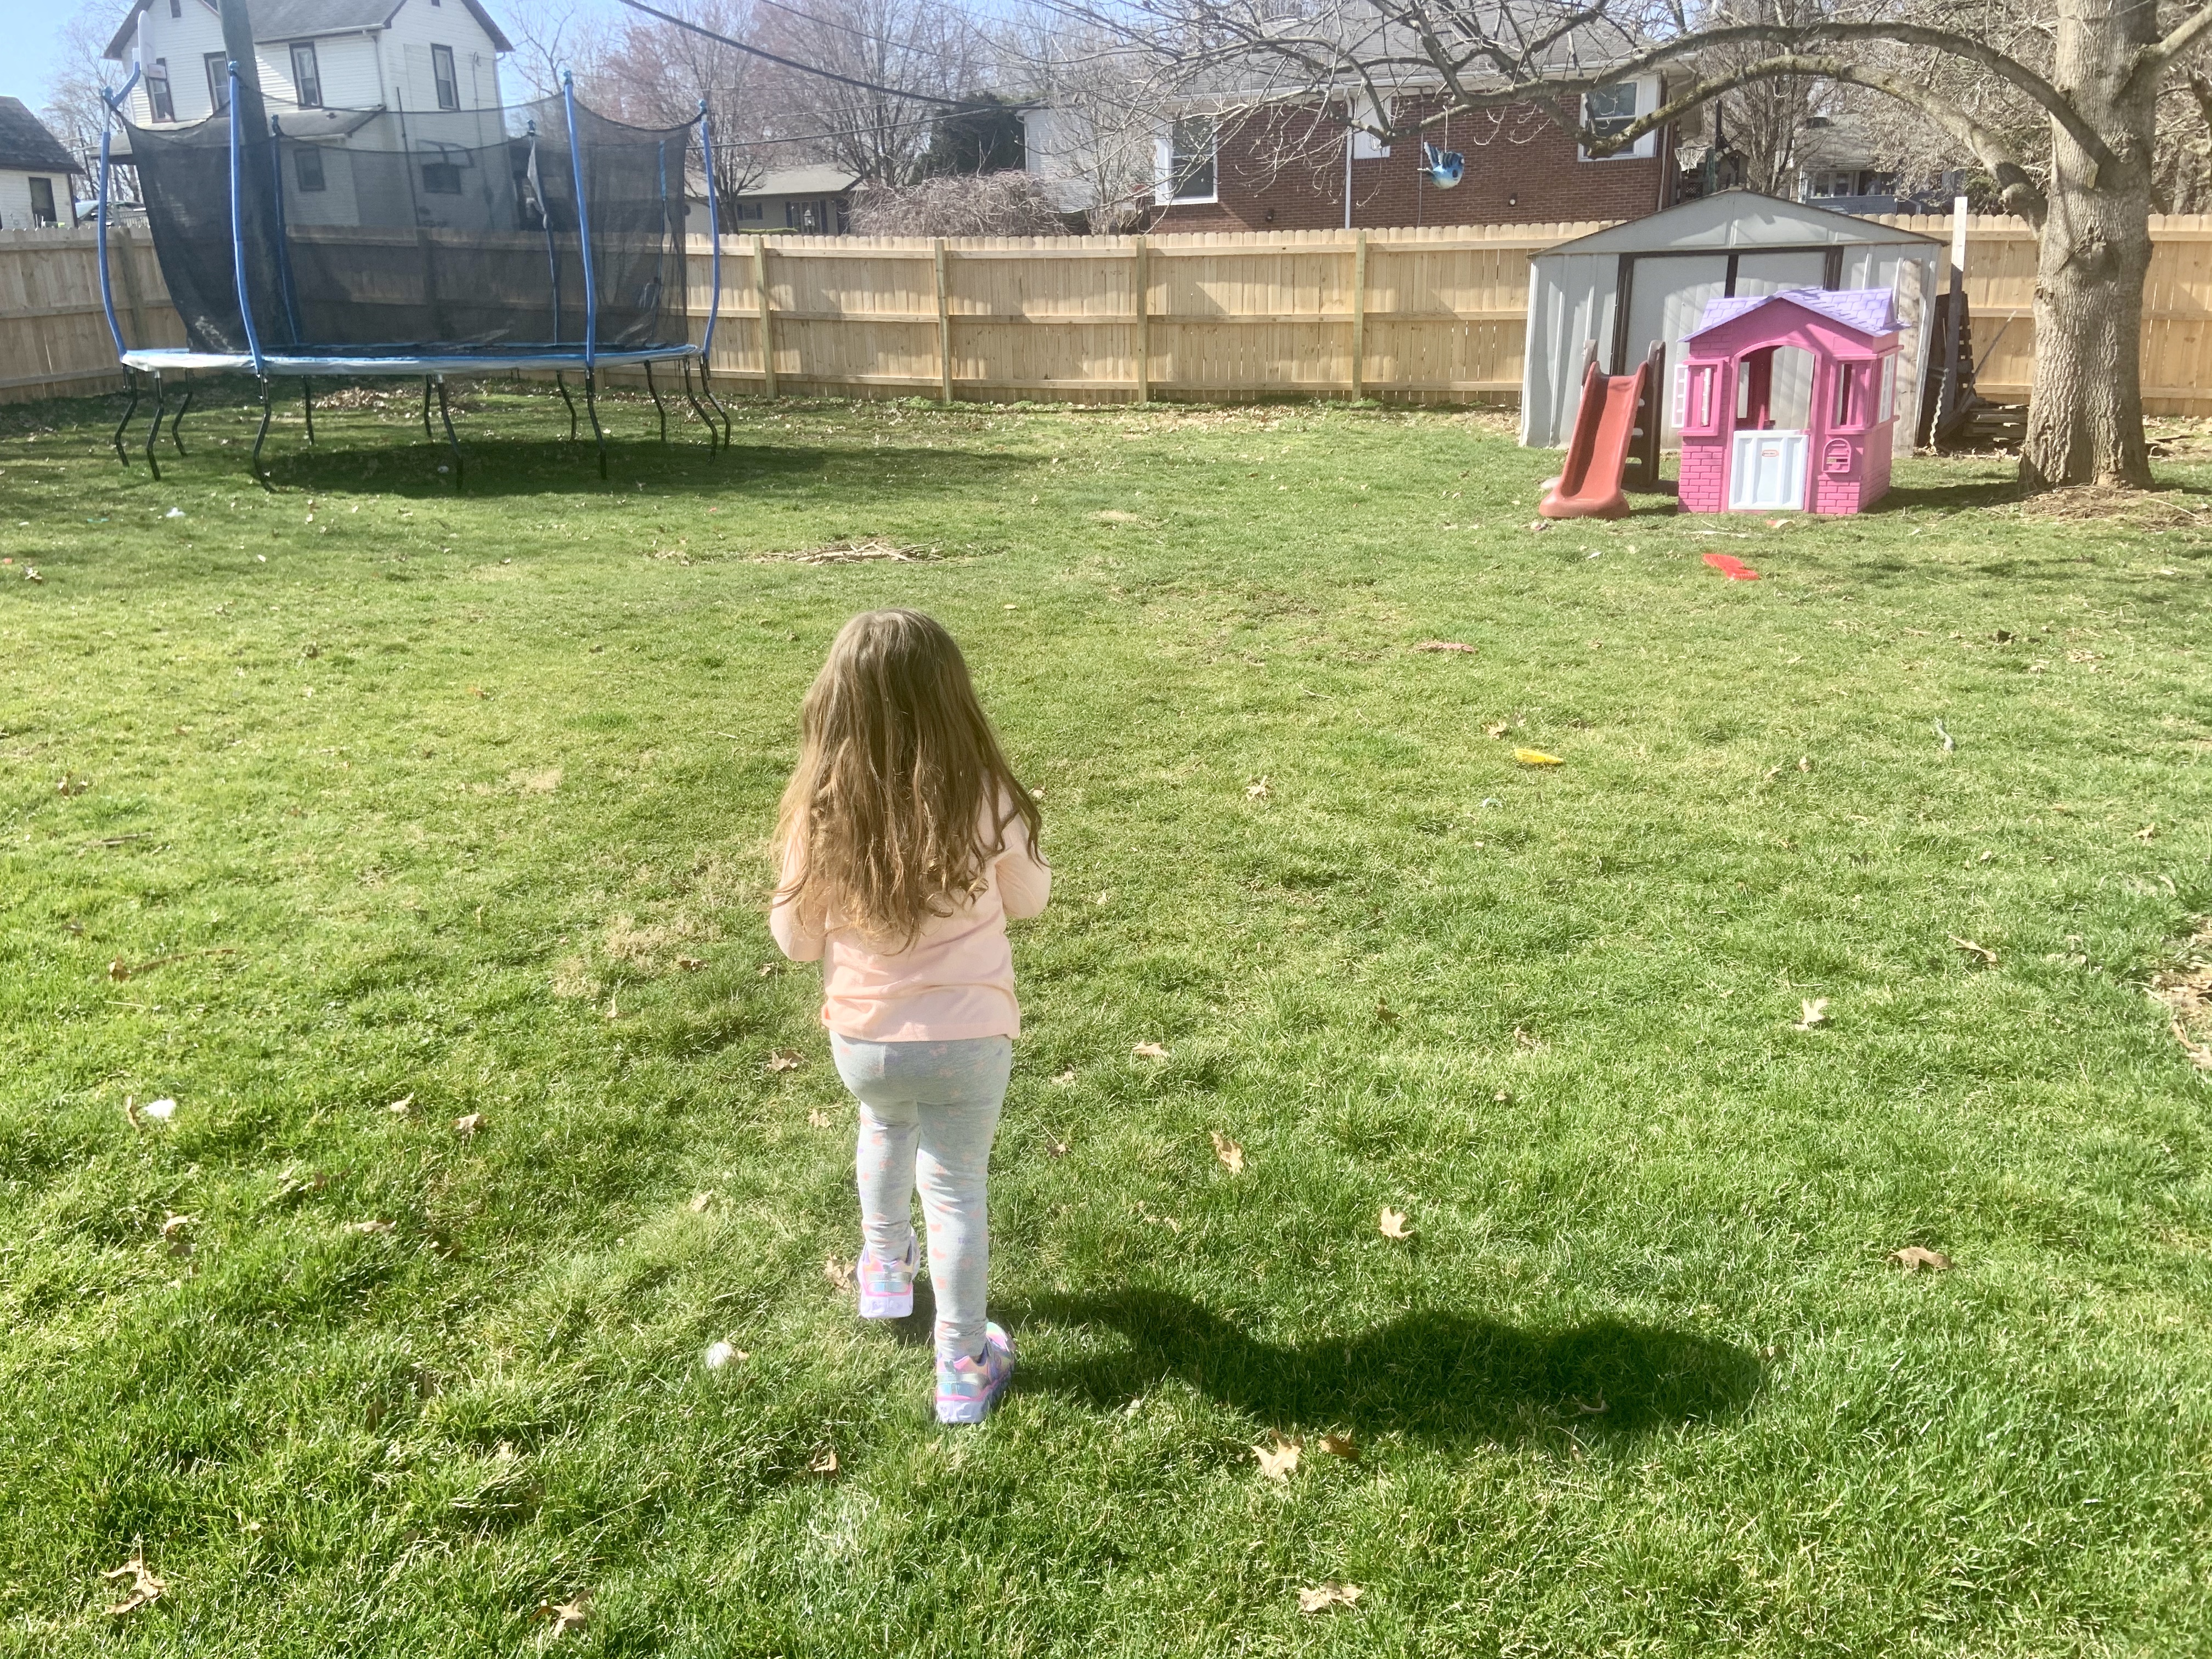
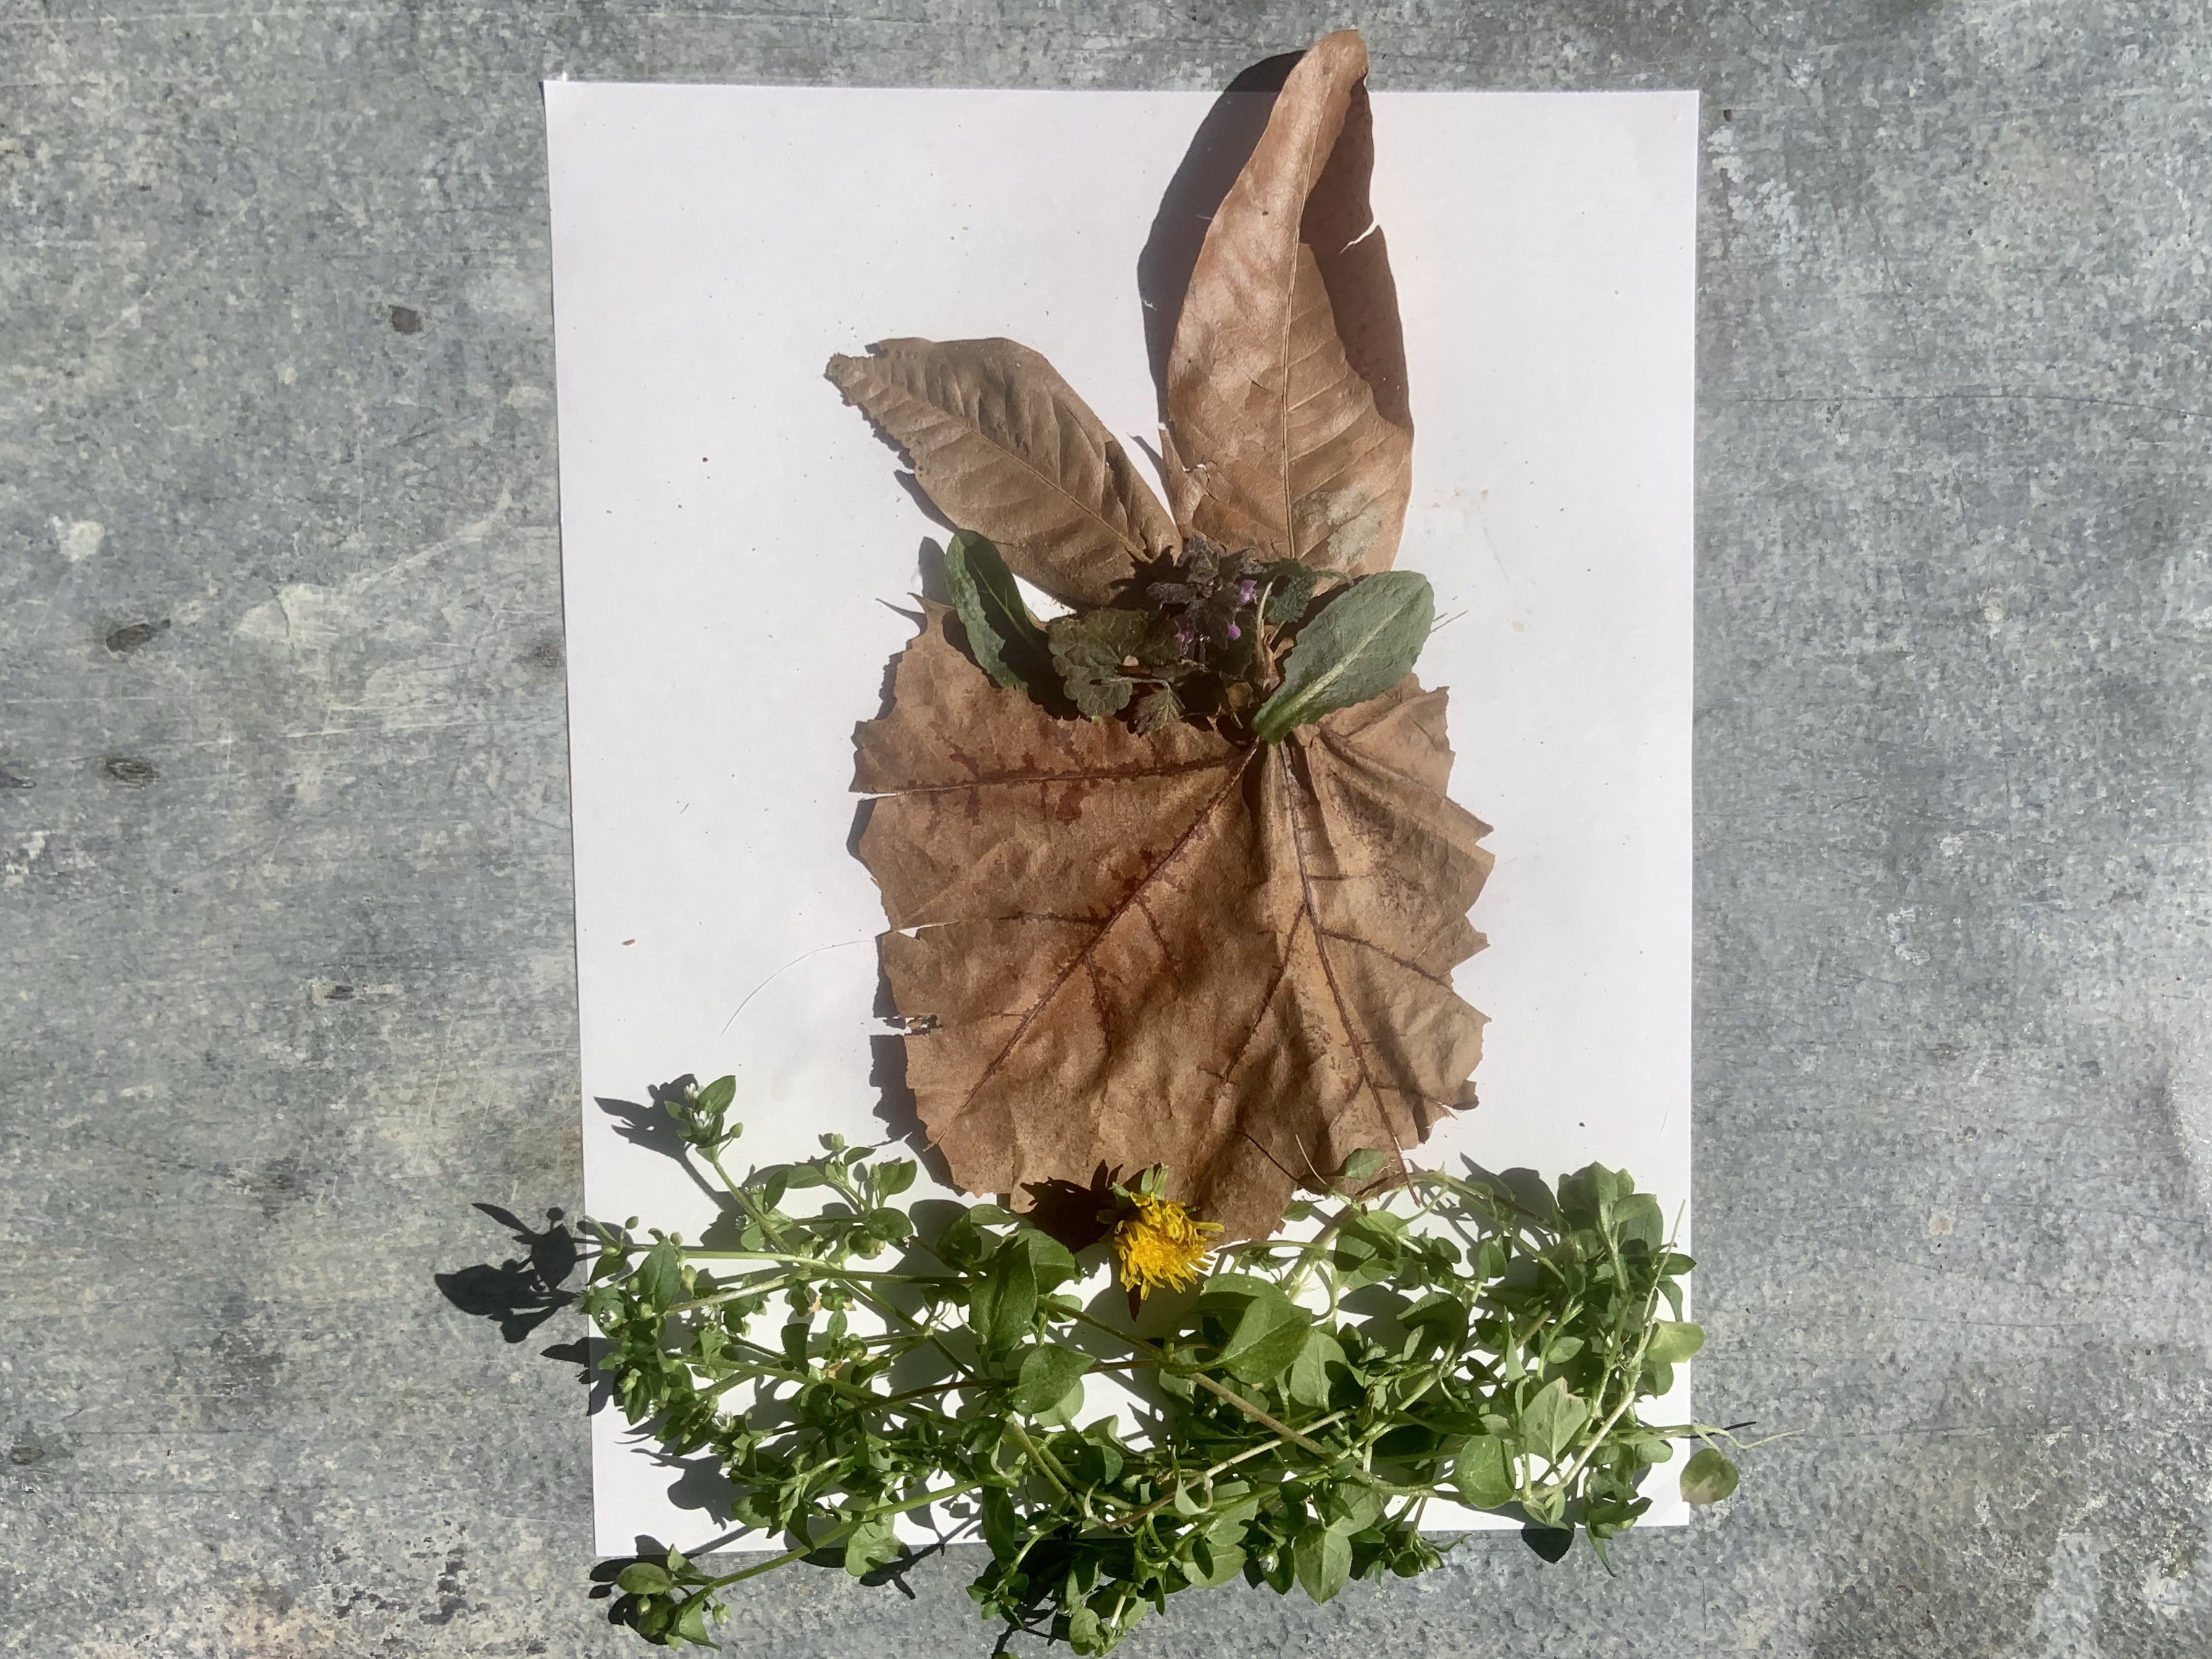
  • Go on a nature walk. If there’s one thing I’ve learned, my little absolutely loves getting outside and exploring. Going on a nature walk and having her find different things while walking is always a hit! You can have littles do a Nature Scavenger Hunt or look for something specific depending on their interests. Either way, getting outside is always a great idea.
  • Help to clean up a local park or beach. This is a great way to teach kids about the importance of keeping our environment clean. I swear Mila constantly asks if we can pick up the trash on the side of the road every time we’re in the car. Maybe one day, but we just focus on our walking paths for now.
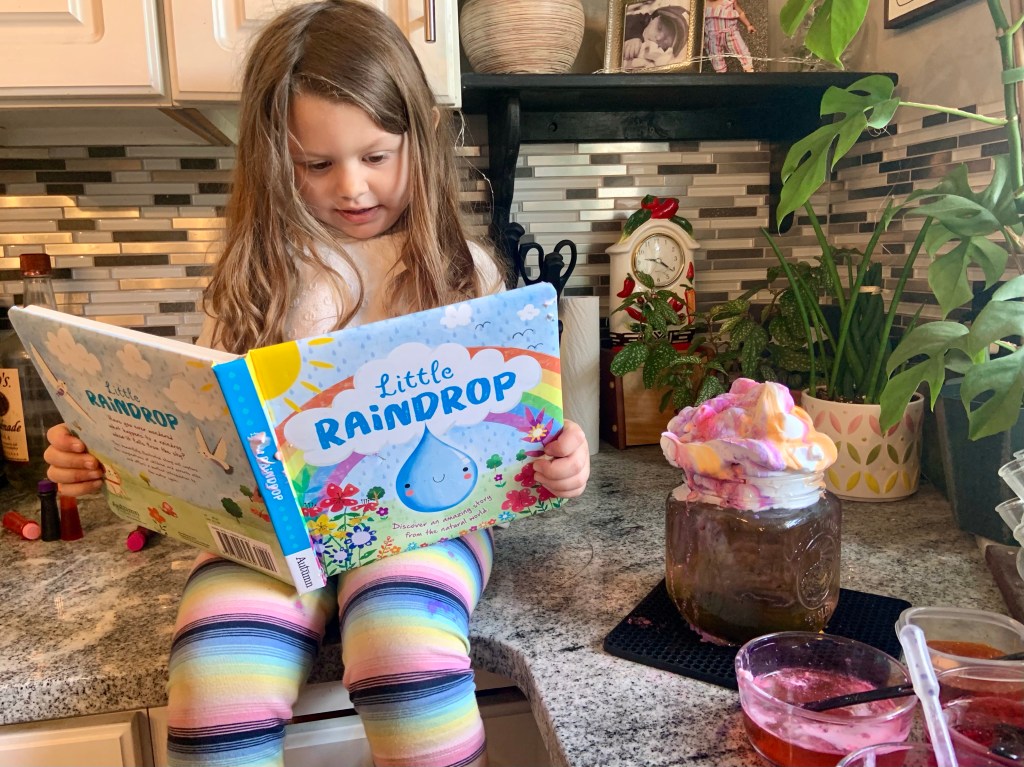
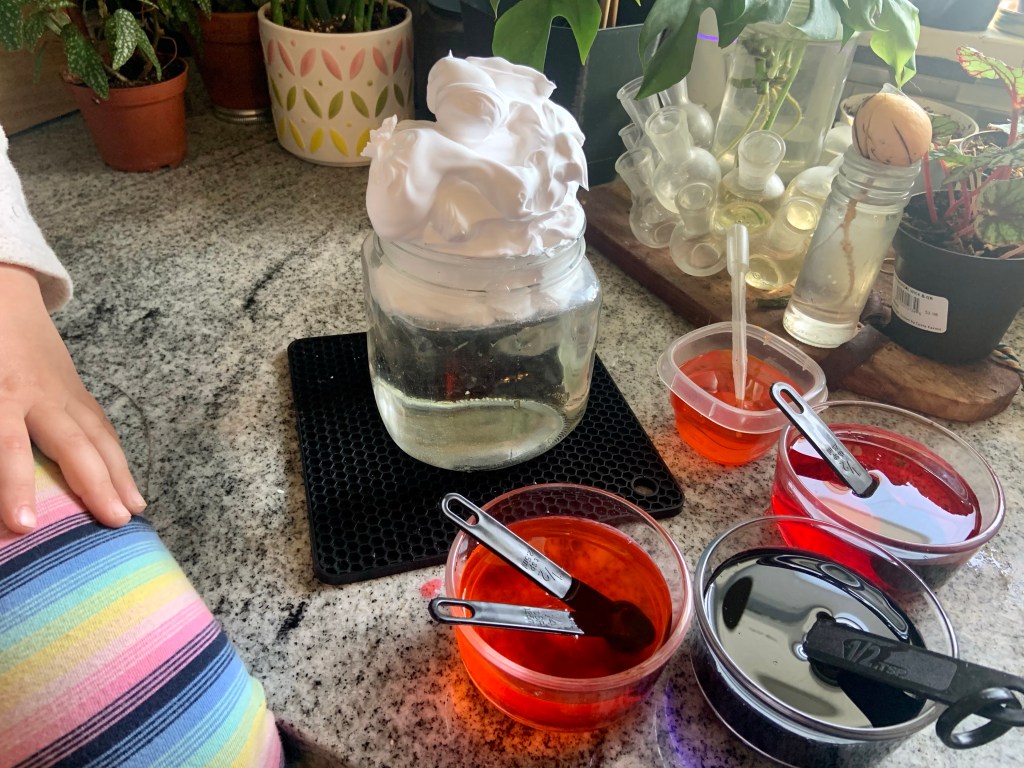
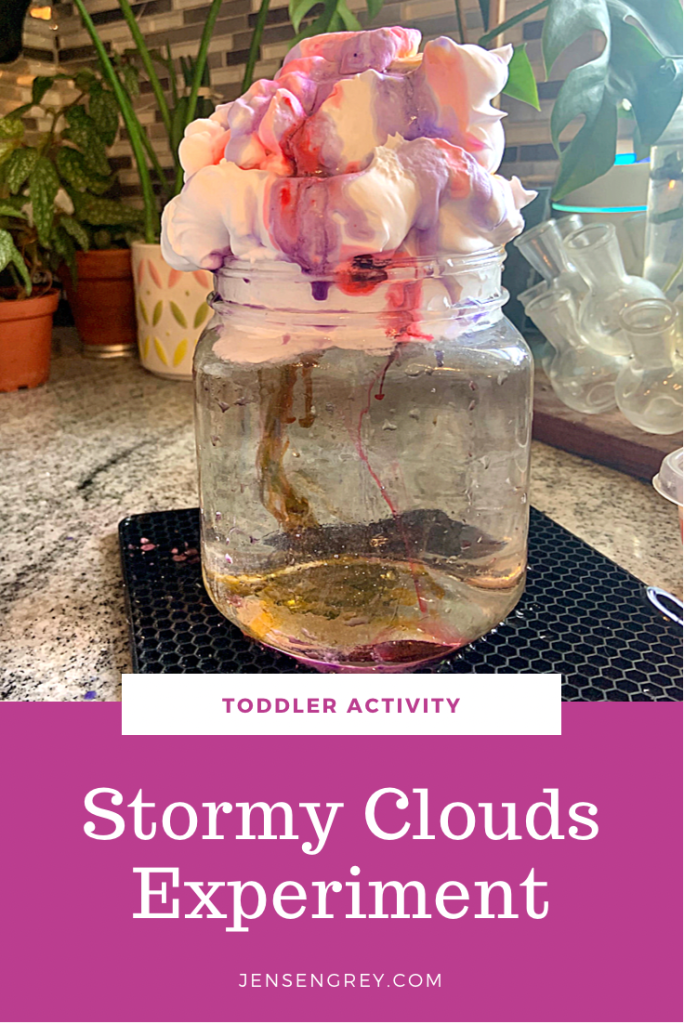
  • Learn about recycling. There are so many fun ways to teach kids about recycling. This water activity let Mila see the impact of what our trash does to our oceans.
  • Make a bug hotel. Get a cardboard box, paint it, fill it with leaves/twigs/flowers/rocks, and set outside. Bugs will love the space and you can learn about them while they’re exploring their new hotel.
  • Make a compost bin. Composting is a great way to reduce the amount of food waste that goes to landfills. We have not started one at our house yet, but it is a huge goal of mine to finally do it. One day soon and I’ll make sure I share with you guys too.
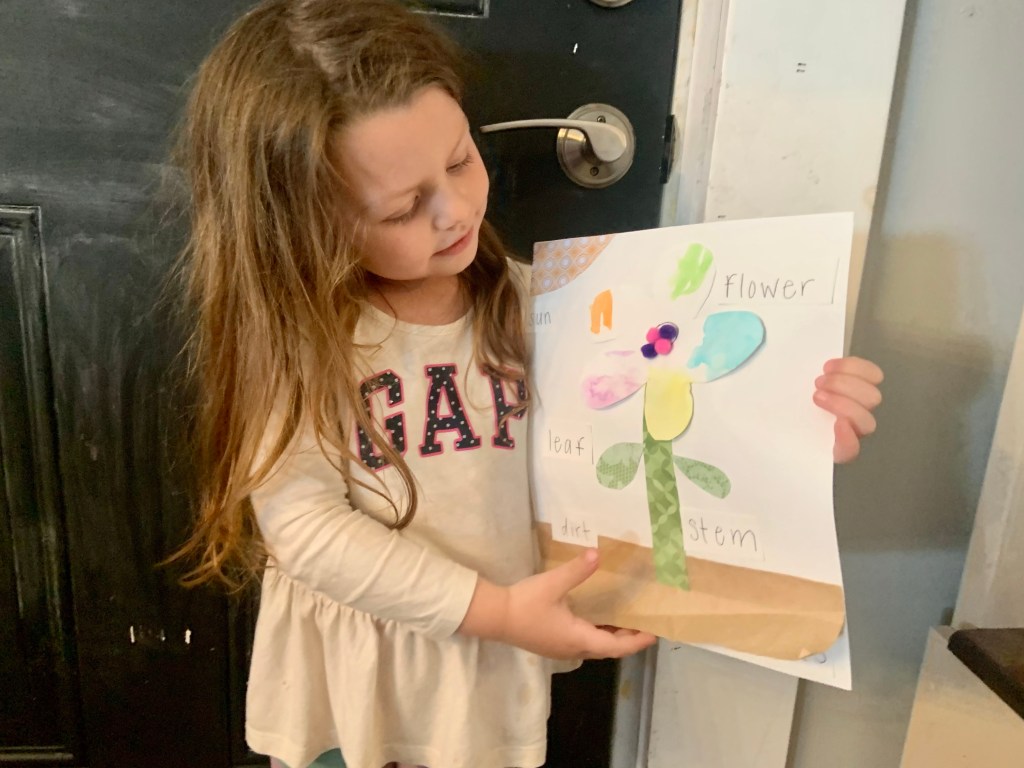
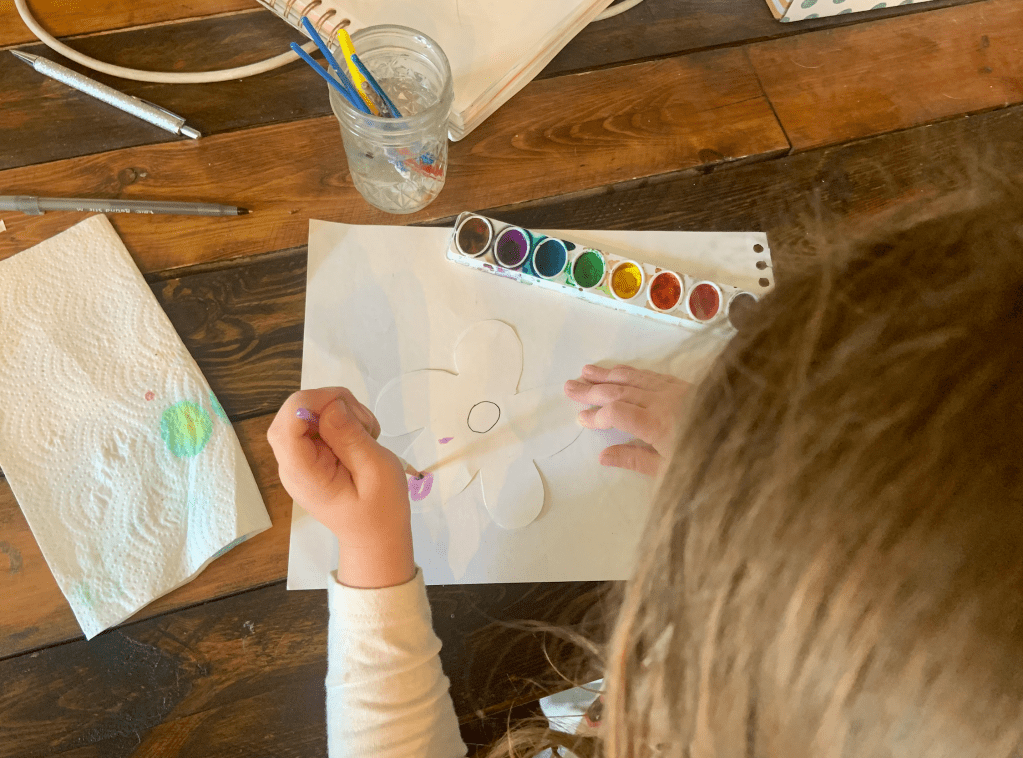
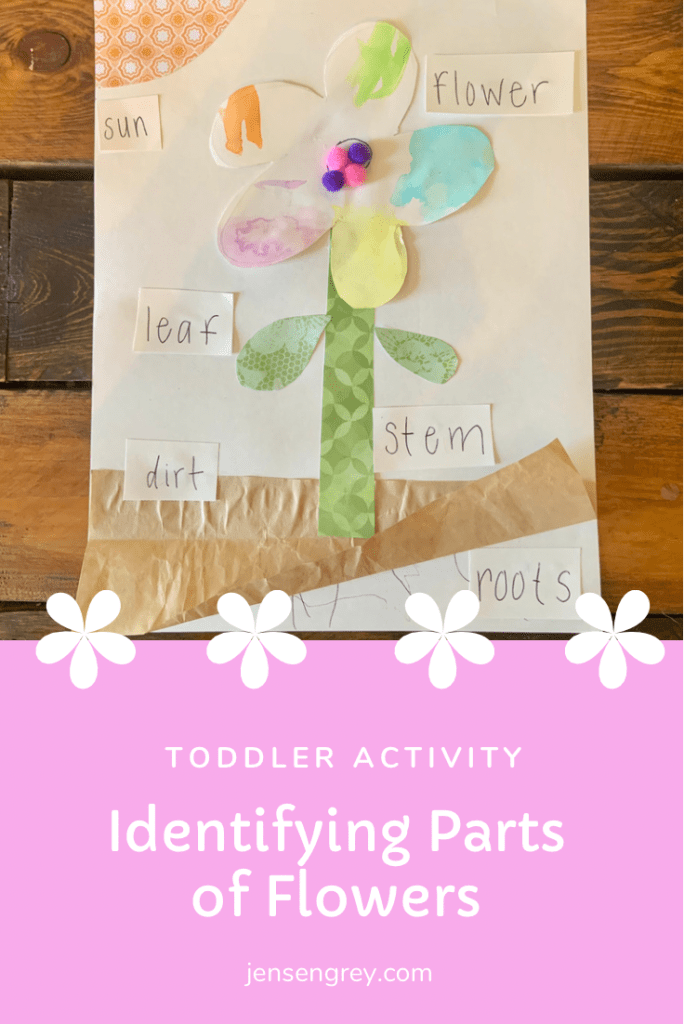
  • Start a garden. Growing your own food is a great way to teach kids about where their food comes from and how to eat healthy. We absolutely love making a garden every year. Some years we start off with seeds and others we get starts. Either way, it’s a great way to celebrate Earth Day!
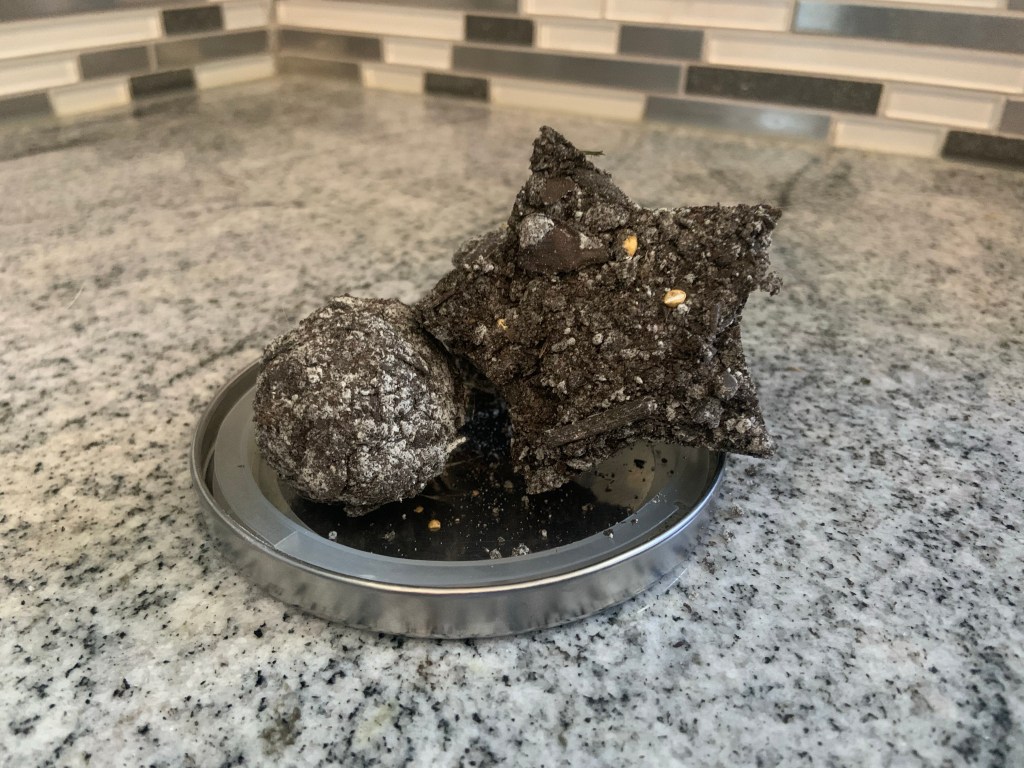
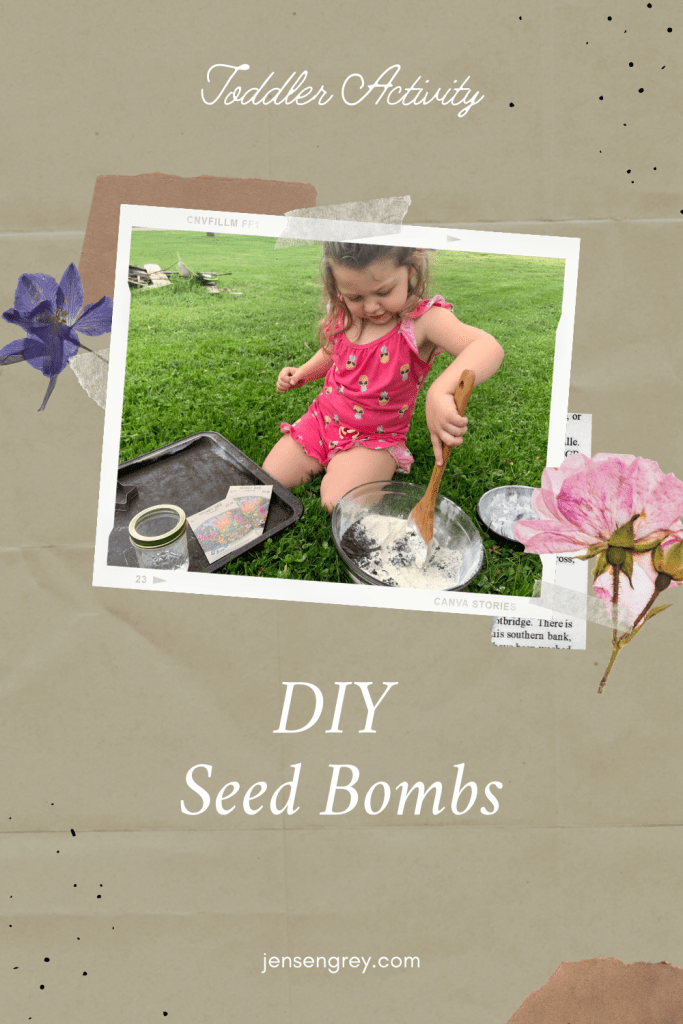
  • Make seed bombs.
  • Paint a pot. We have a lot of plants in our house, but seemingly never enough pots. A fun way to either get a plant for your home or replant a new one is for your little to paint a pot. When Mila does this, she knows she’s in charge of watering and checking in on that plant. It helps teach her responsibility and broaden her love for our Earth.
  • Don’t use paper or plastic plates. This is a huge one! We normally don’t use paper plates or any cutlery that you can throw away. It helps reduce waste and we get to buy really cute plates too.

I’d like to end this post by saying, it’s okay if you don’t do any of these things. Being a parent/guardian is hard work and you’re doing your absolute best!

Here are some other Earth Day projects if you’re feeling inspired:

Advertisement

Hoppy Spring Artwork with Peeps!

It’s the first day of spring! To celebrate, we created a piece to showcase all season long. The best part is that kids of any ages can join in on this fun.

For the last year, I’ve been decorating Mila’s room to match the current season or holiday. Instead of buying new things all the time, we’ve been making decor! It makes it so much more personalized and Mila is always super proud of her work.

This Hoppy Easter project was a ton of fun to make. We decided to recreate our family as bunnies on a small canvas, but the opportunities of this project are endless. Last year we made a project with the same concept, but with a year difference they look completely different.

Here’s what you’ll need:

Although we used canvas, you could definitely use paper or cardboard too. We use cardboard for so many crafts and activities. It’s a great way to reuse from leftover boxes.

To set up, lay something down you wouldn’t mind getting paint on. Then lay your canvas on top of that. Again, we use cardboard to catch all the left over paint. If you keep reusing the same cardboard, it looks so cool at the end of a season or year.

The most perfect size paint tray for these Peeps Bunnies are the tops of butter containers. They bunnies fit just right. Pick a color with your little for the bunnies. We decided to do just two colors: purple and blue. The purple represent the girls in our family and the blue the boys. You could also do the person’s favorite color per bunny or whatever colors are in your spring decor.

Next, have them use the Peeps Bunnies as a stamp. These aren’t too hard for little to grasp and use. I would definitely keep a wipe nearby in case they do get paint on their hand.

Although we didn’t add details to our bunnies, you could add faces which would make them even more cute. We did add grass though at the bottom and ‘Hoppy Spring’ at the top. Here are a few other sayings your sign could have too:

  • Every bunny is welcome here.
  • Hoppy Easter
  • Hanging with my Peeps
  • Some bunny loves you.
  • Don’t worry, be hoppy!

I love how are Hoppy Spring sign turned out and can’t wait to share all our crafts and activities we have planned all season long.

If you end up making this sign, please tag me on socials (Facebook, Instagram, Tik Tok) or comment a picture in the comments. I love seeing everyone’s interpretations. It makes me so happy seeing that we could help inspire you!

Most of all, make sure to treasure all those memories you get to make with your family. That’s the best thing we can do.


Here’s some other fun Easter activities to try with your kiddo this year:

Toddler Activity: Birdhouse Motel

Mila and I love watching birds in our backyard. After making DIY bird feeders, we thought it’d be fun to expand their spot on the tree. We created what I like to call a little birdhouse motel.

If you didn’t know, birds hold a special place in my heart. They remind me of Jensen and whenever I see a red or blue bird, I feel as if it’s him saying, “hello mom!” There are also birds on his urn. For some reason, his urn called out to me. It felt like it was a freeing image and after that, birds just felt right to celebrate him with. With that being said, we really welcome them in our backyard.

I’ve been looking at different birdhouses to purchase, but have been so busy I’ve forgotten to order one. Thanks mom brain! When I last went to the dollar store, I found two little kits, so I had to buy them. Then I figured we could reuse something at home too.

Not everything has to look perfect or expensive, it still turns out cute when made with love.

Here’s what we used for our birdhouse motel:

As I said before, if I could do this again, I probably would have ordered a different birdhouse kit. Yet, this one worked out perfectly because it wasn’t so big that Mila lost interest.

For the kits, I followed the instructions on the back of the package.

Honestly, I threw away the wood glue and went straight to my hot glue gun. It went a lot quicker! If you’re up for the challenge and have the patience, you could try the wood glue.

After the hot glue was dried, Mila and I each painted one of the mini birdhouses.

She wanted to pick out the colors and of course chose purple and pink. They’re truly her go to colors! It makes me laugh that most of the crafts and artwork in our house are bright and girly. Let’s hope the birds like it too!

While Mila continued to paint her birdhouse (which she did all by herself!), I cut out a big chunk of the juice carton and then washed it out. I also cut two holes across the top to pull string through to hang. It would have really helped if I had done this before I painted, but… I forgot!

Afterwards, I ended up painted it black (against Mila’s wishes) with a purple little heart on it. When it was dried, I pulled the string through and tied a knot.

When the kits were done, I also tied the string and hung them all together.

Mila went to find some grass, small sticks, and a little bit of bird seed to welcome in our new friends. It was so cute seeing which objects she thought the birds would like. If I were them, I’d feel right at home!

I can’t wait until we can get more birdhouses and maybe do another DIY.

These two were simple enough for us to do it in an evening. As she gets older, we can definitely do more complicated things. For now, she’s in love with our birdhouse motel. I am so proud of how well she painted and worked on her little project.

Now we get to wait to see who decides to move in and benefit from the motel. Hopefully different types of birds will visit and maybe even a bluebird or two. Fingers crossed!

What’s your favorite type of bird? Let me know in the comments.

If you love birdhouses and want some other inspiration to do a DIY one, check out what these moms have done.

Toddler Activity: Flyswatter Painting

We love process art! With spring here, as well as the bugs, we had to find a creative way to make a unique piece of art. This time, with a flyswatter and a hyper toddler!

Mila has a love hate with bugs. On one hand, she’s afraid of most of them. Then, on the other, she likes butterflies and the ‘pretty’ bugs. She despises flies and gnats, but was pretty impressed last year when she was introduced to the flyswatter. It’s like she’s on fly patrol whenever she sees one.

To get her creative and being active (which she loves), I thought this activity would be fun for her!

Not only is it fun for Mila to paint and have fun with it, the texture the flyswatter made was amazing to me. It turned out to be a great project.

Here’s what you’ll need:

  • Canvas or paper
  • Flyswatter
  • ‘Bugs’ (aka paint)

I love activities that have an easy set up. It works for Mila’s patience level and if I just need a quick activity, it’s so nice. This one was just like that.

The only real planning we did was picking out paint colors. Mila, of course, went for her normal colors: pink, blue, and purple. We had everything else already on hand, but you can find all of these materials almost anywhere.

Then, I just poured little dots of paint all over the canvas. I told Mila to pretend they were bugs and to smack them!

She had so much fun hitting all the different bugs. If I do this activity again, I’ll have her hit the certain colors to practice color matching. It would be fun seeing if she or any toddler would try their best not to hit any other colors too.

The patter the lines on the flyswatter made were perfect. When she asked for more bugs, the layered look was so cute. Somehow, the paints didn’t all muddle together and you could see all the different colors. I was worried they’d just become a huge purple blob!

I think this pattern would end up making great homemade wrapping paper too!

Mila had a ton of fun hitting the canvas and we ended up doing the same activity on a big wood board too.

I hope to finish her painting off with writing a quote on it in the near future. I love to combine her artwork with encouraging words! It just makes for a fun team project that I know we’ll enjoy for years to come.

Let me know in the comments if you like bugs or if you’re on Mila’s side of the flyswatter.

Check out how some other moms incorporated bugs and insects in their learning.

Toddler Activity: Frida Kahlo Portrait

In celebration of Cinco de Mayo, femininity, and art, Mila learned more about one of my favorite historical woman: Frida Kahlo. Of course, we had to do a craft of a Frida portrait; just with a toddler spin.

If you don’t know about Frida, she’s truly an amazing woman. Her history was tragic, but her perseverance to keep going against all odds really speaks to me. Through everything, she became one of Mexico’s greatest artists. She did a ton of self portraits, which is why we honored her this way.

Now, I understand Frida has NOTHING to do with Cinco de Mayo. This holiday commemorates Mexico’s unlikely defeat over France in 1862. Since then, it’s turned into a huge celebration.

With Mila being three, I don’t feel completely comfortable talking about war with her yet. It’s still a great way to teach her about Mexican culture. Frida is a huge cultural icon and since we love learning about art, it felt perfect.

Anyways, you can look up all kinds of information about CInco de Mayo and Frida all over the internet. Now it’s time to get to our little craft.

Here’s what you’ll need:

Honestly, i wish I had a free printable for everyone to make this craft a little easier. The elements in this project are a little detailed, but the end result is worth it.

To prep for this craft, I drew the different elements of Frida’s face on the construction or craft paper. They don’t have to be perfect. I think the more unique it is with its imperfections, the more it connects with Frida and her work.

I drew Frida’s hair, nose, eyes, and unibrow on black construction paper. Her lips on red scrapbook paper. The accessories on yellow scrapbook paper. Her body is made out of brown construction paper and the dress out of floral scrapbook paper.

Once everything was drawn, I cut them out.

Since we used a canvas, I hot glued Frida’s body and part of her hair down. Then, it was all up to Mila.

She has seen Frida and her artwork for her entire life. We read books with her in them, but I showered her a picture before she started. After, I asked if she could make her face.

Honestly, she did a great job. She loved talking about the different parts of her face and was in love with the flowers. I think she said Frida about a thousand times too. It amazes me that she picks up on all these new words.

I think she did a really good job. She put it in a prime spot for all to see! I love that she loves all her hard work.

Plus, it was a fun way to celebrate Cinco de Mayo.

Tonight we’ll be enjoying tacos and I’ll have a margarita. We love to celebrate these holidays and learn all about new culture.

Let us know what you think about this Frida craft and how you celebrate Cinco de Mayo!

Before you go, check out how these moms celebrate Cinco de Mayo and Mexican heritage.

Toddler Activity: DIY Mother’s Day Watercolor Cards

If you’re like me, you might be running a little behind getting Mother’s Day presents. One thing I always seem to forget is the card! This year, try these DIY watercolor cards!

These are a fun way to share your child’s creativity and a way for you to get involved too. Mila loved seeing our creations and I know they’ll be a hit. This could also be a great tradition to start with your children too. They could end up just making them for you as they get older.

All you need is:

This activity is pretty easy.

Go to an area or set up one that you’re okay with paint getting on. Then lay everything out. This specific water color paint was already mixed up. This made it easier for Mila so she didn’t have to dip her brushes in water first.

After, let them paint whatever they would like. There’s no right or wrong way for them to paint or create these.

Once they’re done with a specific card, have them sprinkle salt on the paint. Not only does this help it dry, it creates an amazing texture to the cards. Plus, it’s a little science experiment that your child will love!

They can continue with their painting and salt.

When the salt is dried, you and your child can rub it off. They’ll love seeing how it looks and Mila was in awe of how the salt was colored too.

The next part is up to you. If your child is older, you can instruct them to draw flowers or something that reminds them of the female figures in their lives. Mila wasn’t interested in this, so I personally drew flowers that flowed with her painting. It’s so much fun to take their creations and help make it even more special.

I ended up taping the paintings to cards. On the inside, I wrote a special note for each of Mila’s cards and had her sign it.

They turned out so cute and I really love them. Mila loved the outcome of her cards and was so proud of her painting. I think seeing it all come together helped complete her vision. As always, she will be so excited for her loved ones to receive them.

Honestly, I’m keeping one for myself so I can see how Mila’s art skills grow. Plus, I’m just as proud of her as she is of herself.

If you end up trying this activity, let me know in the comments. Make sure to tag me on Instagram if you share on there too.

What are your favorite types of Mother’s Day gifts?

Toddler Activity: DIY Seed Bombs

With Earth Day coming up quickly, Mila and I have been making Earth friendly DIYs. Our favorite is seed bombs! They are messy and fun to make, but they lead to a summer of beautiful flowers.

Since we love picking flowers, this is a win all around!

This recipe comes from the Kids Art Box, which is an amazing subscription service that has activities curated for your child with all the supplies.

Here’s what you’ll need to make seed bombs:

As I said before, this can get quite messy, but toddlers love it!

Mila was able to help with every part of the activity. It’s a great way to help them with their motor and life skills by pouring and mixing. Plus, we counted everything we could. This is also a great time to talk about Earth Day and how we need to protect our Earth.

Anyways, back to how to make the seed bombs!

First, mix the dirt, flower, and water up until you get a sticky concoction. Once it starts sticking to the spoon and forming together, add the two packets of seeds too. Mix them evenly in the mixture.

Then either use cookie cutter to form shapes or make little balls.

Let them dry out. I would definitely recommend waiting two days for them to dry out and then plant.

It’s really that simple!

Mila loved helping out with this project. It was a great way to talk to her about how plants and flowers grow. Actually seeing the seeds helped her understand where plants came from. In our “Identifying Parts of Flowers” activity, seeds were the biggest confusion for her. This DIY helped cross that bridge!

Another great idea to use with seed bombs is to give to family members. With Mother’s Day here, they’re a great DIY present for aunts, grandmas, and other motherly figures!

If you try this activity out or have any suggestions to make these seed bombs better, let me know in the comments.

Toddler Activity: Identifying Parts of Flowers

If your toddler is anything like Mila, they love flowers. Spring is the perfect time to not only go and pick flowers, but to learn and identify parts of flowers too!

After learning about the water cycle, it was an easy transition to learning about flowers. While reading the Little Raindrop Book, Mila noticed that flowers and plants were a part of a raindrops journey. Since I have a ton of plants, she connected how our houseplants get thirsty and that they needed water to live.

So, we reread the book, talked about what makes a flower, a flower, and made a fun craft too.

To do this activity with your child, you only need a few supplies.

Before beginning this activity, there’s a little prep to do.

First, cut out pieces to make a stem, flower, leaves, sun, and dirt. I did basic shapes, but you can be as creative as you want. For the flower, I left it white so Mila could paint and personalize it.

Then, cut squares for your child to actually label the flower. There should be six squares. Label them with these: sun, flower, stem, leaves, dirt, and roots.

There are a few ways to introduce this activity to your child. Mila interacts with flowers and plants everyday at our home and through the book I mentioned. Your child might enjoy going outside and actually seeing flowers before doing this.

After you talk to your child about flowers, it’s time to set up the activity.

I first had Mila paint her flower with watercolors. Since we’ve been in a creative mood, she loved this part!

After that was finished. I had Mila tell me what she remembered about flowers.

To get to the main part of the activity, I asked her a few leading questions. The first was where do flowers live. She instantly said dirt, so on our paper we laid down where dirt would be. Then I asked her what part of the flowers lived under the dirt. Roots! This is a difficult question and I think she only knew this through my plant propagations.

We glued down half of the ‘dirt’ and then drew roots underneath the other half. This makes this project interactive.

With the dirt and roots set, it’s a little easier for them to figure out what comes next.

Mila ended up putting the stem, leaves, and flowers on by herself. She helped me glue the pieces of paper and placed them where she wanted them to go. For the sun, I asked her what gives the plant life. the sun and water. She placed the sun in the top corner and said that was in the sky.

We used the little pompoms to talk about seeds. Since seeds are in the middle of the flower, we put them there. Although we didn’t talk about seeds, I did extend her learning and told her seeds go in the ground. Then I told her they sprout roots and flowers from that one little seed. She seemed pretty amazed by that.

After it was all laid out, I made her go through all the parts to label them.

As she stated what part of the plant was what, I glued down the appropriate label so she could see the words by them.

Overall, it was a fun activity that she’s really proud of. She’s showed everyone who’s came over.

Make sure to check out these seven spring books that can help you talk to your toddler about flowers and spring. They all have beautiful illustrations and I know toddlers and young children will LOVE them.

If you tried this activity, let me know in the comments. I’d love for you to tag me on Instagram at @greyskies.rainbowhighs so I can see everyone’s creations!

Before you go, check out how these other mom incorporated flowers with their kids:

Toddler Activity: Stormy Clouds Experiment

Rain rain, go away, come back another day! Or if you insist on staying, it’s a perfect time to introduce the water cycle to toddlers.

Mila LOVE experimenting. I try to tailor to her learning style as much as I can. She would prefer doing an experiment every day, but that’s not always possible. Thankfully, teaching her about rain and the water cycle gives us an amazing opportunity to get dirty and make what she calls Stormy Clouds.

This experiment is fun for both toddlers and adults. It not only talks about the rain cycle, but you can incorporate color recognition, the Scientific Method, and motor skills too; so much learning packed in one rainy day activity.

Here’s what you’ll need to make stormy clouds:

I’m going to first start off by saying this activity can get messy. Whenever there is food coloring, it somehow gets everywhere. I’d recommend placing a plate, mat, or some sort of paper under your big jar. Of course, food coloring will clean up, but it’s nice to just take some precautions.

Once you get an area where you’ll experiment set up, fill a big clear jar with water. The jar I used had a lip on it. I filled it up to the bottom of the lip so it gave me some room to put the shaving cream.

Next, mix your food coloring with water in little jars and bowls. Your child will be either scooping the colored water with a spoon or using a pipette. I used very small Tupperware containers for this step. For the water/food color combination, I used 8-10 drops of food coloring and eyeballed the water. I wasn’t too scientific about the measurements!

Then, add shaving cream to look like a cloud on top of the BIG jar of water. I did this step after the food coloring because Mila would not have had enough patience to wait for all of the colors.

After you’re set with the cloud, have your toddlers start spooning or dripping the dyed water over the could.

It takes a little bit for the water to penetrate through the cloud, but once it does, it’ll look like rain drops are coming out of it. Mila enjoyed using purple the best since it was easier to see. Although, it was fun to do a huge mix of colors.

Throughout the experiment, we talked about how clouds make the rain and then it goes down to Earth. I’m not a huge science buff, so I turned to Little Raindrop, which is a cute book that talks age appropriately about the water cycle! It has adorable pictures and tells the story about a single raindrop. Mila got this when she was one and it was too advanced for her. At almost three, it’s perfect!

Even if your child is not interested in learning about the water cycle or even into rain, the activity is fun to just make a mess and play with colors. I showed a group of adults this activity and they enjoyed it too. It really is fun watching the shaving cream turn different colors.

Next time it’s raining or anytime you want a hands on activity to do with your child, this Stormy Clouds Experiment is perfect!

If you liked or tried this activity, let me know in the comments!

Check out these rainy day activities from other moms!

Toddler Activity: Easter Bunny Nature Craft

Spring is finally here and we’re gearing up for Easter!

One way to celebrate was making a Easter Bunny Nature Craft. We were able to get outside and create, which is our favorite.

Everything we used, we found in our back yard, besides the paper and glue.

For our craft, I told Mila she was going to make a bunny out of leaves and flowers. Since she had a traumatic experience with the Easter Bunny this year, I wanted to help her see he wasn’t all that bad.

She loved finding leaves for the bunny’s ears and then a flower for his tail. It was a great hunt. I think it’d be awesome to have a scavenger hunt for all the components too.

Since the trees in Ohio still haven’t produced new leaves, a lot of what she found was old.

After we set it all out, I had her tell me what she wanted to use for the bunny’s body parts. She decided about its body, tails, and ears.

Then, I asked her if she thought we should make the bunny a crown. She did!

Once we added grass for the bunny to stay in, mila thought it was complete. As she played, I glued everything down.

It turned out so cute and it was fun watching Mila pick out different things around the yard. She was so creative in making the bunny too.

I can definitely see us doing something similar again! It’d be really challenging with having her find Easter eggs filled with supplies too. Maybe I’ll have a lamination machine by the next time we do an activity with nature. A girl can dream right?

As always, let me know in the comments if you tried to make an Easter Bunny Nature Craft! I know your child will love getting outside and creating too.