Unknown's avatar

About danielleridgway

Momma to an angel and a rainbow. Journeying through grief, parenting after loss, and living life one day at a time. Want to hear more from me? Follow me on Instagram: @greyskies.rainbowhighs If you have any other questions or anything else, just let me know. Thanks for reading!

Toddler Activity: Cupcake Liner Octopus

If you’re looking for a fun, ocean animal themed animal craft that’s not a mermaid, you’ve came to the right spot. This Cupcake Liner Octopus is easy to do and turns out looking cute!

When I say easy, I mean that Mila made her octopus with little assistance by me. Yay for independence and growth.

I also like that even though we LOVE mermaids, we’ve done so many this year. It was nice to switch up the ocean themed activities with a different sea animals. Mila remembers them from our trip to Ripley’s Aquarium in Myrtle Beach, which helped a lot!

The best part of this activity, you can find everything at your local dollar store for less than $5! Here’s what you’ll need:

First, have your child pick out what colors they want the octopuses to be. In our pack of cupcake liners we had pastels: pink, yellow, blue, and green.

Mila picked pink for her (of course) and yellow for me.

Then, to help your toddler succeed in this craft, cut four, long strips of scrapbook paper and tissue paper. These will be the octopus’s legs.

Then, glue together a strip of tissue paper and a strip of scrapbook paper. The scrapbook paper should be on top of the tissue paper. I folded them in the middle to help my guide where they should meet.

Mila did help me with gluing, but she doesn’t have the scissor skills yet to cut long strips. She enjoyed cutting some small pieces off though.

While the legs are drying, take two of the same color cupcake liners and glue them together. This reinforces the octopus and makes it stronger if you want it to hang longterm.

Then, it’s time for the googly eyes. Mila matched the octopuses’ body color with their eyes. She’s been obsessed with googly eyes so I knew I needed to have a craft that had them in there. It was a success.

Just glue the eyes on to the cupcake liner. For this, I flattened the liner to make sure they stayed.

After that, I had her used a marker to draw a smiley face.

Now it’s time to put the legs and body together!

I assisted her with this a lot because it’s a little tricky for toddler.

Take one of the legs and put glue on the center of the scrapbook paper part. Then, place it in the inside of the cupcake liner. It should look like the octopus has two legs dangling down.

After, flip it upside down again, repeat the gluing, and rotate how you put the legs so it’s opposite. You want to make a little ‘x’ in the middle.

While the first two strips dry on the octopus, help with the other one or wait until it dries a little more. I found it dried better if it was flipped on the octopus’s head.

When it’s strong enough make another ‘x’ with the remaining legs.

The legs should look like a star when they’re laying down. It’s hard to explain, but simple to do.

If you’d like to hang then, just take a string and scrapbook paper and glue it on top of its head. I put the string under the paper to give it a little more strength.

Now you’re all done!

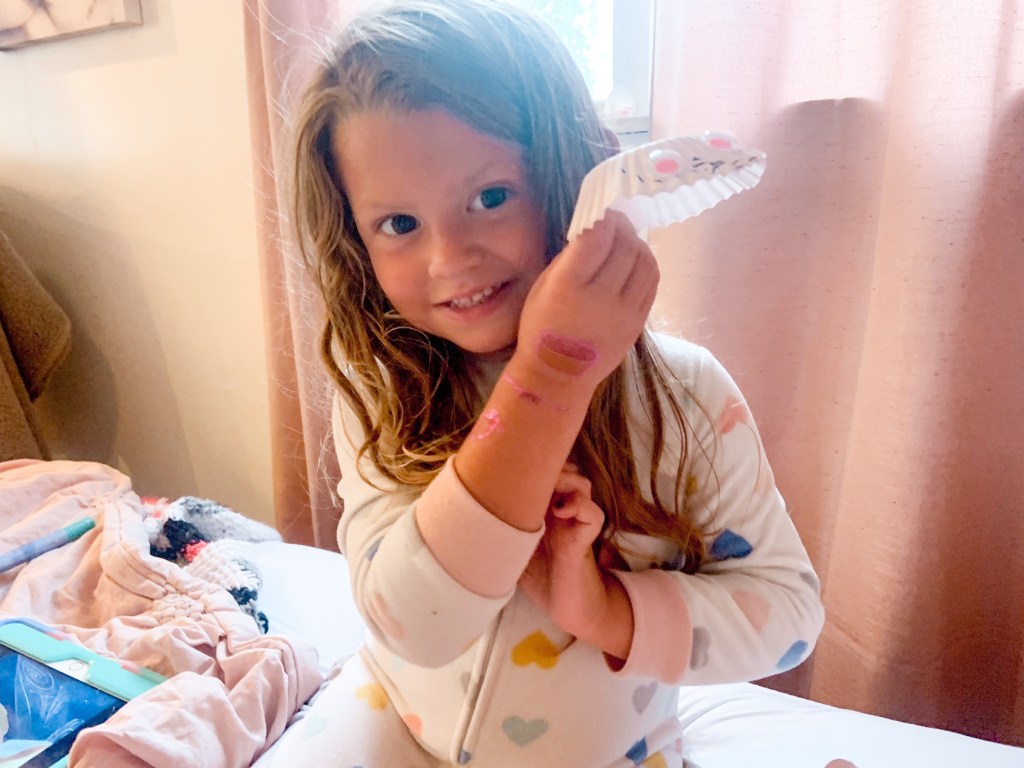
Mila was super proud of our Cupcake Liner Octopus and I think they both turned amazingly cute.

If you try this craft out, let me know in the comments. Also, if you know of a cute octopus book, I’d love for you to share it too. It’d be a great idea to pair this craft with a book for other toddlers.

After that, check out how these other moms incorporated mermaids and sea creatures in their day too!

Mother-Daughter Self Care Night Ideas.

There’s nothing more special than a mother daughter date night! Instead of going out, Mila and I stayed in and practiced self care.

Since this first week back to school has been hectic, staying in and relaxing felt right. We both needed the rest and the together time to recharge for the upcoming week. Plus, we got to just focus on what self care we needed.

To begin the night, I took a hot shower where I put on a hair mask (seriously the mask I linked does wonders!) and used sugar scrub.

I never have enough time to do these extra steps! Setting aside this time made my skin and hair feel so soft and new.

Mila, on the other hand, had a bubble bath beforehand. She spent her time doing her own makeup. I didn’t know this, but she definitely was feeling herself and all the glitter.

We kept it on until right before bed because she liked it. When you have a self care night, you have to feel like your best self.

I can’t blame her for wanting to be covered in glitter.

After my lotion dried, we put on our favorite jammies. Then, we got our self care essentials for the night:

Mila choose to read Unicorns Are Real! by Holly Hatam. I got to read a few pages of my fav The Great Gatsby.

As a busy mom, I don’t always get to read as much as I’d like. Just even being able to read a few pages felt so nice. It’s also amazing for Mila to see me reading and enjoying it! I hope so loves English and language as much as I do.

The book she picked out is adorable! She often asks me to read it to her before bed. Now she makes up the story when she looks at it herself.

Throughout watching movies and reading our books, we snacked on our cheese balls and jello.

Mila asked for water, without Mio. I’m so proud of her positive choices. I told her she could have anything to drink and that’s what she chose.

We ended the night taking selfies and I painted Mila’s nails. I love that we both have dark purple polish on now. Anytime we can match, I feel like we try to do it. Even when we stay in.

It wasn’t long after her nails dried until Mila fell asleep. We had wiped her makeup off and she was just relaxed.

I ended the night watching dance moms and maybe had a few more cheese balls too.

Our night was pretty perfect.

We love being together and doing the things we enjoy. I can’t express how much joy Mila brings me. Hopefully she’ll be able to see the importance of self care as she gets older.

We all deserve to love and cherish ourselves.

Have you ever had a self care night with just your or with your little? What was your favorite activity?

DIY Wine Cork Rainbow.

There’s nothing like a craft and sip night with your favorite bottle of wine. But what do to with all the corks?

Turn them into your craft!

This DIY Wine Cork Rainbow makes the perfect decoration in your house and the excuse to buy more wine.

I personally love different types of wine. My favorite is sweet reds though!

When I went to Italy during college, we had wine every night for dinner. I think that experience really helped me love wine even more. It brings back those fond memories.

Speaking of things I love, rainbows mean SO much to my family. They’re a signal of hope, Mila, and creativity. That’s why I had to create a rainbow with all these wine corks I have in my jar!

If you’re ready to do something with yours, here’s what you’ll need for this DIY:

  • Wine corks
  • Hot glue gun
  • Glue sticks

To cut down on the weight of the rainbow, I decided to cut the wine corks in half. This took a little bit, but there’s a ton of blogs and videos that cover the best ways to cut them in half.

I just grabbed a cutting board and knife to chop!

Before starting, I poured myself a glass of wine and started organizing them.

At first, I did it randomly. It still looked super cute, but I thought ombré-ing the colors from dark to light would look adorable. You could definitely paint your corks whatever colors too. I just personally like the natural shades of cork.

After you get it all laid out, it’s time to use your glue gun.

This obviously takes a little bit of time and patience. Just know that your rainbow probably won’t come out exactly how you set it up.

I hit glued the sides first. Then to help make it more sturdy, I hot glued the back where the creases were. Honestly, it probably didn’t need that extra step, but I’d rather just get it all done at once.

It’s been a little while since I’ve crafted just for me, but I think it turned out amazing!

I took down the big picture frame that held all my corks and replaced it with this. My kitchen now has a happy rainbow that blends in perfectly. I smile every time I glance at my wine cork rainbow.

For your next girls night, I hope you can try out this DIY Wine Cork Rainbow and enjoy a big glass of wine. Crafting is always so relaxing.

Before you go, let me know in the comments what your favorite type of wine is. If you don’t drink wine, have you ever crafted with wine corks before? Would you try?

Then, check out some of these wine recipes and crafts from creative, wine loving moms!

The Forgotten Kindergartener.

It’s back to school time.

Backpacks are filled up. Kids are excited to meet their new teachers and see their friends. Parents are watching their kids grow and learn. The elementary schools are getting a new group of students: kindergarteners.

They’re giddy and so cute. Moms and dads are snapping pictures with their kids walking into their school, in front of the door, or the school sign. It’s how it’s supposed to be.

Kindergarten teachers see their classroom fill up. Every desk is filled. They start to remember their students’ names and smiling faces. A huge classroom full of kindergarteners exactly where they’re expected, needed, and wanted.

But, I have the forgotten kindergartener.

There wasn’t a school list sent out to me. I didn’t get to prepare him to be away from me all day. No first day of school pictures or the last hug goodbye. There will never be ay more growth or learning or anything.

We don’t get to meet his teacher or have them remember his name or smiling face. He won’t get to run to my car in the pickup line and tell me all about his day.

He won’t wake up the next day and join his new friends for day two, three, or ever.

Because I have the forgotten kindergartener that I’ll always remember.

As much as I’m happy to see all the smiling back to school pictures this year, I’m really sad the one little boy’s pictures I want to see won’t be there. I’ll never get to see his smiling face or hear him talk.

Every day I know this fact, but it’s days like what was supposed to be his first day of kindergarten that it just hits a little harder.

Child loss and the grief that comes along does not just go away with time. You get stronger as a person, but it still is the most pain I’ve ever felt. Especially when you remember all that they should be and what you wanted for them.

Even though I didn’t really know how much I’d feel before Jensen’s first day of school, Mila and I did some positive things in his name.

We actually got the kindergarten supply list. A few days ago, we went out and bought what was on the list to donate a backpack. Mila helped pick out the different supplies and knew we were donating them for Jensen because some other little boy might need those supplies.

I packed them up with care, with Mila’s help and we went on our way to donate the backpack.

As hard and sad as it was, I’m always thankful to do things to honor Jensen and his life. This is definitely one that I hope to be able to do every year for him.

No matter what or how many years it’s been… I’ll always remember my baby boy.

Toddler Activity: Cake Decorating Sensory Bin

Cake it till you make it with this Cake Decorating Sensory Bin.

Shaving cream is such a fun ingredient to use during sensory play. It’s cheap, versatile, and easy to clean up. That makes this bin perfect for kids and their parents!

I also loved seeing Mila’s creativity again and again. She did a lot of different designs and pretended she was a cake decorated the entire time.

It was a sensory bin success!

Here’s the only things you’ll need for this one:

I feel like I always say this, but putting this bin together took no time.

The longest part was cutting up the straws into sprinkles. For this, all I did was randomly cut it in small pieces. I didn’t measure or make anything exact.

Then, I put shaving cream in the bin. There was a decent sized layer there, but I didn’t fill the bin.

After that, I set it in front of Mila and told her the goal of the sensory bin. She did everything else without me having to monitor it.

The only thing I did have to mention that this was shaving cream… not whipped cream.

Mila played with this activity for way longer than I set it up. Which is always a win in my book. When she wanted to clear off her cake, we put the sprinkles in a colander and cleaned them off.

This Cake Decorating Sensory Bin really was such a simple and fun activity for her!

I’m the future, I can see this activity expanding into her spelling words or having her make certain images. Mainly because it was so easy!

Let me know in the comments your child’s favorite type of sensory play. I think Mila’s might be water!

Check out these other sensory play ideas too:

Toddler Activity: The Rainbow Fish Paper Craft

The Rainbow Fish by Marcus Pfister is a classic story about sharing. Since preschool is quickly approaching, I thought this story and lesson would be great for Mila to read and remember.

Sharing can be a tricky thing to learn, so a book with beautiful illustrations is a great place to start.

One of my favorite parts about this activity is you can make it however you want!

Every fish will as individual as your child.

Here’s what you’ll need:

Before the activity, I prepped the basics of Mila’s fish.

Instead of a paper plate, I just used left over scrapbook paper to make the fish’s body, fins, and eyes. Then I cute out aluminum paper and taped it on the fins. I tried to mimic the book, but I think it turned out just fine!

At this time, I also premade the foil scales too!

To start out this activity, we first read The Rainbow Fish. While reading, I asked Mila a few different situational questions like…

Would you share your scales?

Do you think you have to share to have friends?

Would you be sad if someone didn’t share with you?

Do you know you’re just as beautiful inside as your are out?

Plus a few extra ones that I can’t think of at the moment. Yet, they all touched on these topics.

Another BIG thing we talked about with this book is consent. Mila stated she wouldn’t want to give away her scales or parts of her. When she said this, I thought… duh mom?!

We talked about how it’s okay not to share all of yourself or things with others. But it is nice to take turns with toys and listening ears.

Who knew she’d get so deep so fast.

Then, I had her use her watercolors to paint her own scales. She made me a beautiful pictures first.

After she was finished painting, we let the paint dry. It only took a little bit and you could speed it up with a hair dryer. Then make more paper scales.

To assemble rainbow fish, I taped the back of the scales and we talked about sharing and consenting again.

While she taped on her painted scales, I would ask her about positive ways she could share in preschool. Every time she thought of one, she could add a shiny scale to her rainbow fish.

I think she did excellent and was so proud of her fish after it was done!

When I reflect back on this book and activity, I’m really shocked with the questions she had. It also made me smile knowing she’ll be good to go with sharing and being a friend in preschool.

Let me know in the comments if you love The Rainbow Fish or what other books about sharing you’d recommend.

Then, if you love pairing books and activities, check out some of these ideas…

Water Balloon Tie Dye Sheets

What’s more fun than water balloons? Throwing water balloons with tie dye in them at a perfectly white sheet.

Let’s just say, Mila custom made me Water Balloon Tie Dye Sheets to celebrate summer.

AND… I love them!

So, let me tell you this first. It was sort of a huge jump of faith to do this activity. Mila was introduced to water balloons this year and throwing them at other people… do you get where my brain went?

Unlike Mila, I didn’t wear a swimsuit for this activity. I hoped with all my might she wouldn’t just throw them at me.

She ended up not getting me with them, but if you do this activity, beware! Tie dye is so hard to get off other clothes if you can’t get to it right away. It also takes a few days to get off of skin too.

But it was totally worth it! This is my favorite art project of the summer that I get to use frequently!

When you brave it with your kids, here’s what you need:

There is some prep going into this activity. It’s a lot easier than the Balloon Pop Artwork we did for Mila’s birthday!

For some reason, Mila slept until 10 am one morning, which gave me a perfect amount of time to set up and prep for this. Usually I’m all for older kids helping with prep, but this one can get messy!

To start off, I mixed the tie dye together and let the solution saturate.

Then, I color coordinated the balloons to match the dye. This way Mila knew what to expect and could do more color recognition… because we’re always learning!

After I thought they were mixed enough, it was time to start.

I’m guessing there’s probably easier ways to do this, but this is how I did it. If you know of a better way, PLEASE let me know in the comments.

Anyways, I blew up the water balloon with air. Then, added the tie dye water to the balloon by sticking the tip of the bottle into the balloon. After, I added extra water into it.

See… messy.

I found it better to blow it up as much as it could and not fill it completely with water.

Not going to lie, this took a little while, but I had the time. If you’re planning to do this, just know they’ll want way more than you planned! We probably threw around 50 to 75. They all didn’t hit or pop on the sheet.

So, if you think you have enough, do ten more.

After the balloons were done, I set up the outside area. Since I have access to pallets, I used that to hold the big sheet. The pillow cases went to the ground to catch the splatter.

At first I had it more upright, but it worked better with a slant.

By the time Mila woke up, the area was ready to rock-n-roll. Let’s just say, she woke up pretty easy when she found out what we’d be doing!

All I told her to do was get her swimsuit on and meet me outside.

Then she saw the balloons and sheets.

I told her the plan for the day and she took right to it. Again, I’m thankful she didn’t hit me with any because I wore normal clothes. Which I would not recommend.

We found out that the balloons were harder to pop than we originally thought. I’m guessing because of the air in them.

She found her rhythm though!

Look at that lefty power.

It took a lot less time to throw all the balloons than it did to pop them.

I actually made more midway through.

We had fun talking about the different colors and making predictions about their pop. Like I said, it took a little bit to figure out how to pop them. I think the sheets softened the blow.

It was fun watching Mila’s strength and persistence while throwing them.

One tip I’ll give is to turn the sheets and pillow cases half way through. That way both sides can get optimal color!

I am super impressed with how these turned out.

To finish off the tie dye, I folded the sheet and pillow cases up, put them in a plastic bag, and popped them in the refrigerator overnight. Then, wash and dry them. They’ll be ready to go after that.

Once I put them on the bed, I’ll update this post and share on Instagram and Facebook.

We’ll definitely be tie dying again with this kit! I’ve made a few shirts with it, but this way by far the most fun we’ve had with it.

Have you ever tie dyed anything? What’s your favorite way to do it? Comment to let us know.

I think ours is with water balloons!

After you comment, check out how these moms incorporate water play with their kids!

Rainbow Watermelon Pizza.

Did you know today was National Watermelon Day? To celebrate the occasion, we made a tasty little treat: Rainbow Watermelon Pizza.

This fun to make dish is perfect to take to cookouts or just to eat as a snack.

Plus… toddlers love to help decorate it too!

Here’s what you’ll need:

  • Watermelon
  • Fruit dip
  • Strawberries
  • Grapes
  • Pineapple
  • Kiwi
  • Blueberries

These are just the different fruits we used. You can use any that you like best!

First, cut all of your fruit into smaller pieces. I sliced the strawberries and kiwi, halved grapes, used pineapple chunks, and whole blueberries for ours.

Then, cut your watermelon into slices. Then you can make different shapes if your toddler would like. We used star cookie cutters for Mila’s.

After you figure out the shape of your watermelon pizza, spread fruit dip all over it.

You could also use whipped cream too!

Next, take the fruit and cover your watermelon. We ordered ours like the rainbow on Mila’s star and an inverted rainbow on my watermelon slice.

I absolutely love how these turned out!

It was such a tasty snack, but I bet they’d be a huge hit at family get-togethers or parties. I can even see it being an interactive station.

A melon-ion possibilities.

Yes. I absolutely had to throw a watermelon pun in the post somewhere. All of you would be disappointed if I didn’t after the Shark Week post! Which was just JAWesome.

No matter what you make these for, you won’t be disappointed with how they taste. And your toddler will love helping out with their snacks.

Let me know in the comments if you’ve ever made watermelon pizza.

OR

Comment your favorite fruit.

Toddler Activity: Olympic Ice Play

The Summer Olympic Games are heating up! Try cooling off with a fun way to get your toddler excited about the games with a science experiment.

This activity is easy to set up and keeps your toddlers attention for a long time.

Here’s what you’ll need:

  • Flowers (you could use other things for the rings)
  • Water
  • Container
  • Freezer
  • Ice
  • Brushes

For this one, you have to do a little preplanning.

The night before you want to do this activity, it has to be frozen. I used an old Tupperware container and filled it with water. Then, I added colored flowers that matched the Olympic Rings to the container.

To keep the flowers in place, I filled the containers lid and put something heavy on it in the freezer.

It ended up looking like this…

Next, I poured a little bit of table salt into a jar and got some brushes out too. To help the melt, I also gave Mila a little cup of water.

Everything was set into a bin to collect the water.

All I instructed Mila to do was rescue the ‘rings’ and that the salt helped make it melt.

While she worked hard on melting all the ice, we talked more about the Olympics and I showed her how it was spelled. She’s recognizing letters that are in her name and the ones she sees frequently!

She worked really hard on figuring out the best way to make the ice melt.

Her favorite was to dump a ton a salt on the ice, then water. It was so neat watching her figure out why it was melting and what helped.

It really did take her a while for all the ice to melt. I was impressed with her persistence.

Once it was melted, she enjoyed played with the letters and the flowers in the water. Water is always a great sensory component!

During this play time, Mila let me know her favorite Olympic sport was swimming… of course. She thinks it’s amazing how fast they can get through the water! I’ve also showed her some gymnastics routines that she enjoyed.

We always love sensory play and toddler activities.

It gives toddlers time to have fun while learning and parents time to get some things done! This Olympic Ice Play was a hit with Mila and I think a ton of other kids will enjoy it too!

Do you watch the Olympic Games? What’s your favorite sport?

25 Self Care Activities for August.

Hello August!

I’m completely shocked August is here. Summer is flying by, but there’s always time to focus on self care.

As parents, we sometimes forget to take care of our mental and physical health. It’s hard to fit it all in. Here are twenty-five self care activities that you can do all August long.

They can even be fun if you have littles with you too!

1. Take a walk

2. Read a book

3. Do a paint by number

4. Journal

5. Bake a cake

6. Listen to a podcast

7. Binge a new series

8. Go swimming

9. Take a drive

10. Tend plants

11. Visit a market

12. Go kayaking

13. Call a friend

14. Go to lunch

15. Buy your favorite coffee

16. Look at the stars

17. Pick flowers

18. Dance

19. Volunteer

20. Go on a walk

21. Cuddle an animal

22. Put new sheets on your bed

23. Take a phone free day

24. Go fishing

25. Try something new

No matter what you decide to do this month, make a little time just for you.

You are so important.

If you feel selfish for taking you time… your kids will benefit from your self care too! A happy mom or dad leads to happy kids.

You and your happiness matters.

What self care activity do you plan on doing this month? Any that you’d add to the list? Let me know in the comments.