Toddler Activity: Balloon Pop Artwork

Toddlers love throwing things, balloons, and making a mess. I’ve found a way to incorporate all three with this Balloon Pop Artwork.

For Mila’s third party birthday in April, (I still haven’t wrote about it. I’ll get to it as soon as I can!) we did a Young, Wild, and THREE theme. That meant animals prints, fun games, and friends. The day was truly a celebration.

Anyways, one our favorite parts was all the littles creating a huge piece of art. It was a carnival style game that the adults had a lot of fun watching.

This set up was inspired by the balloon throw game at fairs and carnivals.

And yes… we used darts.

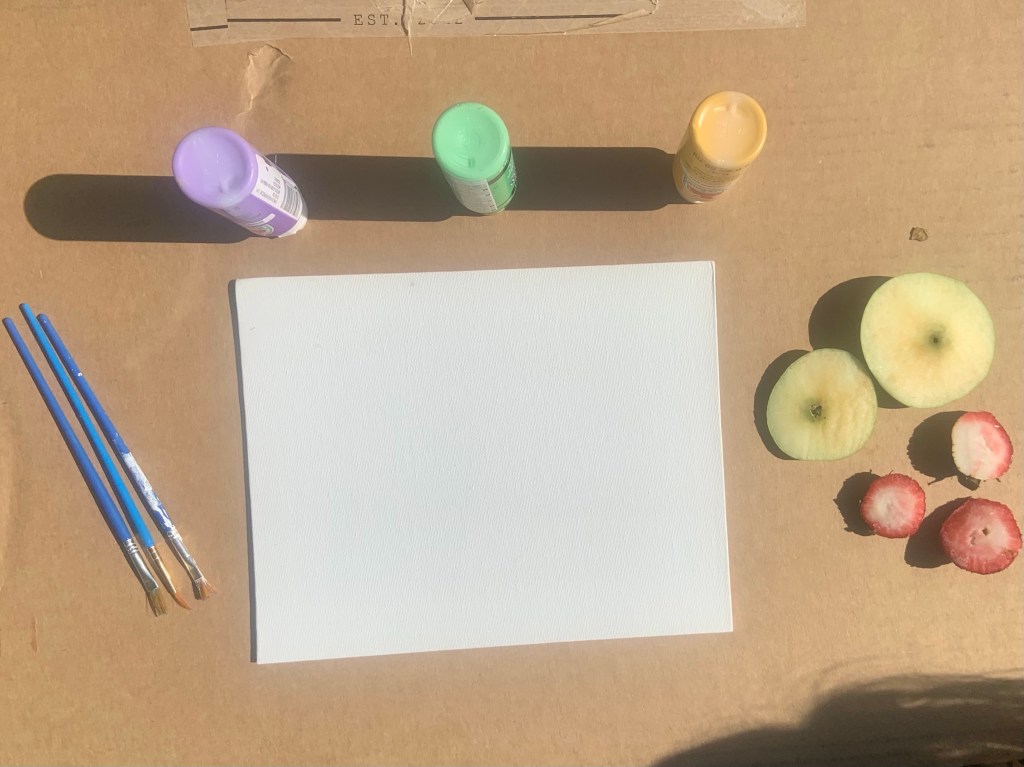
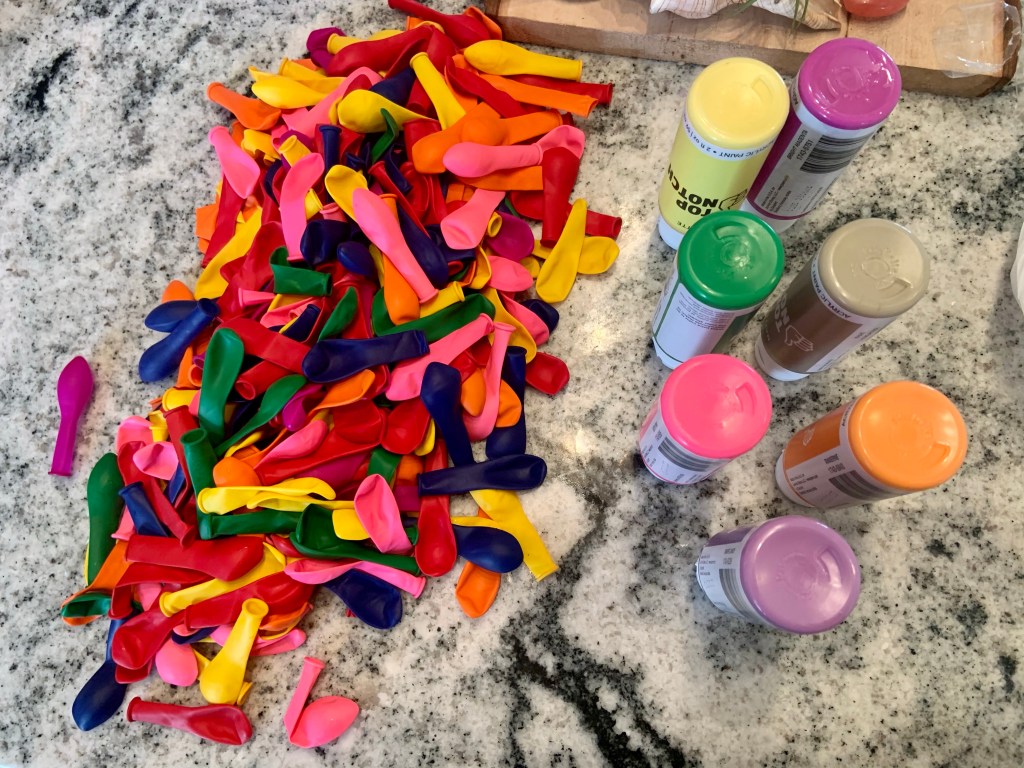
Here are the supplies we used to create the balloon pop artwork:

  • A huge canvas
  • Paint
  • Balloons
  • Darts
  • Tape
  • A crazy group of kids

I want to start off saying that this project was a little more difficult than I thought. Honestly, I didn’t think through the getting the paint in the balloon or how to get them to stick effectively.

Yet… here are my tips to help! Plus a funny story or two.

The first thing you need to do is get the paint inside the balloons. Like I just said, this is not easy at all. If you have a trick of how to do this, please let all of us know. Hopefully that tip will help someone else out.

Anyways, after trial and error, I found the best way to put paint in a balloon are these steps.

First, blow up the balloon and let the air out. Second, stretch out the hole and squeeze paint in the balloon. Then, blow it up.

It sounds way simpler and easier than it actuality.

At first, I tried filling the balloon with a straw. It helped for a little bit, but pulling it out put paint everywhere. Which isn’t good when you still have to blow the balloon up.

BEWARE…

With one balloon, I had it half blown up then accidentally let go of the opening… that meant, all the air and paint in the balloon sprayed back on me.

It covered my face and shirt. Some got on my teeth and in my mouth. It just was not a great time.

So, there will be some trial and error.

After you’re done blowing up balloons, you have to tape them to the canvas.

I’d suggest not taping the balloons on or getting the activity outside until you’re ready to do it. The balloons will pop in the heat and tape doesn’t hold really well on canvas.

Yes… some balloons did pop prematurely in my house. It was a mess the entire time. But made me laugh too. What’s life without laughter?

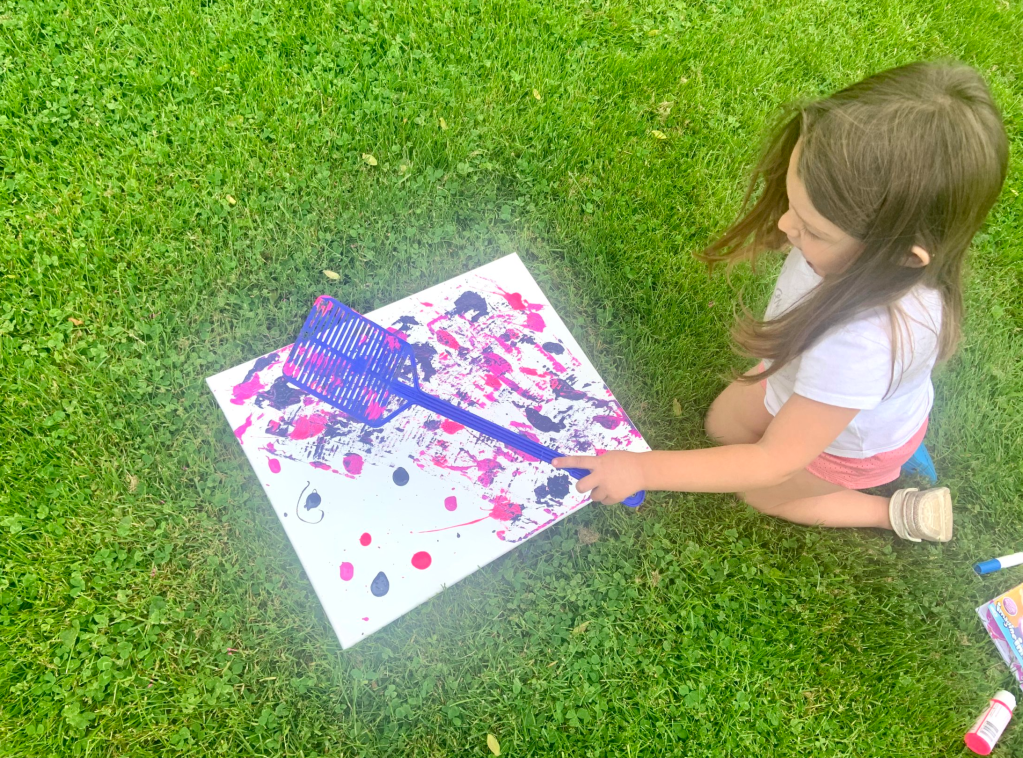
Once it’s time to throw down, just set it up where you don’t mind paint getting every where.

We lined the kids up and told them what to do.

They all took turns really well and had a lot of fun with it. The littler kids had a harder time, but as soon as they realized they could throw hard, it got a lot more fun.

If you have kids close to the canvas, they will get paint on them!

Anyways, it took them a while to actually pop all the balloons. They started inching up after a few rounds.

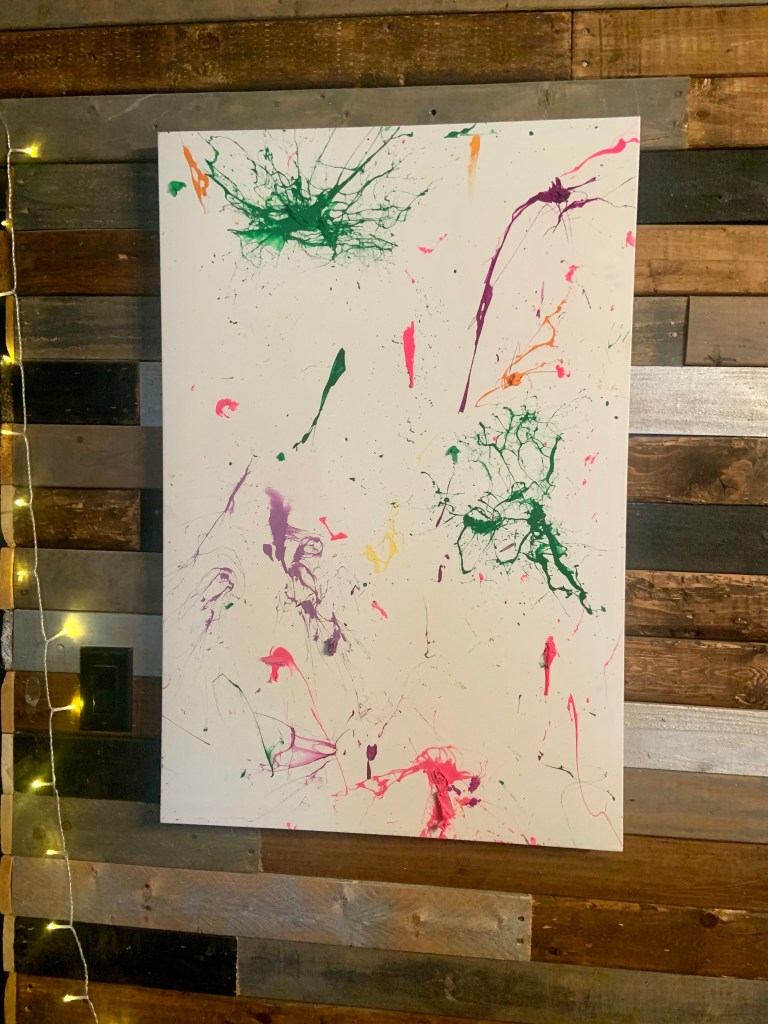
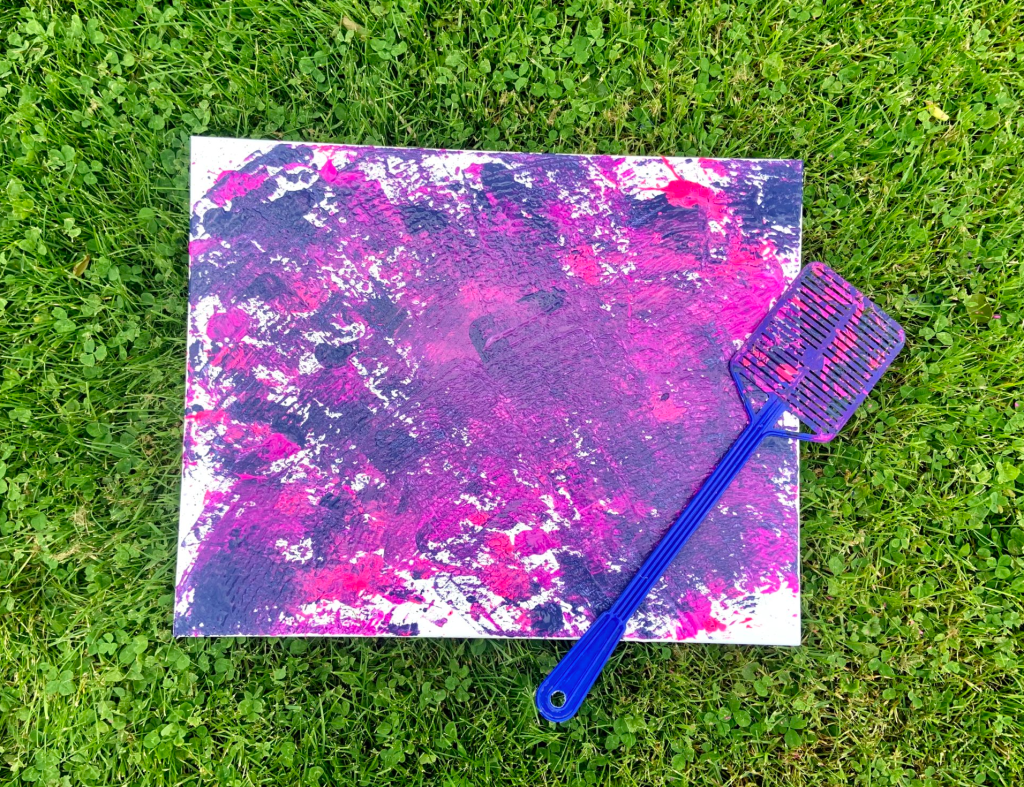
Even though it was messy, I’m obsessed with out the Balloon Pop Artwork turned out. It’s actually the first piece of art someone sees when they walk into my house right now.

I love that every time we look at it, we remember how much fun Mila’s third birthday was!

Let me know in the comments if you’ve ever done an activity like this? Or let me know what your favorite carnival game is.

Before you go, check out how these moms incorporate the carnival in their play…

Unicorn Flower Crown

What’s more magical than a unicorn? A unicorn wearing a flower crown!

With flowers popping up everywhere and our love for being outside, we combined the two for another fun backyard activity.

Mila and I LOVE unicorns. I swear when I found out I was having a girl I bought all the rainbow, pink, and unicorn items I came across. Its no wonder why Mila loves them.

Since I know she is interested in backyard adventures (scavenger hunt, birdhouse motel, fairy-tale garden, and nature crafts), I figured we’d do another one.

As always, you’ll have most of the items you’ll need on hand.

Here they are:

  • Cardboard
  • Sharpie
  • Pen
  • Yard full of flowers

All you need to do is cut a cardboard piece to whatever size. I had just recently bought candles and they came in the cutest, smallest boxes. They turned our perfect doe this activity.

Then, try your best to draw a unicorn ‘head.’ To simplify it, I obviously just drew the eyelashes, hair, horn, and some hair.

It’s not perfect by adult standards at all, but Mila thought it was the best thing ever.

Next, poke holes where a crown would be. I just used a pen to push through the cardboard. It would have been cute to do a pattern on a bigger piece of cardboard. Maybe next time!

All that’s left is to let your child explore the outdoors.

I let Mila pick ANY flowers in the yard and flower garden. For some reason, she was intent on picking the little white ones.

To keep the flowers from falling, I had Mila thread the stems in. If your little can get long stems, this will help. Then when she went back to look for more, I made little knots from the excess stems.

If you have an older child, this might be good practice for them!

Once she was all done, she gave me the biggest smile possible. Then ran inside to place it on her favorite shelf. It needed the prime spot.

Toddler activities do not need to be crazy intense for your child to be engaged and happy. Most of the time, it only take a piece of cardboard and creativity from a parent!

Even though we love unicorns, this activity can easily be tailored to your child’s animal preference.

I hope you and your child enjoys this activity! Let me know in the comments if you’ve done something similar or what animal you’d draw.

Before you go, check out how these moms included magical animals in their play:

The Very Hungry Caterpillar Butterfly Activity

And I just think that whatever our eyes touch should be beautiful, tasteful, appealing, and important.

Eric Carle

Children’s book author and illustrator Eric Carle has gifted us so many stories. Each help us learn about the world around us. I loved reading his work as a kid and Mila loves it now. I was so sadden to hear about his death in May.

His books inspire us to slow down and find the beauty in all parts of life. Even with a paper plate. I am so thankful for the lessons he’s imprinted on so many of us. His words will echo throughout generations.

In celebration of Eric Carle’s life and our favorite book of his, we made a transforming craft. By following along with The Very Hungry Caterpillar, we turned a paper plate caterpillar into a beautiful butterfly.

Here’s what you’ll need for this activity!

The only prep that was difficult for this activity was drawing a caterpillar/butterfly shape on the paper plate. It ended up looking like the big caterpillar at the end.

Mila did not question it, so I think it turned out good. It does make me giggle though.

This activity is quite simple though. It actually reminds me of this years St. Patrick’s Day book activity. Pretty much every time the caterpillar eats, your child should put a dot of paint on the caterpillar paper plate.

I tried to get Mila to do big dots of paint, but she refused. It still turned out cute.

You can also correlate the colors too. Whatever color food the caterpillar eats, they can put it on the caterpillar.

It was also a great way to practice counting too. We counted the food on the page, then again when she was painting. I actually love the holes in the book to help them count.

When it gets to the page with the not so hungry caterpillar and it’s cocoon, just flip the paper plate to where the paint is touch the other side. Then press down so the paint can transfer to the other side.

I pretended that the folded up plate was the cocoon. Then we counted to fourteen (two weeks in the cocoon) and flipped the paper plate as we turned the page.

Mila was shocked with the activity. I don’t think she knew we were making a butterfly. She just thought we were painting just to paint again.

The reveal of TWO butterflies was quite exciting.

In the end, it was another fun activity to do while reading one of our favorite books. I’m sure we’ll find more with it too.

Mila has been reading it by herself too. It’s the cutest thing. She swears the caterpillar eats a hot dog, not a sausage during his binge.

Not matter what, I love the message Eric Carle’s books have brought to our lives. We will always read them and do fun activities with. He has left a legacy in our lives forever.

What’s your favorite Eric Carle book?

Toddler Activity: Fruit Flower Art

Two of our favorite parts of spring are the flowers and fresh fruit! Since we love playing with our food, we were inspired to paint our favorite spring things.

Mila has painted with different foods before. It’s always fun watching her experiment with how the paint works with random objects. Even more fun, is how it all turns out at the end.

For this project, we ate a fruit salad for breakfast and then used the tops for her artwork. It was a way to reduce waste and be creative all in one.

Try saving some of your fruit scraps and try this flower painting out.

Here’s all you’ll need:

This activity is really simple to set up.

All you need to do is prep your fruits, get a painting space, and pour paint. Your child will figure out the rest as they paint.

For Mila, I asked her if she wanted to paint flowers and we looked at the ones in our yard.

Since we practiced the parts of flowers, she kept telling me which part of the flower she was painting. It’s amazing how much little ones remember! She also kept telling me the apples made bigger flowers and the strawberries made smaller ones.

I absolutely love watching the world Thats in her head come alive on a canvas. She’s always telling a story when she paints too.

We make sure to ‘sign’ and date the back of every painting she does. One day I’ll need to get a huge storage box for all of her paintings. For now, they’re decorated all throughout my house.

With these paintings, you can have your child paint whatever they’d like. Mila just loves flowers and it’s perfect for springtime.

I think she did an amazing job!

What’s the craziest thing you’ve ever painted with and what do you think Mila and I should try next?

If you’re into playing with your food, but just prefer eating it, check out these recipes from other mamas. I’m sure you’ll love them!

Toddler Activity: Birdhouse Motel

Mila and I love watching birds in our backyard. After making DIY bird feeders, we thought it’d be fun to expand their spot on the tree. We created what I like to call a little birdhouse motel.

If you didn’t know, birds hold a special place in my heart. They remind me of Jensen and whenever I see a red or blue bird, I feel as if it’s him saying, “hello mom!” There are also birds on his urn. For some reason, his urn called out to me. It felt like it was a freeing image and after that, birds just felt right to celebrate him with. With that being said, we really welcome them in our backyard.

I’ve been looking at different birdhouses to purchase, but have been so busy I’ve forgotten to order one. Thanks mom brain! When I last went to the dollar store, I found two little kits, so I had to buy them. Then I figured we could reuse something at home too.

Not everything has to look perfect or expensive, it still turns out cute when made with love.

Here’s what we used for our birdhouse motel:

As I said before, if I could do this again, I probably would have ordered a different birdhouse kit. Yet, this one worked out perfectly because it wasn’t so big that Mila lost interest.

For the kits, I followed the instructions on the back of the package.

Honestly, I threw away the wood glue and went straight to my hot glue gun. It went a lot quicker! If you’re up for the challenge and have the patience, you could try the wood glue.

After the hot glue was dried, Mila and I each painted one of the mini birdhouses.

She wanted to pick out the colors and of course chose purple and pink. They’re truly her go to colors! It makes me laugh that most of the crafts and artwork in our house are bright and girly. Let’s hope the birds like it too!

While Mila continued to paint her birdhouse (which she did all by herself!), I cut out a big chunk of the juice carton and then washed it out. I also cut two holes across the top to pull string through to hang. It would have really helped if I had done this before I painted, but… I forgot!

Afterwards, I ended up painted it black (against Mila’s wishes) with a purple little heart on it. When it was dried, I pulled the string through and tied a knot.

When the kits were done, I also tied the string and hung them all together.

Mila went to find some grass, small sticks, and a little bit of bird seed to welcome in our new friends. It was so cute seeing which objects she thought the birds would like. If I were them, I’d feel right at home!

I can’t wait until we can get more birdhouses and maybe do another DIY.

These two were simple enough for us to do it in an evening. As she gets older, we can definitely do more complicated things. For now, she’s in love with our birdhouse motel. I am so proud of how well she painted and worked on her little project.

Now we get to wait to see who decides to move in and benefit from the motel. Hopefully different types of birds will visit and maybe even a bluebird or two. Fingers crossed!

What’s your favorite type of bird? Let me know in the comments.

If you love birdhouses and want some other inspiration to do a DIY one, check out what these moms have done.

Toddler Activity: Flyswatter Painting

We love process art! With spring here, as well as the bugs, we had to find a creative way to make a unique piece of art. This time, with a flyswatter and a hyper toddler!

Mila has a love hate with bugs. On one hand, she’s afraid of most of them. Then, on the other, she likes butterflies and the ‘pretty’ bugs. She despises flies and gnats, but was pretty impressed last year when she was introduced to the flyswatter. It’s like she’s on fly patrol whenever she sees one.

To get her creative and being active (which she loves), I thought this activity would be fun for her!

Not only is it fun for Mila to paint and have fun with it, the texture the flyswatter made was amazing to me. It turned out to be a great project.

Here’s what you’ll need:

  • Canvas or paper
  • Flyswatter
  • ‘Bugs’ (aka paint)

I love activities that have an easy set up. It works for Mila’s patience level and if I just need a quick activity, it’s so nice. This one was just like that.

The only real planning we did was picking out paint colors. Mila, of course, went for her normal colors: pink, blue, and purple. We had everything else already on hand, but you can find all of these materials almost anywhere.

Then, I just poured little dots of paint all over the canvas. I told Mila to pretend they were bugs and to smack them!

She had so much fun hitting all the different bugs. If I do this activity again, I’ll have her hit the certain colors to practice color matching. It would be fun seeing if she or any toddler would try their best not to hit any other colors too.

The patter the lines on the flyswatter made were perfect. When she asked for more bugs, the layered look was so cute. Somehow, the paints didn’t all muddle together and you could see all the different colors. I was worried they’d just become a huge purple blob!

I think this pattern would end up making great homemade wrapping paper too!

Mila had a ton of fun hitting the canvas and we ended up doing the same activity on a big wood board too.

I hope to finish her painting off with writing a quote on it in the near future. I love to combine her artwork with encouraging words! It just makes for a fun team project that I know we’ll enjoy for years to come.

Let me know in the comments if you like bugs or if you’re on Mila’s side of the flyswatter.

Check out how some other moms incorporated bugs and insects in their learning.

Toddler Activity: Frida Kahlo Portrait

In celebration of Cinco de Mayo, femininity, and art, Mila learned more about one of my favorite historical woman: Frida Kahlo. Of course, we had to do a craft of a Frida portrait; just with a toddler spin.

If you don’t know about Frida, she’s truly an amazing woman. Her history was tragic, but her perseverance to keep going against all odds really speaks to me. Through everything, she became one of Mexico’s greatest artists. She did a ton of self portraits, which is why we honored her this way.

Now, I understand Frida has NOTHING to do with Cinco de Mayo. This holiday commemorates Mexico’s unlikely defeat over France in 1862. Since then, it’s turned into a huge celebration.

With Mila being three, I don’t feel completely comfortable talking about war with her yet. It’s still a great way to teach her about Mexican culture. Frida is a huge cultural icon and since we love learning about art, it felt perfect.

Anyways, you can look up all kinds of information about CInco de Mayo and Frida all over the internet. Now it’s time to get to our little craft.

Here’s what you’ll need:

Honestly, i wish I had a free printable for everyone to make this craft a little easier. The elements in this project are a little detailed, but the end result is worth it.

To prep for this craft, I drew the different elements of Frida’s face on the construction or craft paper. They don’t have to be perfect. I think the more unique it is with its imperfections, the more it connects with Frida and her work.

I drew Frida’s hair, nose, eyes, and unibrow on black construction paper. Her lips on red scrapbook paper. The accessories on yellow scrapbook paper. Her body is made out of brown construction paper and the dress out of floral scrapbook paper.

Once everything was drawn, I cut them out.

Since we used a canvas, I hot glued Frida’s body and part of her hair down. Then, it was all up to Mila.

She has seen Frida and her artwork for her entire life. We read books with her in them, but I showered her a picture before she started. After, I asked if she could make her face.

Honestly, she did a great job. She loved talking about the different parts of her face and was in love with the flowers. I think she said Frida about a thousand times too. It amazes me that she picks up on all these new words.

I think she did a really good job. She put it in a prime spot for all to see! I love that she loves all her hard work.

Plus, it was a fun way to celebrate Cinco de Mayo.

Tonight we’ll be enjoying tacos and I’ll have a margarita. We love to celebrate these holidays and learn all about new culture.

Let us know what you think about this Frida craft and how you celebrate Cinco de Mayo!

Before you go, check out how these moms celebrate Cinco de Mayo and Mexican heritage.

Toddler Activity: DIY Mother’s Day Watercolor Cards

If you’re like me, you might be running a little behind getting Mother’s Day presents. One thing I always seem to forget is the card! This year, try these DIY watercolor cards!

These are a fun way to share your child’s creativity and a way for you to get involved too. Mila loved seeing our creations and I know they’ll be a hit. This could also be a great tradition to start with your children too. They could end up just making them for you as they get older.

All you need is:

This activity is pretty easy.

Go to an area or set up one that you’re okay with paint getting on. Then lay everything out. This specific water color paint was already mixed up. This made it easier for Mila so she didn’t have to dip her brushes in water first.

After, let them paint whatever they would like. There’s no right or wrong way for them to paint or create these.

Once they’re done with a specific card, have them sprinkle salt on the paint. Not only does this help it dry, it creates an amazing texture to the cards. Plus, it’s a little science experiment that your child will love!

They can continue with their painting and salt.

When the salt is dried, you and your child can rub it off. They’ll love seeing how it looks and Mila was in awe of how the salt was colored too.

The next part is up to you. If your child is older, you can instruct them to draw flowers or something that reminds them of the female figures in their lives. Mila wasn’t interested in this, so I personally drew flowers that flowed with her painting. It’s so much fun to take their creations and help make it even more special.

I ended up taping the paintings to cards. On the inside, I wrote a special note for each of Mila’s cards and had her sign it.

They turned out so cute and I really love them. Mila loved the outcome of her cards and was so proud of her painting. I think seeing it all come together helped complete her vision. As always, she will be so excited for her loved ones to receive them.

Honestly, I’m keeping one for myself so I can see how Mila’s art skills grow. Plus, I’m just as proud of her as she is of herself.

If you end up trying this activity, let me know in the comments. Make sure to tag me on Instagram if you share on there too.

What are your favorite types of Mother’s Day gifts?

Toddler Activity: Identifying Parts of Flowers

If your toddler is anything like Mila, they love flowers. Spring is the perfect time to not only go and pick flowers, but to learn and identify parts of flowers too!

After learning about the water cycle, it was an easy transition to learning about flowers. While reading the Little Raindrop Book, Mila noticed that flowers and plants were a part of a raindrops journey. Since I have a ton of plants, she connected how our houseplants get thirsty and that they needed water to live.

So, we reread the book, talked about what makes a flower, a flower, and made a fun craft too.

To do this activity with your child, you only need a few supplies.

Before beginning this activity, there’s a little prep to do.

First, cut out pieces to make a stem, flower, leaves, sun, and dirt. I did basic shapes, but you can be as creative as you want. For the flower, I left it white so Mila could paint and personalize it.

Then, cut squares for your child to actually label the flower. There should be six squares. Label them with these: sun, flower, stem, leaves, dirt, and roots.

There are a few ways to introduce this activity to your child. Mila interacts with flowers and plants everyday at our home and through the book I mentioned. Your child might enjoy going outside and actually seeing flowers before doing this.

After you talk to your child about flowers, it’s time to set up the activity.

I first had Mila paint her flower with watercolors. Since we’ve been in a creative mood, she loved this part!

After that was finished. I had Mila tell me what she remembered about flowers.

To get to the main part of the activity, I asked her a few leading questions. The first was where do flowers live. She instantly said dirt, so on our paper we laid down where dirt would be. Then I asked her what part of the flowers lived under the dirt. Roots! This is a difficult question and I think she only knew this through my plant propagations.

We glued down half of the ‘dirt’ and then drew roots underneath the other half. This makes this project interactive.

With the dirt and roots set, it’s a little easier for them to figure out what comes next.

Mila ended up putting the stem, leaves, and flowers on by herself. She helped me glue the pieces of paper and placed them where she wanted them to go. For the sun, I asked her what gives the plant life. the sun and water. She placed the sun in the top corner and said that was in the sky.

We used the little pompoms to talk about seeds. Since seeds are in the middle of the flower, we put them there. Although we didn’t talk about seeds, I did extend her learning and told her seeds go in the ground. Then I told her they sprout roots and flowers from that one little seed. She seemed pretty amazed by that.

After it was all laid out, I made her go through all the parts to label them.

As she stated what part of the plant was what, I glued down the appropriate label so she could see the words by them.

Overall, it was a fun activity that she’s really proud of. She’s showed everyone who’s came over.

Make sure to check out these seven spring books that can help you talk to your toddler about flowers and spring. They all have beautiful illustrations and I know toddlers and young children will LOVE them.

If you tried this activity, let me know in the comments. I’d love for you to tag me on Instagram at @greyskies.rainbowhighs so I can see everyone’s creations!

Before you go, check out how these other mom incorporated flowers with their kids:

Toddler Activity: Stormy Clouds Experiment

Rain rain, go away, come back another day! Or if you insist on staying, it’s a perfect time to introduce the water cycle to toddlers.

Mila LOVE experimenting. I try to tailor to her learning style as much as I can. She would prefer doing an experiment every day, but that’s not always possible. Thankfully, teaching her about rain and the water cycle gives us an amazing opportunity to get dirty and make what she calls Stormy Clouds.

This experiment is fun for both toddlers and adults. It not only talks about the rain cycle, but you can incorporate color recognition, the Scientific Method, and motor skills too; so much learning packed in one rainy day activity.

Here’s what you’ll need to make stormy clouds:

I’m going to first start off by saying this activity can get messy. Whenever there is food coloring, it somehow gets everywhere. I’d recommend placing a plate, mat, or some sort of paper under your big jar. Of course, food coloring will clean up, but it’s nice to just take some precautions.

Once you get an area where you’ll experiment set up, fill a big clear jar with water. The jar I used had a lip on it. I filled it up to the bottom of the lip so it gave me some room to put the shaving cream.

Next, mix your food coloring with water in little jars and bowls. Your child will be either scooping the colored water with a spoon or using a pipette. I used very small Tupperware containers for this step. For the water/food color combination, I used 8-10 drops of food coloring and eyeballed the water. I wasn’t too scientific about the measurements!

Then, add shaving cream to look like a cloud on top of the BIG jar of water. I did this step after the food coloring because Mila would not have had enough patience to wait for all of the colors.

After you’re set with the cloud, have your toddlers start spooning or dripping the dyed water over the could.

It takes a little bit for the water to penetrate through the cloud, but once it does, it’ll look like rain drops are coming out of it. Mila enjoyed using purple the best since it was easier to see. Although, it was fun to do a huge mix of colors.

Throughout the experiment, we talked about how clouds make the rain and then it goes down to Earth. I’m not a huge science buff, so I turned to Little Raindrop, which is a cute book that talks age appropriately about the water cycle! It has adorable pictures and tells the story about a single raindrop. Mila got this when she was one and it was too advanced for her. At almost three, it’s perfect!

Even if your child is not interested in learning about the water cycle or even into rain, the activity is fun to just make a mess and play with colors. I showed a group of adults this activity and they enjoyed it too. It really is fun watching the shaving cream turn different colors.

Next time it’s raining or anytime you want a hands on activity to do with your child, this Stormy Clouds Experiment is perfect!

If you liked or tried this activity, let me know in the comments!

Check out these rainy day activities from other moms!