Toddler Activity: Celery HeARTwork

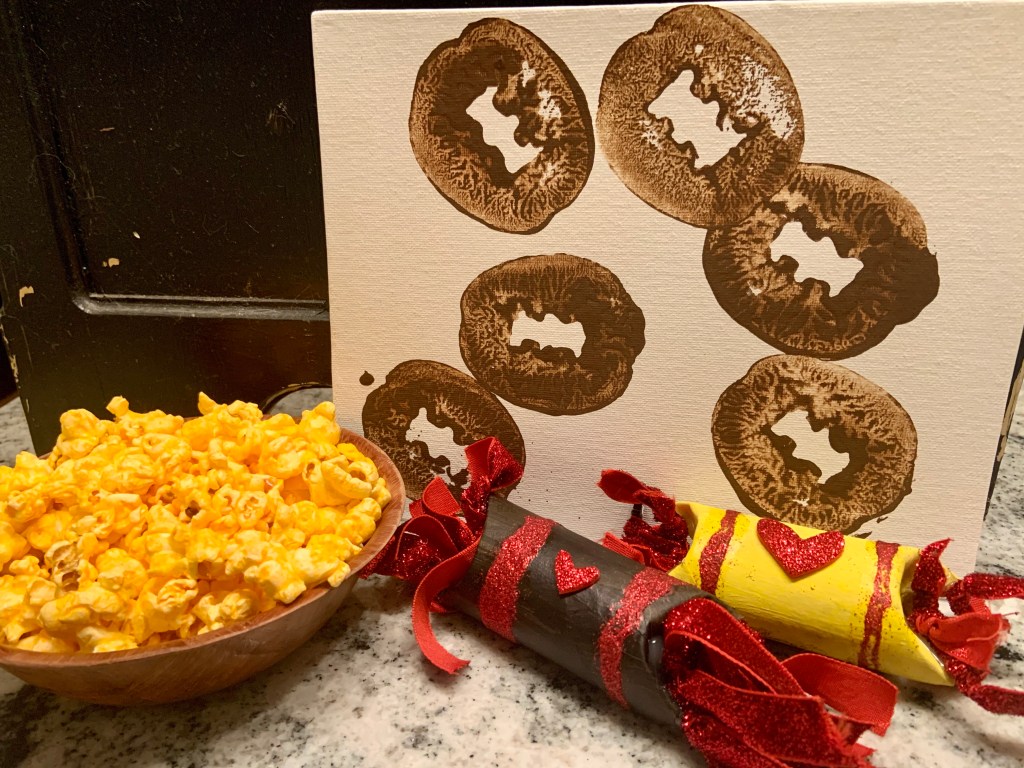
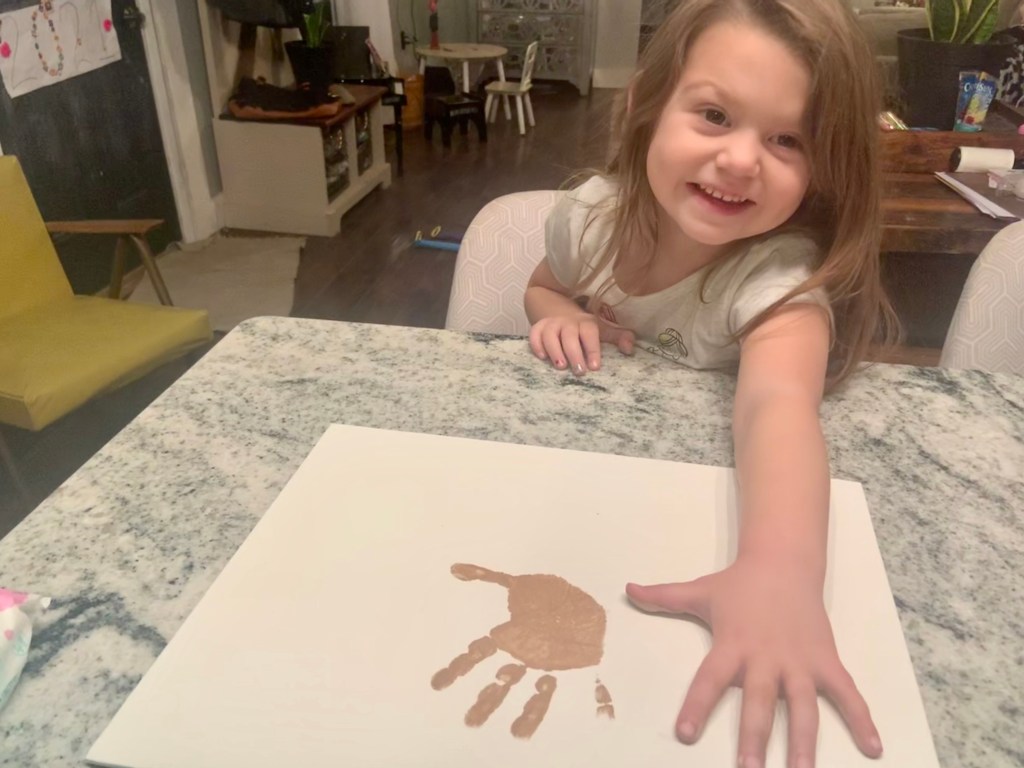
Process art is one of my and Mila’s favorite ways to be creative. This week we discovered that celery makes the cutest, little hearts.

Isn’t that just amazing or is it just for me since I’m the worst at drawing heart?

Anyways, this celery heARTwork activity is so easy to set up and your child can be as creative as they want. It was also great for us to mix in with snack time.

It takes playing with your food to a different level.

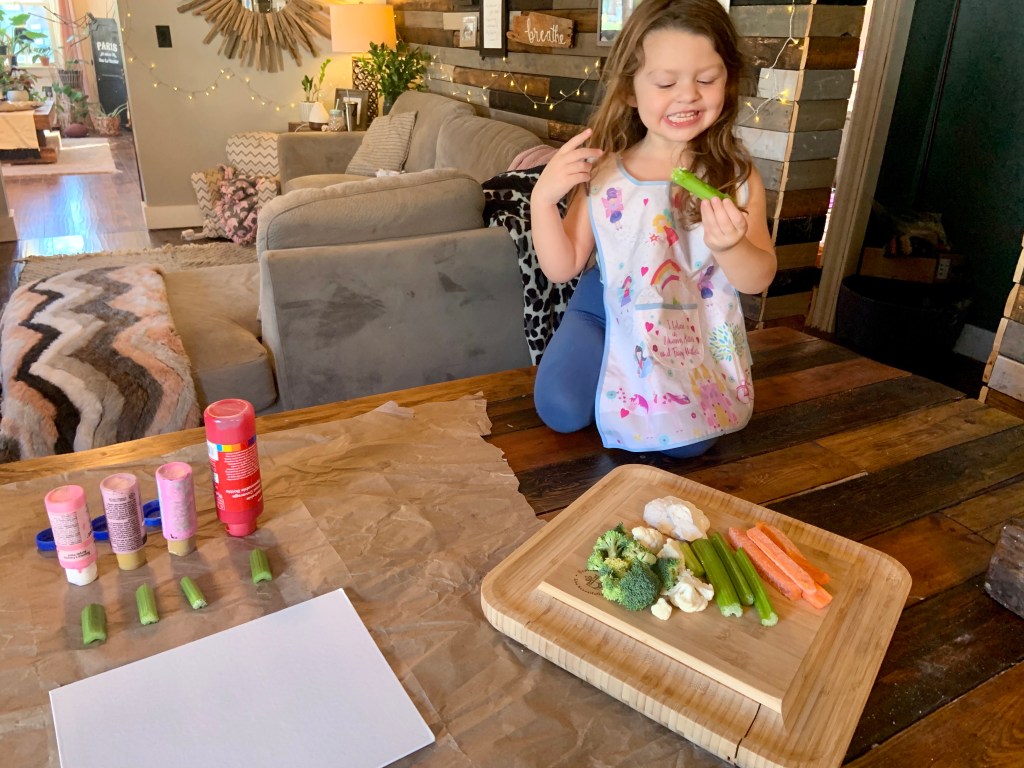
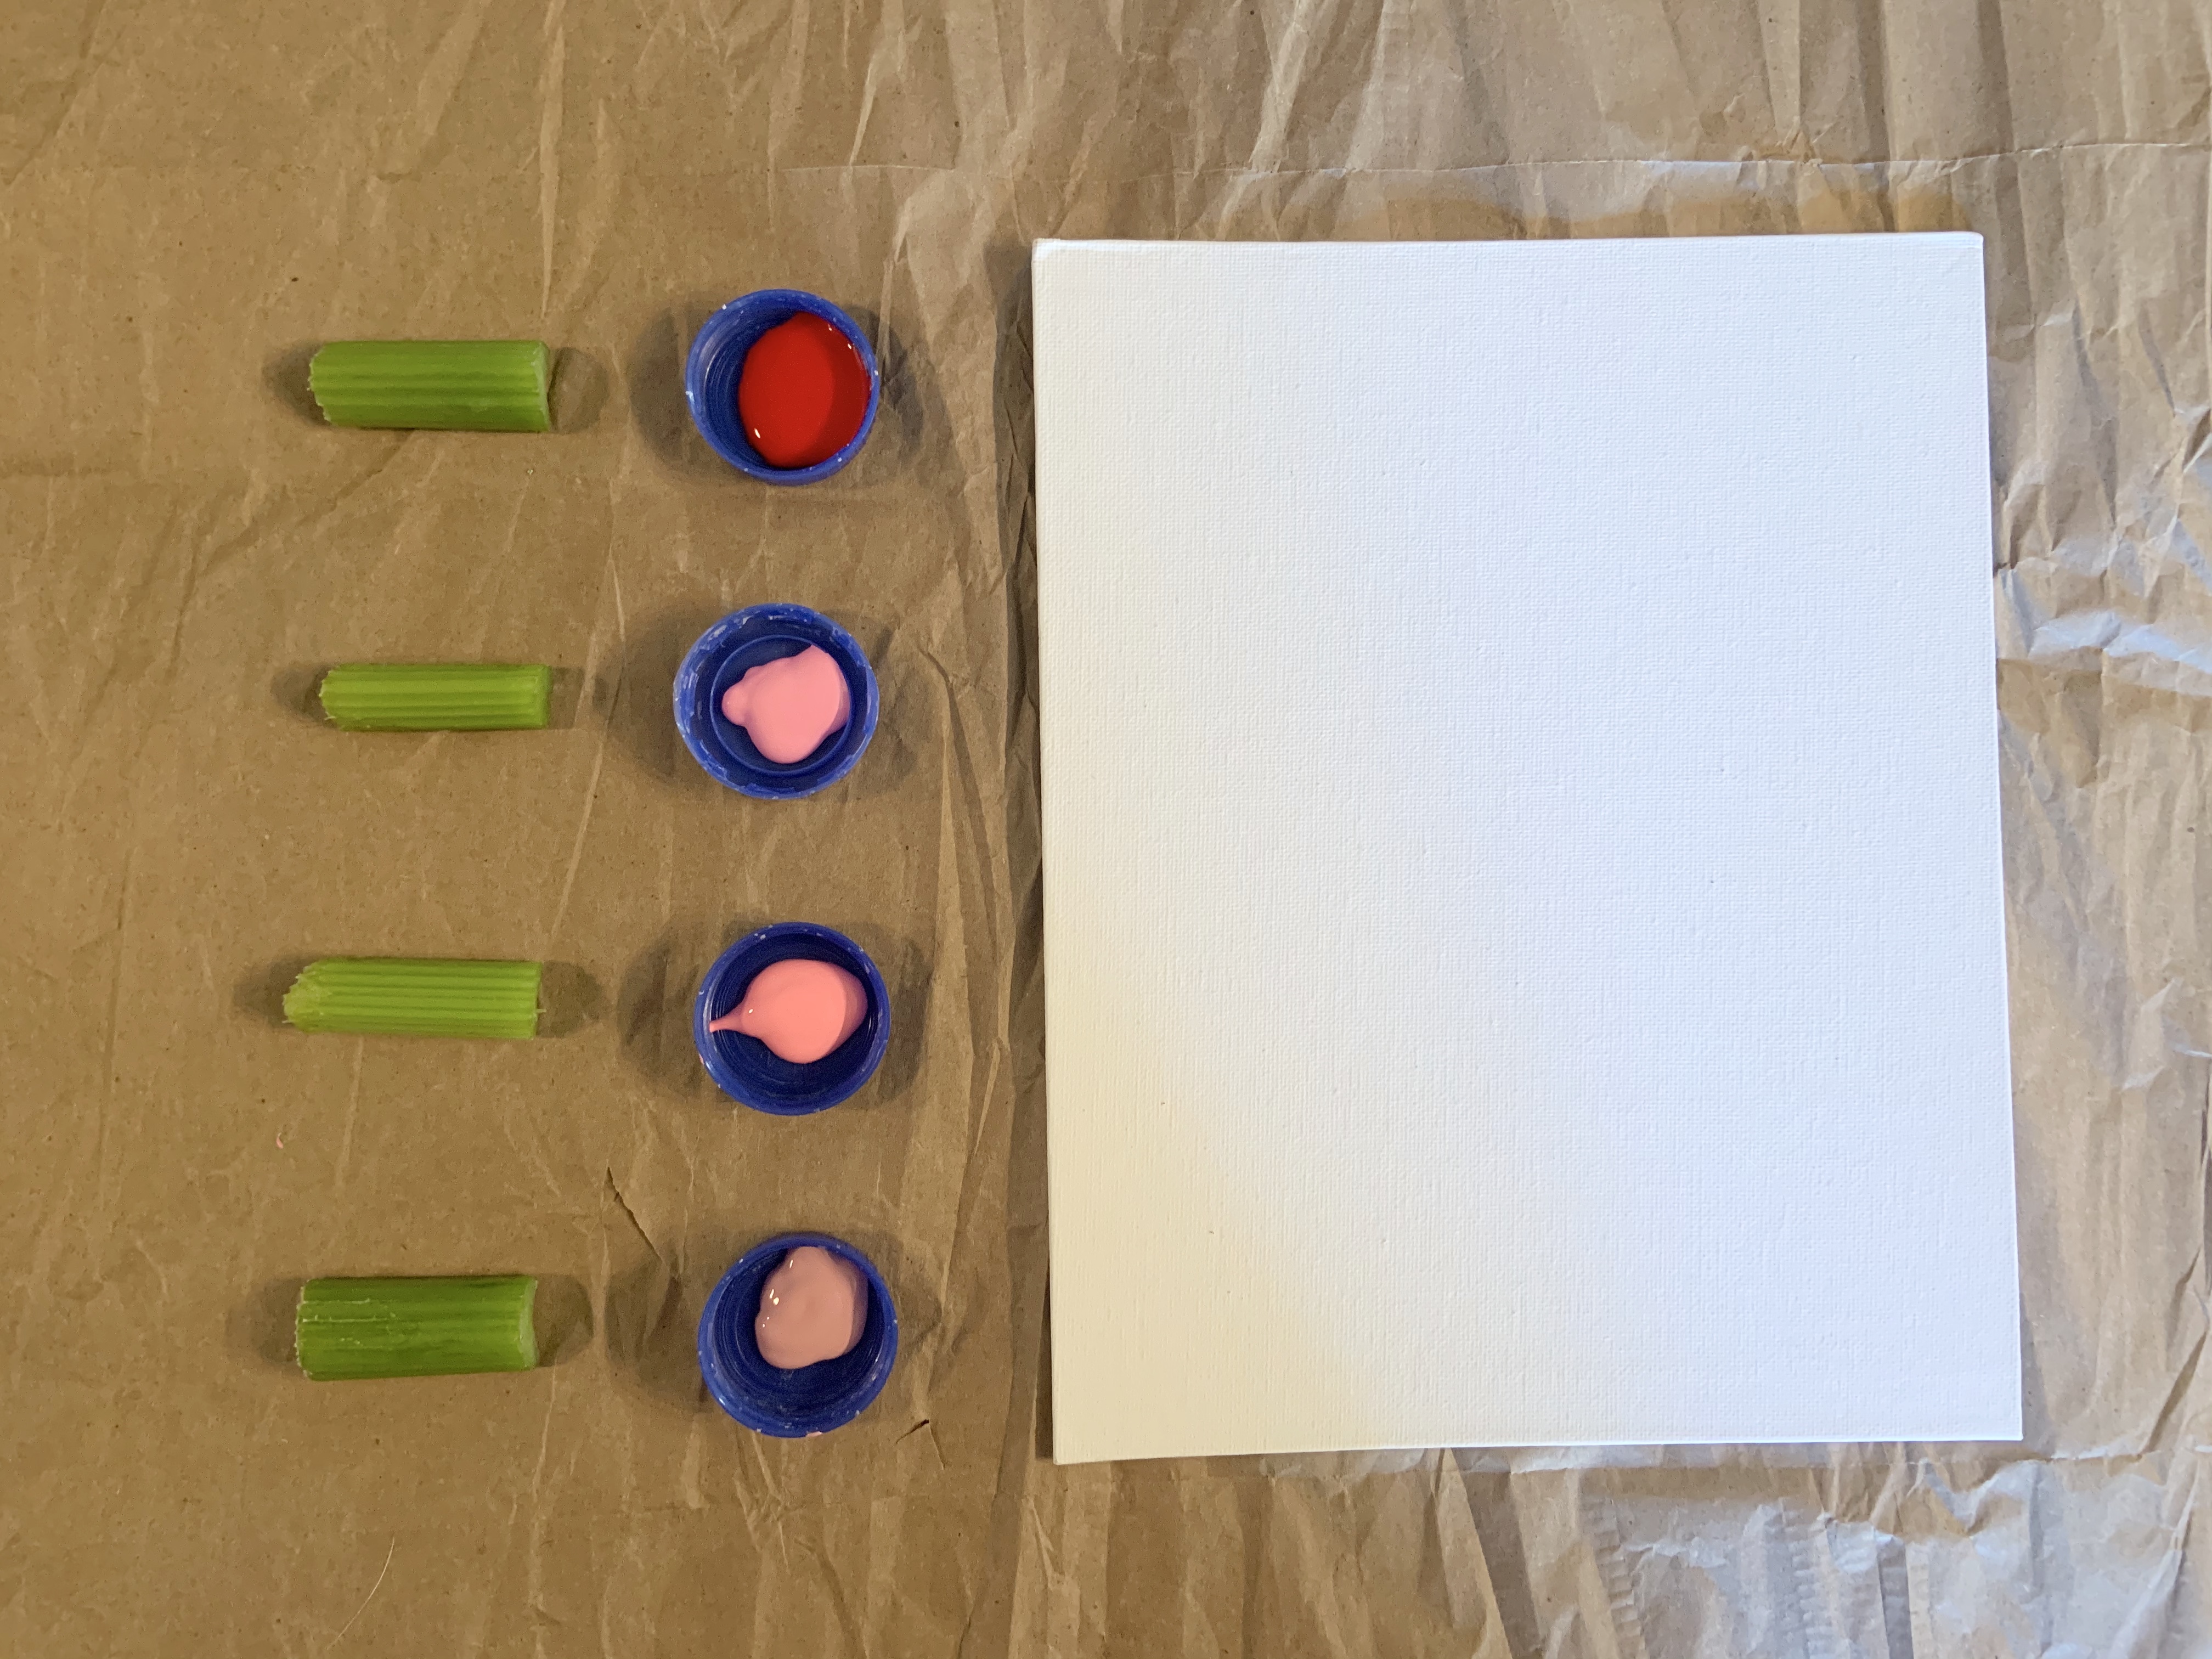
This is all you need for this activity:

  • Canvas or something to paint on (craft paper makes amazing wrapping paper!)
  • Paint
  • Celery
  • Something to put paint on (I used recycled milk jug lids.)

That’s seriously it! We obviously used different shades of pink and red. You can use whatever colors your child picks.

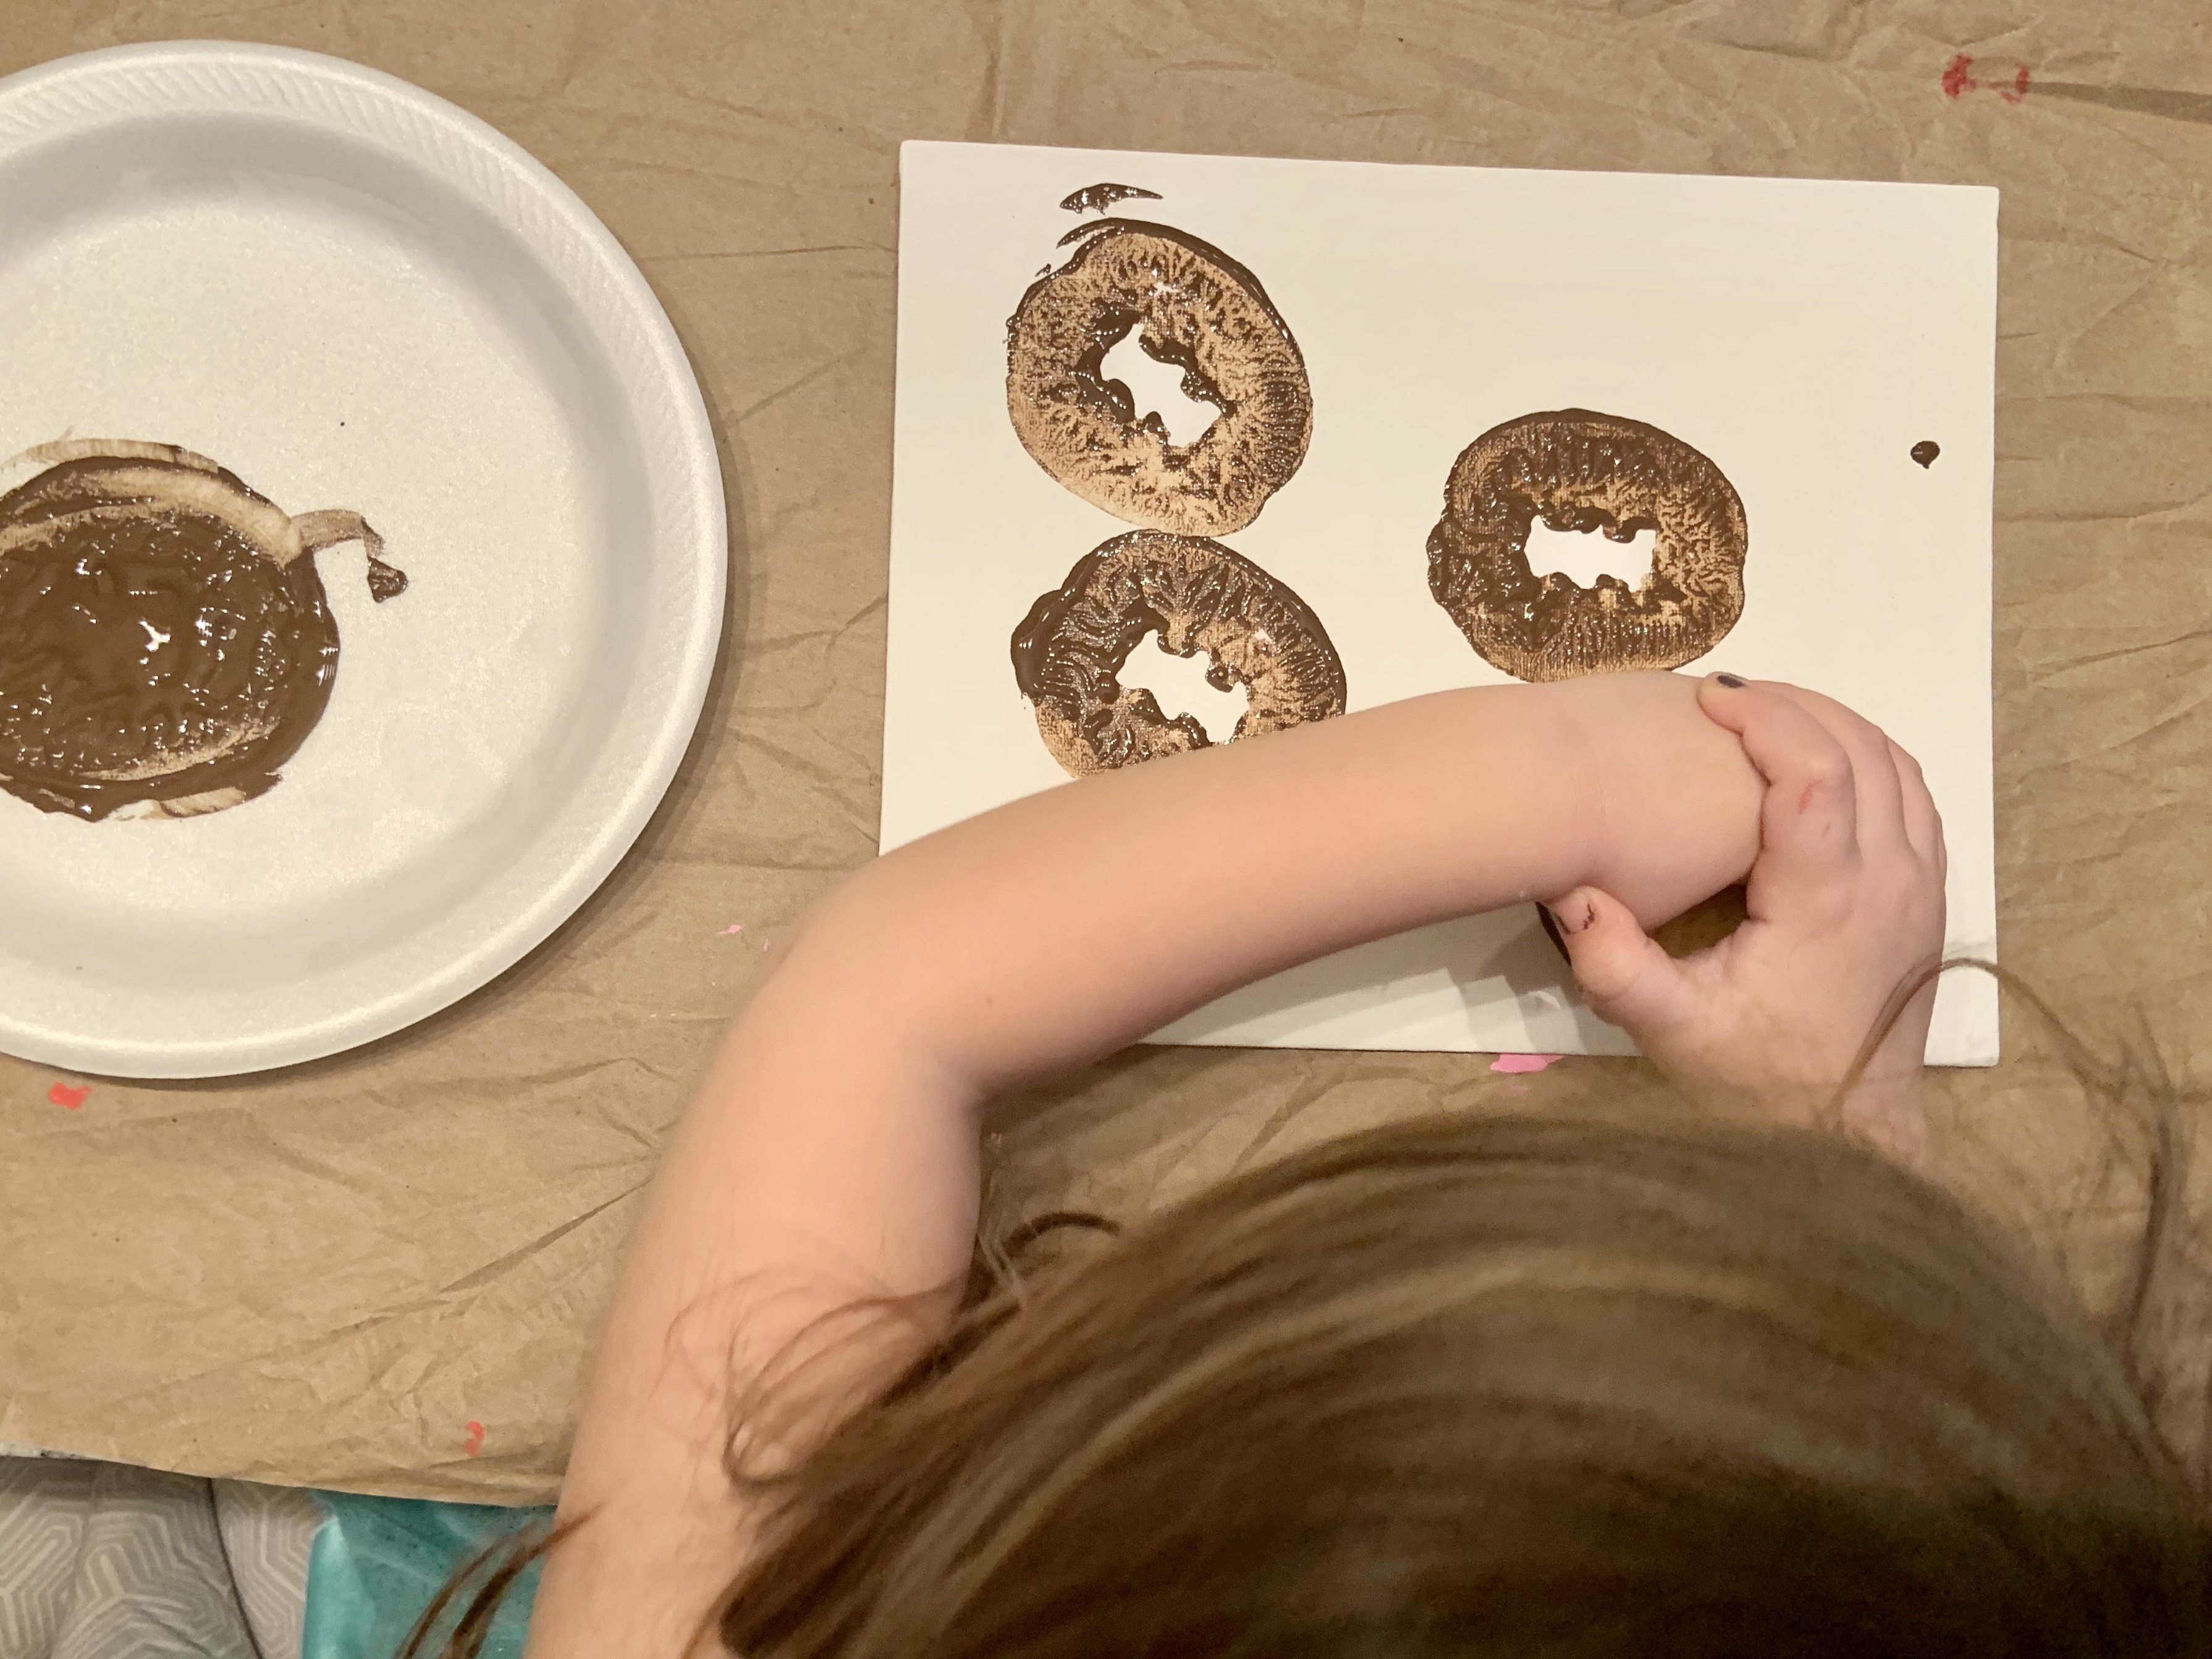
All they have to do is use their celery sticks like a paint brush. Dip the celery into the paint. Then press it down on the canvas.

At first, Mila wanted to move the celery like a brush. I showed her how to use it like a stamp to clear that confusion. She immediately recognized they were hearts.

Celery transfers the paint MUCH easier than potatoes. That means they don’t have to push down as hard.

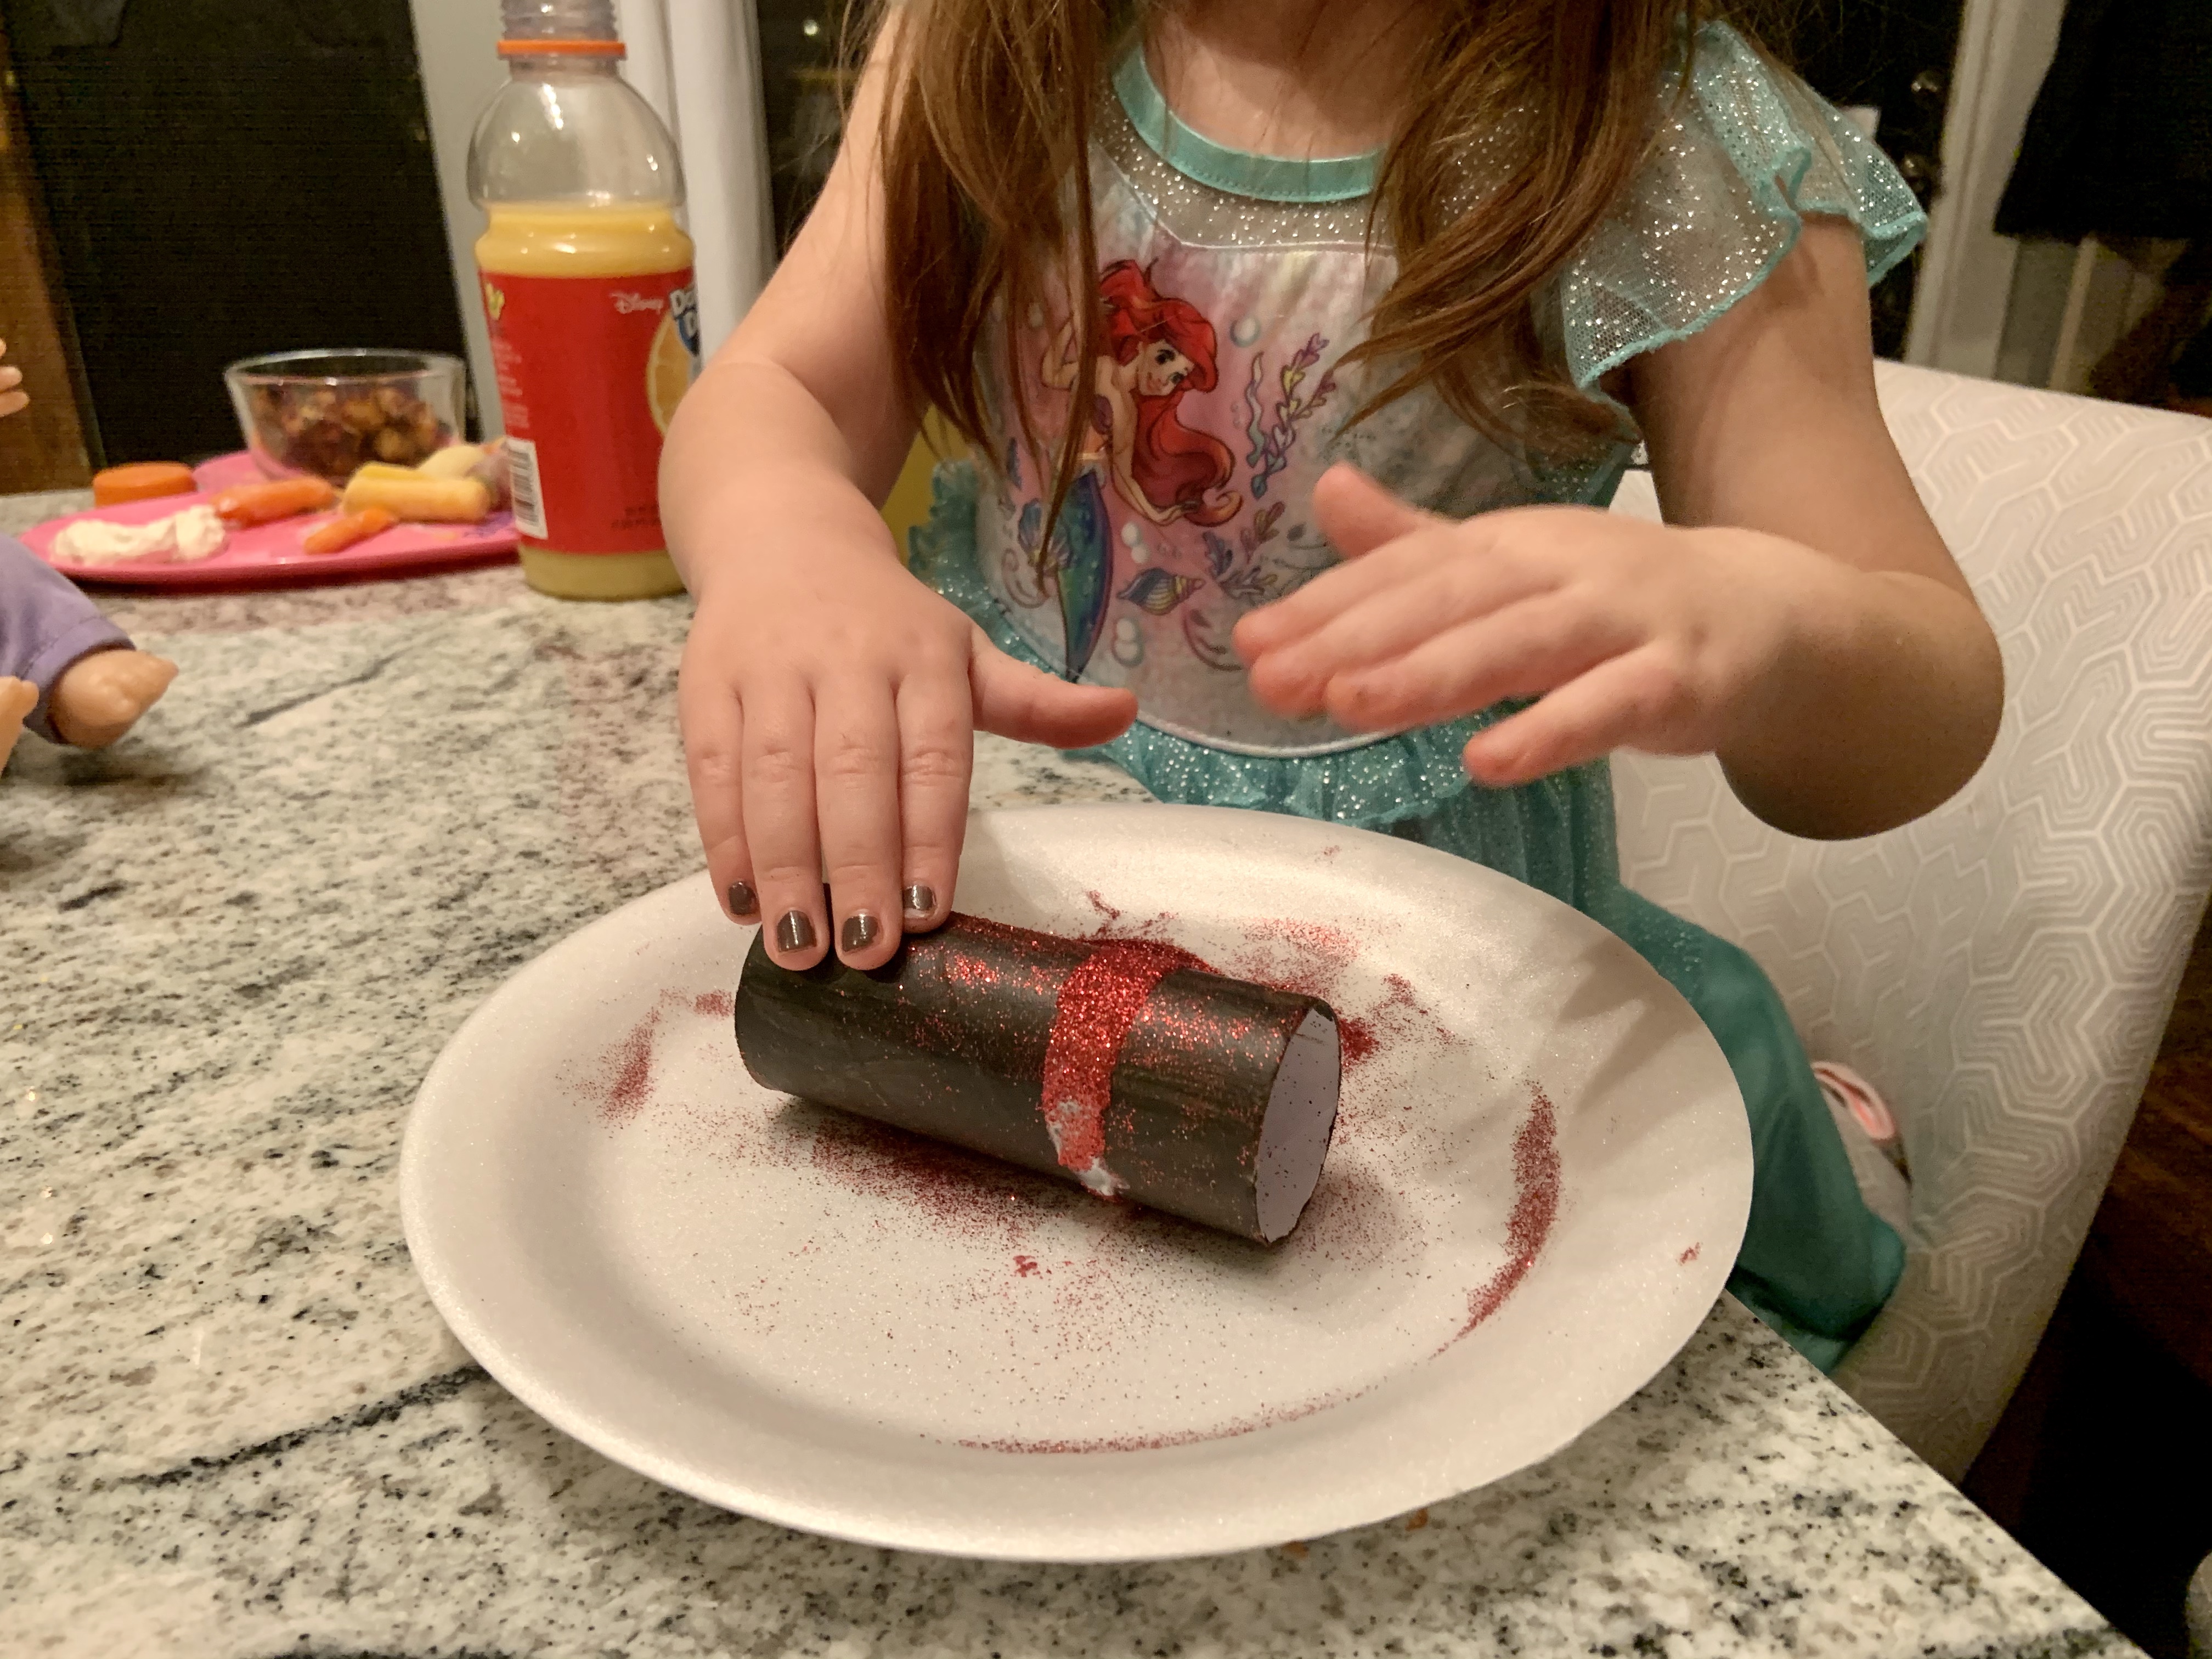
Mila had so much fun playing with her food, while eating the same type.

When she would switch to snacking, I had a rule that all four celery paint sticks had to be in the upright position. That made me feel a little more comfortable when she kept switching back and forth!

No paint was consumed during this art project.

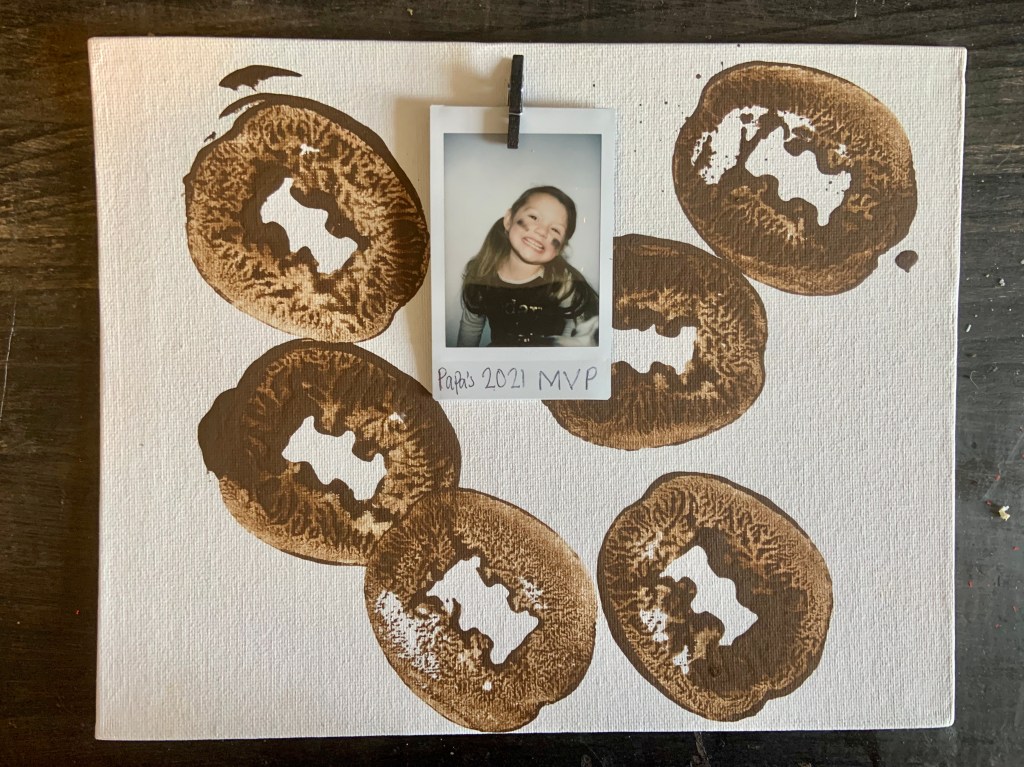
I love the way this process celery heARTwork turned out.

She just made the canvas and wrapping paper, but again, this can be used for anything you need hearts on!

The biggest thing to remember while kids do process art is there’s no end goal. This is their time to be as creative as they like.

I think the best part of process art is to see how your child grows with it. They get a better sense of composition, shapes, and colors the more they paint.

Their growth is truly the greatest gift.

As always, I hope if you do this activity, you let me know in the comments.

Toddler Activity: Super Bowl Artwork and Noise Makers

The Super Bowl is this weekend! If you’re a person who just watches for half time, here are two activities you can do with your kid’s before the game or during.

I incorporated two things Mila loves: art and music. For both of these activities, you probably have everything you need in your home.

When doing these, I would highly recommend a parent to help on a few steps.

Noise Makers Supplies:

  • Toilet paper rolls
  • Paint
  • Glue – Elmers and hot glue
  • Glitter
  • Ribbon
  • Rice

The first step is to paint both rolls.

I tried to stick with both teams colors, so Mila can shake when either team scores. She was able to help me paint them, but it was messy!

After the paints dried, you can add glitter to them. I did stripes around each side and Mila rolled the glitter on. To get it to stick, I did another coat of Elmers paint on top of the glitter. Then she wanted to add a sticker to both.

When the glue is dried, fold one side of the roll down. Then, put hot glue over top to seal it.

Add rice when the hot glue cools down and the fold and glue the other side too. I didn’t measure out the rice to a science. The rice probably filled half of it!

Then, we added ribbons on the end for extra decorations and to cover up the dried glue. It also double seals the ends so no rice flies out.

These are fun to shake and Mila loves dancing with them!

The next activity is so simple and we turned it into a little gift!

All you need is three things:

  • Brown paint
  • Canvas
  • Potato

To get the football effect with the potato, just carve the laces into it. I used a knife. That was one step definitely not suitable for young kids.

Then, all you have to do is dip the potato in the paint and use it like a stamp. I would suggest to really press down on it. If not, it doesn’t transfer the paint well.

I let Mila do her own design, but it’d be really cute to tape down a rectangle to make a frame. Then put your child’s picture inside of it.

We ended up taking pictures and made our own little frame with a clip. It turned out SO cute.

Other ideas for the potato/football stamp would be table cloths, banners, or place settings. Another idea could be to use the potato stamp for a fun way to keep score. There are so many possibilities.

We had so much fun making these and I can’t wait to see her play with the noise makers. My dad, her papa, is going to love this little gift as well.

I hope this gives you something to do if you get bored during football or are just really excited for the game.

As always, if you decide to try these out, let me know in the comments.

Toddler Activity: DIY Heart Banner

With only a few days of January left, I thought it was a perfect time to start thinking about Valentine’s Day. Since Mila loves to paint, I incorporated that and my love for decorating in this project.

I also was inspired by this Instagram post to make Mila’s artwork into a banner!

This little banner looks simple, but took two days to make.

Older kids may be able to do the entire project by themselves. Younger children will need their parents help with scissors and a hole punch.

Here’s what you’ll need for this project:

  • Paint
  • Brushes
  • Paper (we used craft)
  • String
  • Scissors
  • Hole punch
  • Bubble wrap (optional)

We started off doing some process art with bubble wrap. Anytime we can add new ways to create, we do.

I had Mila paint Valentine’s Day colors (pink, purple, and red) on bubble wrap. Then we set our big pieces of craft paper on top. After it was on top, she rolled her rolling pin over it. I told her to do this to make sure the paper picked enough paint up.

We did this for four pieces of paper. She did different strokes of paint for each.

They all came out so individual and Mila enjoyed how different this looked compared to her usual paintings.

Next, we had to wait for everything to dry.

To be honest, this probably would have taken a few hours. I might have waited a couple days. Oops!

Mila is still too little to draw hearts or cut them out, so I did the next steps by myself. If she was a little older, she could have done these steps too!

I drew and cut out different sized hearts. The size variety is interesting to me, but you can do whatever.

If you have extra painted paper leftover, keep it! I have a cute Valentine’s Day card you can make with them!

Next, hole punch two holes on the top of the heart.

Your child can help you put the string through the holes if you’d like. Mila thought it was cool to help put it together this way. It took her a little whole though!

After they’re all on the string, hang it up where ever.

This simple project is fun to do with a toddler and even older kids. You can showcase their art and have festive decorations that are handmade and cute.

The plan the rest of the wall is to put hearts around the canvas she made with reasons why I love her in them.

I can’t wait to make this February special for Mila.

Let me know if you try this project out and what projects you’ll be doing this Valentine’s Day!

Toddler Activity – MLK Day Artwork

With Martin Luther King Jr day quickly approaching, I knew I wanted to do an activity with Mila.

Plus, I thought it’d be fun to share beforehand in case you have your child home from school and want to do a productive activity with them.

Mila and I talk about race a lot. It’s important to me that she grows up anti-racist, especially in the world we live in now. It’s never too early to start those conversations. She has black barbies and dolls, books with diverse characters, and watches shows with people of all races.

Still, talking about MLK with her was a must. During this activity, I mentioned his name and talked about how people have different skin color. We also talked about how she would play with anyone, no matter what they looked like. She seemed shocked when I told her some people don’t like others because of the color of their skin.

Back to the project though!

This is an easy art project that actually took less than five minutes. The conversation we had before, during, and after spanned beyond that though.

Things you’ll need:

I started off by asking Mila what she thought her skin tone was between the three colors. She chose the middle color which was called “Territorial Beige.” It was interesting to see her perception of her skin tone.

This shade went in the middle because I wanted an ombre affect. Of course, you can do whatever color sequence you want.

I took a paint brush and painted her hand. Then we pressed it on the canvas. When pressing their hands down, make sure to get all of their fingers too. If not, it’ll be really faint. Finally, I cleaned her hand off and did the process two more times.

That part really is that easy.

After her handprints, or she calls them paw prints, dried, it’s time for the words. I ended up painting the phrase, “small hands change the world.’

You can use any quote or phrase here. There are a ton of MLK quotes that would work perfectly.

I have some more ideas to do for Black History Month that I want to share. They’ll be posted in the second half of the month. I have a few special activities for Valentine’s Day that I know you’ll love just as much!

If you like this activity or try it, let me know in the comments!

Toddler Activity: NYE Firework Painting

If you enjoyed last weeks Christmas activities, I have a few New Years ones too!

This first one is a firework painting. Mila loves to paint and experiment with how brushes work. That makes these DIY paint brushes even more interesting for her and toddlers.

Here’s what you’ll need:

  • Toilet paper or paper towel tubes
  • Scissors (kid and adult)
  • Paint
  • Canvas
  • Paper plates

I had all of these supplies at home, but most everything can be easily purchased. Feel free to use whatever color of paint. Mila just picked these three and I added the silver in.

First, you’ll want to cut the paper tubes to make the brush. If your child is learning how to use scissors, guide and help them with this. You can also get this step done beforehand.

We did three different firework shapes to get different looks.

Then, we put our paint on paper plates. Mila poured the red, which might have been a mistake. One recommendation is to spread the paint around. This way when your child pushes down with their brushes, all the bristles get paint on it.

After you get all your desired paint ready, it’s time to start painting.

I let Mila know we were making fireworks because that’s how we celebrate the new year. She’s seen fireworks before, so she understood what they were.

Of course she doesn’t grasp the concept of a new year, but it’s fun to begin those conversations with her.

I did have to show her how to push down on the brush. She got the hang of it pretty quick!

It helped when I really pushed the bristles down to make them more flexible. They are quite stiff at first!

With their finished project, you can either write over top of it or just leave it. Mila ended up making two. The canvas will have ‘2021’ written on it and the paper version will be untouched.

I’ll update this post with a finished picture after her artwork is all dried.

This activity is pretty quick, but a lot of fun. Toddlers and young kids will love making their own brushes. Plus, what kid doesn’t like fireworks without all the noise.

If you try this activity out, let me know in the comments below!

DIY Ornament: Salt Dough Santa

Okay, okay. I know it seems like we’ve been making a lot of ornaments around here, but they’re fun!

These salt dough ornaments are easy to do and make great, last minute DIY gifts.

Here’s what you’ll need for these:

  • 2 cups flour
  • 1 cup salt
  • Water (no set amount. I’ll explain!)
  • Paint
  • Glue *optional
  • Glitter *optional
  • Yarn/Ribbon
  • Knife

Admittedly, I have not had the best track record with salt dough. I think I’ve added too much water in the past. This time, they turned out great though.

First, preheat your oven to 250°.

Then, if your child likes to help mix ingredients, they’ll think this is really cool. Add the flour, salt, and a little bit of water together. Then start mixing with a spoon or your hand.

Here’s where the water ingredient is tricky. I just kept adding a little bit at a time until it got to a play-doh consistency.

Next, Mila and I rolled the salt dough out into circles. To get the Santa shape, I told her to keep her four fingers together and she kept her thumb held a little out.

For this part, just press their hands in there. It will imprint nicely. I trimmed around her hand to get more of the shape. All I used was a knife!

I ended up getting four hand Santa’s, a ‘snow globe’ with two of her hands, and two little circular ornaments so Mila could paint however she wants. Then I stuck them in the oven.

They’ll need to bake in the oven for two hours. Then take them out and let them completely cool before you start painting.

If you’re child is older, they’ll be able to paint the Santa’s on. Mila likes to paint crazy right now, so I did this for her. I used red, white, and tan paint.

After the paint was dried, I put glue and glitter down where I wanted it. Then, I used yarn to complete it. You could use ribbon too!

Honestly, I think they turned out so cute. They were simple to do and Mila just loves them.

Happy creating and making with your child.


Is your favorite ornament handmade, passed down, or store bought? Let me know in the comments.

Toddler Activity: Grinch Ornament

It’s finally Christmas break! That means packing Mila and I’s Christmas activities in a few short days.

Here’s a fun one that includes a movie and cuddles afterwards.

Mila absolutely loves the Grinch. We’ve watched the three different movies and I figured I needed to get her the book too. Thank goodness for Amazon Prime!

I came up with this activity after seeing a similar one on Pinterest. Obviously, I’m sure others have done this before, but I wanted to share what we did.

What I used:

  • ‘How the Grinch Stole Christmas’ by Dr. Seuss book
  • Craft Pom Poms (preferably green, but we used rainbow colors and it turned out adorable)
  • Clear plastic bulb
  • Red paint
  • Paint brush
  • Grinch movies – Netflix and YouTube

I started off the activity by talking to Mila about the Grinch. She told me he was mean. We then talked about how Christmas made us feel. Then I asked why Christmas would make the Grinch want to be mean.

Then, I read her the first page about the Grinch’s heart being too small. At this time, I took the bulb and drew a small heart in the middle.

With the empty bulb and small heart on it, I told her the Grinch is mean because his heart is this small and empty. BUT, we could help him out by filling it up with love and Christmas cheer.

After this, I asked her to fill the ‘heart’ with the pom poms every time she thought the Grinch needed some love.

I continued reading her the book and she filled the heart. The moment I flipped to the last page, she put the last pom pom in the bulb.

Then, I reread the part of the Grinch’s heart growing three times it’s size. With that, I painted a bigger heart over the smaller one to visualize this.

Mila and I talked about how Christmas isn’t about presents, but I still think she’s looking forward to that most of all. She hung the ornament up on the tree and we watched two of the Grinch movies to end our night.

It was a fun night and the activity could be modified by the questions and painting for older kids too!

I thought it was a fun and easy one to share, especially with Christmas right around the corner.

If you happen to do this activity, let me know on the comments!

Thanksgiving Turkey Hand Craft.

If you’re looking for an easy Thanksgiving craft to do, look no further.

Mila had a blast making these turkey day cards for family and one to keep. Most of the supplies I had on hand, minus the feathers and small canvas. I got both at the local dollar store.

Supplies:

  • Brown or copper paint
  • Red paint
  • Yellow paint
  • Orange paint
  • Feathers
  • Black marker
  • Tape
  • Computer paper
  • Scrapbook paper
  • Scissors

All you need to do is get your computer paper or canvas ready, paint your child’s hand like a turkey, and place it on the paper or canvas. It’s really as simple as that.

When you put paint in their hand, really put a lot on there or it’ll dry before you get everything painted. I painted the brown last and it seemed to help. With the one paint application, I was able to get four turkeys. One on canvas and the other three on paper.

After the turkeys dried a little, I glued on the feather and added the turkeys face and legs.

To make the three into a card, I taped them on scrapbook paper and wrote a little message on the back. Then it was done.

You can personalize these however you’d like or even add them to tea towels or plates with the right kind of plate. For us, it was easier to do this and they turned out adorable.

We all know this year is not a normal one, but it’s still nice to still make memories and send out cards to the ones we love.

If you give this Turkey Day craft a try, post in the comments so we can see. Lastly, Happy Thanksgiving!

Toddler Activity: DIY Bird Feeders

Mila has been ultra curious about birds lately. When we wake up in the morning, she hears them singing and remembers that birds sing to us. She makes the cutest face every time she hears them. The downside is… she thinks all the birds are her friends and she wants to hold them. NOPE! If she sees them in the yard, she’ll chase after them. It’s hysterical.

Sometimes, we don’t get a lot of birds that fly on our tree or around our yard. It probably has a lot to do with the two year old that chases them and the big dog that’s never far behind. With Earth Day almost here (tomorrow), I figured out a way I could combine Mila’s new love for birds and an activity to teach her how to help them… DIY bird feeders.

I took my memory way back to elementary school when I first made one of these. Fortunately, I had recently purchased birdseed, so I had all the supplies at home too. As with anything, you can substitute these items with something better you have at home. It’s whatever is best for you and your child. I probably should have researched using something other than peanut butter. I’m allergic to it, but not severely. Mila loves it, which is why I keep it at home.

Supplies:

  • Toilet Paper Rolls
  • Bird Seed
  • Peanut Butter
  • String
  • Scissors
  • Hole Punch
  • Knife (or spoon)
  • Baking Sheet (or something flat to roll bird seed on)

To make the bird feeder, it’s pretty easy.

First, I poured birdseed all across the baking sheet. I did this first because I didn’t want to be stuck with sticky peanut butter all over my hand, then try not to mix the two.

Next, I hole punched two holes in the toilet paper roll so I could easily put the string on it. You could also just put it all the way through.

After, I spread peanut butter all over the toilet paper roll. This can be a little messy.

Then, it’s rolling time. I just made sure to get an even amount of birdseed around the roll. For some parts, I had to push down with a little pressure to make sure it stayed. When I was done, I sat them up so the peanut butter could dry a little.

After it’s dried, it’s time to tie the string on the holes. Then you’re finished and can find the perfect place on your tree.

Obviously, this is a lot of steps for a two year old. I will say, Mila did try every step, besides cutting, tying, and hanging. The first roll we did together, she helped me put the peanut butter on the roll and enjoyed rolling the bird seed on. When I went to get the third one, the peanut butter was a little distracting for her. I’m unsure who got more peanut butter… the birds or Mila.

She ended up helping me roll birdseed on the last two, but thought managing and watching me was much more fun. I guess she’s a pretty cute boss.

We found spots in our tree where birds could sit on a branch and easily reach the feeder. With this activity, we were able to recycle the toilet paper rolls and help fees our local birds.

Mila definitely understood that the birds would come eat at our tree. She kept watching for them, but ended up chasing them off. One day, she’ll realize she can admire their beauty from afar. For now, she’ll keep running and stealing their peanut butter.

If you end up making recycled bird feeders, let me know in the comments!

Check out these other spring activities by other bloggers!

Toddler Activity: Easter Watercolor Cards

Hello again today! I’m actually surprised I’ve had time to write twice today and get everything that I’ve gotten done, done.

SO the title of this post is a little deceiving. Mila didn’t actually make this completely by herself. I did the cutting, taping, and lettering. She did the painting part and then went to play. If she was a little older, like preschool age, I think she would have been able to do a lot more. The cutting is a little advanced, but I love perfectly imperfect crafts made by kids.

This was her first time experimenting with watercolor. She loves to paint, but usually uses craft paint. I was pretty impressed with how she did with the extra steps. She kept wanting to put her brush in the water, then paint, then back to the water. I ended up painting with her to show her how it went. For some reason, she was feeling the cool colors.

While she was off playing, I traced a bunny onto the paper. I used the same bunny outline as the one she did in her painting a few days ago. Then, I taped it on the back of Kraft paper and that onto random scrapbook paper too.

I took scrap white paper and taped it on the scrap paper to write on it as well.

This card turned out so cute. I actually am going to make myself one tonight, without the writing, to just have a keepsake for the year. If you find yourself missing family or have some free time tomorrow, this is a fun, easy craft that can be made adapted to any age.

It would be nice to send to relatives if you can’t see them tomorrow. Maybe I should’ve posted this earlier, but there’s always next year!

Again, wishing you all a happy and safe Easter Day.

If you decide to make this DIY Easter Watercolor Card, let me know in the comments. I love seeing your creations!