If you’re looking for a fun way to get your kids outside and interested in bugs, make this DIY Bug Catcher.
The best part, I reused everything to make this!
Mila is slowly getting interested in bugs. She can tell you all about the butterflies life cycle and can identify different bugs too! Mostly, she’s excited about catching lightening bugs this year.
Even though I know she can, I don’t think she’ll want to use her hands. Cue another light bulb parenting moment…
We decided to make a DIY Bug Catcher so we can see lightening bugs and whatever else she catches. Like I said before, we got to reuse items to make it too!
Here’s all that it took to make this:
Parmesan Cheese Bottle
Stickers
Pipe Cleaner
Googly Eyes
Hot Glue
Tulle
First, take the label off and clean the Parmesan cheese container. I don’t think the bugs would mind the cheesy smell, but it needed washed out.
After, I hot glued tulle on the smaller hole side. This way the bugs can get fresh air!
I then put stickers that said, “Mila’s Bug Catcher” on it. When I was done with that, I let her put whatever stickers on there.
While she was decorating her bug catcher, I made the bug face top. I just used the colored googly eyes Mila told me to use and a pipe cleaner for the antennas. All I did was use a little hot glue and it worked perfectly.
Once you’re finished, twist the lid on and your DIY Bug Catcher is complete!
I’ll make sure to update with our bug catching adventures. Which bugs did you like catching as a kid? Let me know in the comments.
If you crave Mountain Dew Baja Blast, but like a little kick to your drink, you’ll love this Boozy Baja Blast Recipe! With only three ingredients, this will be another summer favorite!
Plus, you have to grab a cute cup from DIY With The Wears for all your drinks too.
Lately, all I’ve wanted to drink is Mountain Dew Baja Blast. It’s just so refreshing and tasty. I love to get it during the summer when I go to Taco Bell.
But, I wanted it without going to Taco Bell. I knew I had to find a way to make it at home.
With only two ingredients for the regular DIY Baja Blast, it was super easy. Since I do enjoy a boozy drink or two in the summer, I decided to add a third ingredient too.
Here’s all you’ll need:
Mountain Dew
Blue Powerade
Key Lime Vodka
Ice
First, fill your cup up with ice. I swear certain drinks just taste better ice cold.
When mixing the Mountain Dew and Blue Powerade together, try to make it 75% Mountain Dew and 25% Powerade. This is the most perfect mixture and tastes just like Baja Blast.
Then add a shot of your vodka to top it all off.
It’s an easy drink to make and tastes so good. I love that I get one of my favorite drive through drinks at home!
Let me know in the comments what your favorite summer drink is and make sure to check out some others below:
With spring flowers here, we’re ready to learn about as many of them as we can! To do that, we created a DIY Flower Book.
Although we only started off with one flower, I’ll make sure to update our other flower pages.
Since Mila picks flowers all the time, we had to press and keep them for a while. I thought it’d be cool to see everything in a book for us to review and go over at the end of summer.
All we had to do is start with a base. Here’s the supplies we used:
Cardboard
Scrapbook
Modge Podge
Pipe cleaner
Paper
Stickers
Flowers
For the actual book, I ended up using cardboard from a brownie box. It was easy to cut and I liked how it was thin cardboard too. Then, I used modge podge to paste scrapbook paper on to the cardboard pieces.
After it was dried, I used stickers to write “Mila’s Flower Book.” Then I hole punched the top corner to connect the book with a pipe cleaner.
For the inside flower pages, I just used computer paper. You could definitely do thick card stock paper or other scrapbook paper too. I’ll probably use others with some of the other flowers.
I figured we’d start with tulips since the ones we picked are starting to die.
All we did was dry the flowers, have her draw them, me draw them, and we went over the letters in tulip. It was a fun learning experience for her!
We can’t wait to get started on the other flowers. I think dandelions will be next and some of my Mother’s Day flowers too.
What’s your favorite flower that we should study? Let me know in the comments.
Mother’s Day is almost here and we’re busy making DIY’s for all the special moms in our lives. If you’re looking for an easy one, this DIY Fingerprint Flower Jar is just right for you.
We love making presents for our loved ones. It makes gift giving more personal and shows how hard we worked on it too. Mila is always so proud when she sees something she made up in someone’s house. She’ll get a huge smile.
Since she loves to pick flowers and put them in vases, I thought this would be a perfect gift for the loved ones in our family!
There’s not a bunch of supplies you need for this DIY gift. We had everything already at home and were able to reuse an old olive jar!
Jar
Paint
Modge podge
All you need to do is get an area prepped for paint. Then I showed Mila what I meant by finger painting flowers on a jar. I just did it on the brown paper that I prepped the area in. This way she could see she was allowed to use her fingers as a paint brush.
Then I let her go!
She did a few alone, but then she felt better when I held it up and twisted it for her. I don’t think she wanted to smudge the flowers she already had done!
Once they’re finished making flowers, coat the jar in modge podge. I just did a thin layer so the flowers don’t go off in the future. This step isn’t required, but if you want that added protection, I’d suggest it!
To finish it up, you could add letter beads like I did or a yarn bow too.
We filled ours up with flowers, but you could add your loved ones favorite candy or even a tea light candle too. Either way, this jar is something special and easy a mom in your life will really love!
If you’re looking for more Mother’s Day DIY’s, check out these ones Mila and I have done. Let me know which one is your favorite in the comments.
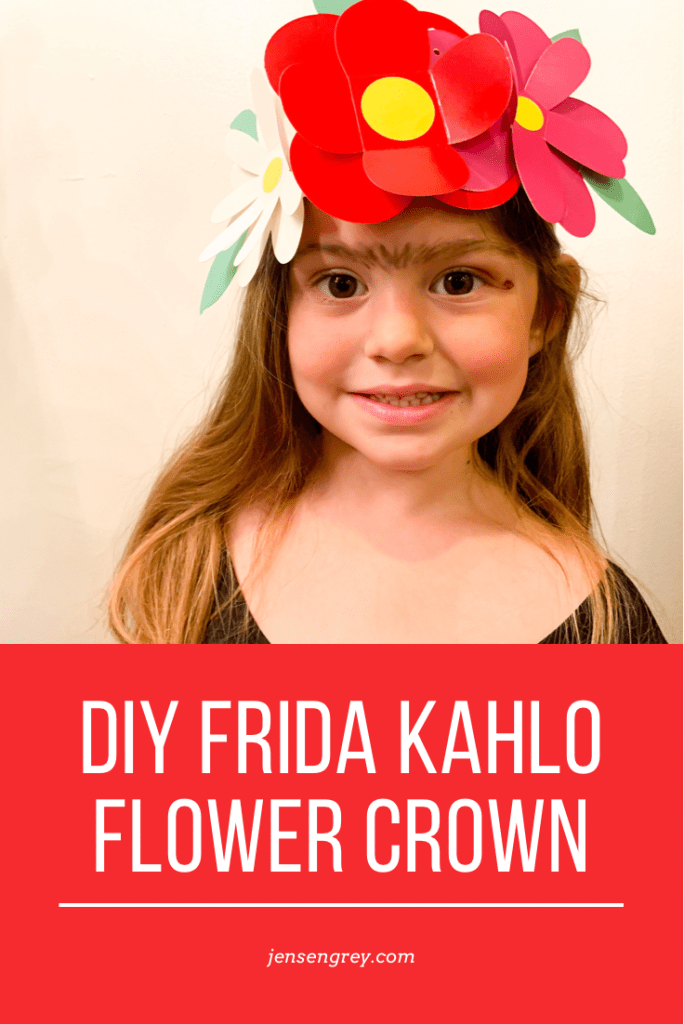
Happy Cinco de Mayo! If you’re looking for a crafty way to celebrate the day and one of their most favorite painters, try this DIY Frida Flower Crown.
Not only will you learn a little more about Mexico, it’s a lot of fun to pretend play!
Mila and I LOVE Frida Kahlo. I even have a tattoo of her on my arm. She’s a feminist icon who went through so much during her life. Her beauty and pain shine through her work. She has inspired Mila and me in so many ways.
On Cinco de Mayo, we like to honor Mexican culture and our favorite girl with fun crafts.
Since we’re in a pretend play kick, I made Mila a Frida inspired flower crown and gave her a unibrow. Here’s all we used to make this iconic crown.
Scrapbook Paper
Paper Flowers
Staples
Hot Glue
First, I cut the base of the crown out of green, floral scrapbook paper. I had to staple to pieces together to fit Mila’s head.
Then, I used paper flowers that was in a floral garland from Mila’s birthday party. I then attached them to the crown with hot glue and fluffed them up. You could make your own paper flowers or use fake flowers too!
After it was all connected, I used eyeliner to thicken her eyebrows and bring them together.
It was such an easy DIY! I showed Mila pictures of Frida and had her do different poses. Then, she drew a self portrait of herself.
Not only was it fun to do, it was a great way for Mila to learn more about a Mexican icon.
How do you celebrate Cinco de Mayo? Let me know in the comments.
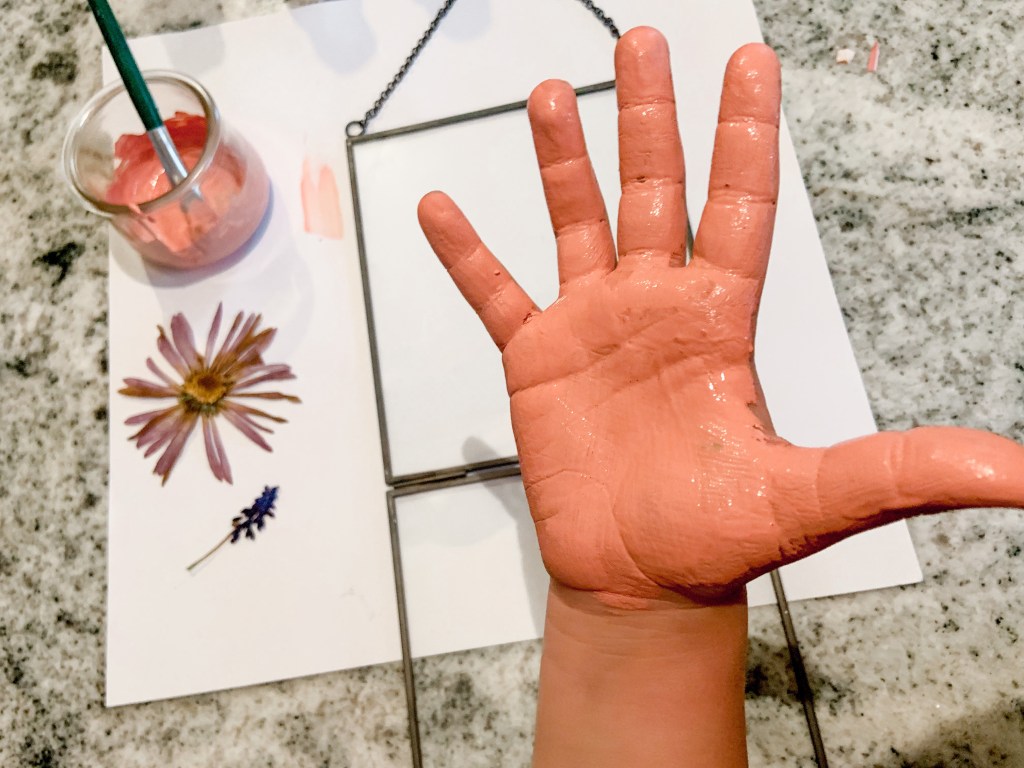
If you’re looking for a memorable and easy craft for Mother’s Day, you’ll love this DIY Floral Handprint Art.
Not only was it simple to make, my four year old helped me through it all.
If you haven’t noticed by my last few posts on social media, we’re in a hand art phase. I think it’s a mix of wanting to preserve how little she is and they’re easy to do!
I’ve had this floating frame in my house for about a year. In my head I pictured it with pressed flowers all around. Then, the past few days I thought it’d be a perfect Mother’s Day gift to myself.
So, with Mila’s help and flowers from Josh, we created something beautiful.
First, clean off your frame. I like to do this so I don’t noticed smudges after everything is finished. Plus, it’s nice to work with a clear area.
Then, paint your child’s hand. Mila picked pink, of course and I thought it looked beautiful. When it’s painted, firmly press your child’s hand on the inside pane of glass. If there’s a few missing space, you can repaint their hand and redo the process!
Next, let your child put the pressed flowers where they’d like.
When they have their final spot, clasp the second glass pane to keep the handprint and flowers safe.
On the outside, I decided to paint the word love and the year on the corner. “Love” was purely decorative, but the date is something I do on all of our projects!
Then you’re all finished.
I truly think this DIY Floral Handprint Art would be a lovely piece for moms, grandmas, and every other mother figure in your child’s life.
What’s your tips on pressing or drying flowers? I’d love to hear different ways… especially with Mila’s love of flower picking.
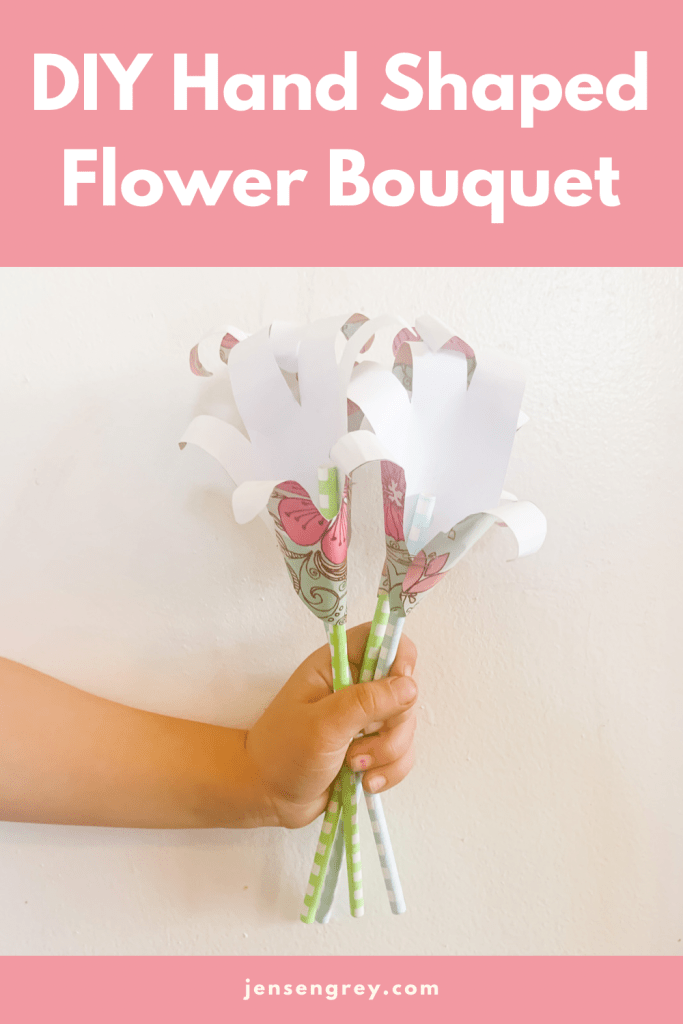
If you’re looking for a fun Mother’s Day DIY, this Hand Shaped Flower Bouquet is easy to make and will last a lifetime. The moms in your life will love them!
Plus, I was able to reuse products around the house to make it Earth friendly too!
I love when Mila makes me things. Maybe a little too much. I don’t think I’ve ever thrown any artwork or drawing she’s made me. She’s so proud of herself for it too.
For Mother’s Day, it’s always fun to see what kids come up with. Mila loves gifting flowers. When I saw this on Pinterest, I knew I had to recreate it with Mila! She loved how they turned out and it’ll be perfect to add to the bouquet as she grows.
As I stated above, I reused everything for this. Here’s all I used:
Scrapbook Paper
Stapler
Paper Straws
Hot Glue
These were super simple to make.
I traced Mila’s hand on thick paper to make a stencil. Then cut it out to trace it on scrapbook paper. Although I only traced four for the picture, we’ll be making more for different family members.
You can make how many you’d like and with different types of scrapbook paper.
Then, cut the hands out. Next, I stapled the two sides together with the print side facing out.
When they’re cut and stapled, spiral the hands so they flutter out. You can make them as curly as you want!
After the flower was made, I hot the paper straws inside to make it look like a stem.
To display, I put them in a glass jar. They look really beautiful. I love that I’ll have a little piece of her at four forever. It’s a lovely Mother’s Day gift I’ll always love.
What is your favorite DIY Mother’s Day gift you’ve ever made or received?
Lets bring on the May flowers and start this month off with a Gardening Sensory Bin.
Since kids need some type of play at parties, I thought a Gardening Sensory Bin would be great. It turns out… it was.
Although I haven’t posted about it yet, Mila’s birthday part was garden and plant themed. She loves plants so much, it was a perfect fit. All of Mila’s friends loved it and Mila kept playing with it for days after.
Just beware of beans flying everywhere.
For this bin, I used things that were around my house, but you can find everything at the dollar store:
Dried Beans
Fake Flowers or Produce
Gardening Accessories
Jars or Mini Pots
Sensory Bin
All you need to do is a fill a sensory bin with whatever kind of dried beans or rice.
Then, place fake produce and flowers like they’re planted in the ground. I loved the felt produce from Targets Dollar Spot or we use fake flowers from the Dollar Tree.
Next, place some jars or pots in the bin along with some gardening accessories.
Now it’s time to play!
Your child will know exactly what to do with this bin. It’s a lot of fun to watch them play and discover. I’ll have this sensory bin ready for whenever. It’s easy and has endless amounts of fun.
What are you looking forward to this month? Let me know in the comments.
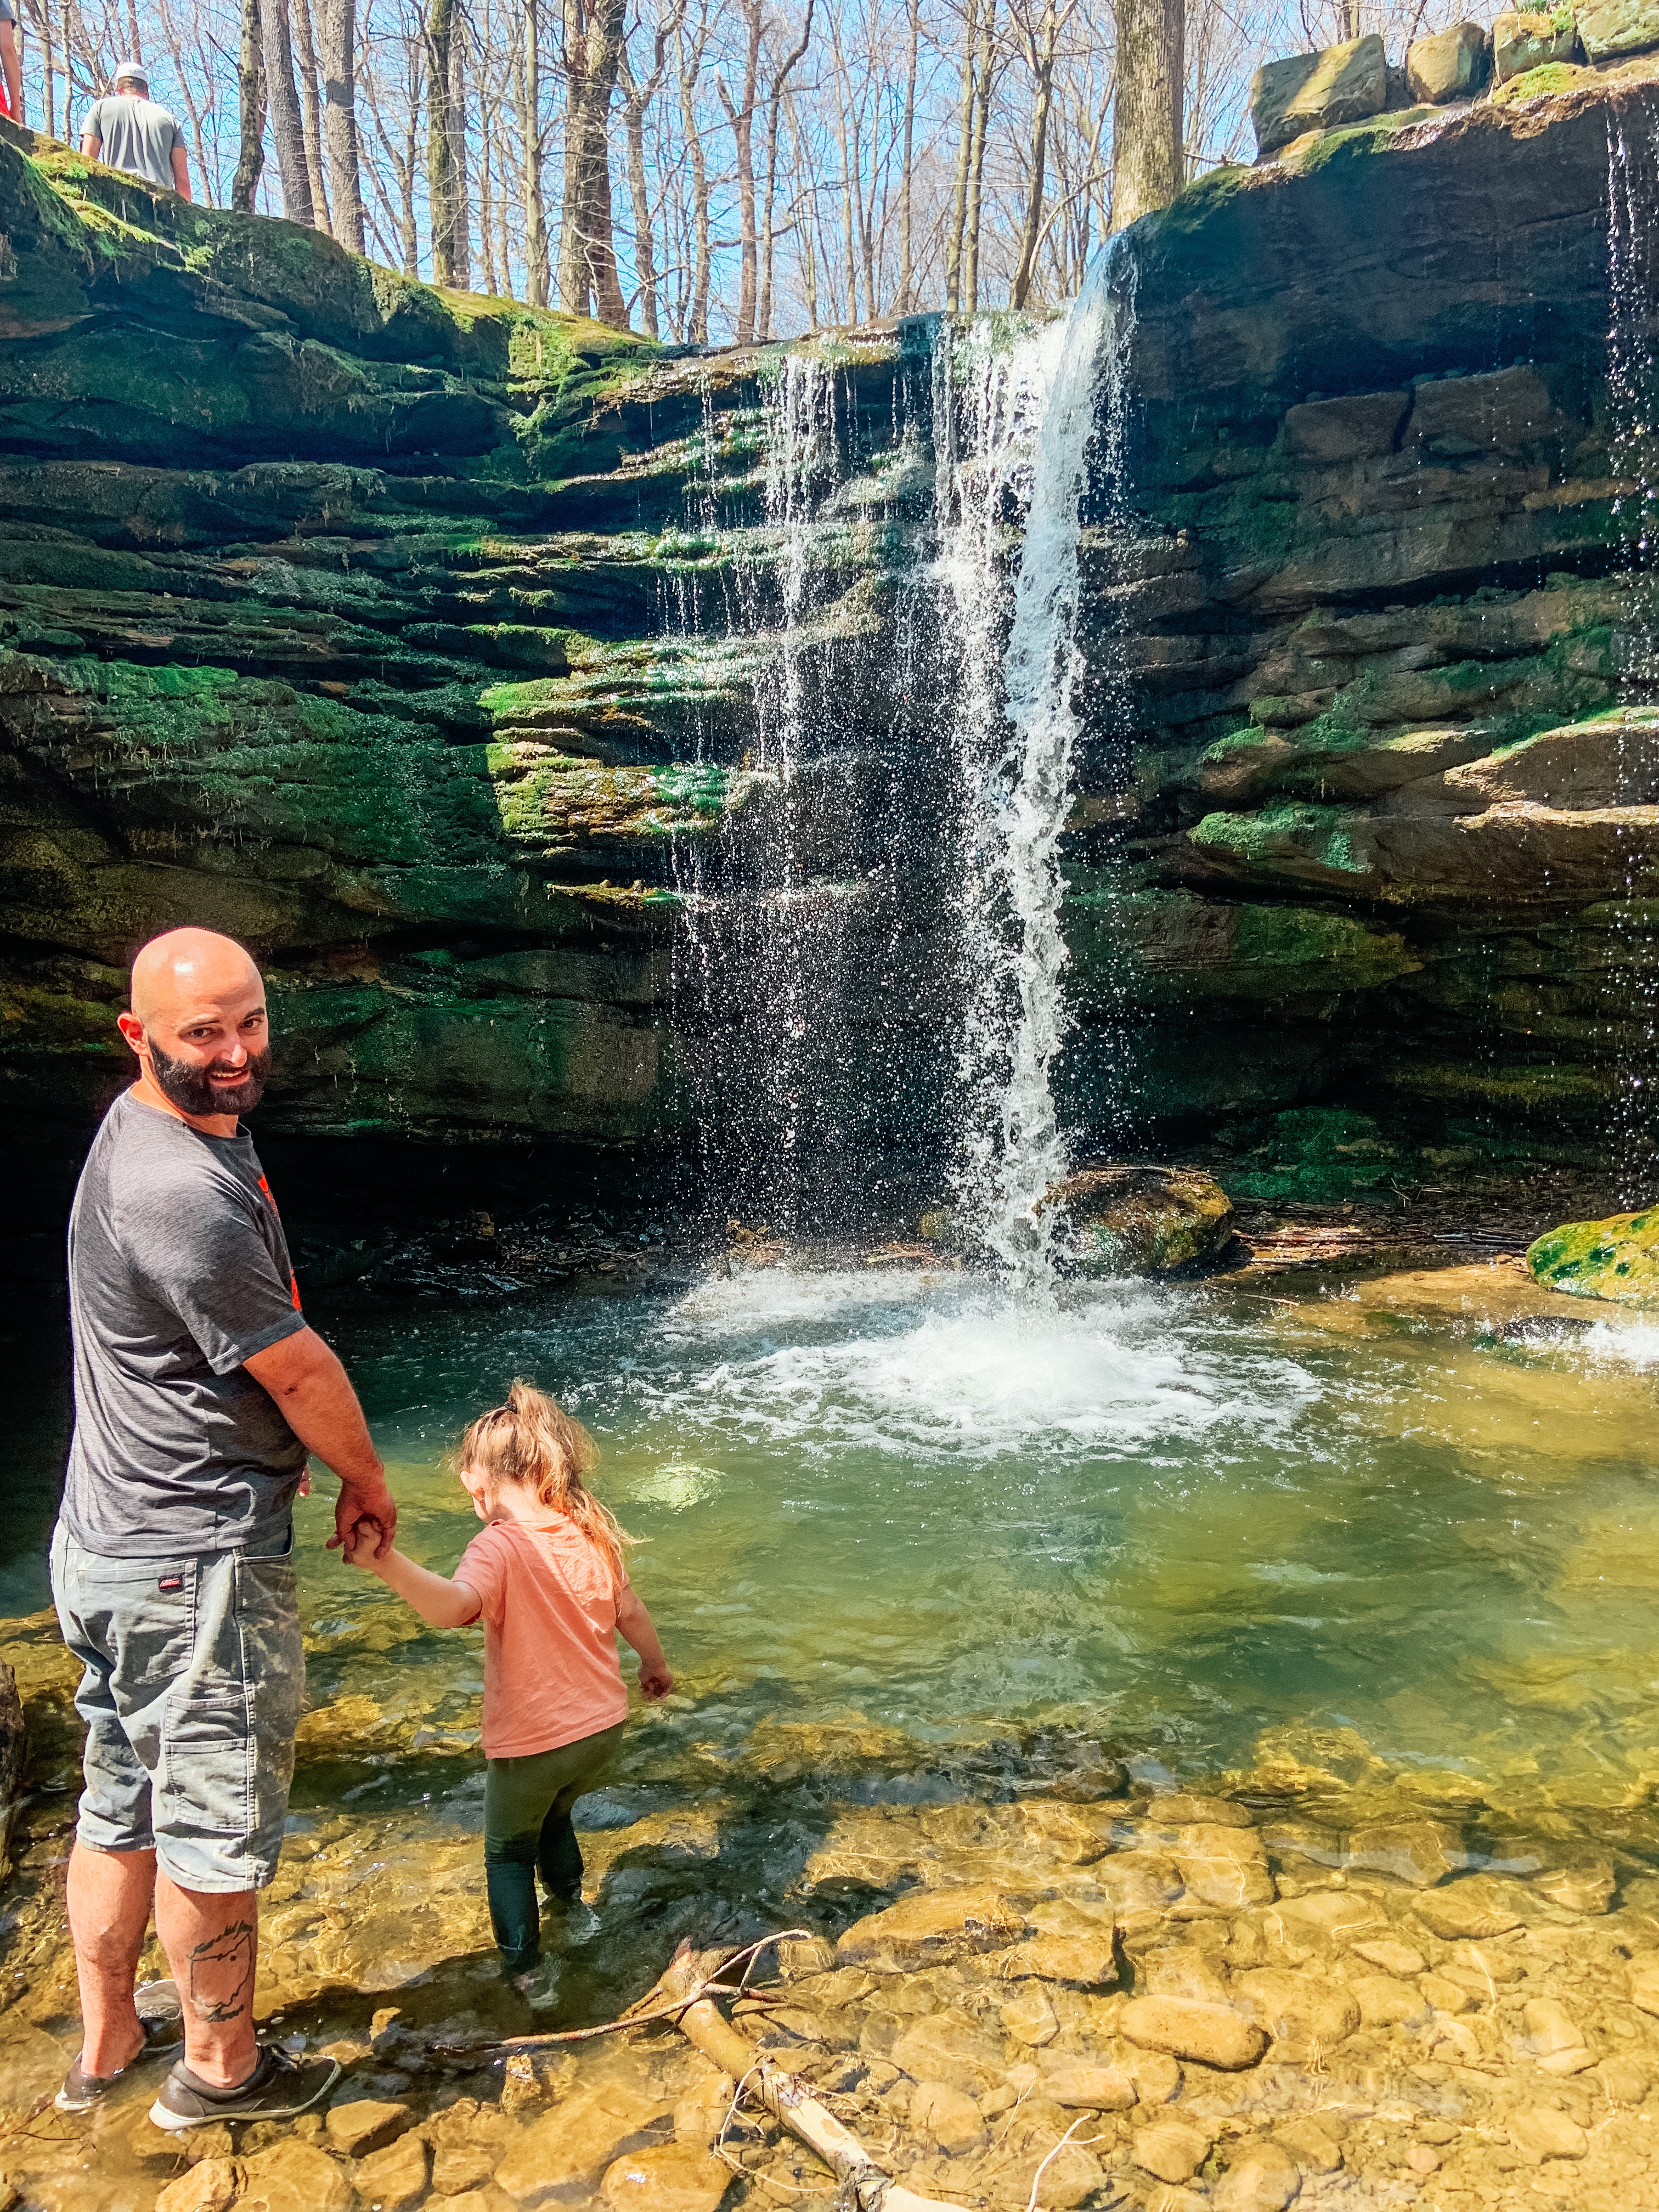
Ohio is a state full of hidden gems. Our favorite local one is Dundee Falls in Dundee, Ohio. With a short hike, you’ll find a beautiful waterfall and peaceful scene.
Besides the view, I love that Dundee Falls is perfect to explore for people of all ages.
For our first adventure of the season, Mila, Josh, and I all went to Dundee Falls. Mila and I have been there quite a few times, but it was Josh’s first. My family has taken Mila since she’s been one and she’s always loved it!
It’s only about a mile hike from the start to the falls. Then another mile back. It’s not long at all and it’s shaded by trees. That makes it so nice for a hot summer day.
Some things I would suggest people to bring when they come to Dundee Falls are a change of clothes, water bottle, and sunscreen.
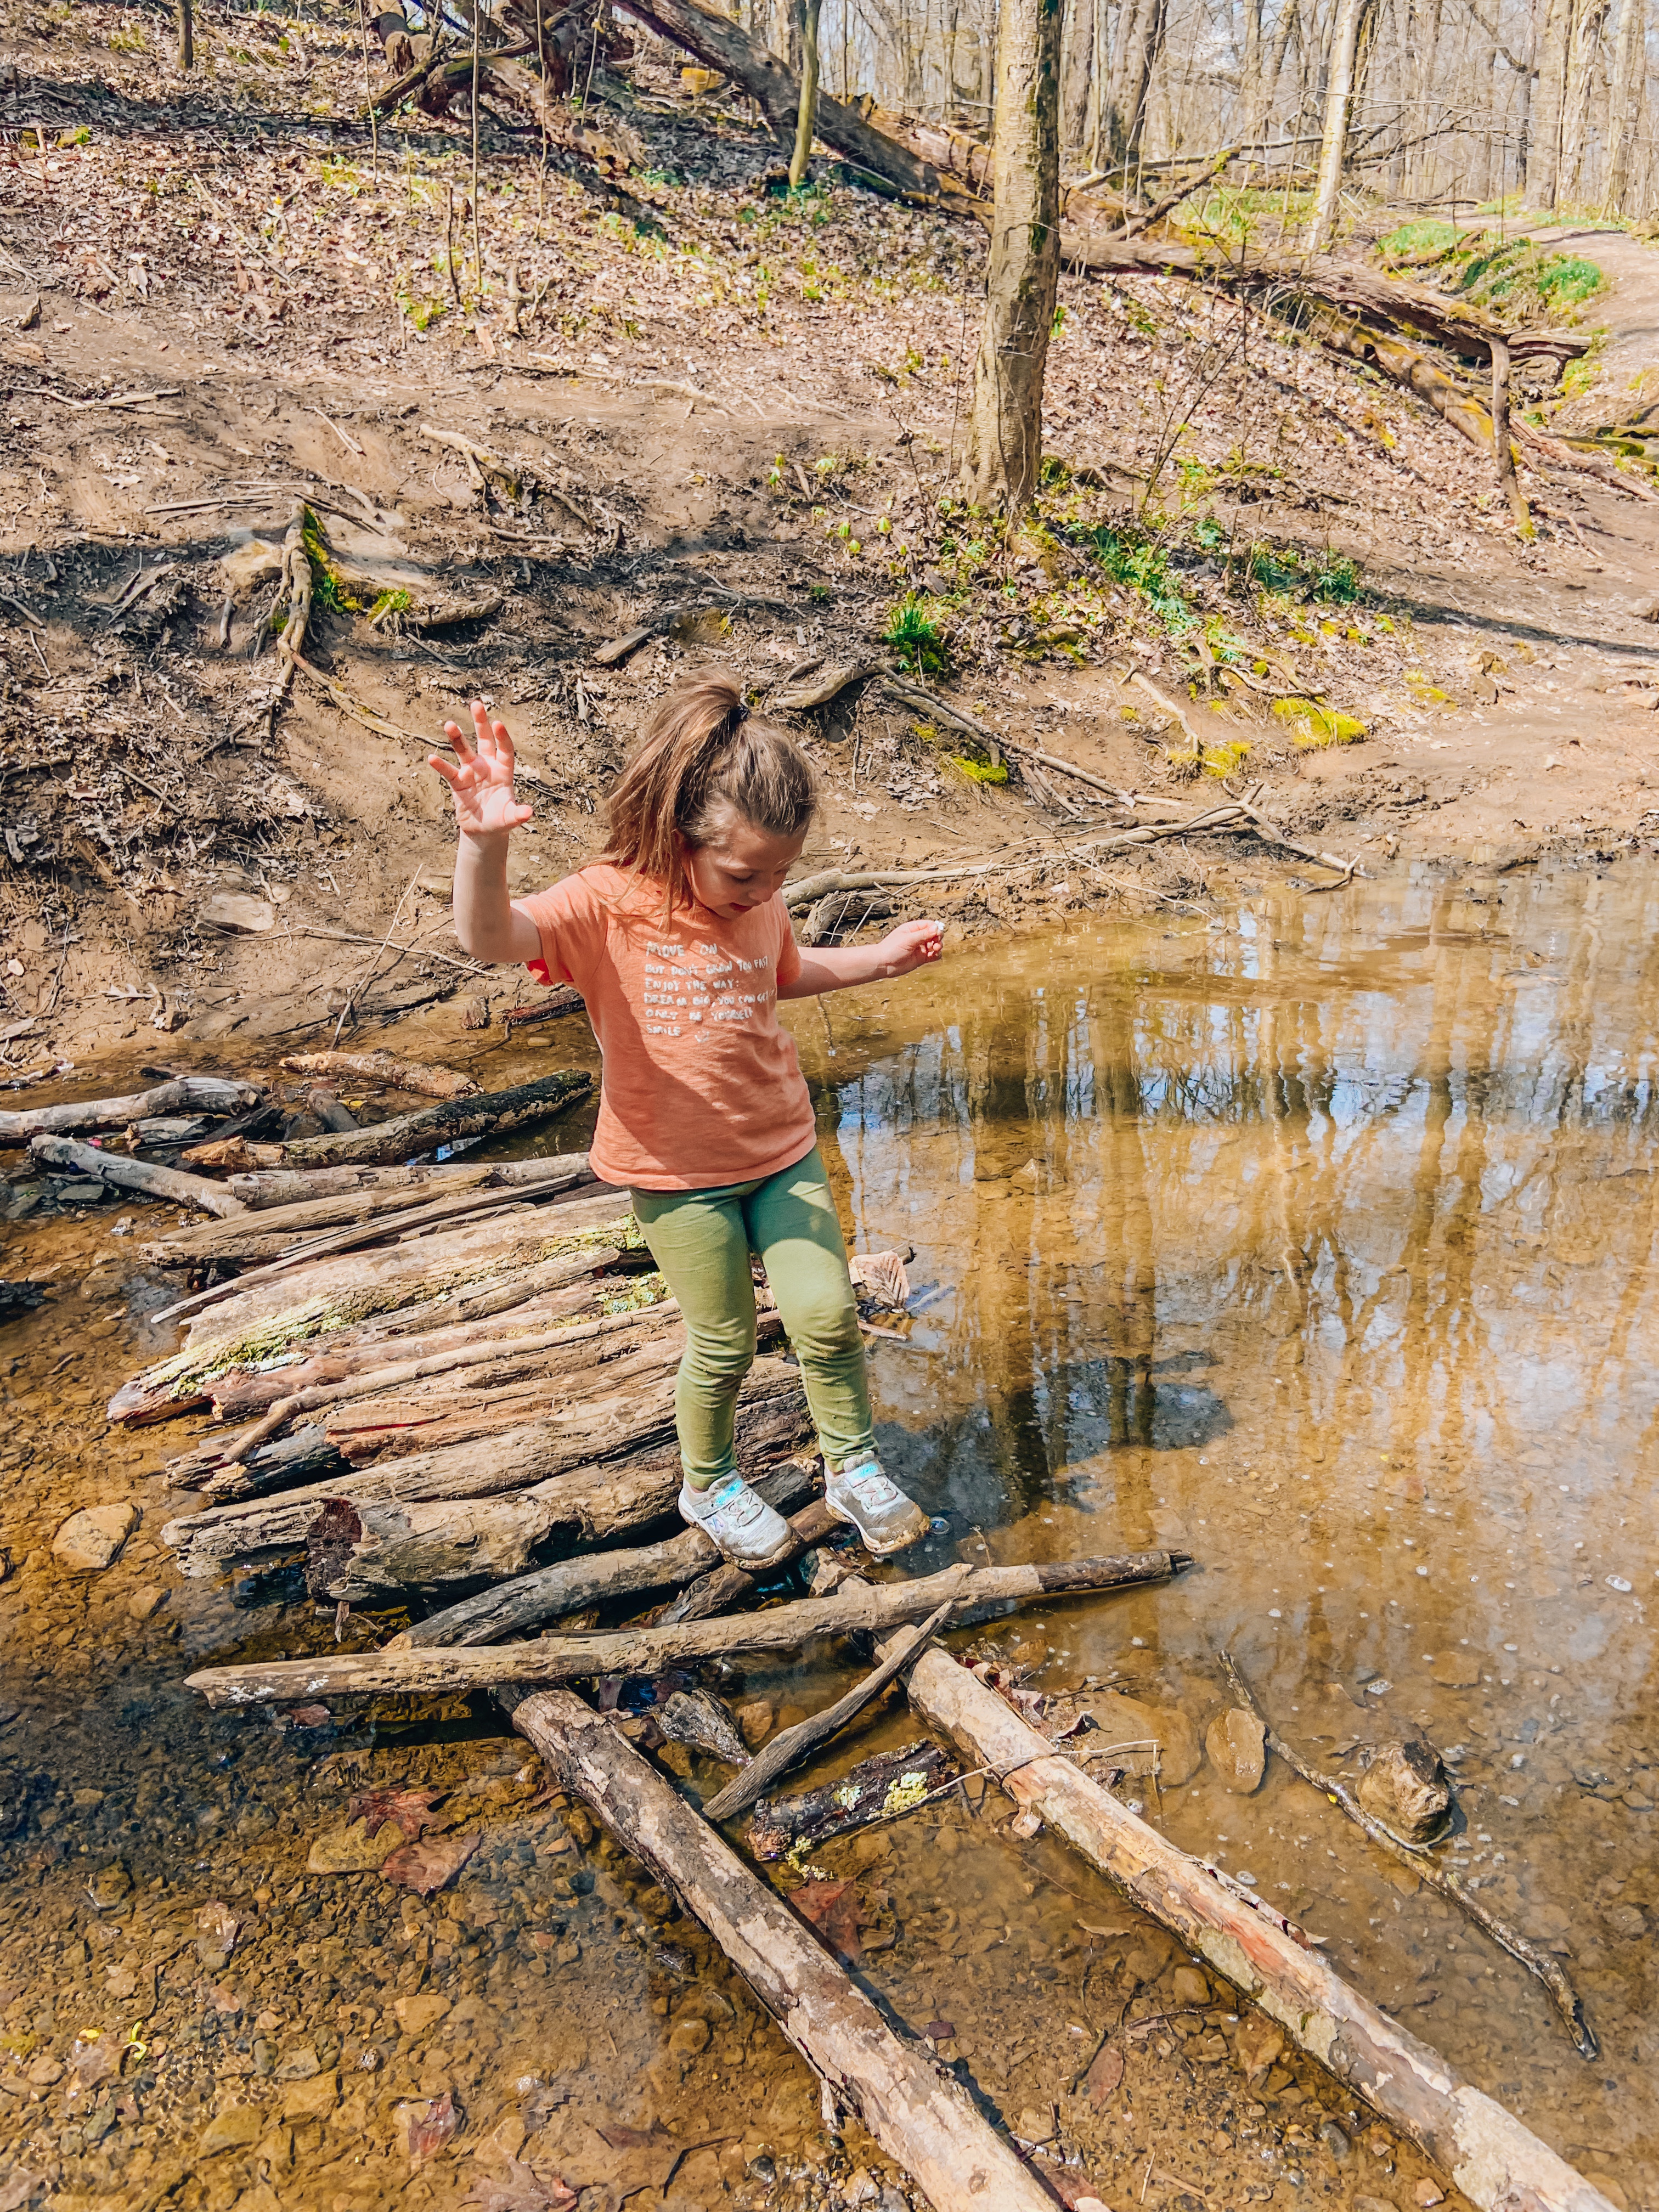
Since it’s the first time Mila and I’ve went so early in the year, I did not expect it to be as muddy as it was. If you’re planning on visiting in the spring, prepare for the slippery mud! It’s sort of everywhere.
This time, we went a different path from normal. We crossed the stream before the falls and went the long way around.
It was fun seeing them from a different view and just getting to explore. I did fall like ten times, but it was still a blast. We also got to climb over the river rocks and just get completely immersed in nature.
If you go the regular way to get to the falls, you do have to climb down a little rock way. This is normally somewhat slippery, but it was even more muddy which made it a little difficult to get up. I can imagine it was tricky to get down too. BUT there were so many people able to get up and down of all ages and ability levels. Just know it’s not accessible for those in wheelchairs or other limiting abilities.
Mila’s favorite part is actually getting into the water at the falls. She just loves to play and jump in it. She always looking for fish, frogs, and whatever else she can find too. At this time of the year, the water felt nice. I fell in the deeper water under the falls and was soaked. It wasn’t too cold for me to get back.
Our trips to Dundee Falls are so informative and an amazing sensory experience for Mila too. We loved pointing out wildlife and talking about cleaning up our Earth.
Speaking of… the trail and park in all is really clean. People who visit are mindful of their trash if they bring a picnic. They’re also really nice too. I’ve always had positive experiences visiting Dundee Falls. Some people even bring their dogs, which is always so cute!
The three of us had an amazing time Exploring Dundee Falls. Mila and I might have ended the trail completely muddy and soaked with water, but the adventure was worth every second.
Once you’re done visiting Dundee Falls, I would suggest making a short drive to the World’s Largest Cuckoo Clock. We go every time we’re near Sugarcreek! It’s Mila’s favorite.
Another place you have to visit is The Wallhouse. They have such great ice cream. It ends the day perfectly.
If you’re from Ohio, let us know some trails or places we should visit next! Or let me know your favorite place to go to where you live. Maybe we’ll have to go too.
If you’re looking to surprise a gardener in your life with a little gift, this DIY Gardening Grow Kit will be a hit!
Mila and I LOVE to garden. We try to grow vegetables every year and eat what we produce. It’s always a fun way for her to learn about the growing cycle and show her how much work it takes to make our food. She’s always very into growing flowers and making arrangements.
Let’s just say, we always are surrounded by plants and gardening supplies!
Since this time of the year is so close to Mother’s Day and end of the year, this is a great gift to give and easy to assemble too. You can find all these items at any local store.
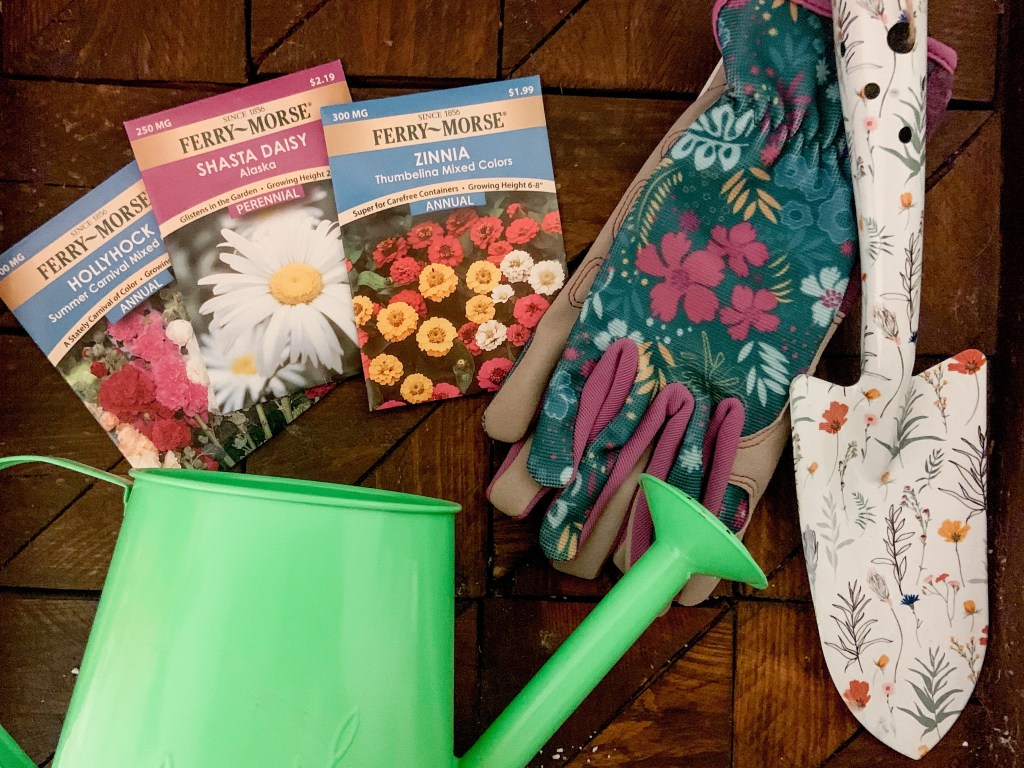
I love being able to put all the items into the watering can. It makes for an easy gift bag. You could also add ribbon or a printable with it too.
Even though I added flower seed packets, you could easily do veggies or even DIY seed bombs in there too. If you’d rather skip seeds in general, putting a plant inside of the watering can would be a cute idea too!
For soil, I would suggest either buying a whole potting soil bag or putting enough for a pot in a ziplock bag. You can easily stuff in it the bottom of the watering can.
This DIY Gardening Grow Kit will be perfect for the mothers, teachers, or any gardeners in your life!
What’s your favorite outdoor plants to grow: flower or veggies?