DIY Floral Handprint Art

If you’re looking for a memorable and easy craft for Mother’s Day, you’ll love this DIY Floral Handprint Art.

Not only was it simple to make, my four year old helped me through it all.

If you haven’t noticed by my last few posts on social media, we’re in a hand art phase. I think it’s a mix of wanting to preserve how little she is and they’re easy to do!

I’ve had this floating frame in my house for about a year. In my head I pictured it with pressed flowers all around. Then, the past few days I thought it’d be a perfect Mother’s Day gift to myself.

So, with Mila’s help and flowers from Josh, we created something beautiful.

For this DIY Floral Handprint Art, you’ll need:

*You can find this frame here.*

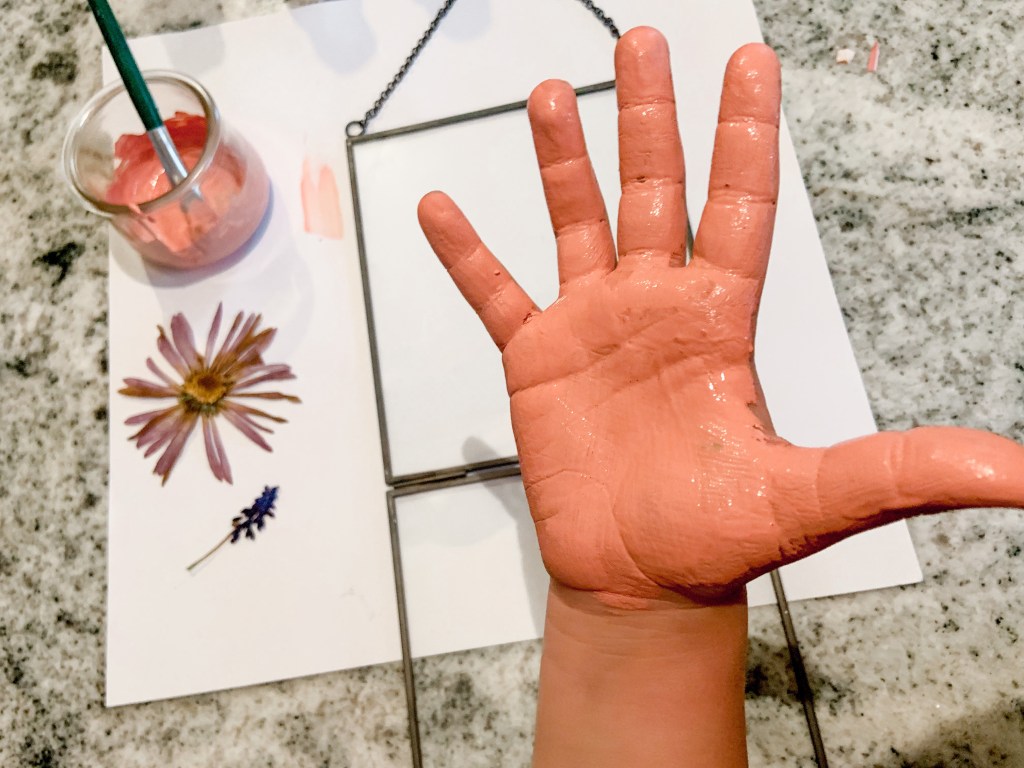
First, clean off your frame. I like to do this so I don’t noticed smudges after everything is finished. Plus, it’s nice to work with a clear area.

Then, paint your child’s hand. Mila picked pink, of course and I thought it looked beautiful. When it’s painted, firmly press your child’s hand on the inside pane of glass. If there’s a few missing space, you can repaint their hand and redo the process!

Next, let your child put the pressed flowers where they’d like.

When they have their final spot, clasp the second glass pane to keep the handprint and flowers safe.

On the outside, I decided to paint the word love and the year on the corner. “Love” was purely decorative, but the date is something I do on all of our projects!

Then you’re all finished.

I truly think this DIY Floral Handprint Art would be a lovely piece for moms, grandmas, and every other mother figure in your child’s life.


What’s your tips on pressing or drying flowers? I’d love to hear different ways… especially with Mila’s love of flower picking.

Advertisement

DIY Earth Day Handprint Artwork

Small hands make a big different, especially when it comes to protecting our Earth.

This DIY Earth Day Handprint Artwork is perfect way to showcase your love for Earth while using recycled crafts supplies.

At a young age, I’ve taught Mila she needs to love our Earth. We’ve always talked about recycling and how we need to be mindful of our decisions. She always picks up trash off the ground and loves every part of the outside world.

It’s important to me that she knows her impact and ‘small’ hands can help our Earth heal.

This DIY Earth Day Handprint Artwork was a perfect way to showcase that. We reused supplies we already had and made it cute to show off. Hopefully signs like these will help inspire others to love Earth as deeply as we do.

Here’s all we used:

  • Wood sign
  • Paint
  • Paint brush
  • Yarn
  • Hot glue

To start off, I reused the back of an old summer sign. It was the perfect size and shape of what I had in mind. Plus, it gave it another purpose too!

Next, paint your child’s hands resembling the Earth. This was a bit tricky. I just added blue paint first then topped it off with green. Obviously it’s not going to look exactly right, but I think ours turned out pretty cute.

Then, press down on your child’s hand to get the paint to transfer to the wood sign. You have to work quick so it doesn’t completely dry on their hands.

Once the paint is dry, you can add whatever quote around the hand Earth. I was inspired by The Letter Vee’s Earth Day worksheet and used, “Small Hands Make A Big Difference.” You can write whatever speaks to you!

At this point, I could’ve been done, but I had to add a little extra.

I used scrap yarn as bows on the hanger. The color really popped and gave that earthy feel. Once I saw that, I knew this piece needed more texture than just the bows.

So, I added the fluffy white yarn around the outside of the sign. It really made it look special and stick out.

Since I wanted to spread our love for the earth, this sign is hanging on our porch. Hopefully it’ll inspire someone to make good choices. The future of our world and children are in our hands.

We can make a difference.


What ways do you celebrate our Earth? Check out these fun ways we have:

DIY Handprint Photo Display.

Grandparent’s Day is this weekend! To celebrate, I, with the help of my favorite littles, helped create a DIY Handprint Photo Display.

One of my favorite ways to include Jensen with our family is to use his hand and foot prints. I learned how to transfer these a few years ago and I’m so thankful.

He’s always a part of our family.

My parents love pictures; my dad constantly takes them. Any gift that includes showcasing the grandkids is one they’re going to love.

This Handprint Photo Display is easy to do at home too! You’ll only need a few things…

First, attach a sawtooth hanger or whatever hanging device you like to the back. I normally do this first so I don’t hurt anything on the front when I hammer the hanger in.

The next and probably the most fun part of this DIY gift is the handprints.

You can find an ink pad at your local craft store. I think I found the one I’ve been using at Joann Fabrics. I’ve had it for a few years and it’s still full of ink!

There’s really no trick in getting the handprints nicely on there.

Since Mila is three, she can do it better than when she was younger. Isla, my niece, did not like the ink on her hands. I still think her handprint turned out adorable!

Just gentle press their hands on the pad then whatever else you’re using. Make sure to wipe their hands off after.

For Jensen’s, I do my special process. If you’d like to see some of my work, check out my Etsy page: Grey Woods Design.

Then, write their names over top their handprints. I just used a thin Sharpie, but you could use paint or even a circuit for this step.

After, heat up your hot glue gun and attach the clothes pins.

Add pictures of your parents’ favorite kids and you’ll have a perfect DIY Handprint Photo Display!

Although I didn’t take a ton of pictures of this DIY, I hope you liked the video! It was so much fun to do.


Do you celebrate Grandparent’s Day? If so what do you give to your grandparents?