Mother-Daughter Self Care Night Ideas.

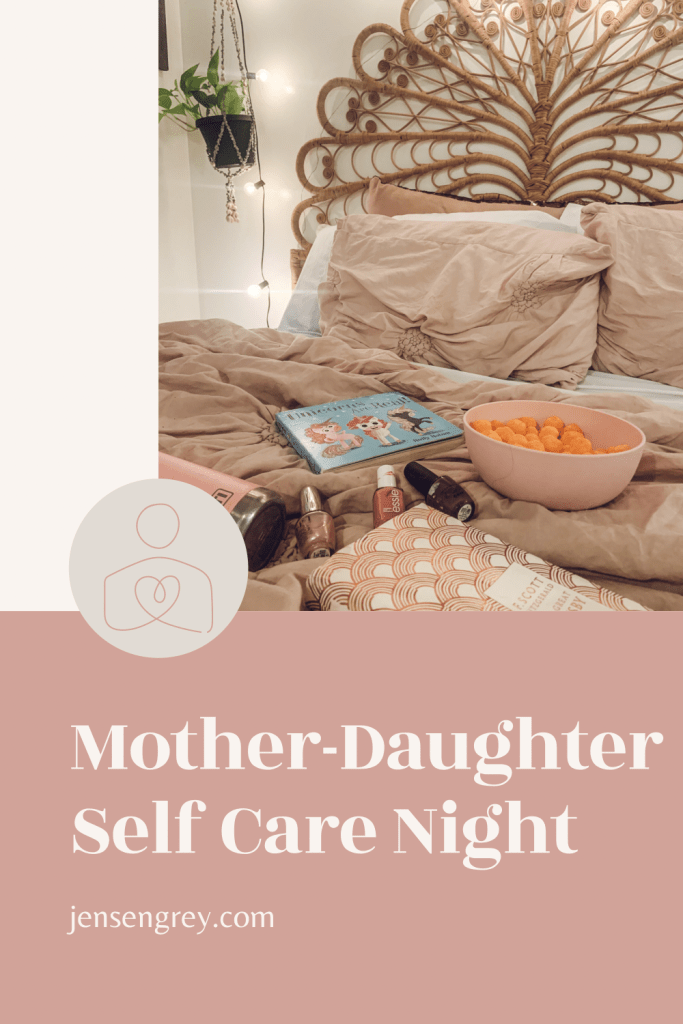
There’s nothing more special than a mother daughter date night! Instead of going out, Mila and I stayed in and practiced self care.

Since this first week back to school has been hectic, staying in and relaxing felt right. We both needed the rest and the together time to recharge for the upcoming week. Plus, we got to just focus on what self care we needed.

To begin the night, I took a hot shower where I put on a hair mask (seriously the mask I linked does wonders!) and used sugar scrub.

I never have enough time to do these extra steps! Setting aside this time made my skin and hair feel so soft and new.

Mila, on the other hand, had a bubble bath beforehand. She spent her time doing her own makeup. I didn’t know this, but she definitely was feeling herself and all the glitter.

We kept it on until right before bed because she liked it. When you have a self care night, you have to feel like your best self.

I can’t blame her for wanting to be covered in glitter.

After my lotion dried, we put on our favorite jammies. Then, we got our self care essentials for the night:

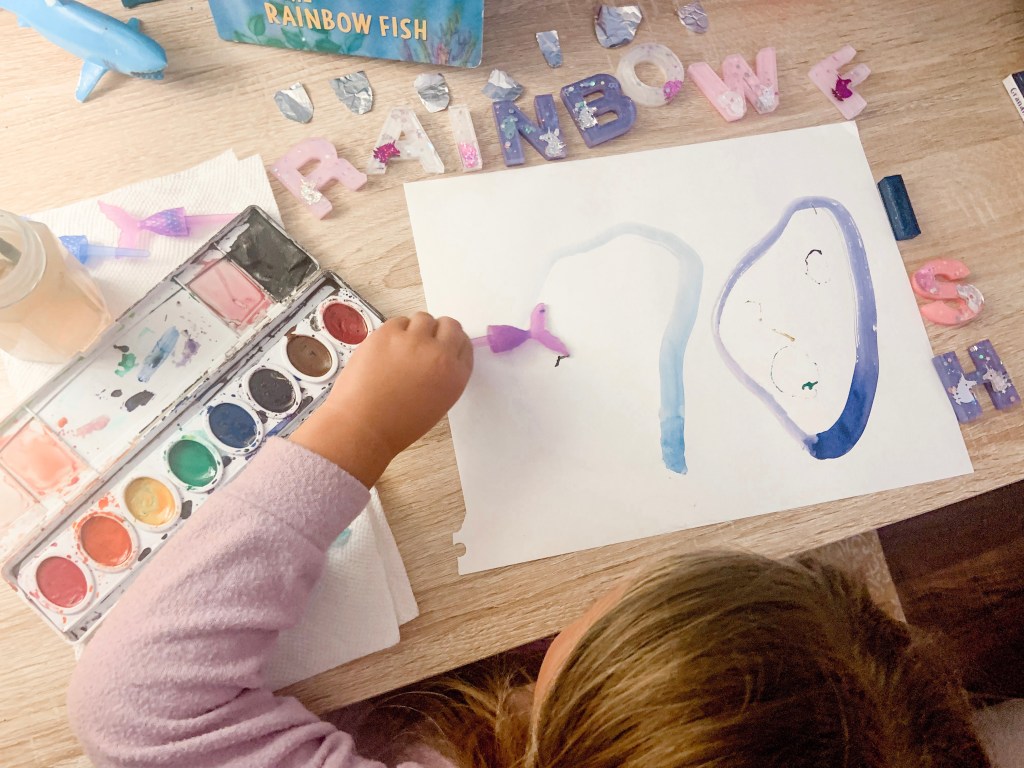
Mila choose to read Unicorns Are Real! by Holly Hatam. I got to read a few pages of my fav The Great Gatsby.

As a busy mom, I don’t always get to read as much as I’d like. Just even being able to read a few pages felt so nice. It’s also amazing for Mila to see me reading and enjoying it! I hope so loves English and language as much as I do.

The book she picked out is adorable! She often asks me to read it to her before bed. Now she makes up the story when she looks at it herself.

Throughout watching movies and reading our books, we snacked on our cheese balls and jello.

Mila asked for water, without Mio. I’m so proud of her positive choices. I told her she could have anything to drink and that’s what she chose.

We ended the night taking selfies and I painted Mila’s nails. I love that we both have dark purple polish on now. Anytime we can match, I feel like we try to do it. Even when we stay in.

It wasn’t long after her nails dried until Mila fell asleep. We had wiped her makeup off and she was just relaxed.

I ended the night watching dance moms and maybe had a few more cheese balls too.

Our night was pretty perfect.

We love being together and doing the things we enjoy. I can’t express how much joy Mila brings me. Hopefully she’ll be able to see the importance of self care as she gets older.

We all deserve to love and cherish ourselves.

Have you ever had a self care night with just your or with your little? What was your favorite activity?

Toddler Activity: Cake Decorating Sensory Bin

Cake it till you make it with this Cake Decorating Sensory Bin.

Shaving cream is such a fun ingredient to use during sensory play. It’s cheap, versatile, and easy to clean up. That makes this bin perfect for kids and their parents!

I also loved seeing Mila’s creativity again and again. She did a lot of different designs and pretended she was a cake decorated the entire time.

It was a sensory bin success!

Here’s the only things you’ll need for this one:

I feel like I always say this, but putting this bin together took no time.

The longest part was cutting up the straws into sprinkles. For this, all I did was randomly cut it in small pieces. I didn’t measure or make anything exact.

Then, I put shaving cream in the bin. There was a decent sized layer there, but I didn’t fill the bin.

After that, I set it in front of Mila and told her the goal of the sensory bin. She did everything else without me having to monitor it.

The only thing I did have to mention that this was shaving cream… not whipped cream.

Mila played with this activity for way longer than I set it up. Which is always a win in my book. When she wanted to clear off her cake, we put the sprinkles in a colander and cleaned them off.

This Cake Decorating Sensory Bin really was such a simple and fun activity for her!

I’m the future, I can see this activity expanding into her spelling words or having her make certain images. Mainly because it was so easy!

Let me know in the comments your child’s favorite type of sensory play. I think Mila’s might be water!

Check out these other sensory play ideas too:

Toddler Activity: The Rainbow Fish Paper Craft

The Rainbow Fish by Marcus Pfister is a classic story about sharing. Since preschool is quickly approaching, I thought this story and lesson would be great for Mila to read and remember.

Sharing can be a tricky thing to learn, so a book with beautiful illustrations is a great place to start.

One of my favorite parts about this activity is you can make it however you want!

Every fish will as individual as your child.

Here’s what you’ll need:

Before the activity, I prepped the basics of Mila’s fish.

Instead of a paper plate, I just used left over scrapbook paper to make the fish’s body, fins, and eyes. Then I cute out aluminum paper and taped it on the fins. I tried to mimic the book, but I think it turned out just fine!

At this time, I also premade the foil scales too!

To start out this activity, we first read The Rainbow Fish. While reading, I asked Mila a few different situational questions like…

Would you share your scales?

Do you think you have to share to have friends?

Would you be sad if someone didn’t share with you?

Do you know you’re just as beautiful inside as your are out?

Plus a few extra ones that I can’t think of at the moment. Yet, they all touched on these topics.

Another BIG thing we talked about with this book is consent. Mila stated she wouldn’t want to give away her scales or parts of her. When she said this, I thought… duh mom?!

We talked about how it’s okay not to share all of yourself or things with others. But it is nice to take turns with toys and listening ears.

Who knew she’d get so deep so fast.

Then, I had her use her watercolors to paint her own scales. She made me a beautiful pictures first.

After she was finished painting, we let the paint dry. It only took a little bit and you could speed it up with a hair dryer. Then make more paper scales.

To assemble rainbow fish, I taped the back of the scales and we talked about sharing and consenting again.

While she taped on her painted scales, I would ask her about positive ways she could share in preschool. Every time she thought of one, she could add a shiny scale to her rainbow fish.

I think she did excellent and was so proud of her fish after it was done!

When I reflect back on this book and activity, I’m really shocked with the questions she had. It also made me smile knowing she’ll be good to go with sharing and being a friend in preschool.

Let me know in the comments if you love The Rainbow Fish or what other books about sharing you’d recommend.

Then, if you love pairing books and activities, check out some of these ideas…

Water Balloon Tie Dye Sheets

What’s more fun than water balloons? Throwing water balloons with tie dye in them at a perfectly white sheet.

Let’s just say, Mila custom made me Water Balloon Tie Dye Sheets to celebrate summer.

AND… I love them!

So, let me tell you this first. It was sort of a huge jump of faith to do this activity. Mila was introduced to water balloons this year and throwing them at other people… do you get where my brain went?

Unlike Mila, I didn’t wear a swimsuit for this activity. I hoped with all my might she wouldn’t just throw them at me.

She ended up not getting me with them, but if you do this activity, beware! Tie dye is so hard to get off other clothes if you can’t get to it right away. It also takes a few days to get off of skin too.

But it was totally worth it! This is my favorite art project of the summer that I get to use frequently!

When you brave it with your kids, here’s what you need:

There is some prep going into this activity. It’s a lot easier than the Balloon Pop Artwork we did for Mila’s birthday!

For some reason, Mila slept until 10 am one morning, which gave me a perfect amount of time to set up and prep for this. Usually I’m all for older kids helping with prep, but this one can get messy!

To start off, I mixed the tie dye together and let the solution saturate.

Then, I color coordinated the balloons to match the dye. This way Mila knew what to expect and could do more color recognition… because we’re always learning!

After I thought they were mixed enough, it was time to start.

I’m guessing there’s probably easier ways to do this, but this is how I did it. If you know of a better way, PLEASE let me know in the comments.

Anyways, I blew up the water balloon with air. Then, added the tie dye water to the balloon by sticking the tip of the bottle into the balloon. After, I added extra water into it.

See… messy.

I found it better to blow it up as much as it could and not fill it completely with water.

Not going to lie, this took a little while, but I had the time. If you’re planning to do this, just know they’ll want way more than you planned! We probably threw around 50 to 75. They all didn’t hit or pop on the sheet.

So, if you think you have enough, do ten more.

After the balloons were done, I set up the outside area. Since I have access to pallets, I used that to hold the big sheet. The pillow cases went to the ground to catch the splatter.

At first I had it more upright, but it worked better with a slant.

By the time Mila woke up, the area was ready to rock-n-roll. Let’s just say, she woke up pretty easy when she found out what we’d be doing!

All I told her to do was get her swimsuit on and meet me outside.

Then she saw the balloons and sheets.

I told her the plan for the day and she took right to it. Again, I’m thankful she didn’t hit me with any because I wore normal clothes. Which I would not recommend.

We found out that the balloons were harder to pop than we originally thought. I’m guessing because of the air in them.

She found her rhythm though!

Look at that lefty power.

It took a lot less time to throw all the balloons than it did to pop them.

I actually made more midway through.

We had fun talking about the different colors and making predictions about their pop. Like I said, it took a little bit to figure out how to pop them. I think the sheets softened the blow.

It was fun watching Mila’s strength and persistence while throwing them.

One tip I’ll give is to turn the sheets and pillow cases half way through. That way both sides can get optimal color!

I am super impressed with how these turned out.

To finish off the tie dye, I folded the sheet and pillow cases up, put them in a plastic bag, and popped them in the refrigerator overnight. Then, wash and dry them. They’ll be ready to go after that.

Once I put them on the bed, I’ll update this post and share on Instagram and Facebook.

We’ll definitely be tie dying again with this kit! I’ve made a few shirts with it, but this way by far the most fun we’ve had with it.

Have you ever tie dyed anything? What’s your favorite way to do it? Comment to let us know.

I think ours is with water balloons!

After you comment, check out how these moms incorporate water play with their kids!

Christmas in July Snacks.

Christmas is officially SIX MONTHS away! I can’t believe 2021 is halfway over.

To celebrate the occasion, Mila and I made some Christmas inspired treats. Then, we cleared out some of her older things to give to others. ‘Tis the season of giving.

The three snacks we made were Strawberry Santa’s, marshmallow ‘Olaf’s,’ and frozen hot chocolate.

Each are pretty easy to make. They all include one of Mila’s favorite things: sugar.

For the Strawberry Santa’s here what you’ll need:

  • Strawberry’s
  • Whipped cream
  • Sprinkles
  • Food coloring

To make this little guy, all you need to do is cut a strawberry in half. Then, add whipped cream to the middle to make Santa’s face and beard and to the top to make the fluff on the top.

A face only Mrs. Claus can love.

I made his eyes with food coloring… I’ll admit, he looks like a creeper. But let’s just say Santa has some shades on. For his mouth, I added a red sprinkle.

Out of the three, this was my personal favorite. Yeah, I know I’m on a strawberry kick this summer.

Mila’s favorite was the Marshmallow Snowmen. she obviously named them Olaf’s.

All you’ll need for these are;

  • Marshmallows (2 per snowman)
  • Chocolate chips
  • Sprinkles
  • Toothpicks
  • Food coloring.

Honestly, these are just as easy to assemble.

I stuck the toothpick through both marshmallows to keep the snowman upright. Then, I pushed the chocolate chips in as eyes and buttons. Finally, an orange sprinkle made the perfect nose.

For his smile… I just painted on food coloring because that would have been too many chocolate chips.

I think I also wanted to showcase that I actually know how to paint on a circle to a face.

I think this was Mila’s favorite treat. Mostly because she loves Olaf and the nose made her giggle.

Last but not least, the frozen hot chocolate was so easy to make.

All I did was take a hot chocolate packet, milk, and ice to my blender and mixed it up. It turned o it really good. Then I put it in the Santa mug and topped it off with whipped cream.

After our little snack, we took the time to go through Mila’s old clothes, toys, and baby accessories. I think the sugar rush definitely helped Mila get through it.

It was nice to clear up some closet space for Mila and giveaway a few toys.

I told Mila she was Santa’s little helper. Then reminded her he’s always watching so to keep being a good girl!

Now she won’t take off her Santa headband! We’ve been reading Christmas books and watching Christmas movies too. I guess she’s already excited.

Mila and I had so much celebrating Christmas in July!

It’s always nice to make something special for Mila. AND I love teaching her early on that giving is important.

Ww have a little work to do for when Santa’s not watching, but it’s a start.

If you’re looking for more ways to celebrate Christmas in July or want to have a little party to celebrate, check out how these moms do it:

Shark Week Paper Craft

Duuun dun duuun dun… look out, it’s Shark Week!

This might be the first year that I’ve ever participated in Shark Week. They’re one of my biggest fears… good thing I live in Ohio. But, I’m raising Mila to be fearless, so we did a toddler-friendly shark inspired craft!

The set up is reminiscent of our Frida Kahlo portrait we did earlier this year. Just shark inspired.

Here’s what you’ll need to hammer it out:

Since Mila isn’t the Steven Spielberg of using scissors, I prepped this activity. If your kids are older, they’ll have fun with this.

All I did was cut out different shapes of the shark and waves for her to put together.

  • Light blue for the background
  • Newspaper for the shark’s body
  • Black for the shark’s mouth and pupils
  • White for the eyes and teeth
  • Dark blue for the waves

Honestly, I just free-cut everything jaws because it was easier and I knew it wasn’t going to be ‘perfect.’ I’m so happy I did because the shark’s expression is amazing.

Once your done cutting the pieces out, have your child assemble their shark.

I let Mila place the shark’s parts however she wanted. She also had her toy shark for reference. The only thing I did tell her was that a shark’s mouth is FULL of teeth.

Take a bite out of this…

Shark’s will have 30,000 teeth over their lifespan. I told Mila that, but she doesn’t really know 30,000 is a huge number.

Back to the craft…

While Mila was working away, I found the letters to ‘shark’ in the newspaper to cut them out. There’s always an opportunity to learn letters, so we take them.

After the pieces are set, glue them down.

So, Mila’s shark is the only shark I probably would not be afraid of seeing in the water.

I mean, just look at him.

He’s not very ferocious and makes me laugh every time I look at him. I don’t know if it’s how big the eyes are or the mismatched teeth…

All I do know is Mila is extremely proud of her shark.

He’s currently hanging on our fridge. So every time I look in our kitchen, his bewildered face makes me smile.

Isn’t that fintastic?

We hope you liked our Shark Week paper craft! It’s always fun to see your child creating and learning at the same time.

What’s your favorite type of shark?

I’d you’re looking for other Shark Week activities, check these more ferocious ones out:

Support Local: The Little Theatre of Tuscarawas County.

Mila and I got all dressed up to meet some friends for a play! It was Mila’s first. She was so excited to see The Little Theatre of Tuscarawas County put on The Little Mermaid.

Okay… she was way more excited than this picture shows. This was after watching and she was tired!

The play took place at Dover High School‘s auditorium. It provided comfy seats, a decently sized stage, and an overall nice atmosphere.

I will say… Mila and I did get lost finding the restrooms though.. oops!

We met Mila’s dance friend, her sister, and mom there. The girls were SO excited to see Ariel. The potential of meeting here was in the air. All they had to do was watch one of their favorite stories unfold in front of their eyes.

Since it was there first play, we explained how they worked. The lights would dim when they play would start. We had to stay quiet while the lights were dim and they were on stage. Clap after the songs. No eating and drinking while we were watching.

The first time they saw Ariel was like magic. Every time she left the stage, they wondered where she went!

It was so cute seeing their excitement and hearing their little chatter. Thankfully the people in front of us didn’t mind toddler talk and their seats being touched.

Honestly, hearing all the kids in the theatre made it extra adorable.

The play would be in two parts with an intermission in between. I’d say the break was definitely needed with two three year olds.

Although I won’t give too much away about the play (you know the story), the intermission took place right after Ariel lost her voice. Hopefully if you go the next two nights, this can help you plan for your littles.

During intermission, the girls took some pictures, ate a snack, and got some of Ariels treasures!

Her treasures were some mermaid inspired merchandise. Mila got a necklace, ring, lipgloss, tattoo, and shell. They also had crowns, keychains, and so much more.

One really cool option was writing a note to a cast member. Mila and the girls chose to write their note to Ariel!

During the second part of the play, the girls were getting tired. Somehow knowing they were about to meet their favorite mermaids kept them awake.

Honestly, I was so impressed by the play. It’s the first local one I’ve been to in a couple years. The actors were amazing. I laughed so many times throughout the entire thing. Sebastian had me laughing out loud every time he was in stage! The music and singing amazed me too. On top of that, the props and costumes were on point too.

It was just such a great play.

As they play ended, the girls knew it was time to meet all of their favorite characters. It was so interesting watching Mila interact with different characters.

She ran up to King Triton and gave him a big hug. On our way home, she told me, “Ariel’s daddy is so cute!” No wonder why she ran up to him then! When she saw Sebastian, she had to go talk to him too.

I mean, just look at their costumes!

Then, she saw Ursula. Mila refused to even stand beside her. I absolutely loved her costume, makeup, and performance. It’s quite comical that Mila wanted nothing to do with her. She knows she’s ‘evil’ in the movie.

The girls met other cast members and took their pictures. Mila also did not want a picture with Flounder or Prince Eric. I found this perplexing because she loves watching them.

While we were meeting with other characters, Ariel snuck in the room.

Mila was so giddy and just happy to see her.

The actress was so patient and gave each child time to talk. I think that’s such an important thing to do when portraying a Disney princess. It’s a huge deal for kids and she understood that.

I wish I could tell her thank you again!

The night was absolutely beautiful. We got to spend it with great friends watching an amazing performance! The added bonus of meeting Mila’s favorite characters just made it sweeter.

Although the rest of The Little Mermaid performances are sold out, you should still check out The Little Theatre of Tuscarawas County. They put on different shows throughout the year. I can only imagine they’re as great as this one!

I can’t wait to see what they put on next year for the kids. Mila and I will definitely go.

Maybe one day she’ll want to try theatre too. Who knows? No matter what she does, I’ll be there cheering her on.

Until then, Mila and I have plenty of mommy-daughter date nights ahead.

What was your or your child’s first play?

If you’d like to support The Little Theatre of Tuscarawas County, check out their website. They provide a ton of great ways to get involved with local arts.

Toddler Activity: Marshmallow Painting

S’mores are obviously a huge part of our summer. We have tons of fires and we’re always craving the gooey treat. Sometimes, you can have a ton of leftover marshmallows. Instead of just throwing them away before they get hard, try this Marshmallow painting.

It’s a fun way for kids to play with their food and wait for the s’mores to get done!

If you’re by the campfire making s’mores, you have almost everything you’ll need.

  • Marshmallows
  • Paint
  • Sticks
  • Canvas

To start this activity off, I had Mila go find sticks. It gave her some time to explore and find the perfect ones.

While she was doing that, I prepped the painting area. All you need to do is find a spot for your canvas, get a palette (I used old cardboard) to put the paint, and get out marshmallows.

Once Mila got back with the sticks, I stuck the sticks in the marshmallows to make a ‘brush.’

Before she started painting, I asked her to tell me a campfire story through her art. So, while she was painting, she was telling a big story. Everyone color represented something different.

The storytelling part of this activity is my favorite! People have been telling stories around the fire since the first humans.

I can’t remember exactly what Mila’s was about. There were a lot of details.

What I do recall is the story was about me, Mila, and Max. We rode on a bike to get plants and a tree. She was purple, I was pink, Max was orange, the plants and tree were green, the bike was blue, and there’s some colors she used again that I don’t remember why.

I should have been recording her tell the story, but I didn’t think about it until after. Either way, when I look at her little painting, I smile.

Afterwards, we enjoyed a little s’more and told more stories. It was such a fun activity to start our evening. Summer nights like these are my absolute favorite.

In the next week or so, I hope I can start writing down her stories. She’s been telling a lot of them and I want to make sure I always remember. When I do, I’ll make sure to write a post about it in case you’d like to do something similar.

Have you ever painted with marshmallows before? If not, what’s your favorite camping or summer craft you did as a child?

Here’s some other summer/camping crafts you might want to check out too!

DIY Stars and Stripes Sign

Hello July!

I can’t think of a better way to start the month of than a DIY sign. Especially when a three year old is doing all the heavy lifting! With the Fourth of July right here, it seemed fitting to do a patriotic Stars and Stripes sign.

On Pinterest and Instagram, I’ve been seeing so many cute, patriotic signs. I knew Mila and I had to make one too. When I went to Joann Fabrics last, a wooden sign was calling out to me.

*I’ve looked all over Joann Fabrics’ website and Amazon to link the sign. There’s nothing comparable, but something still could be in your local craft store. Whenever I go, there’s a multitude of wood signs! Plus, you might find something else you like more!*

Unfortunately, I got too excited to actually take pictures of the plain wood. I painted the outside of the sign blue. Then, red and white went on the ‘stripes’ in the middle.

I just used craft paint and it worked fine!

Usually, I set up Mila’s activities and projects when she’s asleep or working on something else. When she saw me painting, she was not happy with me! She didn’t understand why she wasn’t painting either! Oops.

I promise the next part makes up for my apparent painting betrayal.

After the sign was dry, I laid out her part of the activity. She requested we use light blue in the sign too… which was a fantastic choice.

All we ended up using was:

Of course, I laid down brown paper to protect my table and a paper plate to dip in the paint.

Thankfully this isn’t the first time Mila has used something other than a brush to paint. She knew she had to push down hard to get the paint off.

It always amazes me how she creates art. I have no idea what her method is, but it always turns out so cute.

She ended up layering all the star sizes and blended the colors. I love how some of the stars turned out ombré from navy to light blue. The pops of light blue are actually my favorite.

Since the sign wasn’t huge, it didn’t take too long to fill the inside up.

I went back and forth on adding words or something on the blue ring of the sign. Eventually, I decided it was perfect how it was. I didn’t want anything to take away from the stars. Sometimes less is more.

If you can’t find star cookie cutters, sponges would be an amazing alternative. We haven’t used sponges to paint a ton, but it’s on our list this summer!

I am SO happy with how our DIY Stars and Stripes sign turned out. It’s proudly hanging on our front door now.

My favorite part is just making art with Mila. It’s something I’ll always treasure.

The next few days will be ones to treasure too! I’m excited to see her react to our community’s festivities and fireworks. As a child, I loved being around my family for the Fourth and hope Mila does too. Check out her second Fourth of July here.

I hope you have a fantastic July as well!

Do you craft or make signs for different holidays? If so, which is your favorite holiday to craft for?

Toddler Activity: Mermaid Swim Party

With summer heat waves, it can be hard to stay cool when you’re outside. Our favorite way is to add water play to our routine. This week started off with a Mermaid Swim Party.

Every day, I like to do a hands on activity with Mila. In the summer, that usually happens first thing in the morning. It’s a great way to set the mood and guarantees extra learning for the day!

A win-win right?

Since Mila loved the beach sensory play activity earlier this month, I thought I’d bring those themes back.

The best part, we used actual water this time!

A mermaid swim party wouldn’t be complete without these:

This activity was pretty simple to set up. The hardest part was getting the sprinkler in the hose.

All I did was setup the sprinkler (which wasn’t that hard at all), grab the items for the sensory bin, place them in, and fill up the bin with water. That’s all!

Before I let her play with the bin, we read a book. I believe reading books everyday is so crucial for a child’s development. They’re able to expand their vocabulary with every new word they here and start becoming familiar with sight words.

For this activity, we read That’s Not My Mermaid from the Usborne series.

It was a fun stepping stone to get her describing the differences of our mermaids during the activity. Plus, Usborne books are so educational. We love this series and find different ways to learn from it each time.

I would recommend the That’s Not My series to anyone!

After we read the book, I showed Mila her sensory bin and let her do whatever she wanted with it.

She went wild!

Between the water, the mermaids, and the sprinkler, she thought it was the best activity. I loved the way she reacted to it all. It’s always so much fun to see her growth through play.

I’d love to say I watched her the entire time, but she played with this activity for two hours. Yes. You read that right THREE HOURS.

For some reason, she really just thought this was a blast. We did different educational activities like talking about the resin letters and talking about the differences in the mermaids. She also loved pretending and making up stories about them.

At one point, Mila even got into the sensory tray to try to play with them more.

Eventually, after three hours, Mila was finally done with this activity and playing with the the hose. I was amazed that she was so engaged. It allowed me to wash the dishes, change the laundry, and tidy up. Of course, I kept checking on her, but it was hot!

Honestly, it makes me so happy to see how much she loves to play, use her imagination, and be outside. If creating simple activities helps, I’ll keep doing just that.

What are some of your favorite ways to beat the heat waves? Do you stay inside or like to play with or in water too?

Make sure to check out these other water inspired play ideas too!