DIY Fairy-Tale Garden

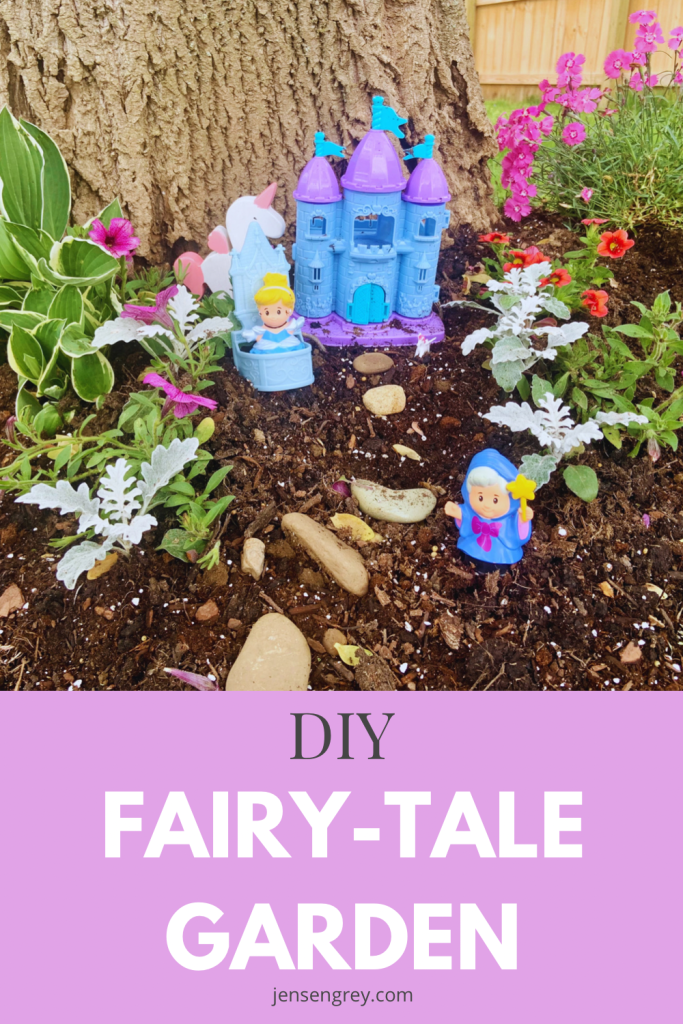
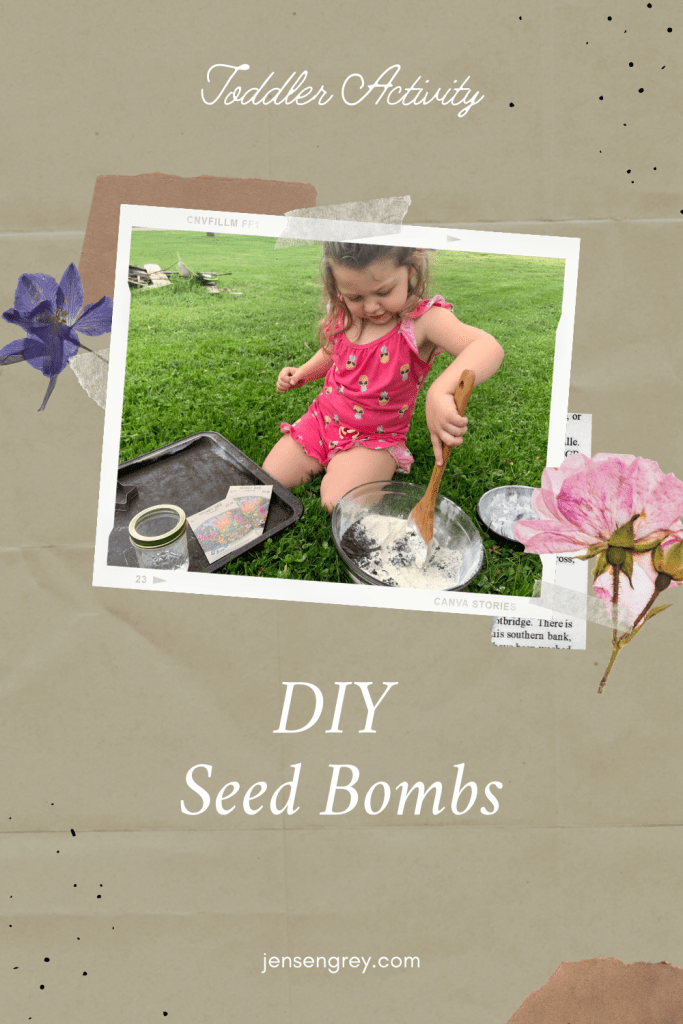
April shower bring May flowers. To celebrate just that, we’re welcoming May with our very own DIY Fairy-Tale Garden.

Mila is obsessed with fairy gardens. My parent’s neighbor has the little fairy figurines in their garden and Mila goes to play with them every day. I figured she should have one of her very own since she likes them so much.

Since we love our fairytales, I thought a little spin on the idea would be fun for Mila’s imagination.

One day after work, we went to our local Lowe’s and picked out flowers that made her smile. She loves pink and purple so all the flowers are just that. I also encouraged her to pick some non-flowering plants as well.

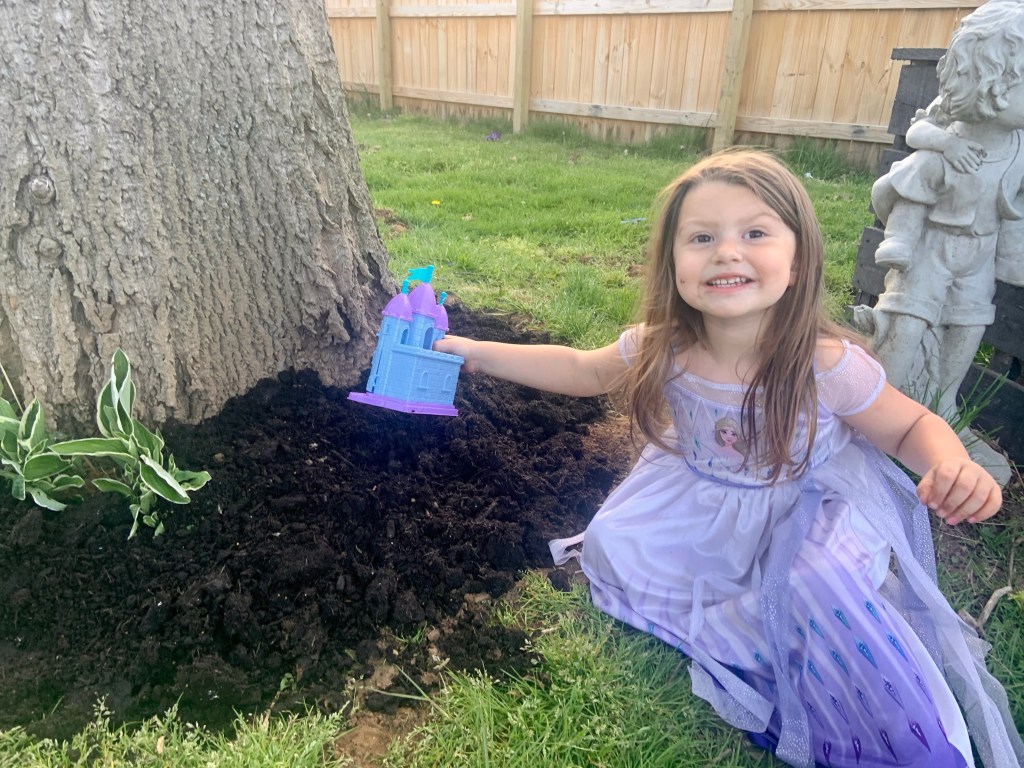
I also purchased filling snd too soil at Lowes’s. At our dollar store, Mila picked out a princess castle to place in her fairytale garden.

Then we started digging.

I most definitely should have taken before pictures, but we were too excited to start.

We picked the tree in our backyard to make the fairytale garden. It has a few hosta and wildflowers already there, so we left them. We did clean up the area by taken out the weeds.

The area also needed built up. We used a ton of fill dirt and top soil so our plants and flowers could thrive.

One word of advice for all toddler parents is to buy your toddler their own little shovel. Mila had so much fun digging holes and helping along the way.

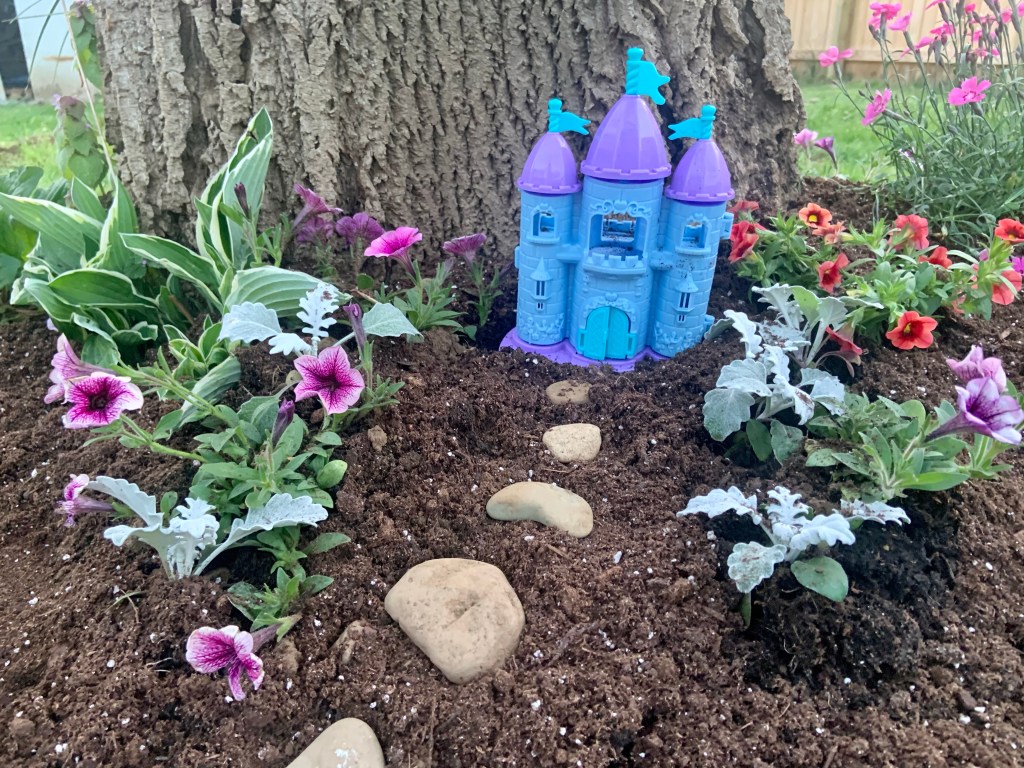
She also found rocks to lead up the the castle. We’re going to try and get more to put around the circle too.

We brought out plastic toys that won’t be impacted by the weather out. Mila was also gifted a gnome set to place here too. It’s going to be a mixture of all things magical.

Just like a fairytale.

I’m so excited to see how the garden and Mila’s imagination grows this summer. We are constantly outside, so I know this little area will be well loved. She’s even already showed it off to her friend who lives close.

With a little hard work, there will be a summer full of fun.

Some key items we needed to make our fairytale garden were these:

I hope that if you want an outdoor place space like this, you’re able to make one. It could have easily been made into a big pot that could be brought inside for winter too!

If you end up making a fairy or fairy-take garden, I’d love to see or hear about it!

Do you have any gardening memories that you did with a parent, grandparent, or any other important individual in your life?

Before you go, check out how these moms incorporated fairytales in their children’s play:

Toddler Activity: DIY Mother’s Day Watercolor Cards

If you’re like me, you might be running a little behind getting Mother’s Day presents. One thing I always seem to forget is the card! This year, try these DIY watercolor cards!

These are a fun way to share your child’s creativity and a way for you to get involved too. Mila loved seeing our creations and I know they’ll be a hit. This could also be a great tradition to start with your children too. They could end up just making them for you as they get older.

All you need is:

This activity is pretty easy.

Go to an area or set up one that you’re okay with paint getting on. Then lay everything out. This specific water color paint was already mixed up. This made it easier for Mila so she didn’t have to dip her brushes in water first.

After, let them paint whatever they would like. There’s no right or wrong way for them to paint or create these.

Once they’re done with a specific card, have them sprinkle salt on the paint. Not only does this help it dry, it creates an amazing texture to the cards. Plus, it’s a little science experiment that your child will love!

They can continue with their painting and salt.

When the salt is dried, you and your child can rub it off. They’ll love seeing how it looks and Mila was in awe of how the salt was colored too.

The next part is up to you. If your child is older, you can instruct them to draw flowers or something that reminds them of the female figures in their lives. Mila wasn’t interested in this, so I personally drew flowers that flowed with her painting. It’s so much fun to take their creations and help make it even more special.

I ended up taping the paintings to cards. On the inside, I wrote a special note for each of Mila’s cards and had her sign it.

They turned out so cute and I really love them. Mila loved the outcome of her cards and was so proud of her painting. I think seeing it all come together helped complete her vision. As always, she will be so excited for her loved ones to receive them.

Honestly, I’m keeping one for myself so I can see how Mila’s art skills grow. Plus, I’m just as proud of her as she is of herself.

If you end up trying this activity, let me know in the comments. Make sure to tag me on Instagram if you share on there too.

What are your favorite types of Mother’s Day gifts?

Toddler DIY: Painted Flower Pots

Don’t scramble this Mother’s Day to come up with gift. Try these DIY painted flower pots to give to your loved ones.

Not only are they easy to make, it’s adorable watching your child pick out the plants for it.

Plants are great gifts to give because they keep growing! It’s extra special to get a personalized pot as well. The combo makes a beautiful present and you’ll toddler will be proud to gift it.

Here’s everything you’ll need:

Most of these items, you probably have at your house. If you don’t have any extra pots laying around, terracotta pots are inexpensive and can be found at most stores. Another option is to use plastic ones too.

To personalize the pots, I added stickers to it before we painted. This is completely up to you!

Then it was time to set up.

I laid a sheet of parchment paper down on my island. Just so there wasn’t paint everywhere like her Earth Day painting.

Next, I had her let me know what color paint she wanted to do. Another great way to practice her color recognition, which she has nailed! But, it’s always fun listening about her favorite color. I ended up putting all the colors on a plate.

After everything was set up, I instructed her to paint all over the pots.

It took her a little bit to get both of them done.

All of the colors got mixed together too. It made a beautiful green color, but it’s a good word of caution if you don’t want all the colors together.

We let the pots dry and took a nap. I should’ve tried to pull the stickers off before we fell asleep though!

When I removed them, the paint stuck. Of course.

To fix this, I ended up just using permanent markers to fix it. This happens with DIYs. Nothing will ever turn out perfect, but I just love them.

After everything’s dried and the way you’d like it, it’s time to pick the plant or flowers.

I have a ton of plants that need ‘real pots,’ not just nursery pots. Yes, yes. I’m most definitely a crazy plant lady at this point!

Honestly though, I think these turned out so cute. I love how mine turned into a rainbow, marble piece and my mom’s is a nice blue and green swirl. They’re both made with so much love.

You and your toddler can easily make these pots in an afternoon. They’ll make anyone smile to receive!

Let me know what you think about these pots in the comments. If you DIY them, tag me on Instagram: @greyskies.rainbowhighs. I can’t wait to see your and your toddler’s creativity.

Before you go, check out what these other moms are doing for Mother’s Day this year…

Toddler Activity: Picnics and Food Positivity

One of Mila and I’s favorite spring activities is having picnics! Not only is it great to tell her some food comes from the ground, it’s a perfect time to talk about food positivity.

By having a negative relationship with food growing up, I want Mila’s to be different.

The best ways for anyone to learn is by reading. “The Very Hungry Caterpillar” by Eric Carle is in Mila’s top ten favorite. She loves seeing him transform into the butterfly and counting all the food he eats!

Since she’s familiar with the story, I wanted to build upon how she can use the caterpillars experience with her own.

After reading through the entire book, I went back to where the caterpillar ate all the food that gave him a tummy ache. I asked Mila if there’s foods that make her stomach feel funny. She told me when she eats certain candy her tummy feels upset and about all the food she doesn’t like.

It’s always eyeopening to have big conversations with such little humans. They know what makes them feel happy and sad. Then they’ll tell you all about it, which I just love.

She took out all the play food and plates in her picnic basket. We talked about the colors of the food and which ones we thought tasted best. Out of everything, she said the hotdog and cow milk was her favorite meal with ‘popcorn’ being a close second.

Then we tried to find the food the hungry caterpillar ate and help him make different choices so his stomach didn’t feel so sick.

I told her that listening to our bodies cues and knowing that we can eat different types of foods. There’s no such thing as bad food, but we have to make our bodies happy through our choices.

We ended up pretending to eat different types of meals and rereading the book many times. I plan on making different activities with it in the future too! But, it was a great way to open up on being food positive and listening to your body.

I can’t wait to have even more picnics with Mila and letting her try all different types of meals. Exploring foods and trying to persuade her not to be a picky eater will be a fun journey.

Let me know what your favorite picnic food is in the comments.

Toddler Activity: Earth Day Painting

To celebrate our Earth on its special day, Mila created a beautiful Earth Day Painting.

Is there a huge possibility that more paint ended up on her than the canvas? Of course! But she had a lot of fun talking about the Earth and describing what she was painting.

As for me, I loved watching her creativity and seeing how much she actually notices the world around her.

Reliving curiosity about everything is the best part of parenting for me. Mila has taught me how to love our Earth and everything around us so much more deeply. It makes huge, paint messes like these not feel a burden to clean up. She makes life fun and happy.

I absolutely loved that proverb when I was looking information up about Earth Day. Being a mom and wondering what Mila’s future will be like made me have a connection with it. This proverb is just so powerful.

Anyways, thinking about Earth Day and her creativity led us to doing a painting.

If you want to do what we did, here’s what you’ll need:

This activity is super simple. I promise we had every intention on making neat little earths.

To prep, just grab something circular shaped that you don’t mind getting paint on. Then pour green and blue paint beside each other.

All you have to do is instruct your child to dip the ball in the paint and put it on the canvas.

The ball is way easier to paint with than food!

At some point, Mila decided she didn’t want to paint with the ball anymore. She dipped her finger in the green paint and slid it across her forehead.

I have no idea why this popped in her head, but I just let her do her thing.

I would NOT suggest letting them finger or hand paint if you’re unprepared. Paint went all over Mila’s clothes and the picnic bench. She was covered too.

But it was okay and washed off. The memory of watching her paint was way worth it.

She described she was painting rainbows and grass. The earths on the top of the canvas were clouds and the sky. She had a whole story for her artwork. It was the cutest thing.

The best part was how proud she was of her painting. When my mom came to pick Mila up, she showed off her work.

I love that she’s able to learn, but always put her twist on things.

As always, if you end up doing this activity, let me know in the comments or tag me on Instagram: @greyskies.rainbowhighs.

Check out some of these other Earth Day and natured inspired activities Mila and I have done. They’re a lot of fun!

Toddler Activity: Ocean Pollution Cleanup

Water sensory bins are perfect ways to help toddlers understand the world around them. For Earth Day, I wanted to talk to Mila about keeping our world clean. A perfect way to get her to connect was through an ocean pollution cleanup activity.

Since Mila loves the beach, I wanted her to know how not throwing trash away can hurt other living things environment.

Obviously, toddlers can’t understand the concept of the whole world at this age. We still want to teach them about their actions and the results after.

To connect Mila with ocean pollution, I used some toys and trash she sees every day.

Here’s what you’ll need if you try this water sensory bin:

  • A container – I reuse plastic storage drawers
  • Trash or unused crafting materials
  • Ocean animal toys
  • Reusable stickers
  • Strainer
  • Spoon

I placed Mila’s reusable mermaid and ocean stickers to the bottom of the container first. Also, I added some seashells and her favorite aquatic friends we have around the house.

Then, I filled up the container about half way.

We talked about how ocean animals (and mermaids of course) lived in the water. That all the oceans were their home. I asked her what makes a home? She said a clean place to have fun.

I’m pretty sure she saw my bowl full of trash at that moment.

After that question, I started throwing trash in the container. She definitely was a little confused. I told her sometimes the oceans get dirty because trash doesn’t get thrown away and other things don’t get recycled.

Soon, her ocean friends home were riddled with pollution. Until, I gave her the opportunity to cleanup!

I asked her if she wanted to help the ocean out and of course she agreed.

She used the spoon and strainer to fish out trash. Some of the trash was her fruit snacks, caps, and old ball she had in our house.

Honestly, her face seemed a little disgusted by all the trash. Somehow, she pushed through that phase and still had fun playing in the water.

Little by little, her hard work paid off. The ocean pollution cleanup was done!

We continued talking about trash and the ocean. She asked to do the activity again, and was still very concerned about saving her friends.

This water sensory was a great way to put environmental cleanup in Mila’s hands. She felt like she was helping the world around her and it might help teach her to do just that.

We love the Earth and connecting with all parts of nature. Activities, like this, can help our child love our world even more.

To find some other Earth Day activities, check out what these moms have planned:

If you liked this activity or do it in the future, let me know in the comments!

Toddler Activity: Nature Scavenger Hunt

With Earth Day coming up so soon, there’s a ton of crafts and activities circulating online. The best thing you can do with your child is get outside!

No matter if it’s walking on a trail or exploring your backyard, connecting with nature is good for you and the Earth. There’s so much healing that happens when you have fresh air and the grass under your feet. You might need to get a few more baths and showers, but totally worth it.

One way Mila and I keep busy outside is by doing a nature scavenger hunt.

This little board was easy to make. All I did was reuse a piece of cardboard and painted on different colored squares. To help with word recognition, I made sure to write the corresponding color.

To get the clips to stick, I hot glued them on there.

Mila is at the age where she can do this all by herself. So, it’s fun to make two to see the different items each collect.

In the past, I’ve picked up trash to show her how it’s harmful. Even though it’s colorful, I tell her that it doesn’t belong. We talk about what belongs in nature and she tells me trash belongs in the garbage. It’s also a great way to talk about recycling too!

The best part is just being outside.


Although we spend a ton of time out there, this activity extends play and lets us have other discussions too.

We love the Earth and want to make sure we can always spend our time safely outdoors. It may sound a little extreme, but keeping the world around us clean. Educating Mila about that is important to me since she loves it so much.

If you live in Ohio, like us, this might not be the best week to get outside since we’re expecting SNOW! But, this activity can be done on other days than Earth Day too.

As always, if you and your child do this activity, let me know in the comments below.

Toddler Activity: DIY Seed Bombs

With Earth Day coming up quickly, Mila and I have been making Earth friendly DIYs. Our favorite is seed bombs! They are messy and fun to make, but they lead to a summer of beautiful flowers.

Since we love picking flowers, this is a win all around!

This recipe comes from the Kids Art Box, which is an amazing subscription service that has activities curated for your child with all the supplies.

Here’s what you’ll need to make seed bombs:

As I said before, this can get quite messy, but toddlers love it!

Mila was able to help with every part of the activity. It’s a great way to help them with their motor and life skills by pouring and mixing. Plus, we counted everything we could. This is also a great time to talk about Earth Day and how we need to protect our Earth.

Anyways, back to how to make the seed bombs!

First, mix the dirt, flower, and water up until you get a sticky concoction. Once it starts sticking to the spoon and forming together, add the two packets of seeds too. Mix them evenly in the mixture.

Then either use cookie cutter to form shapes or make little balls.

Let them dry out. I would definitely recommend waiting two days for them to dry out and then plant.

It’s really that simple!

Mila loved helping out with this project. It was a great way to talk to her about how plants and flowers grow. Actually seeing the seeds helped her understand where plants came from. In our “Identifying Parts of Flowers” activity, seeds were the biggest confusion for her. This DIY helped cross that bridge!

Another great idea to use with seed bombs is to give to family members. With Mother’s Day here, they’re a great DIY present for aunts, grandmas, and other motherly figures!

If you try this activity out or have any suggestions to make these seed bombs better, let me know in the comments.

Toddler Activity: Safari Animal Hunt

With rainy days ahead, there’s a ton of fun, indoor activities you can do with your toddler. Since Mila loves zoo animals right now and hide and seek, I’ve combined the two to a Safari Animal Hunt!

You can easily do this activity too! It’s a great way for toddlers to learn about different animals, find hidden objects, and be creative in hiding too.

Here’s what you’ll need:

I made this printable for Mila and she used it as a matching sheet for the animals she found. You’re more than welcome to download and print to use. We used a full sheet of paper, but they can easily be made into half sheets.

I make sure to challenge Mila in saying all of the animals full names. Her favorite to say is hippopotamus and it’s just as cute to hear her say it too.

Next time, I’ll have to make a water animal hunt. It could be a really cool sensory bin!

All you have to do for this activity is have your toddler cover their eyes or go into another room. Then hide all the animals around a single room or your house. We did just one room to make it a little easier for Mila. You can hide at whatever difficulty rating you think would be best for your toddler.

Then, have your toddler put the printable in the middle of the room. Instruct them to find the different animals and match them to the paper.

After they find everything, have them tell you what animal is which.

At this point, they may want to hide their animals for you. Mila had a blast at hiding her animals for me. It was fun watching her try to keep her hiding places a secret.

This is an activity that can last for a while.

It might be good to find out your toddler’s hiding spots. Especially if you’re missing markets, crayons, and scissors! You learn as much about your toddler as they do about safari animals.

If you do this activity, let me know in the comments!

Before you go, check out these other indoor activities you can do with your kids.

5 Tips to a Successful Garden

Last year, Mila and I tried our best to maintain a toddler garden. With a little practice, we’ve found five tips that really help our garden grow and thrive.

I will admit, we’ve acquired a few houseplants since our go at it last year. It’s really helped up understand what plants need to grow. Germinating seeds are a little more tricky than having houseplants, but it’s the same principal.

We ended up buying an herb kit from the dollar store to practice. It costed $5 for the seeds, soil, and container. I thought it was a great deal. They’re a little wonky right now since they’re growing towards our grow light, but they’ll even out soon!

Here’s what we did to make them sprout.

Warmth

One of the best things you can do for your seeds is to plant them in a warm environment.

At this point, they don’t need a ton of sun. Windowsills can be really cold in April, so keeping them in the kitchen or another warm room of your house is perfect. This will help promote them to germinate and sprout. They also grow quicker when they’re warm.

If they get too cold, they’ll freeze and won’t be viable to sprout.

Humidity

Besides warmth, the other most important component of starting seeds is humidity.

If the heat in your house is on, your home probably doesn’t have a humid environment for the seeds. But, there are easy ways to create it.

The easiest way is to use saran wrap. After you plant your seeds and spray water on them, just tear off a piece of saran wrap and put it over your containers. This and heat will create a humid environment that your seeds will thrive in.

It may not be the prettiest sight, but it really does help!

You could also use plastic takeout boxes or Tupperware to create the same effect too!

Shallow Planting

I think this is where Mila and I messed up the most last year!

Your seeds do not need to be buried in your soil mix. They need to be able to feel the warmth and humidity. Last year, I put them further down and although some sprouted, it was too deep. This year, I mostly spread the seeds on top of the soil and gently pressed them in the soil.

It took them a shorter amount of time to sprout this year and they’re really thriving. I believe this tip was the biggest factor there.

Patience

Gardening and growing herbs and vegetables from seeds take a lot of time and patience.

It can take up to two weeks for seeds to sprout. If they get overwatered or it’s too cold, they can end up rotting and not even sprout. There’s a lot of components and science to starting a garden.

This garden is a great time to talk to your toddler or child of any age about patience. They’ll be excited to check and see if their plants have sprouted every chance they can get. Once they finally start to, your child will be so proud of their efforts. You will be too!

Love

They say plants grow better when listening to happy music. Think how much they can grow from kind words and love from you.

Gardening truly is a labor of love. Not only to the plants, but with you and your little ones too. There are so many teachable moments and just teaching your child that something can grow from the love you put into it sticks.

I might not be the gardening guru, but these tips have helped us out this year. Mila is so excited to see her garden grow!

When our plants get bigger and it’s time to switch pots, I’ll update with those tips too.

If you’re wondering if you should start a garden, you most definitely should! Start small and see what works for you this year. By next year, you can take on more if you’d like. Either way, it can be a fun and ongoing experiment with your kids.

Before you go, check out how these other moms garden with their children:

As always, let me know in the comments if you have any other tips or tricks. Or you can let me know what you’re growing this year.