Pumpkin spice season is in full effect. Every basic witch has to start her day with something frightening good. This Pumpkin Spice Yogurt Bowl would leave all the witches AMUCK AMUCK AMUCK.
I think it looks really cute all put together too. A major plus in my book.
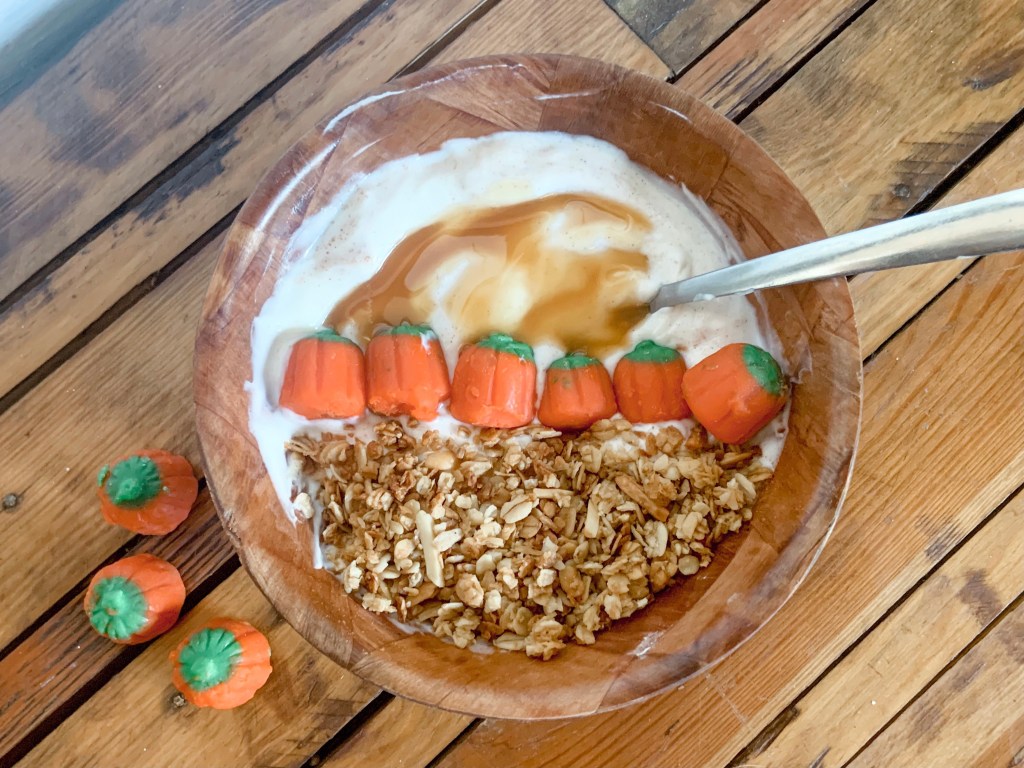
When assembling this Pumpkin Spice Yogurt Bowl, I tried to make it look like a PSL. Here’s the ingredients I used to make it look like that…
Yogurt (I use chobani vanilla)
Pumpkin spice
Granola
Pumpkin candies
Caramel drizzle
First, put the yogurt in a bowl and mix pumpkin spice in it. Like with most of my recipes, I eyeballed this one too. Depending on how much you like pumpkin spice depends on how much you’ll want to add.
For the coffee look alike, the yogurt looks like whipped cream on top.
Then, lay a nice layer of granola at the bottom part of the bowl. I think it’d be a good idea to mix pumpkin spice in here too.
I thought this mimicked the look of coffee.
Next, line up a few candy pumpkins between the granola and yogurt. I’m not a huge fan of these, but mixed with the yogurt and granola, I enjoyed it. Again, it also made the bowl super cute too.
To top it off, I added caramel drizzle. I love it on all my coffees and it made the yogurt a little sweeter too.
I actually loved how this turned out. It tasted yummy and was quick to make.
Yogurt bowls are quick and easy breakfasts for our typical busy mornings. I also love that you can premake them to easily grab too.
This Pumpkin Spice Yogurt Bowl makes me feel like a Halloqueen and I think you’ll love it too.
Do you like making yogurt bowls? What are your favorite things to add in?
Looking for other great Pumpkin Spice recipes? Check these out:
One of my favorite fall activities are watching scary movies under a ton of blankets on the couch with a fall charcuterie board. It makes for a perfect date night or just a fun night with Mila.
I mean, who doesn’t love a charcuterie board?
To amp up our normal grazing boards, I incorporated fall colors and tastes. It turned out so moody and tasted delicious too.
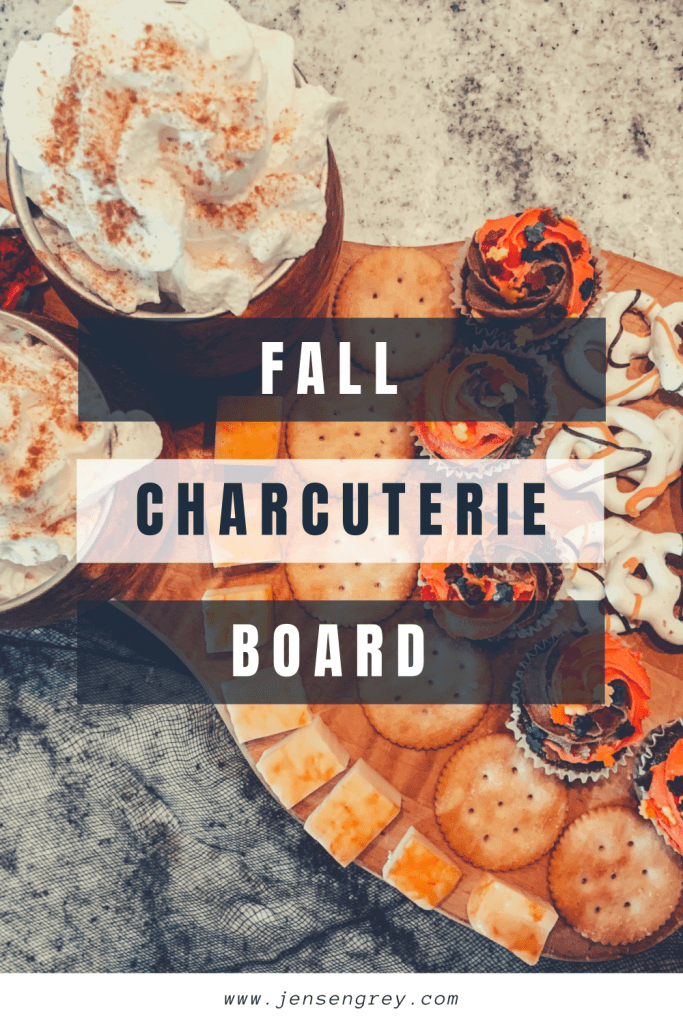
Here’s everything I added to this Fall Charcuterie Board:
Apple Cider
Munster cheese
Ritz Crackers
Mini cupcakes
Chocolate covered pretzels (that tasted like pumpkin spice)
Not pictured were raspberry jalapeño jam to put with the crackers and cheese. Jams are the best addition to charcuterie boards. I also usually try to add some type of meat like salami, but I didn’t have room to add it on here either.
To make it a little more festive, I added the white pumpkin and the extras from my DIY Fall Wreath.
Of course, I took a video to show you all the whole process.
I can’t wait to make a more Halloween inspired charcuterie board for Mila’s Halloween party. Stay tuned to check it out!
What’s your go to items for charcuterie boards? Let me know in the comments.
Today we’re celebrating October with Monster Rolls for a fun boo brunch. It’s not really a DIY recipe, but a way to make food festive for Halloween. Either way, you’ll love it.
Even though I’m SHOCKED it’s October, I’m so excited to bring you fun activities, crafts, and treats all month long. I absolutely love Halloween and everything that goes along with it. Let’s just say, Mila and I have a lot planned for you.
These Monster Rolls are really simple, which are perfect for fall mornings.
First, cook the cinnamon rolls as directed. Since everyone has their own different recipes or favorite brands, I’ll just leave this up to you!
Next, divide icing in different bowls. Add food coloring and mix. Mila absolutely loved helping with this step. As always, you can make it educational by talking about colors and it’s a great way to work on motor skills.
Then, set out the eye sprinkles and sugar to decorate.
Once the cinnamon rolls are done, I suggest dipping them into icing instead of spreading. It’s less messy and just is was easier in my opinion. Mila also helped with this step too!
After they’re all iced, it’s time to be creative.
I promise you eye sprinkles are a MUST for spooky season. They make any food or treat extra special for halloween. Mila loves them too and I think all kids would think they’re fun too. The ones I bought actually taste pretty good too.
Anyways, I just put the eyes in a little bowl and let her use the sugar dispenser. I let her know we were making monsters and she just went for it!
They were so fun to make… and eat too! I loved how quick they were to bake and that it gave Mila some creative time in the morning. We’ll be making these again this month because we both enjoyed them so much.
What did you think of our Monster Rolls? Do you have any Halloween classic breakfast foods, snacks, or treats that you make every year?
Preschoolers can be picky eaters… especially when they’re not home. Believe me, Mila can be one of them! During these first few weeks, I’ve found these 5 tips to help a preschooler eat their lunch at school.
1. Pick out a lunchbox they love.
Before preschool started, Mila never had to pack a lunch to go anywhere… besides when we went to picnics. I wanted her to be excited about lunchtime and knew that getting a lunchbox she loved would help.
We made it a special day to go pick her lunchbox. I didn’t really limit her to what she could or could not choose, but I’m so happy with the one she got too!
She picked a kids portioned Bentgo Box. It’s her favorite colors: pink and purple. It’s perfect!
Before she even went to her first day, she was eating out of her lunchbox. This helped her know how to open and close the box, get used to the portion sizes, and the opportunity to ask me questions about it. Any time I can take the uncertainty of something away from her, the better!
Here’s a few lunchboxes that I thought were amazing options too:
One of my biggest fears with Mila eating lunch at school is that she just won’t eat anything.
While packing her lunch, I let her help me pick out everything. Just by being able to have a choice in her favorite foods, she gets excited for lunch the next day. I make sure to add dessert in addition to healthy options.
When I know my favorite food is going to be served, I get way more excited to eat. There’s no difference for kids either.
Some of Mila’s favorite foods are:
Strawberries
Pistachios
Salad
Jello
Any type of cookie or brownie (LOL)
3. Make food fun.
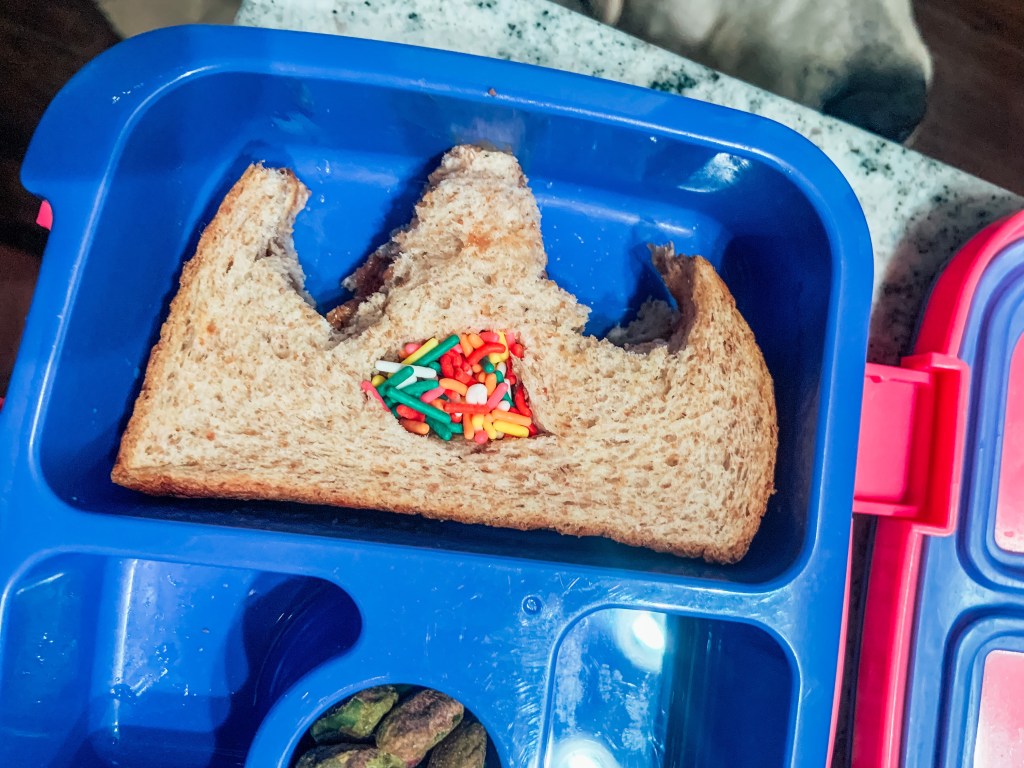
PB&J Crown.
No matter how many favorite foods you add in your child’s lunchbox, their food can seem more enticing when you make it fun!
If your child is a sandwich eater, cutting them in different shapes can encourage your child to eat. I’ve been trying to cut shapes out with a knife, but it’s a lot easier if you use a cookie or sandwich cutter. There’s a ton of different options on Amazon you can easily find.
Other items that you might like to get to make their food fun are cartoon toothpicks and reusable bags.
Cartoon toothpicks are adorable. There are some eye toothpicks, so it looks like your food is looking at you. There’s also different types of animals and objects that your child will have fun identifying and seeing every day.
We love reusable bags here! I’ve bought ones with different sayings and images on it that Mila enjoys using.
Another option to make food fun is to have a themed lunchbox… princesses, dinosaurs, space. The options are seriously endless. There are so many cute ideas that you can find on Pinterest or just on the internet in general. I cannot wait to show you some of the ideas I have for Halloween week!
If you’re interested in looking some of items I talked about, I linked them here.
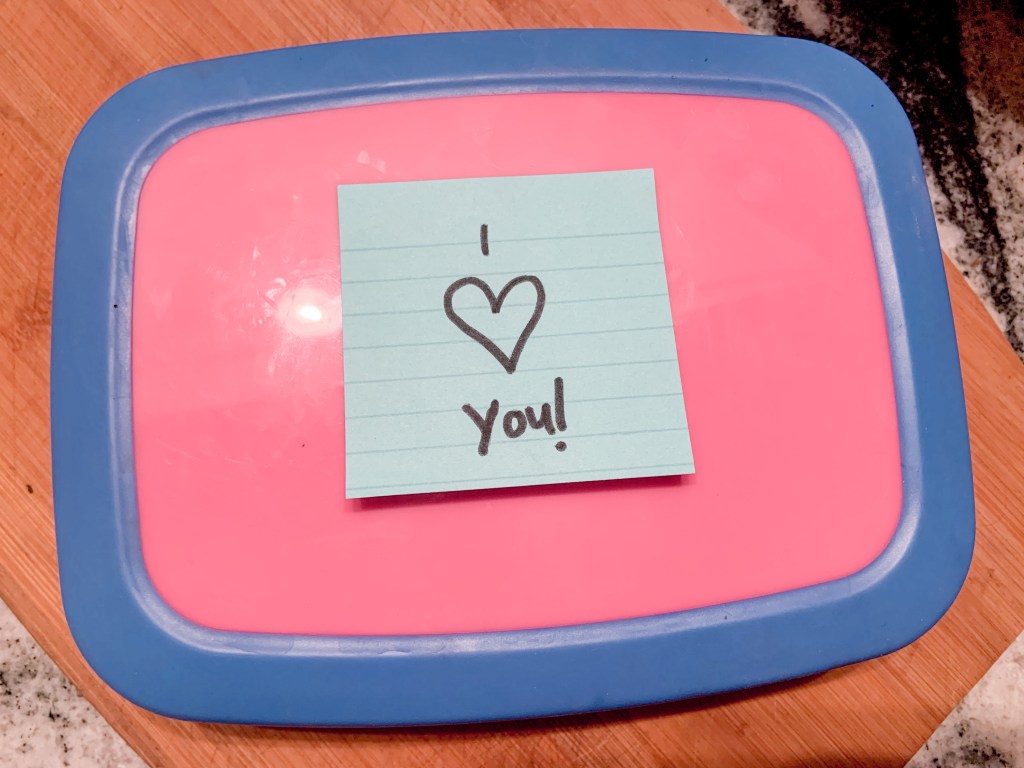
One way I like to stay close to Mila is to write her a little note for lunch time.
Obviously, she’s only three and cannot read yet. Instead of writing words, I draw her hearts. We’ve always talked about how hearts mean love, so she immediately recognizes that. I know it makes her smile to see some love from mom and it lets her know that I’m thinking about her as well!
Even though I just use a post it notes for Mila, there are a ton of options for ones that are prewritten. They have cute designs and motivational sayings on them! I have a feeling I’ll buy them when she gets a little older for busy mornings or nights.
I love this idea for kids who might be having a hard time transitioning into school as well. A little note from home can really turn a child’s day around.
5. Check to see what works.
Sometimes, you can try all the advice above… and your child still doesn’t eat their lunch. It can be frustrating and worrying.
Believe me, I know!
Here’s a little story… since preschool started, Mila has only had one day where she hasn’t ate her lunch. It was packed with her favorite things, but there was one item she wasn’t so sure about. It made her not want to eat the entire lunch! Honestly, it worried me, but it was a good reminder to listen and really take in what your child says.
The next day, I literally had her tell me what she wanted and then added food I knew she loved too.
Just as everything with parenting, we have to learn what works best for our kid. Check in with them and let your child lead the way. They know their body and how they are at school. Especially when they have guidance from great parents like you.
I hope some of these tips help your child eat at lunch time!
As parents, it’s hard not to be proud of your child’s courage to go to school and to blossom into their person they’re becoming. Lunches are one way parents can show that pride and help them succeed in their day.
In the comments, let me know if you have any other suggestions on how to help other parents with their child’s lunches.
These are just the different fruits we used. You can use any that you like best!
First, cut all of your fruit into smaller pieces. I sliced the strawberries and kiwi, halved grapes, used pineapple chunks, and whole blueberries for ours.
Then, cut your watermelon into slices. Then you can make different shapes if your toddler would like. We used star cookie cutters for Mila’s.
After you figure out the shape of your watermelon pizza, spread fruit dip all over it.
You could also use whipped cream too!
Next, take the fruit and cover your watermelon. We ordered ours like the rainbow on Mila’s star and an inverted rainbow on my watermelon slice.
I absolutely love how these turned out!
It was such a tasty snack, but I bet they’d be a huge hit at family get-togethers or parties. I can even see it being an interactive station.
A melon-ion possibilities.
Yes. I absolutely had to throw a watermelon pun in the post somewhere. All of you would be disappointed if I didn’t after the Shark Week post! Which was just JAWesome.
No matter what you make these for, you won’t be disappointed with how they taste. And your toddler will love helping out with their snacks.
Let me know in the comments if you’ve ever made watermelon pizza.
After a weekend full of fireworks, bonfires, and food, I had to share my latest creation. This time I skipped the strawberries and used bananas instead!
Of course, it’s s’mores related.
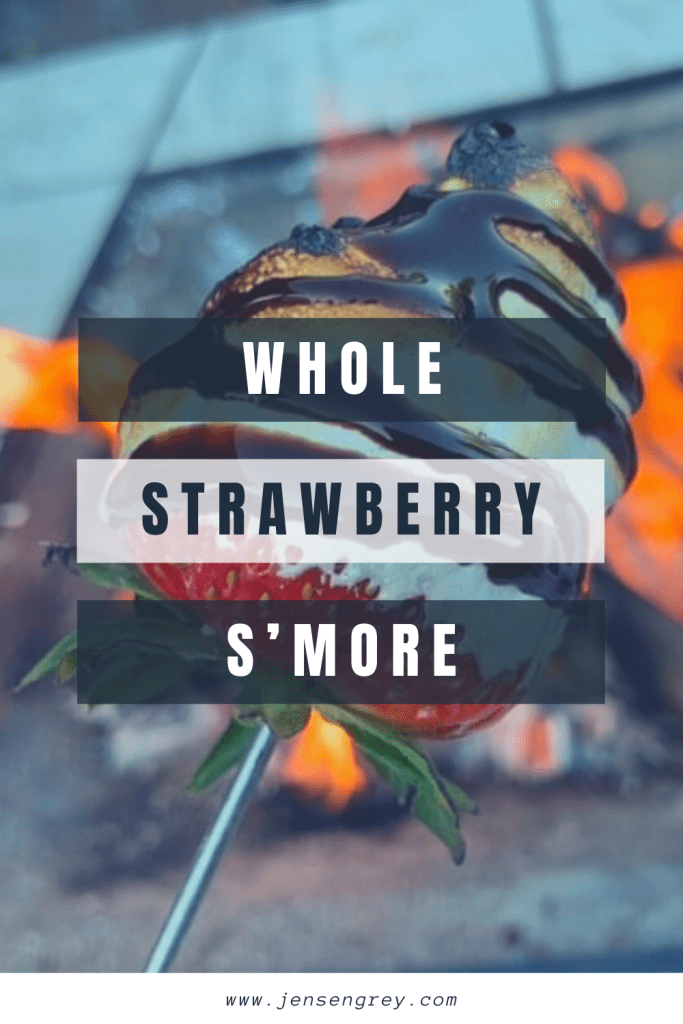
Since everyone loved the Whole Strawberry S’more, I knew the S’mores Banana Boats would be a hit.
So, let’s talk about the obvious, the strawberry s’more looked a lot cuter than this.
It’s not easy taking pictures of bananas.
What you can tell from this picture is how ooey gooey this campfire favorite is. Once you have one bite, you’ll go back for more!
This campfire treat is perfect for those who don’t want to sit and hold a stick. Just have some tin foil handy, wrap it up, and throw it in the fire.
Here’s all you’ll need…
Bananas
Chocolate
Marshmallows
Foil
Tongs
One thing I’d suggest is to buy mini marshmallows. I thought I had some, but instead had the huge, flat ones. Don’t fret if you don’t have minis. You can easily tear them apart.
To start off, take your banana and slice it longwise down the middle.
You can stuff the chocolate and marshmallows in there tightly. I ended up taking some of the banana out to make some room.
This lessened the mess!
Then, I wrapped it in aluminum foil and placed it in the fire.
I’m not sure if the exact amount of time I had it in the fire because I kept checking it. It was probably around eight minutes.
Pretty much, you just want to make sure the chocolate gets melted and the marshmallow gets a little gooey. It probably would’ve taken less time if I hadn’t kept checking in on it!
Once it’s done, let the foil cool down, grab a spoon, and enjoy.
Like I said, it’s not the cutest thing to take a picture of, but this S’mores Banana Boat is absolutely delicious.
The next time you’re around the fire, try it out. You won’t be disappointed.
What’s your favorite campfire treat?
Before you go, check out what others moms across the Internet bring for their families to snack on while camping.
All you need to do is dip your strawberry in the marshmallow fluff. This is a little more difficult than I thought. The best way was to deeply dip the strawberry and twist. You can adjust how much marshmallow fluff gets on there!
Then, roast it like a marshmallow.
Seeing a strawberry roasting looked hilarious to me. It felt like I was roasting the biggest marshmallow ever!
Roast to your preferred marshmallow done-ness. I like mine slightly burnt.
The next part is MESSY… well it was for me.
Drizzle chocolate sauce over top the strawberry marshmallow combo. It might have been easier to dip it, but I just drizzled over a plate.
Now you’re ready to eat it!
Although I didn’t take a picture of it, I added crushed graham crackers to this whole strawberry s’more. It gave it the crunch that I love about s’mores.
Here’s a bonus strawberry s’mores idea.
Since I was just making random s’mores, I tried slicing strawberries and adding them to a regular s’more.
It’s a real game changer!
I loved both strawberry twisted s’mores, but loved the chocolate bar taste on this a little more.
Either way you make it, I’m telling you, add strawberries to your s’more agenda. It adds such a fresh bite to a sweet, summer treat.
Do you add any extras to your s’mores? Let me know in the comments.
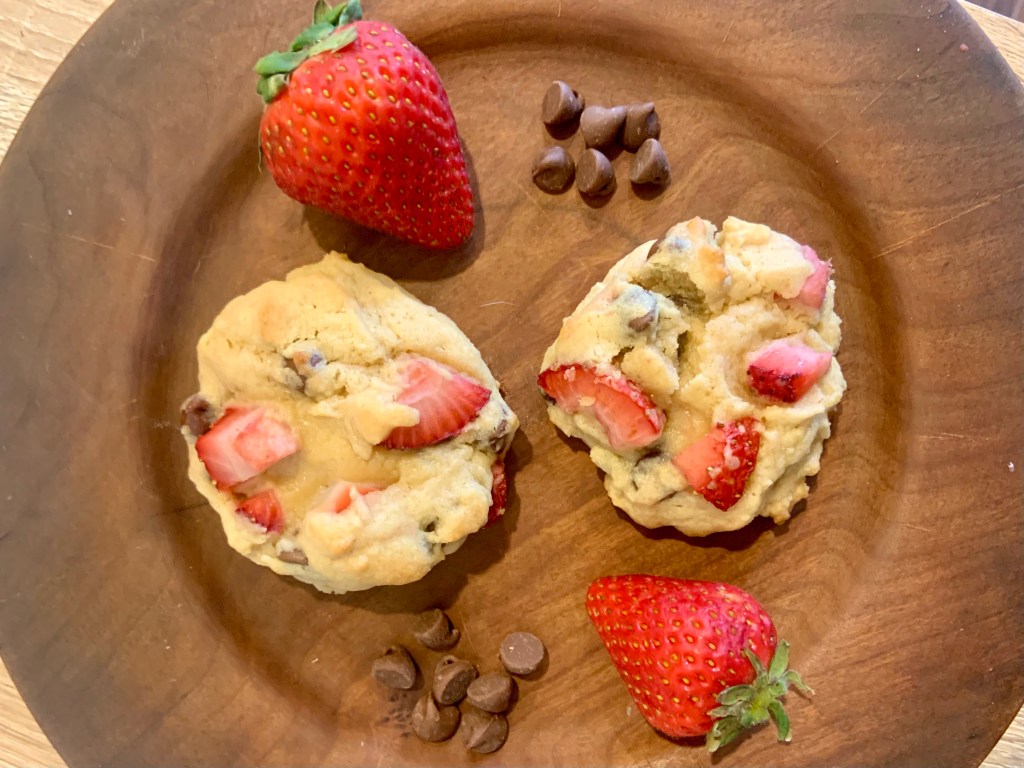
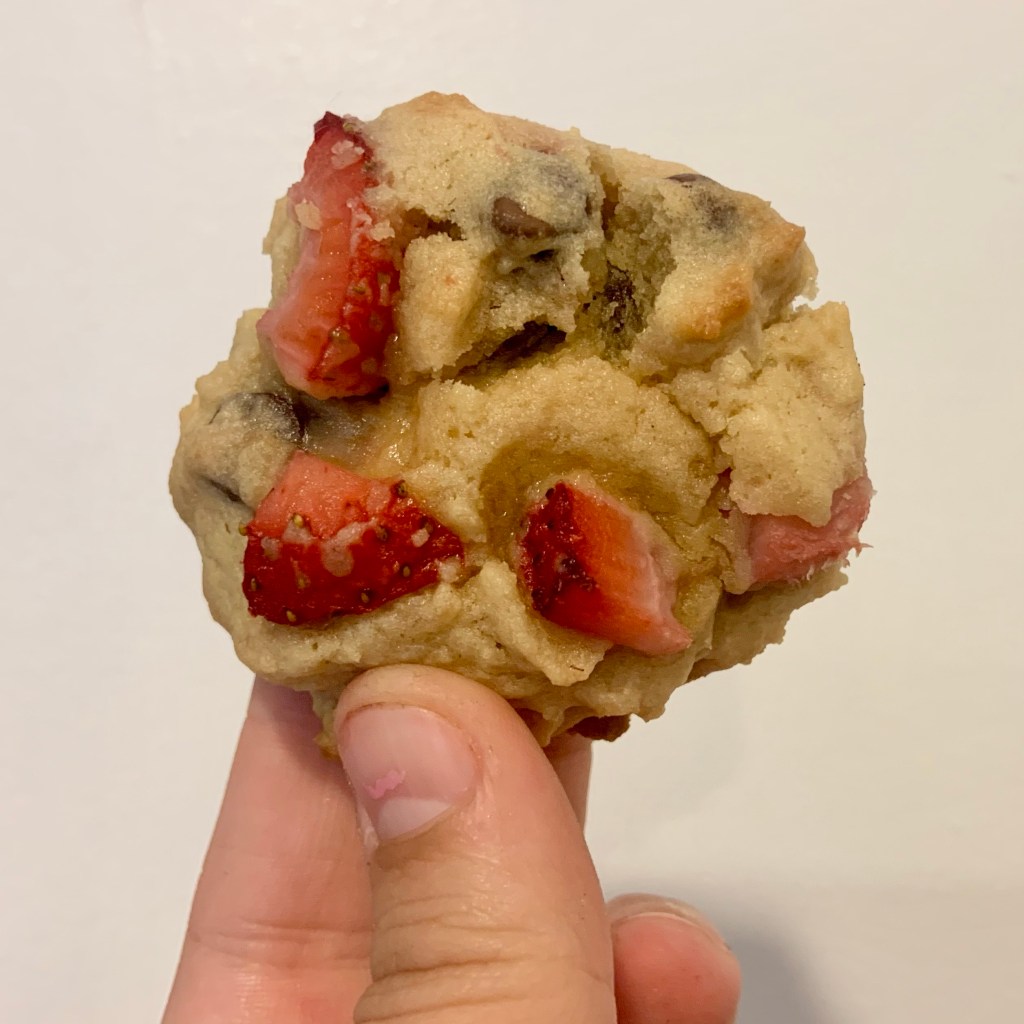
One of the best and most classic desserts are chocolate chip cookies. They’re gooey and make you feel all warm inside. Up until now, I didn’t think they could get any better, until we added one ingredient: strawberries.
This new to us recipe is one I HAD to share with everyone, especially before National Chocolate Chip Day. Not only did we enjoy the finished results, Mila had a blast making these too.
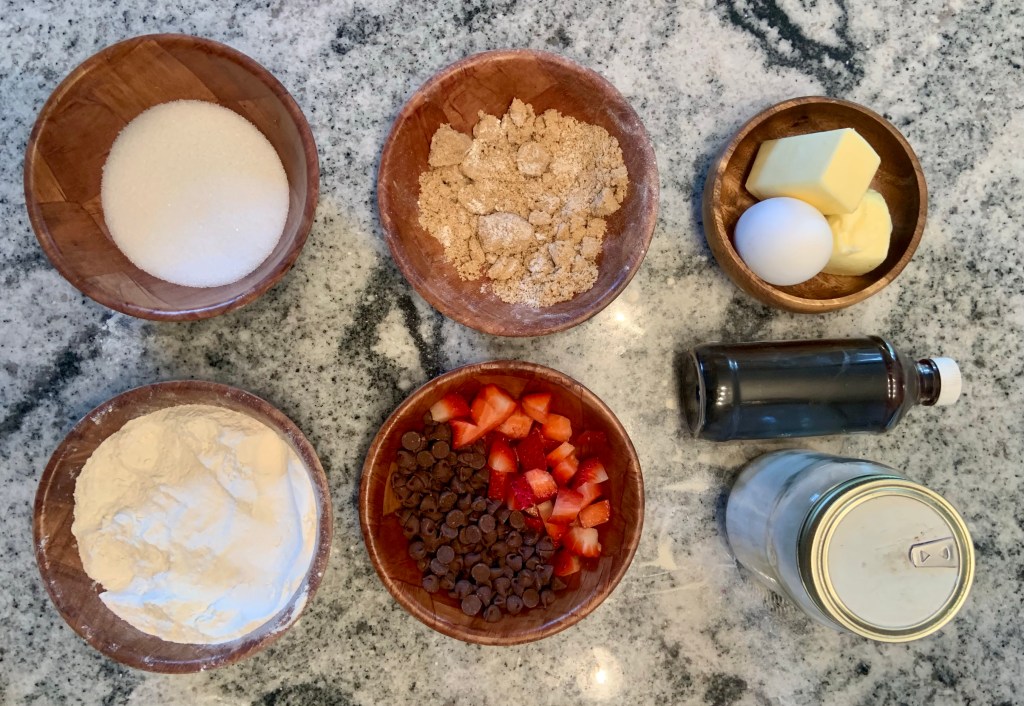
Anyways, here’s what you’ll need to make these delicious cookies:
2 1/4 cups of flour
1 teaspoon of baking soda
1/2 teaspoon of salt
1 stick of unsalted butter
1/2 cup of sugar
3/4 cup of brown sugar
1 tablespoon of vanilla extract
2 large eggs
1/2 cup of chopped strawberries
1 cup of chocolate chips
Before making the cookie dough, preheat the oven to 370 F. Then line two large baking sheets with wax or parchment paper.
In a medium size bowl, whisk together the flour, baking soda, and salt. Set aside.
Next, in a large mixing bowl, use your mixer to cream the butter, sugar, brown sugar, and vanilla extract. I let my butter warm up a little bit to help it cream. Honestly, I just popped it in the microwave for 20 seconds.
Then, add eggs in one at a time. Mix in between eggs.
After it’s mixed, slowly add the flour mixture in. Just mix it until combined and don’t over mix.
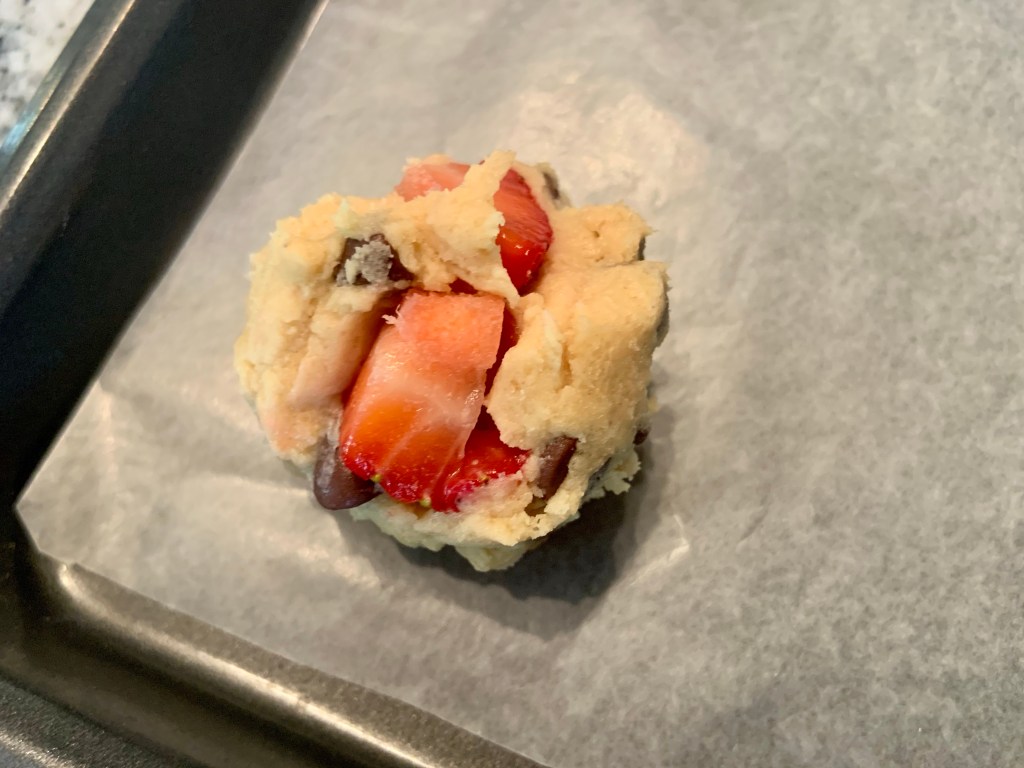
Once you get a good dough consistency, fold in strawberries and chocolate chips. I used a spatula for this.
Now it’s time to place them on the cooking sheet. You can use an ice cream or cookie scoop to help with this part. I just used my hands and made little balls. It was way easier for me this way than using a spoon or anything.
Then, place in the oven and bake for 10 minutes. Rotate the cookie sheet after and place back in the oven for 4-6 more minutes. Your cookies should have holden brown on their edges.
Once it’s done, remove from the oven and let them cool down… or not.
We enjoyed these cookies a little too much. I have a feeling it’ll be a recipe we make over and over again.
Let me know in the comments if you end up trying this recipe… you most definitely should!
Check out these other chocolate chip creations too:
One of Mila and I’s favorite spring activities is having picnics! Not only is it great to tell her some food comes from the ground, it’s a perfect time to talk about food positivity.
By having a negative relationship with food growing up, I want Mila’s to be different.
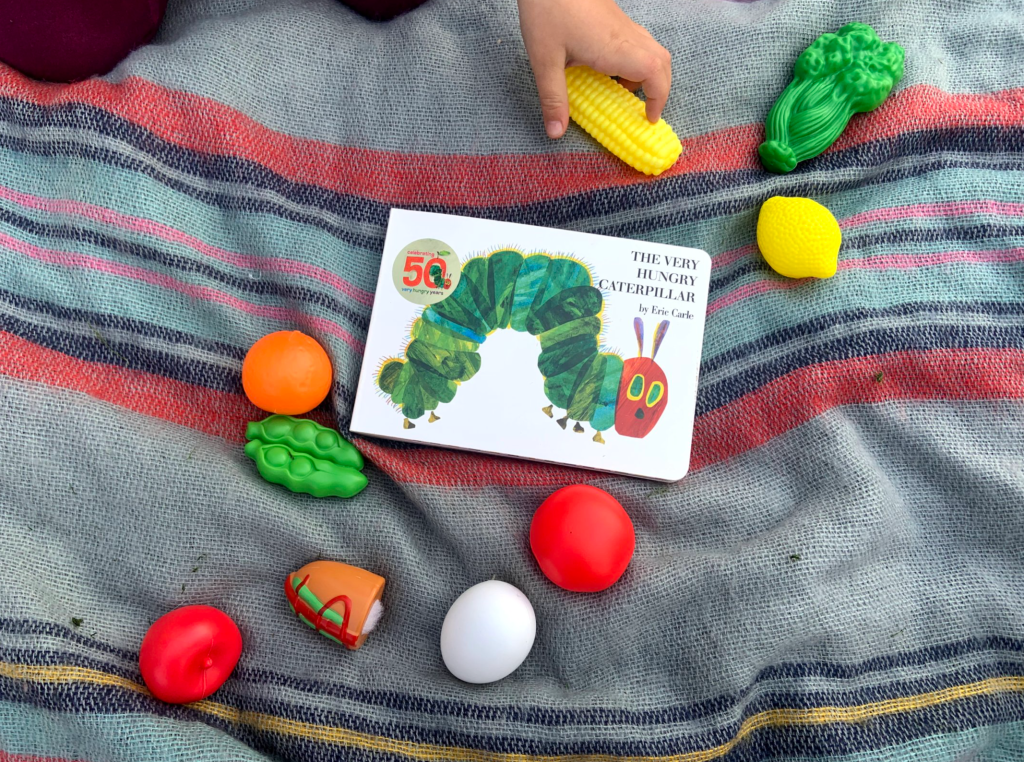
The best ways for anyone to learn is by reading. “The Very Hungry Caterpillar” by Eric Carle is in Mila’s top ten favorite. She loves seeing him transform into the butterfly and counting all the food he eats!
Since she’s familiar with the story, I wanted to build upon how she can use the caterpillars experience with her own.
After reading through the entire book, I went back to where the caterpillar ate all the food that gave him a tummy ache. I asked Mila if there’s foods that make her stomach feel funny. She told me when she eats certain candy her tummy feels upset and about all the food she doesn’t like.
It’s always eyeopening to have big conversations with such little humans. They know what makes them feel happy and sad. Then they’ll tell you all about it, which I just love.
She took out all the play food and plates in her picnic basket. We talked about the colors of the food and which ones we thought tasted best. Out of everything, she said the hotdog and cow milk was her favorite meal with ‘popcorn’ being a close second.
Then we tried to find the food the hungry caterpillar ate and help him make different choices so his stomach didn’t feel so sick.
I told her that listening to our bodies cues and knowing that we can eat different types of foods. There’s no such thing as bad food, but we have to make our bodies happy through our choices.
We ended up pretending to eat different types of meals and rereading the book many times. I plan on making different activities with it in the future too! But, it was a great way to open up on being food positive and listening to your body.
I can’t wait to have even more picnics with Mila and letting her try all different types of meals. Exploring foods and trying to persuade her not to be a picky eater will be a fun journey.
Let me know what your favorite picnic food is in the comments.
If you’re like me? You probably wonder what to do with all the hard boiled eggs every Easter. I have a simple recipe that you might solve your problems!
And… it’s not deviled eggs!
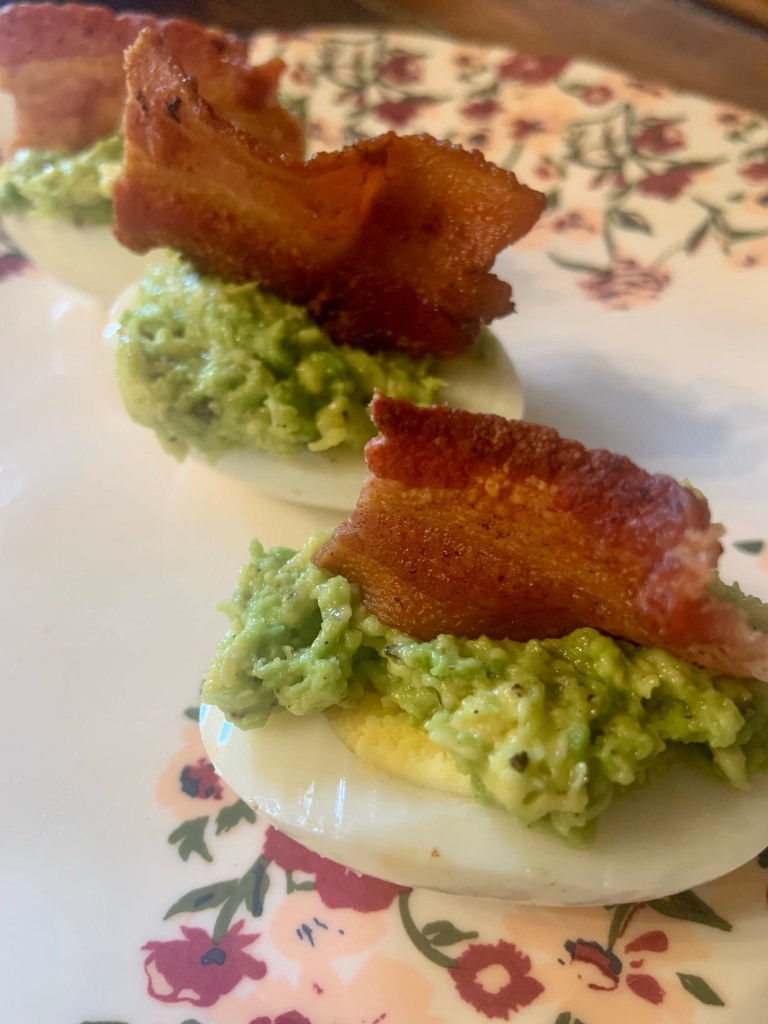
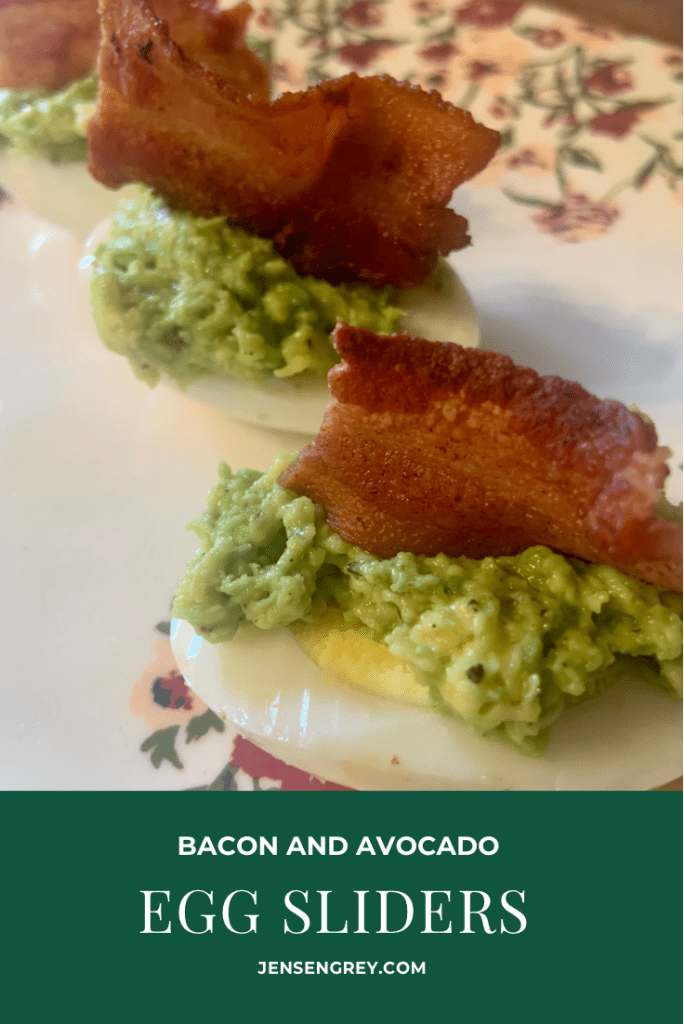
These bacon and avocado egg sliders are keto friendly. Plus, they pack a lot of big flavor in a little package!
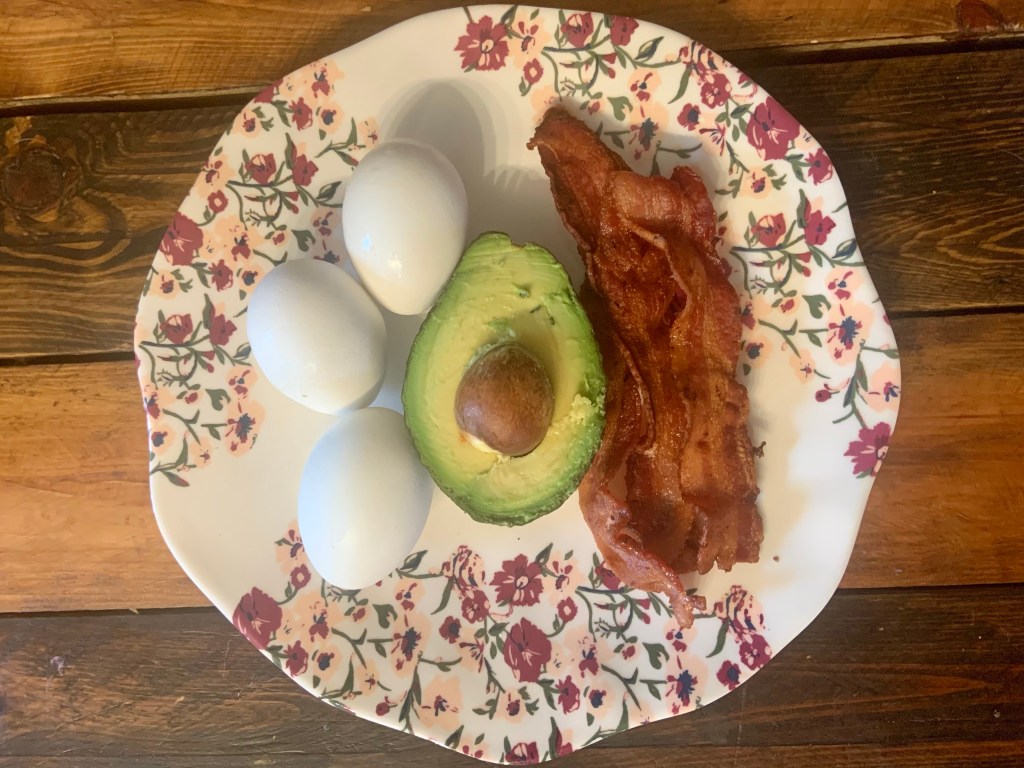
Here’s all you need:
Hard boiled eggs
Avocado
Bacon
Salt and pepper
Quantities depend on how much you want to make!
The first step if you don’t have any leftover Easter eggs is to hard boil eggs. Everyone has different ways to doing this.
If you already have eggs made, start with your bacon. I like mine a little crispy, so I keep it on there for a while. Same as with the eggs, I won’t tell anyone how to cook their bacon either!
Next, cut your avocado up. Then mash it.
Usually, I add salt and pepper to the avocado to give it some spice. Make sure no one steals this mixture… like Mila.
When you’re bacon and hard boiled eggs have cooled down. It’s time to assemble these sliders
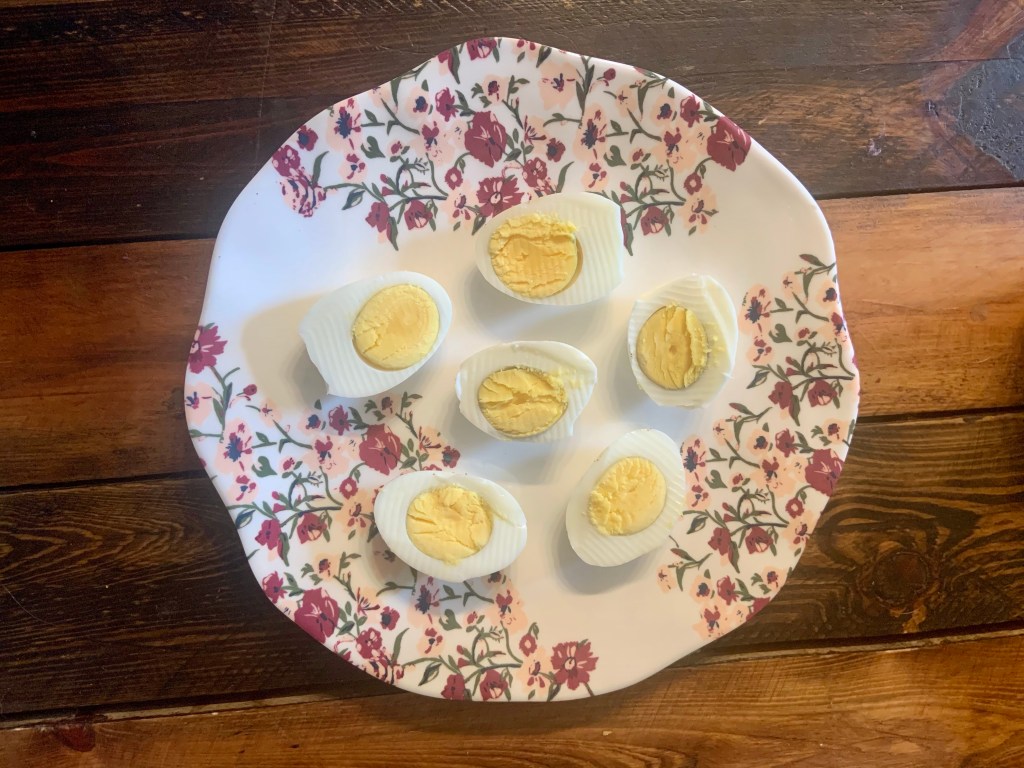
Then, slice your eggs in half, longways.
They can get a little slippery at this stage. Be careful of which plate you put them on! I’m speaking from experience if you couldn’t tell.
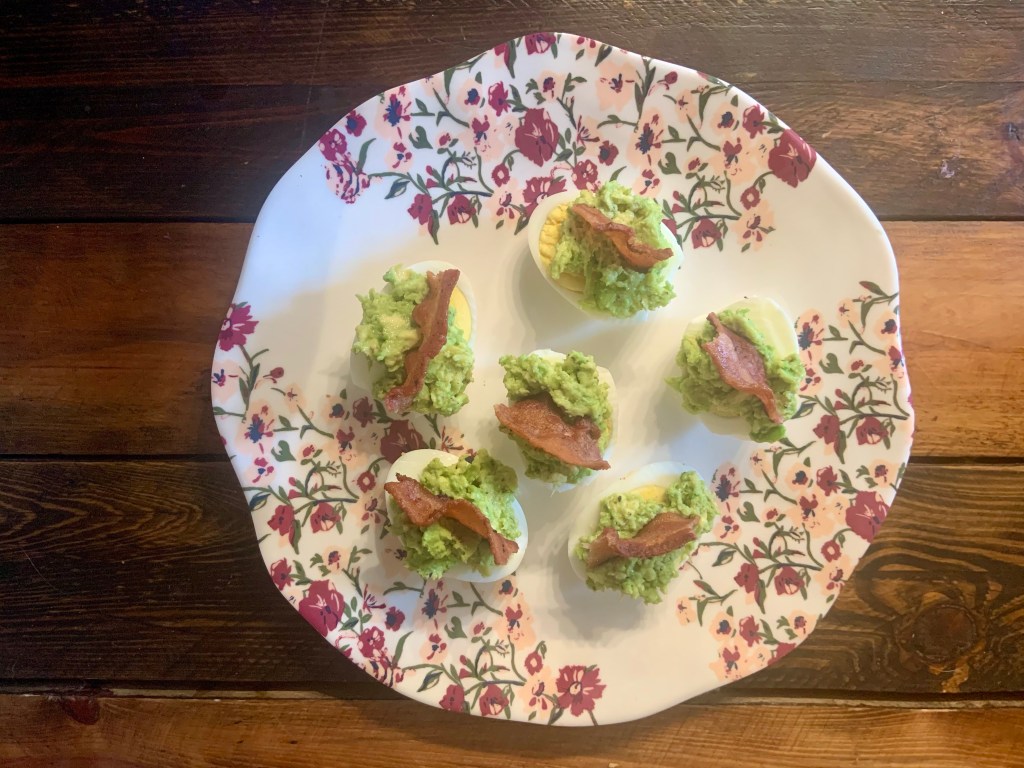
Then spoon avocado on top.
After, break the bacon up in smaller pieces. Then stick it on top of your egg slider.
If you have extra bacon left, you can add more to it too! I usually add one to the bottom to make a little sandwich.
This little bite-sized slider has amazing tastes. I love the saltiness of the bacon and the creaminess of the avocado. Plus, it’s a great mix of textures too.
Honestly, this is one of my favorite ways to eat hard boiled eggs. Mila loves them too!
There’s not a ton of steps to follow and kids can easily help making these. Bacon and avocado egg sliders are really great for the days following Easter.
If you liked and tried this recipe, let me know in the comments!
Before you go, check out these Easter recipes from other moms that blog: