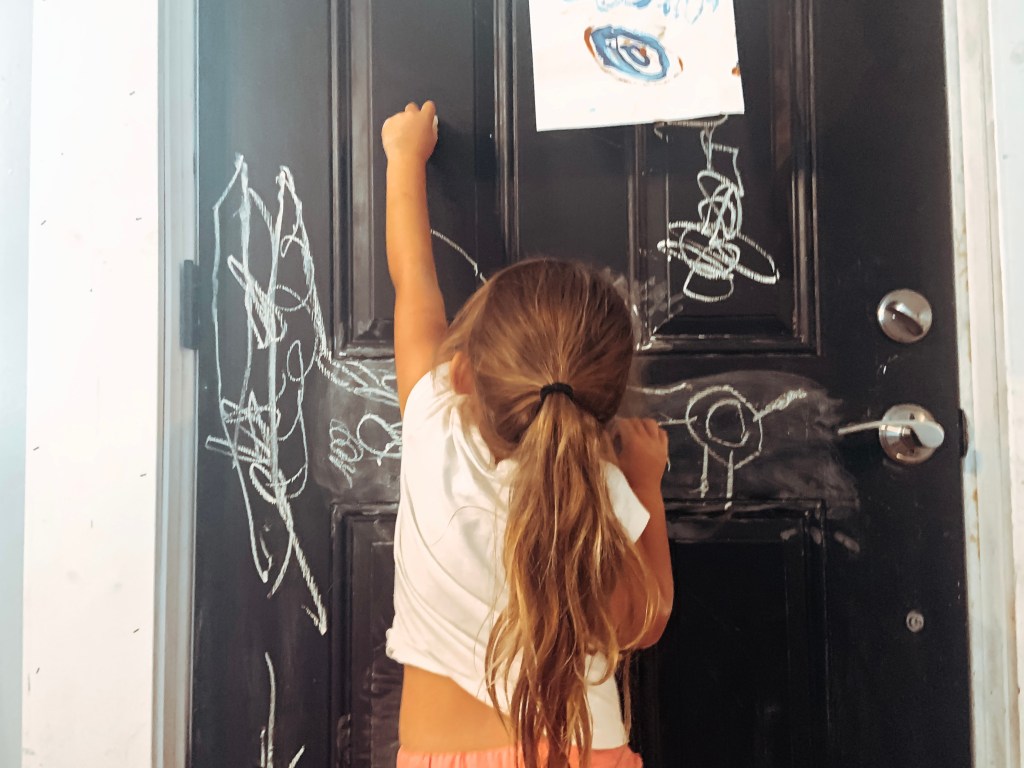
When you have a little artist, walls and flat services are prone to getting drawn on. Since life is all about compromise, we transformed our front door into a DIY Chalkboard Paint Door.
It’s a really simple and fun switch. Plus, you’ll get the cutest drawings constantly.
So if you can remember, I posted a mom tip about how to get crayons off of walls and cabinets. There was also a permanent marker incident that took some time to get off.
The best solution for our family was giving Mila a space to create.
Since I wanted to paint my door black for a long time, it was the perfect reason to buy chalkboard paint!
You can buy chalkboard paint at any hardware store. There’s different colored chalkboard paint, I just preferred black. I know there’s a TON of different ways to make chalkboard paint all over the Internet too.
One suggestion I would make is to paint a base coat in whatever color you want your door.
Chalkboard paint is more expensive than regular paint. So, if you have a base color coat, you won’t need as much blackboard paint.
Always trying to save money!
I love that I’m able to celebrate Mila’s creativeness without losing my sanity with cleaning all the time.
If you don’t want to paint a whole door, you can easily frame off a piece of a wall to create the same effect too!
Would you create a blackboard space for your child? Or what’s your favorite way to encourage your child to be creative… minus the mess.
Looking for other ways to making parenting easy? Check out these mom hacks!
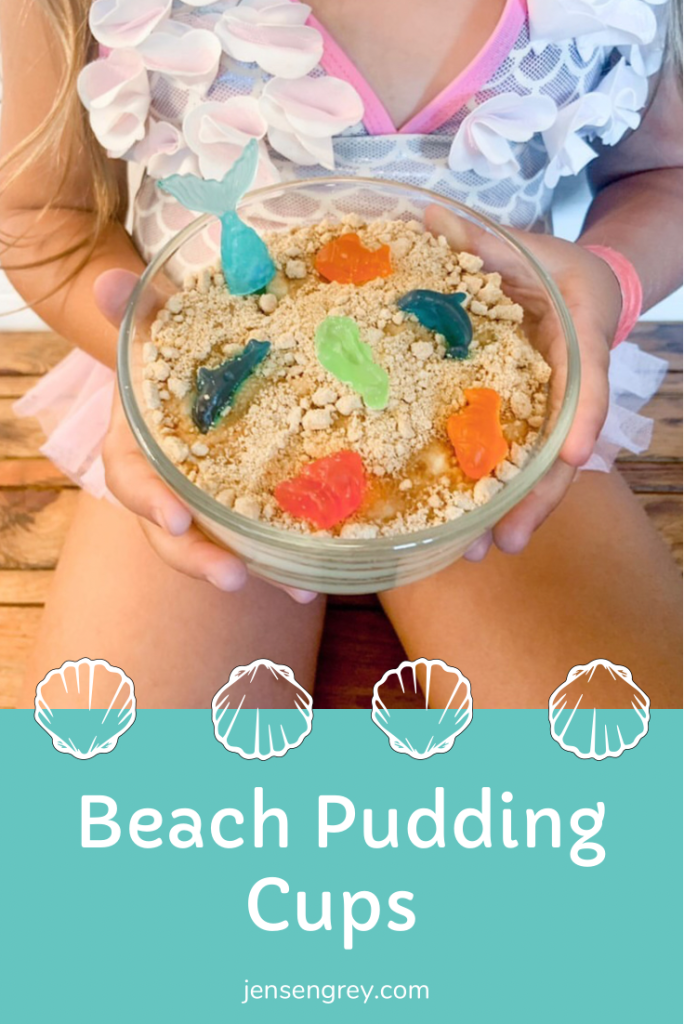
It’s no secret, Mila and I love the beach. With her Mermaid Activity Box last week, I had her make a snack that matched: Beach Pudding Cups.
Honestly, I love that Mila loves the beach. She’s been to so many different beaches during her three years and each time she’s been obsessed. When we’re not there, she’s always asking to go back.
Anytime I can bring beach life to Ohio, I do my best to do so. I think this is why this snack was a hit with Mila.
Here’s what you’ll need to make this beachy snack:
Instant Vanilla Pudding
Graham Crackers
Gummy Fish or Sea Animals
First, make the instant pudding as directed in the box. I think all you need is milk with the pudding powder. It’s (the instant pudding) really simple if you’ve never made it.
Then, make graham cracker crumbs. I just blended in my blender!
Now it’s time to put it all together.
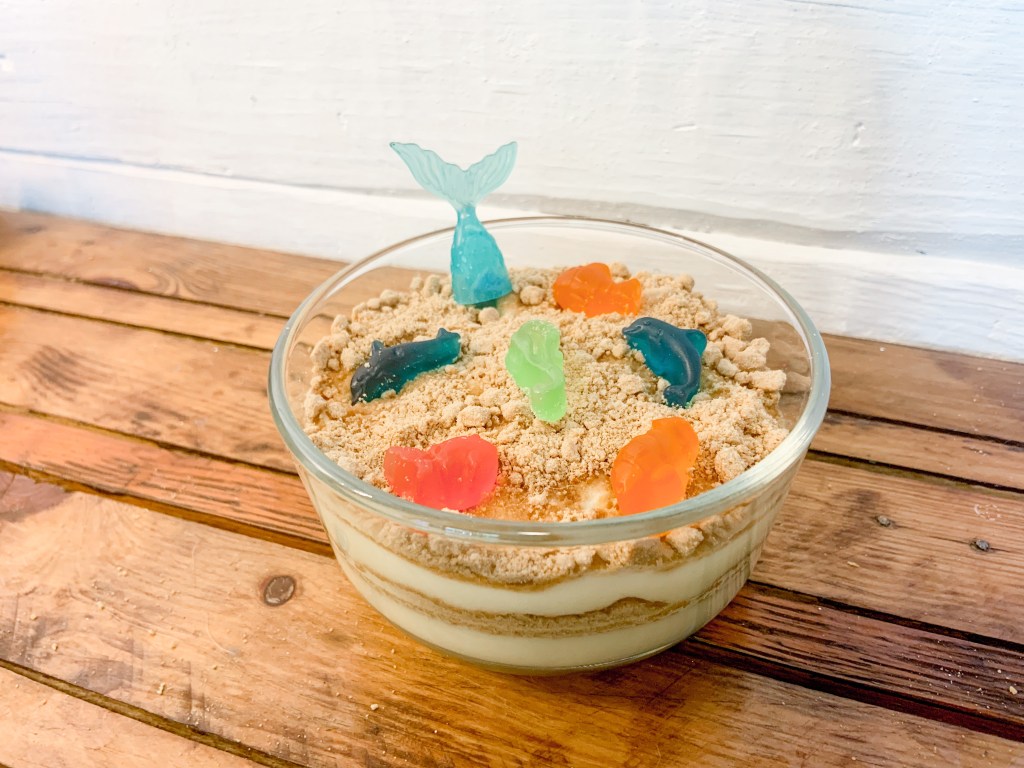
Get a clear bowl or cup and do a pudding layer first. I just eyeballed all the layers and didn’t do a specific amount.
Next, add a layer of graham crackers.
Repeat these steps until you get to the top. You want your final layer to be the graham crackers.
To finish it off, add fish and sea animal gummies. I also added a mermaid tail on top too. Next time I make this, I’ll mix blue food coloring to cool whip to make water too.
I think these Beach Pudding Cups are so cute for at home or even at the beach. Since I used our small Tupperware containers, it’d be perfect to put the top on and serve for a beach picnic.
Mila’s favorite part were the gummy creatures on top! She ate them all before she got to the ‘beach.’
This would also be a perfect after school snack since it’s so easy to make and out together. It made me feel like such a creative mom to do this with her.
She wanted to help layer the ingredients and did good too. So kids can essentially make their own after school snack!
What’s your favorite way to bring the beach home? Snacks, activities, or looking at old vacation pictures? Let me know in the comments.
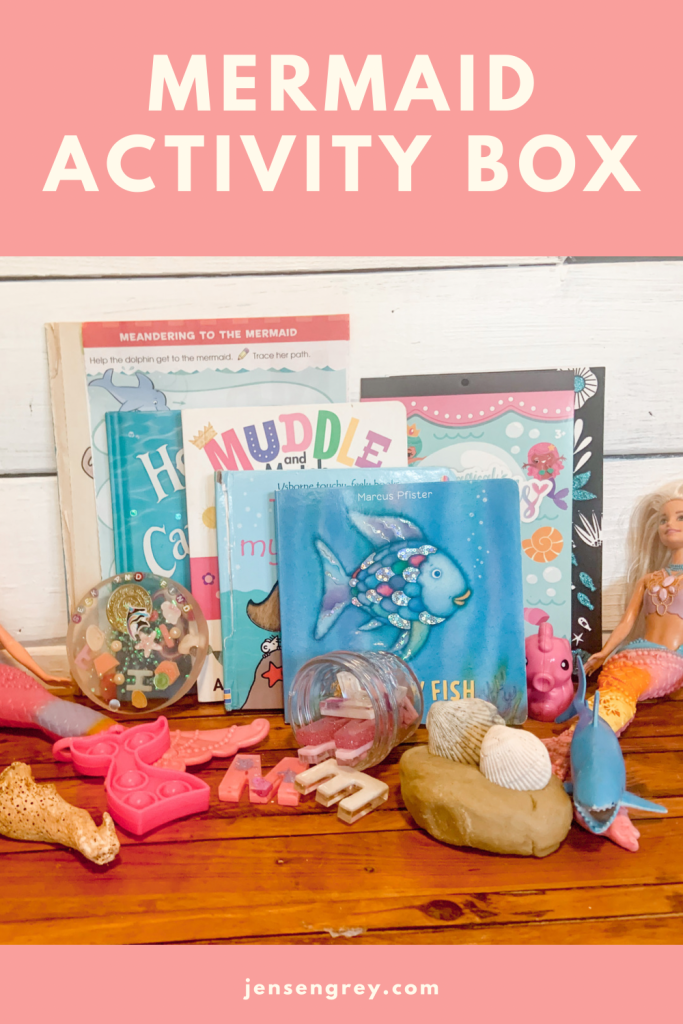
Another week, another activity box for Mila to explore. This week is a Mermaid Activity Box. Since summer is still here and she loves the beach, I thought it was a perfect time to do this theme. It’s fun, education, and a hit with Mila.
Although I over-themed it for mermaids, this could easily be altered to be more about sharks, fish, or any other ocean creature too.
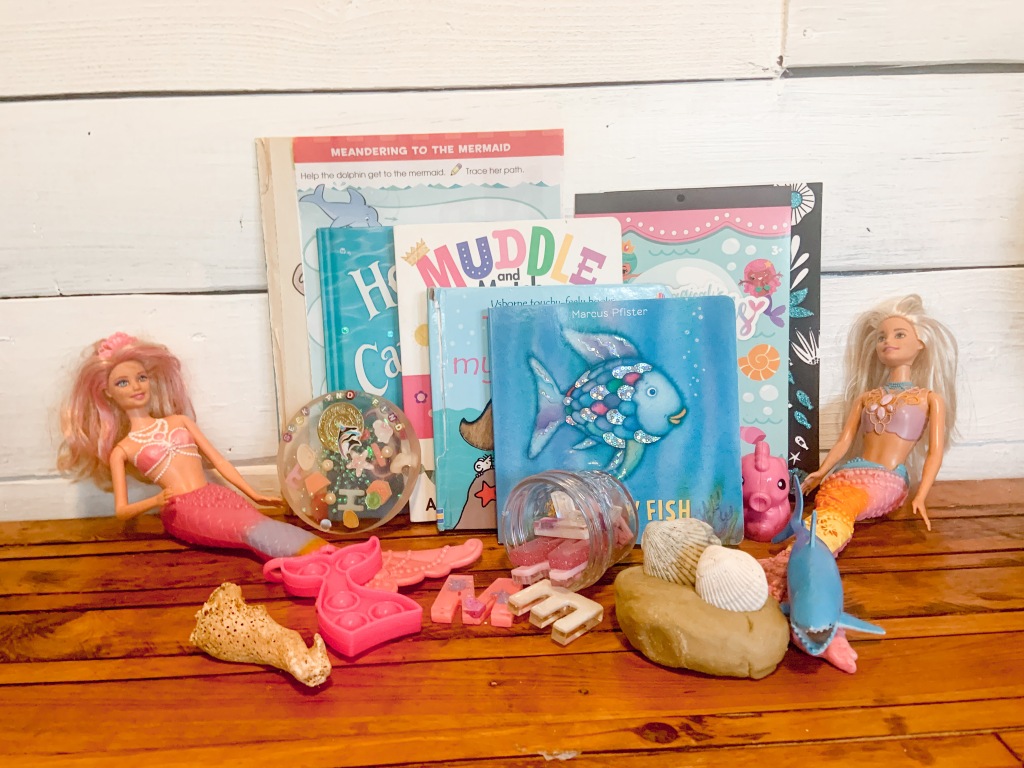
Like the Dinosaur Activity Box, the Mermaid Activity Box is filled with sensory items, toys, books, and educational activities for toddlers and preschoolers. All of this fits inside a book box from Target so it can easily travel from place to place.
These boxes are such an easy way to help promote learning for you little ones with multiple family members and friends.
Every time Mila sees me start to take items out of the box and put new ones in, she gets so excited to see what she’ll be working with. I think by just getting her to sit down with the sensory toys, books, and activity worksheets, it’ll help her prepare for preschool. it can be a huge adjustment to start learning how to sit down for crafts and activities the first time they go to preschool.
Anyways… here’s what’s all in the Mermaid Activity Box.
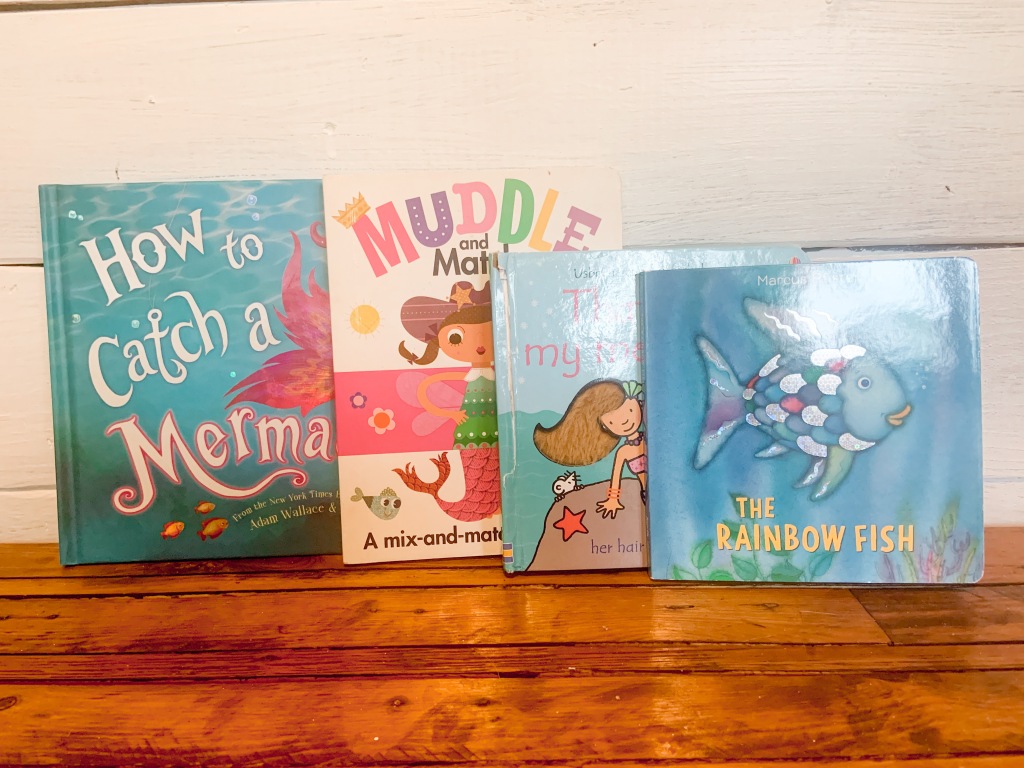
Mermaid Books
I’m a big supporter of Mila reading books every single day. Even if she’s making her own words up with the pictures. Books help kids understand concepts, worlds, and places they don’t have the opportunity or option to explore.
These four books are amazing. I’ve definitely showcased three of them on past posts before. They’re just that good!
In all of these books, we love the stories, but the illustrations are just gorgeous. I think they really capture the ocean vibes with all the blues. Mila’s favorite for a long time have been the That’s Not My… series. She loves finding the mouse and learning new words that describe what the books about.
I’m always on the look out for more books too. If you have fun ocean, sea, or mermaid inspired books you think we’d love, let me know in the comments.
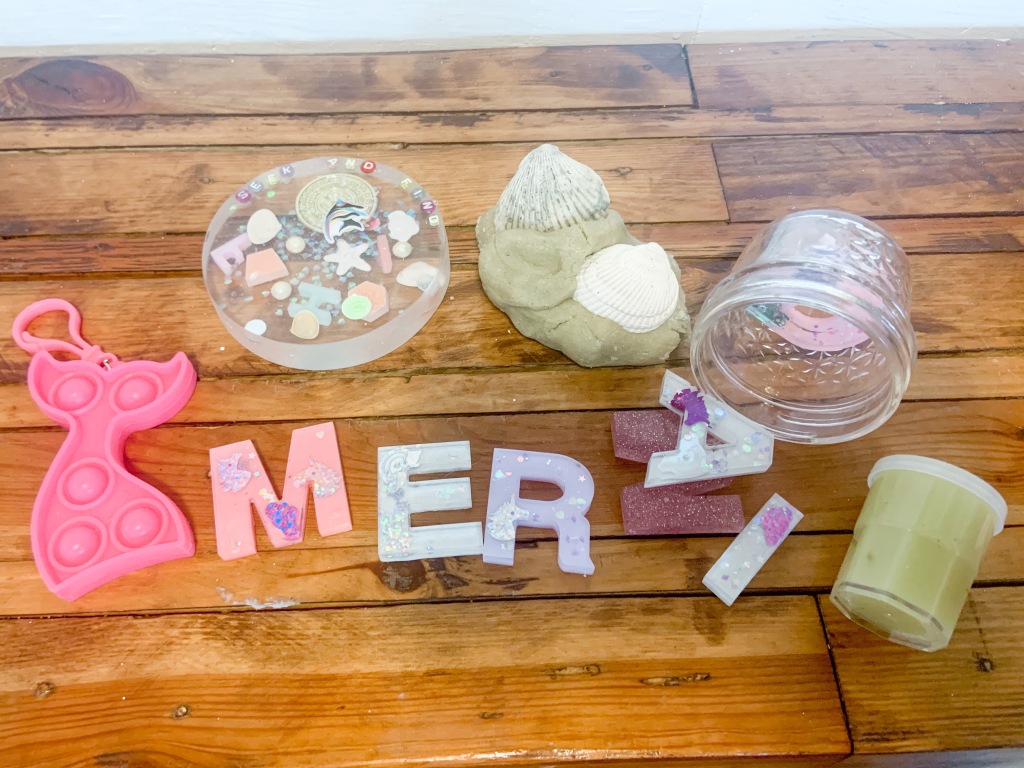
Sensory Play Items
We love sensory play. There’s SO many options for kids to learn by feeling and exploring.
The beautiful resin letters are from Beags and Bubs. I shouted Danielle out last week for her letters and knew I had to showcase them for this activity box. She also created the seek and find activity too (the clear circle in the top left) and the sand play-doh. I would 100% recommend her to anyone. Her Instagram feed is beautiful and she can make custom letters that will be perfect for you child.
I also added her mermaid pop-it. Mila is just amazed by pop-its. Whenever she gets overwhelmed, i’ll give her one and it calms her. This one is adorable, but can easily be carried around too.
She also always loves slime and I gave her blue play-doh too. The seashells were included so she can make impressions in the play-doh. This will allow her to extend her play and be imaginative with the toys too.
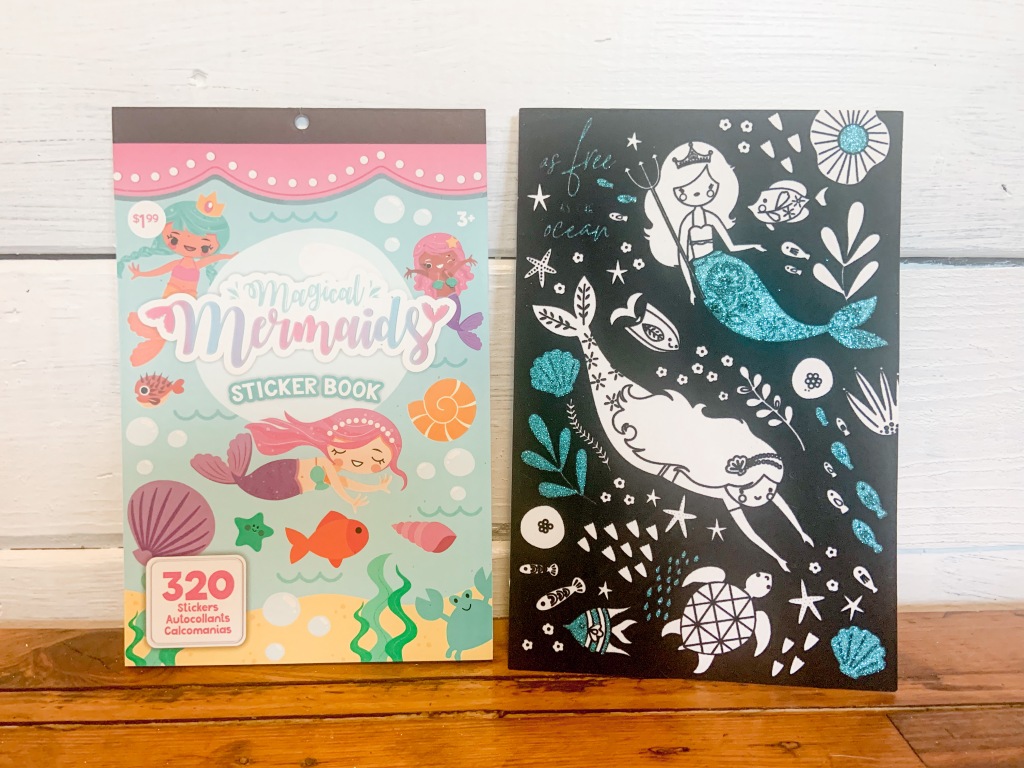
I have a ton of different sticker and coloring books for Mila. She loves them both. For her sticker books, I usually have another page or cardboard for her to put them on too.
The two pictured above were found at Joann’s for cheap! The marker page was actually 70% off. Mila likes the way the black feels and I love that it’ll help her stay in the lines. I also have other coloring pages from older coloring books that she loves to color in.
Like with the Dinosaur Activity Box, I flipped through Mila’s workbooks and found mermaid and ocean themed pages for her to use. Usually preschool workbooks will have a huge range of themes they use in their books, which is awesome for using different themes!
Again, I love preparing her for preschool by giving her these pages now. It helps let her know that learning can be fun!
There’s also a ton of printables on Pinterest you can find for activity pages too!
Although they’re not added in this picture of the activity box, you can add so many other crafts and activities too. We’ve done so many ocean and mermaid themed sensory play and crafts that Mila has asked to do over and over again.
These crafts and sensory components can be put in bags or Tupperware containers to help organize them.
Wondering what crafts and sensory ideas you can do, check out this list:
Overall, this activity bin is so much fun and perfect for summer. Mila loved the girly-ness of it, but I love how it can easily be adapted for sharks or ocean play in general.
I can’t wait to share next week’s theme!
Again, if you have any suggestions about a theme or have something you’d like to see, let me know in the comments.
No matter if your little needs to stay busy after school or during the day, activity boxes will help! This week, Mila has been enjoying a Dinosaur Activity Box.
Filled with books, educational worksheets, sensory objects, and dinosaur toys, Mila has been engaged with this activity box all week. Every time she goes to pull something out, she can explore a new way to play. That’s what makes these boxes so intriguing to kids.
I’m actually really happy that Mila is interested in dinosaurs. Here’s a little secret… dinosaurs are one of my weird fears. I mean they’re extinct. Since Mila is interested in them now, I’ve learned a ton about them. Thank you to all the authors who have simplified the terms and information to toddler books. I really think the dancing dino books have been a huge help into getting Mila interested in them.
Anyways, since Mila is in a weird in between of waiting for preschool while I’m at school, I thought putting together activity boxes would be perfect.
This is a low prep solution to keeping her engaged while she’s with my mom. I can imagine babysitters would love this idea too. All my mom has to do is grab the box and take it. Next week, I’ll have a different theme with similar activities.
Here’s what’s in the box…
Dinosaur Books
Mila learns best with books and activities. We’ve collected a ton of books in her three years, but they have paid themselves off with all that she’s learned.
A few months ago, we actually did a fun activity with Dino Dance by Sandra Boynton. Mila actually remembered it when she saw her activity box and flipped to their dances. It’s so nice to know she has that information stored somewhere.
The other books are just as valuable. We love them all and read them even without talking about dinosaurs…
It turns out, Mila loves worksheets. She loves the idea of ‘working,’ so it’s made learning a breeze.
I went through all her different workbooks and found the dinosaur themed ones. Some of them talk about the letter ‘d’ and others are working on prewriting. Either way, they are her level and she’s learning.
I’d definitely recommend starting your toddler or preschooler with worksheets at home. Target and Amazon always has amazing options!
Resin Letters
Resin letters are a must to add to any activity. I love that they help familiarize kids with the alphabet in a fun way that they can hold in their hands.
For this activity bin, I obviously put ‘dinosaur’ in an egg for Mila to explore. She matched them up with the letters on the books and we went over them too. This particular set was made by one of my students. However, I love Beags and Bubs‘ resin letters on Instagram. I bought a custom set a few weeks ago and have used them a ton. They’d be a great Christmas or birthday present!
Pretend play is Mila’s favorite way to play. She likes to make up different voices and scenarios. I HAD to include them in her bin.
Not only did the dinosaurs dance, they played all types of different games with them too. Mila likes to make the dinosaur toys act out the books as well. She could pretend play for hours. This was no different than usual!
I also added some sensory play items in there for her too. She loves the different textures of the play-dough and slime. In this bin, I only put in ‘dinosaur colors,’ which are greens and blues. This way she can make foot prints, try to make dinosaurs, or just give her brain a little break.
Some of the other sensory items I added were beads, a dinosaur egg, and play-dough moulds.
Overall, this activity box was a success! Mila loved it and I love watching her learn.
I have a few ideas for future boxes, but would love to hear what you all would like to see too! Let me know in the comments!
Then check out these dinosaur inspired activities:
If you’re looking for a fun, ocean animal themed animal craft that’s not a mermaid, you’ve came to the right spot. This Cupcake Liner Octopus is easy to do and turns out looking cute!
When I say easy, I mean that Mila made her octopus with little assistance by me. Yay for independence and growth.
I also like that even though we LOVE mermaids, we’ve done so many this year. It was nice to switch up the ocean themed activities with a different sea animals. Mila remembers them from our trip to Ripley’s Aquarium in Myrtle Beach, which helped a lot!
The best part of this activity, you can find everything at your local dollar store for less than $5! Here’s what you’ll need:
First, have your child pick out what colors they want the octopuses to be. In our pack of cupcake liners we had pastels: pink, yellow, blue, and green.
Mila picked pink for her (of course) and yellow for me.
Then, to help your toddler succeed in this craft, cut four, long strips of scrapbook paper and tissue paper. These will be the octopus’s legs.
Then, glue together a strip of tissue paper and a strip of scrapbook paper. The scrapbook paper should be on top of the tissue paper. I folded them in the middle to help my guide where they should meet.
Mila did help me with gluing, but she doesn’t have the scissor skills yet to cut long strips. She enjoyed cutting some small pieces off though.
While the legs are drying, take two of the same color cupcake liners and glue them together. This reinforces the octopus and makes it stronger if you want it to hang longterm.
Then, it’s time for the googly eyes. Mila matched the octopuses’ body color with their eyes. She’s been obsessed with googly eyes so I knew I needed to have a craft that had them in there. It was a success.
Just glue the eyes on to the cupcake liner. For this, I flattened the liner to make sure they stayed.
After that, I had her used a marker to draw a smiley face.
Now it’s time to put the legs and body together!
I assisted her with this a lot because it’s a little tricky for toddler.
Take one of the legs and put glue on the center of the scrapbook paper part. Then, place it in the inside of the cupcake liner. It should look like the octopus has two legs dangling down.
After, flip it upside down again, repeat the gluing, and rotate how you put the legs so it’s opposite. You want to make a little ‘x’ in the middle.
While the first two strips dry on the octopus, help with the other one or wait until it dries a little more. I found it dried better if it was flipped on the octopus’s head.
When it’s strong enough make another ‘x’ with the remaining legs.
The legs should look like a star when they’re laying down. It’s hard to explain, but simple to do.
If you’d like to hang then, just take a string and scrapbook paper and glue it on top of its head. I put the string under the paper to give it a little more strength.
Now you’re all done!
Mila was super proud of our Cupcake Liner Octopus and I think they both turned amazingly cute.
If you try this craft out, let me know in the comments. Also, if you know of a cute octopus book, I’d love for you to share it too. It’d be a great idea to pair this craft with a book for other toddlers.
After that, check out how these other moms incorporated mermaids and sea creatures in their day too!
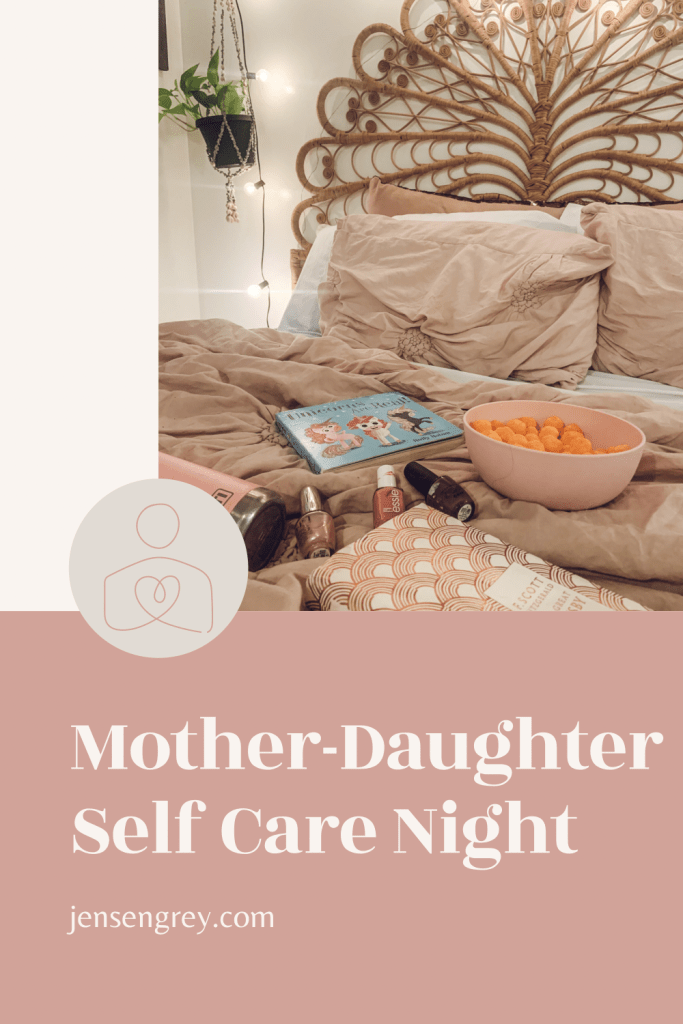
There’s nothing more special than a mother daughter date night! Instead of going out, Mila and I stayed in and practiced self care.
Since this first week back to school has been hectic, staying in and relaxing felt right. We both needed the rest and the together time to recharge for the upcoming week. Plus, we got to just focus on what self care we needed.
To begin the night, I took a hot shower where I put on a hair mask (seriously the mask I linked does wonders!) and used sugar scrub.
I never have enough time to do these extra steps! Setting aside this time made my skin and hair feel so soft and new.
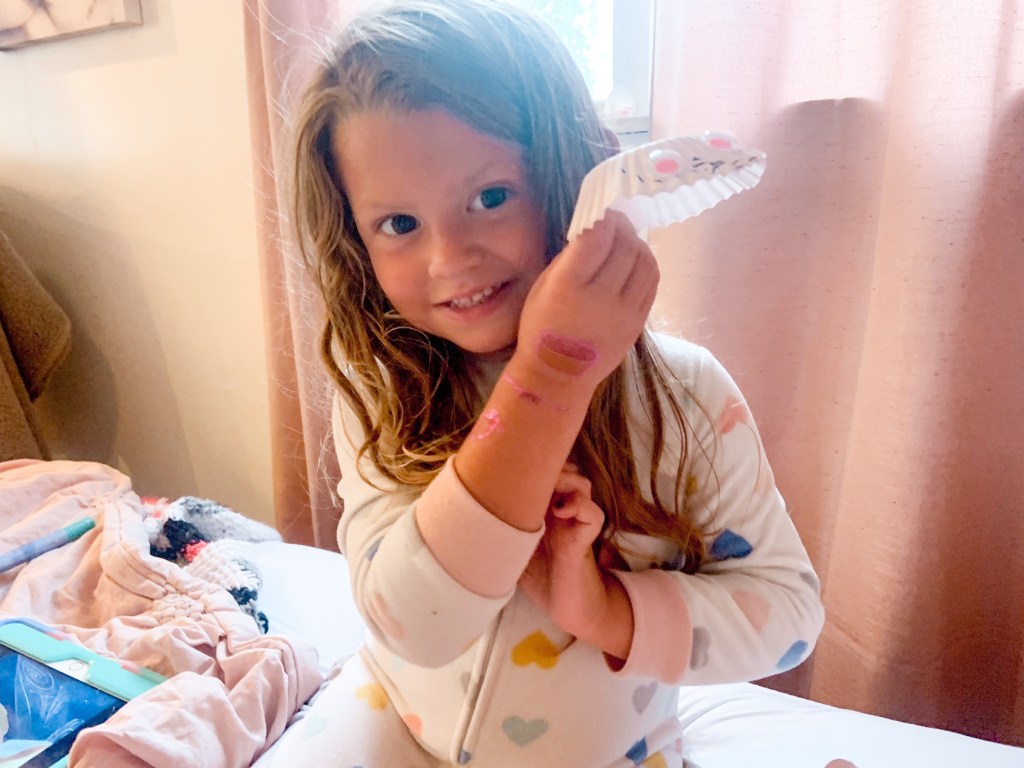
Mila, on the other hand, had a bubble bath beforehand. She spent her time doing her own makeup. I didn’t know this, but she definitely was feeling herself and all the glitter.
We kept it on until right before bed because she liked it. When you have a self care night, you have to feel like your best self.
I can’t blame her for wanting to be covered in glitter.
After my lotion dried, we put on our favorite jammies. Then, we got our self care essentials for the night:
As a busy mom, I don’t always get to read as much as I’d like. Just even being able to read a few pages felt so nice. It’s also amazing for Mila to see me reading and enjoying it! I hope so loves English and language as much as I do.
The book she picked out is adorable! She often asks me to read it to her before bed. Now she makes up the story when she looks at it herself.
Throughout watching movies and reading our books, we snacked on our cheese balls and jello.
Mila asked for water, without Mio. I’m so proud of her positive choices. I told her she could have anything to drink and that’s what she chose.
We ended the night taking selfies and I painted Mila’s nails. I love that we both have dark purple polish on now. Anytime we can match, I feel like we try to do it. Even when we stay in.
It wasn’t long after her nails dried until Mila fell asleep. We had wiped her makeup off and she was just relaxed.
I ended the night watching dance moms and maybe had a few more cheese balls too.
Our night was pretty perfect.
We love being together and doing the things we enjoy. I can’t express how much joy Mila brings me. Hopefully she’ll be able to see the importance of self care as she gets older.
We all deserve to love and cherish ourselves.
Have you ever had a self care night with just your or with your little? What was your favorite activity?
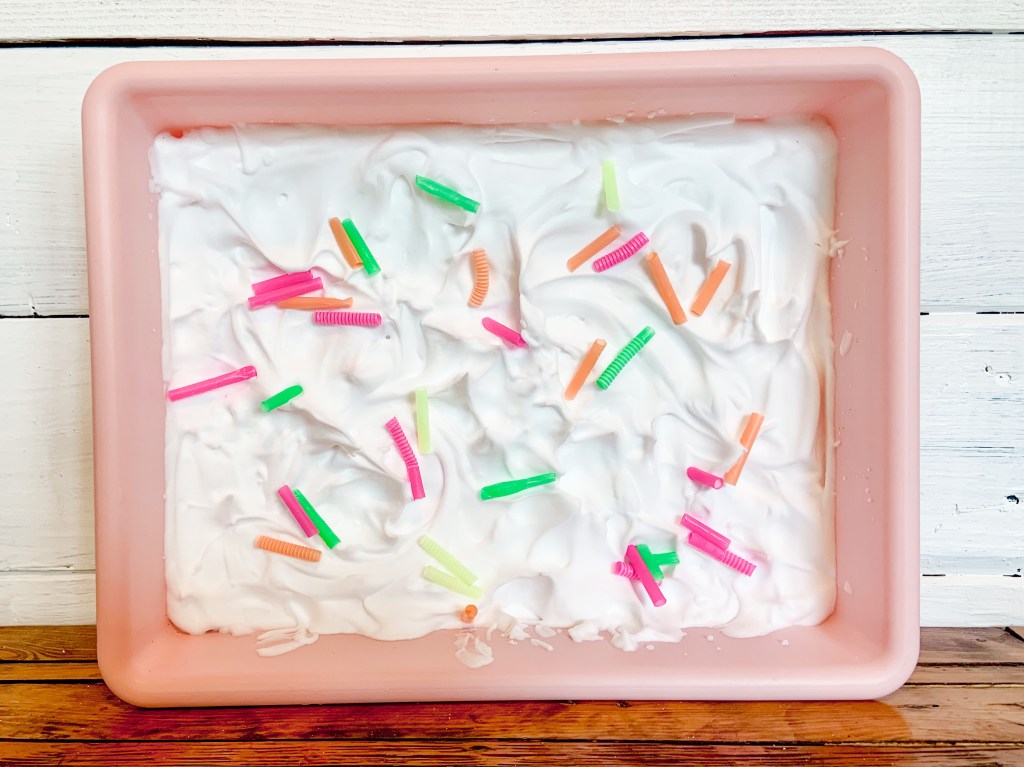
Cake it till you make it with this Cake Decorating Sensory Bin.
Shaving cream is such a fun ingredient to use during sensory play. It’s cheap, versatile, and easy to clean up. That makes this bin perfect for kids and their parents!
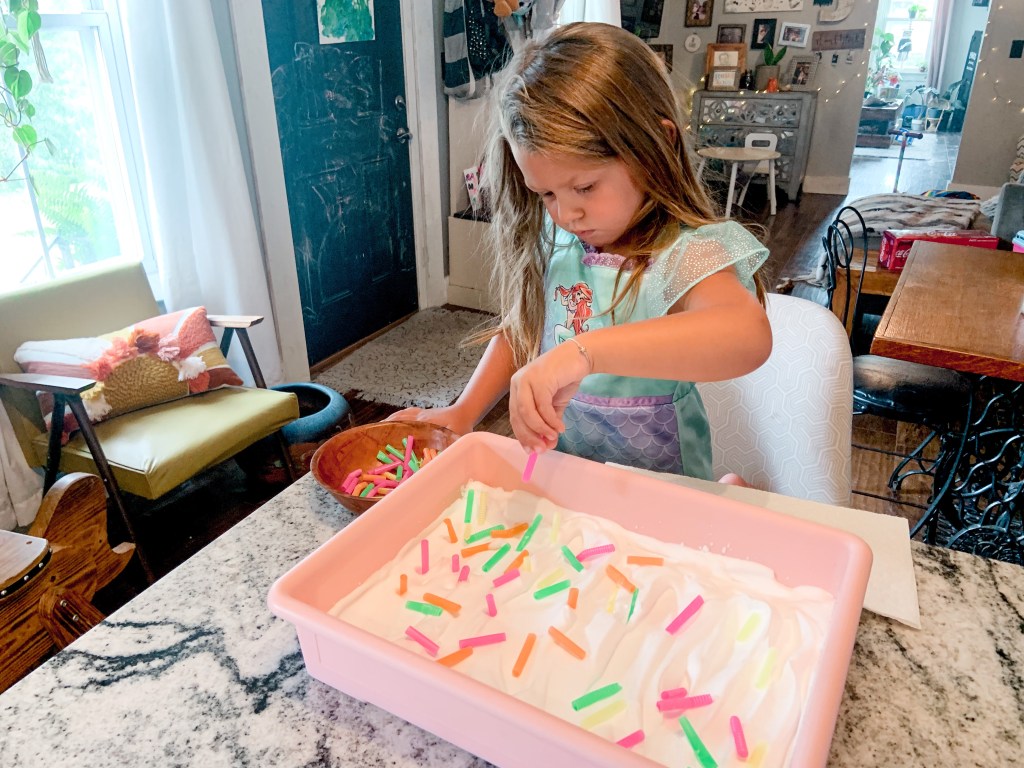
I also loved seeing Mila’s creativity again and again. She did a lot of different designs and pretended she was a cake decorated the entire time.
I feel like I always say this, but putting this bin together took no time.
The longest part was cutting up the straws into sprinkles. For this, all I did was randomly cut it in small pieces. I didn’t measure or make anything exact.
Then, I put shaving cream in the bin. There was a decent sized layer there, but I didn’t fill the bin.
After that, I set it in front of Mila and told her the goal of the sensory bin. She did everything else without me having to monitor it.
The only thing I did have to mention that this was shaving cream… not whipped cream.
Mila played with this activity for way longer than I set it up. Which is always a win in my book. When she wanted to clear off her cake, we put the sprinkles in a colander and cleaned them off.
This Cake Decorating Sensory Bin really was such a simple and fun activity for her!
I’m the future, I can see this activity expanding into her spelling words or having her make certain images. Mainly because it was so easy!
Let me know in the comments your child’s favorite type of sensory play. I think Mila’s might be water!
The Rainbow Fish by Marcus Pfister is a classic story about sharing. Since preschool is quickly approaching, I thought this story and lesson would be great for Mila to read and remember.
Sharing can be a tricky thing to learn, so a book with beautiful illustrations is a great place to start.
One of my favorite parts about this activity is you can make it however you want!
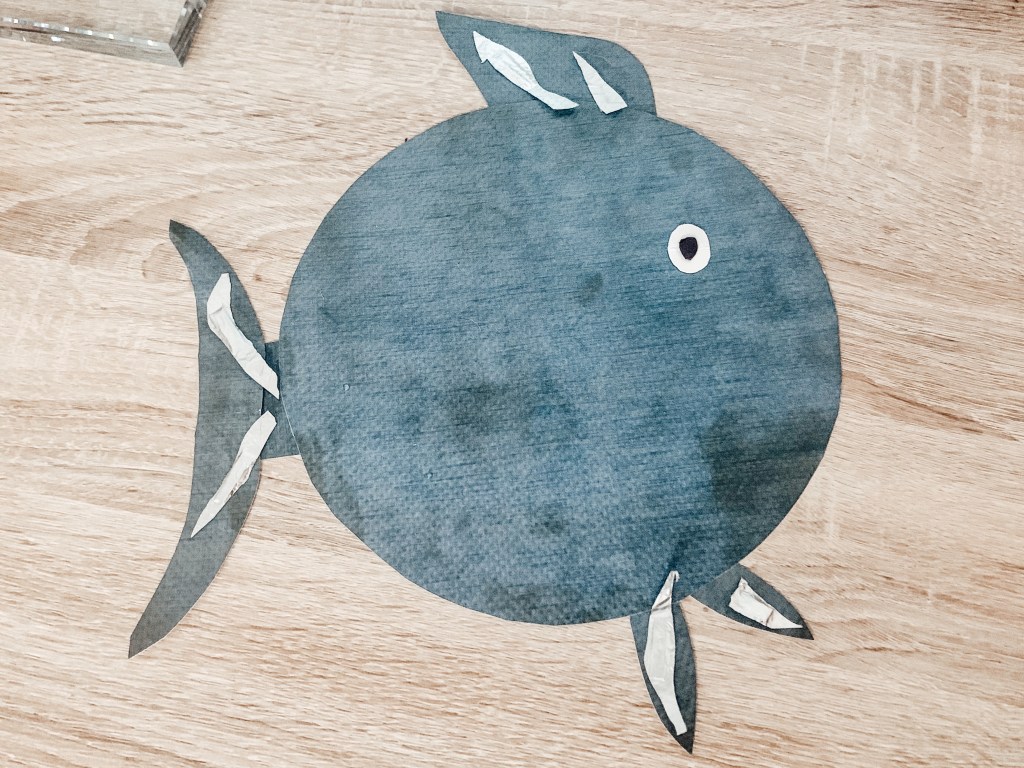
Before the activity, I prepped the basics of Mila’s fish.
Instead of a paper plate, I just used left over scrapbook paper to make the fish’s body, fins, and eyes. Then I cute out aluminum paper and taped it on the fins. I tried to mimic the book, but I think it turned out just fine!
At this time, I also premade the foil scales too!
To start out this activity, we first read The Rainbow Fish. While reading, I asked Mila a few different situational questions like…
Would you share your scales?
Do you think you have to share to have friends?
Would you be sad if someone didn’t share with you?
Do you know you’re just as beautiful inside as your are out?
Plus a few extra ones that I can’t think of at the moment. Yet, they all touched on these topics.
Another BIG thing we talked about with this book is consent. Mila stated she wouldn’t want to give away her scales or parts of her. When she said this, I thought… duh mom?!
We talked about how it’s okay not to share all of yourself or things with others. But it is nice to take turns with toys and listening ears.
Who knew she’d get so deep so fast.
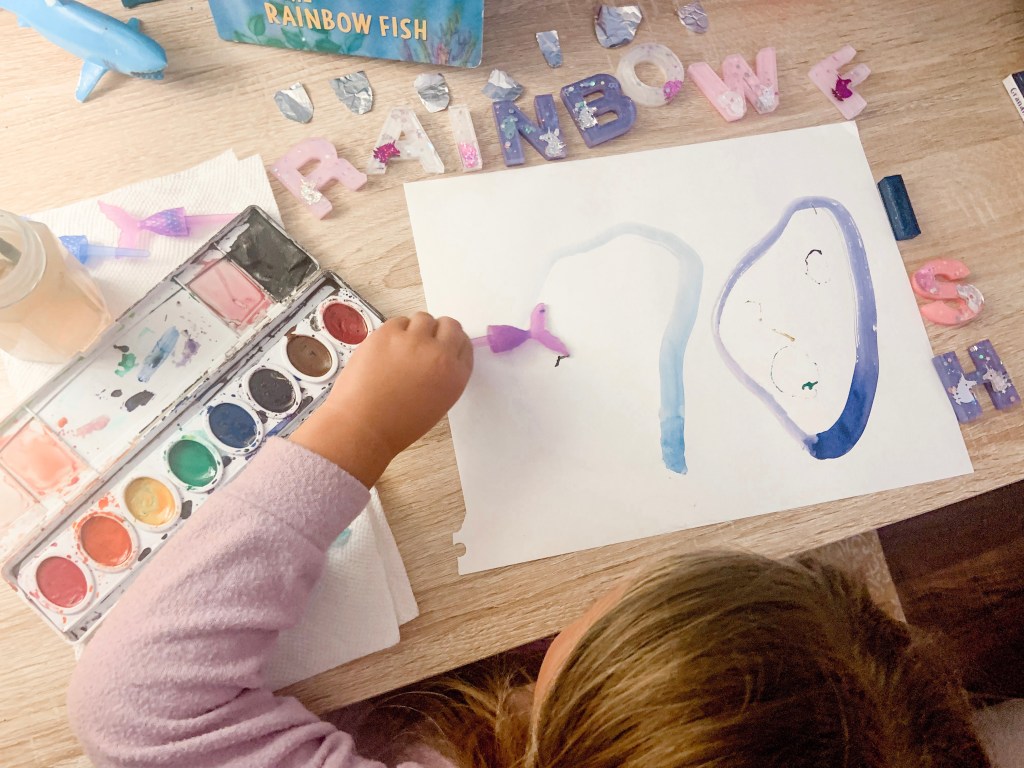
Then, I had her use her watercolors to paint her own scales. She made me a beautiful pictures first.
After she was finished painting, we let the paint dry. It only took a little bit and you could speed it up with a hair dryer. Then make more paper scales.
To assemble rainbow fish, I taped the back of the scales and we talked about sharing and consenting again.
While she taped on her painted scales, I would ask her about positive ways she could share in preschool. Every time she thought of one, she could add a shiny scale to her rainbow fish.
I think she did excellent and was so proud of her fish after it was done!
When I reflect back on this book and activity, I’m really shocked with the questions she had. It also made me smile knowing she’ll be good to go with sharing and being a friend in preschool.
Let me know in the comments if you love The Rainbow Fish or what other books about sharing you’d recommend.
Then, if you love pairing books and activities, check out some of these ideas…
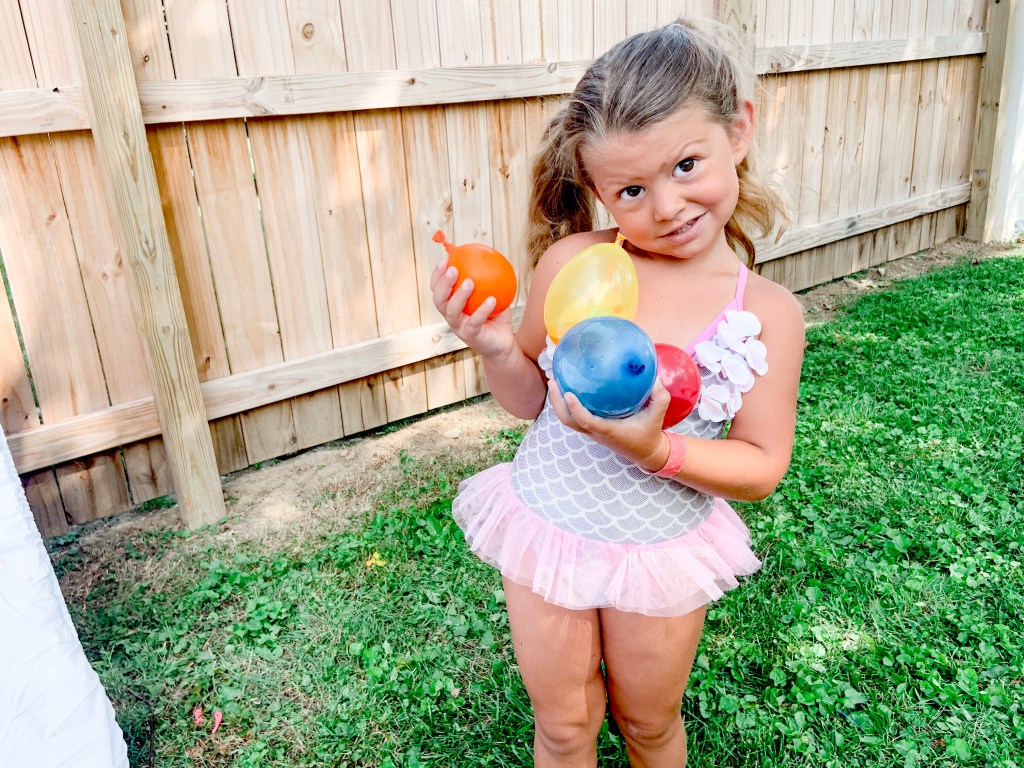
What’s more fun than water balloons? Throwing water balloons with tie dye in them at a perfectly white sheet.
Let’s just say, Mila custom made me Water Balloon Tie Dye Sheets to celebrate summer.
AND… I love them!
So, let me tell you this first. It was sort of a huge jump of faith to do this activity. Mila was introduced to water balloons this year and throwing them at other people… do you get where my brain went?
Unlike Mila, I didn’t wear a swimsuit for this activity. I hoped with all my might she wouldn’t just throw them at me.
She ended up not getting me with them, but if you do this activity, beware! Tie dye is so hard to get off other clothes if you can’t get to it right away. It also takes a few days to get off of skin too.
But it was totally worth it! This is my favorite art project of the summer that I get to use frequently!
When you brave it with your kids, here’s what you need:
There is some prep going into this activity. It’s a lot easier than the Balloon Pop Artwork we did for Mila’s birthday!
For some reason, Mila slept until 10 am one morning, which gave me a perfect amount of time to set up and prep for this. Usually I’m all for older kids helping with prep, but this one can get messy!
To start off, I mixed the tie dye together and let the solution saturate.
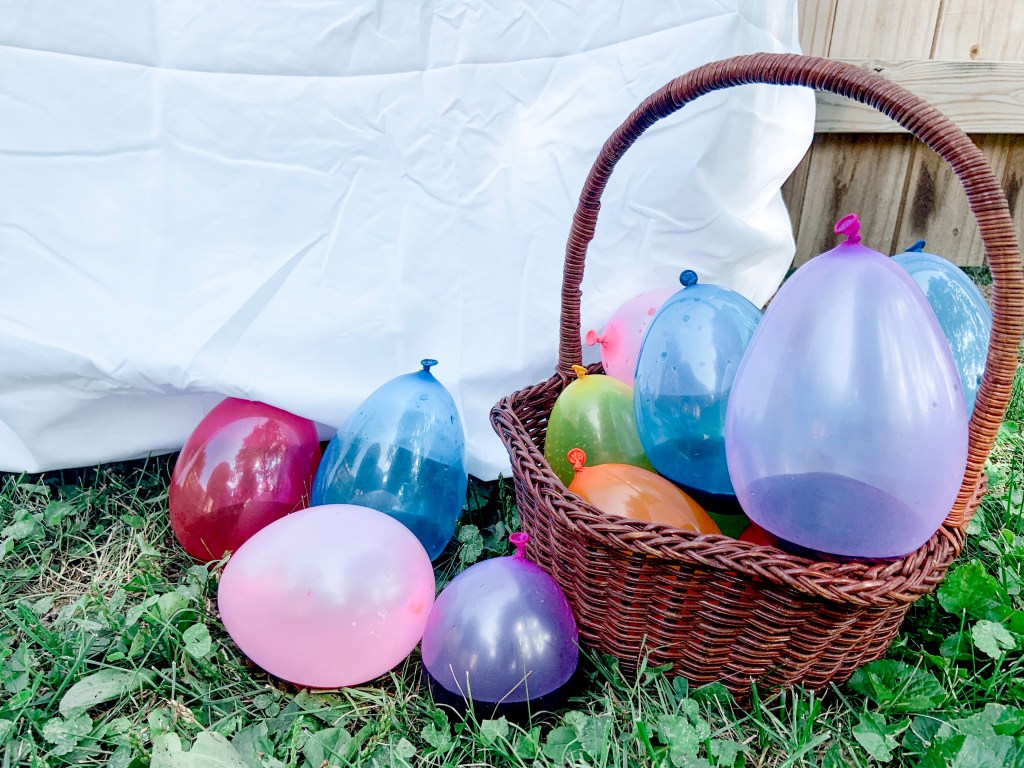
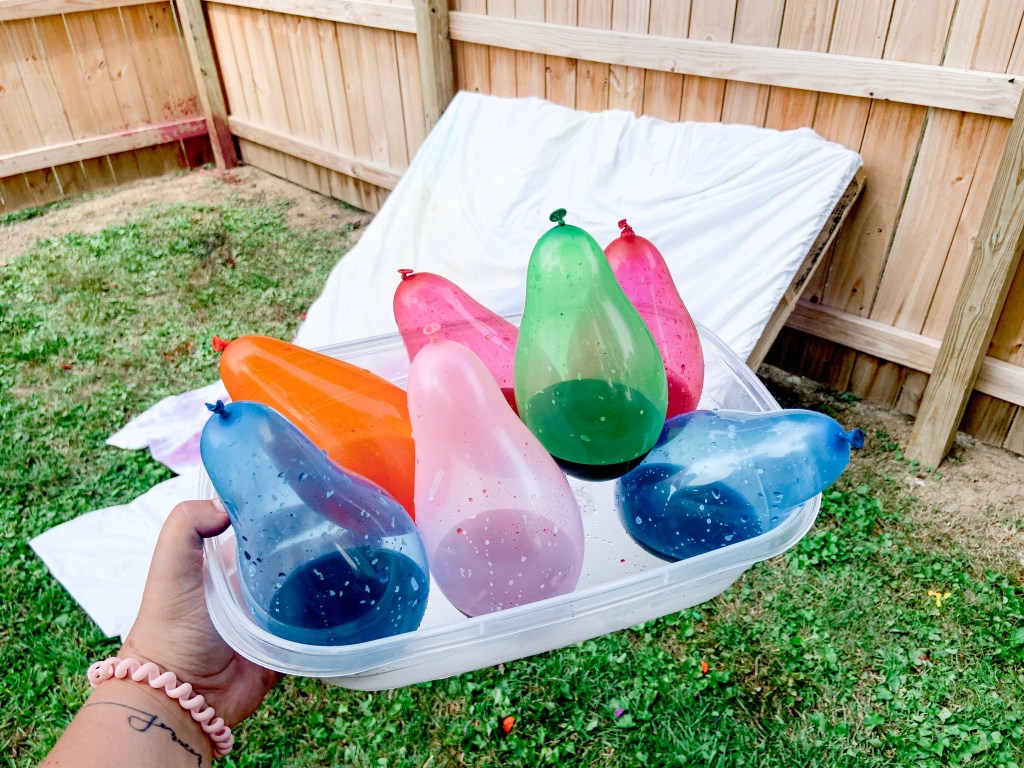
Then, I color coordinated the balloons to match the dye. This way Mila knew what to expect and could do more color recognition… because we’re always learning!
After I thought they were mixed enough, it was time to start.
I’m guessing there’s probably easier ways to do this, but this is how I did it. If you know of a better way, PLEASE let me know in the comments.
Anyways, I blew up the water balloon with air. Then, added the tie dye water to the balloon by sticking the tip of the bottle into the balloon. After, I added extra water into it.
See… messy.
I found it better to blow it up as much as it could and not fill it completely with water.
Not going to lie, this took a little while, but I had the time. If you’re planning to do this, just know they’ll want way more than you planned! We probably threw around 50 to 75. They all didn’t hit or pop on the sheet.
So, if you think you have enough, do ten more.
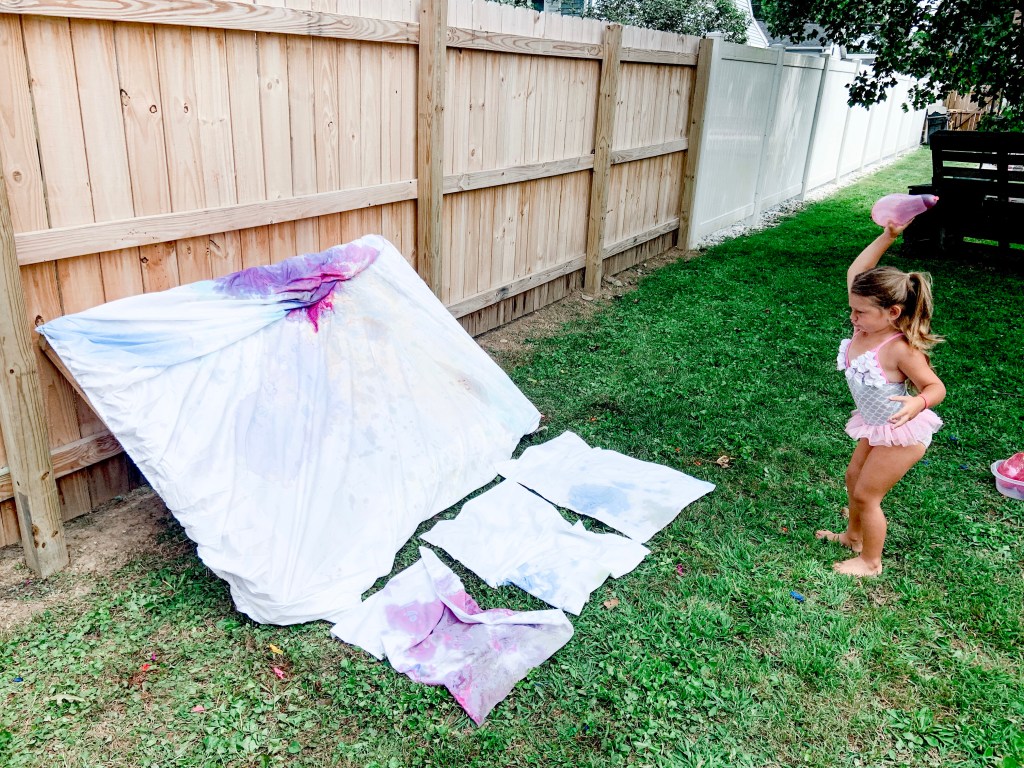
After the balloons were done, I set up the outside area. Since I have access to pallets, I used that to hold the big sheet. The pillow cases went to the ground to catch the splatter.
At first I had it more upright, but it worked better with a slant.
By the time Mila woke up, the area was ready to rock-n-roll. Let’s just say, she woke up pretty easy when she found out what we’d be doing!
All I told her to do was get her swimsuit on and meet me outside.
Then she saw the balloons and sheets.
I told her the plan for the day and she took right to it. Again, I’m thankful she didn’t hit me with any because I wore normal clothes. Which I would not recommend.
We found out that the balloons were harder to pop than we originally thought. I’m guessing because of the air in them.
She found her rhythm though!
Look at that lefty power.
It took a lot less time to throw all the balloons than it did to pop them.
I actually made more midway through.
We had fun talking about the different colors and making predictions about their pop. Like I said, it took a little bit to figure out how to pop them. I think the sheets softened the blow.
It was fun watching Mila’s strength and persistence while throwing them.
One tip I’ll give is to turn the sheets and pillow cases half way through. That way both sides can get optimal color!
I am super impressed with how these turned out.
To finish off the tie dye, I folded the sheet and pillow cases up, put them in a plastic bag, and popped them in the refrigerator overnight. Then, wash and dry them. They’ll be ready to go after that.
Once I put them on the bed, I’ll update this post and share on Instagram and Facebook.
We’ll definitely be tie dying again with this kit! I’ve made a few shirts with it, but this way by far the most fun we’ve had with it.
Have you ever tie dyed anything? What’s your favorite way to do it? Comment to let us know.
I think ours is with water balloons!
After you comment, check out how these moms incorporate water play with their kids!
These are just the different fruits we used. You can use any that you like best!
First, cut all of your fruit into smaller pieces. I sliced the strawberries and kiwi, halved grapes, used pineapple chunks, and whole blueberries for ours.
Then, cut your watermelon into slices. Then you can make different shapes if your toddler would like. We used star cookie cutters for Mila’s.
After you figure out the shape of your watermelon pizza, spread fruit dip all over it.
You could also use whipped cream too!
Next, take the fruit and cover your watermelon. We ordered ours like the rainbow on Mila’s star and an inverted rainbow on my watermelon slice.
I absolutely love how these turned out!
It was such a tasty snack, but I bet they’d be a huge hit at family get-togethers or parties. I can even see it being an interactive station.
A melon-ion possibilities.
Yes. I absolutely had to throw a watermelon pun in the post somewhere. All of you would be disappointed if I didn’t after the Shark Week post! Which was just JAWesome.
No matter what you make these for, you won’t be disappointed with how they taste. And your toddler will love helping out with their snacks.
Let me know in the comments if you’ve ever made watermelon pizza.