PEEPS Bunny Painting

If you need a way to get rid of all the Easter Bunny’s PEEPs he left, try this cute PEEPS Bunny Painting. It’ll be a hit with kids and a cute piece of artwork to treasure for years to come!

You all know how I love when Mila makes art, especially when it is a fun sensory experience. It’s not even the first time she’s gotten to play with her food either!

Honestly though, we got a lot of PEEPs this year for different recipes and what the Easter Bunny is still bringing. We’ve seen all the PEEPs smores and cocktail garnishes, but we wanted to do something we could keep for years. That’s where this artwork comes in.

Another amazing part… you only need three items:

  • PEEPS Bunny
  • Canvas/Paper
  • Paint – we used washable!

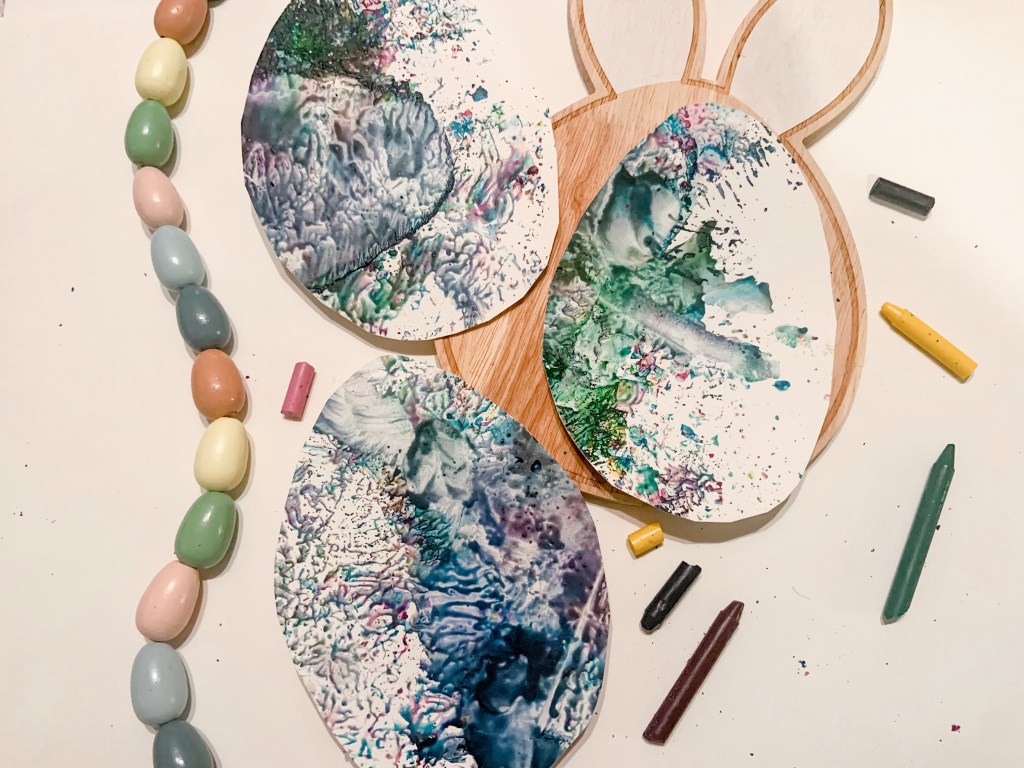
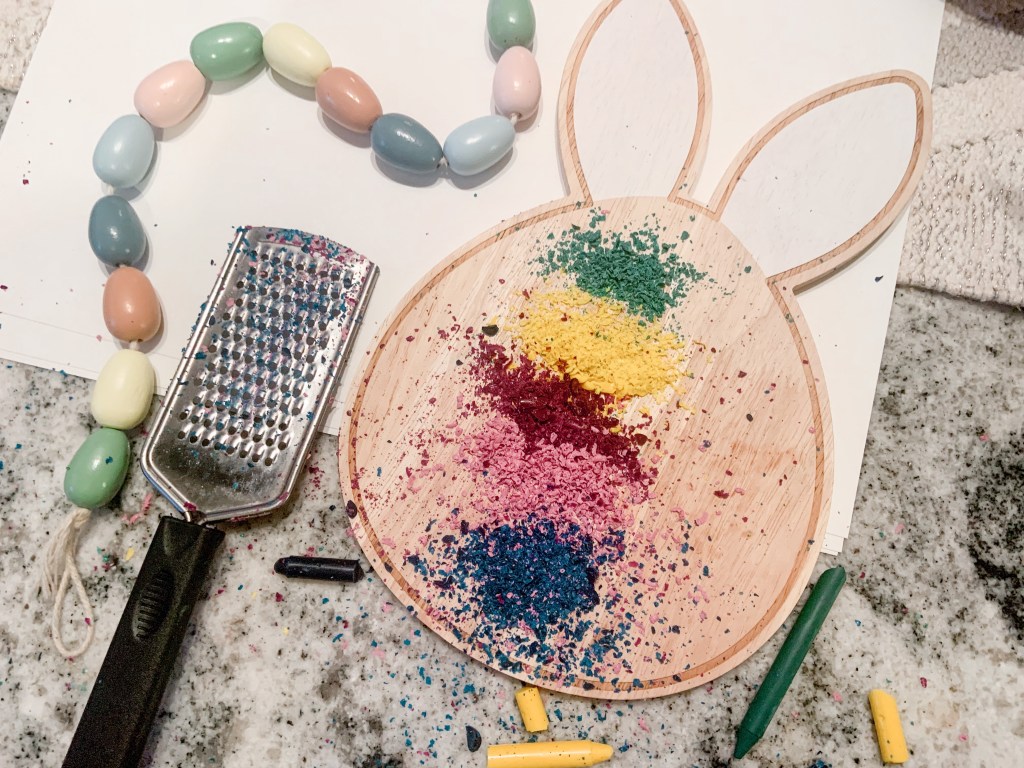
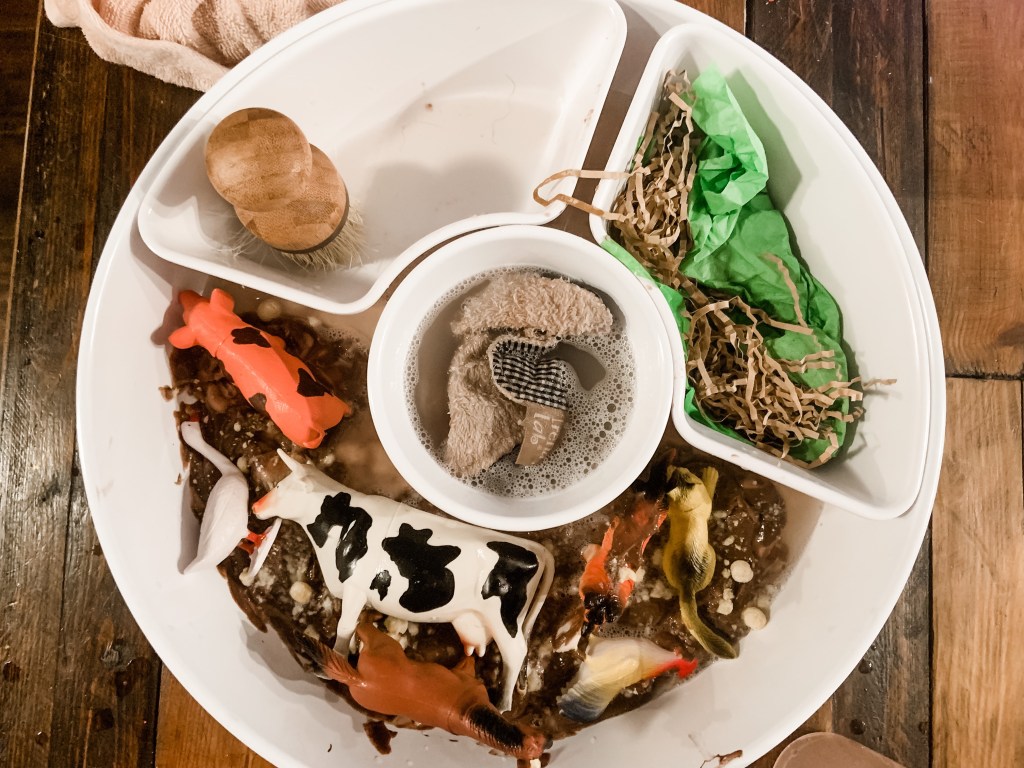
This activity is a simple set up. All you need to do it put paint on a plate. Then let your kiddo know to use the PEEP bunny as a paint brush.

Once they have one color done, give the paint time to dry. You can literally give it time or just use a hair dryer to speed up the process. Either way, you’ll want to do this so the paint doesn’t mash together and just become a ton of brown bunnies.

Repeat with how many colors you’d like to do.

You can even make it more organized than Mila’s by having your child line up the bunnies. I love the chaos of all of Mila’s artwork.

One thing that I haven’t added yet is some sort of saying on there. I’ll try to think of some bunny, spring, or Easter pun to go along with it. If you have any ideas, let me know. I’ll make sure to either update this post or post a finalized picture in my Instagram stories.

No matter what though, this activity was so much fun for Mila to do. I know kids love playing with their food and giving them this option makes it even better.


What’s your favorite Easter artwork you or you child has made? Let me know in the comments.

Advertisement

Mystery Jelly Bean Game

If you’re looking for a fun game to play with family and friends on Easter, this Mystery Jelly Bean Game with be a hit for all ages.

It’s easy to set up and hilarious to get people’s reaction on film!

This is the first Easter Mila really knows what it’s all about. So of course we have to have some fun with it.

Since we both LOVE candy, I figured it’d be fun for her to experience all the different jelly bean flavors. Her wide range of reactions made me laugh so much.

Here’s what you’ll need to play this game with your kiddo:

I printed and cut out the magical jelly bean printable from Whimsically Wonderful. It just makes it extra special and magical to do things like that.

Then, I filled the plastic eggs with the matching jelly bean color.

After, I numbered each egg 1-6 and we tried them one at a time. Mila definitely gave her honest options about them and had me try them too.

Even when she didn’t like a flavor, she ended up eating them.

I think this was such a fun activity for Mila’s age. It would be even more fun with a lot of different people to see their reactions and to see who has similar tastes.

Either way, we had such a fun time doing this game with each other. Maybe next year I’ll get the bag with ‘gross’ flavors too!


What’s your favorite jelly bean flavor? I think my favorite was strawberry.

Nut Free Bunny Trail Mix

Easter is almost here. Hop on over to check out this Nut Free Bunny Trail Mix for Easter Sunday or a fun after school spring snack.

Mila and I LOVE trail mix. It’s such a yummy and easy snack… but I can’t eat nuts. Instead of missing out, I’ve found a few staples of a mix I love.

Not only are they yummy to snack on, you can easily store snack mixes to enjoy for the entire week. It makes snack time SO easy!

One of the best parts of having a great mix is adding seasonal snacks to enjoy.

Here’s the ingredients of our latest spring mix:

  • Pretzel Sticks
  • Pastel M&M’s
  • Bunny Marshmallows
  • Chex Mix
  • Jelly Beans

Anytime I make nut free mixes, all you have to do is throw it in a big bowl. You can mix them up a little bit and you’ll have an amazing snack.

Sometimes we also like to add sprinkles as well!

One fun way to serve these is to use different shaped plates or big jars. It just adds a little more magic. The Dollar Tree always has fun containers and plates. That’s where I found this bunny!

Hopefully your friends and family will love this Easter snack mix!


What are you favorite things to add into trail mix? Let me know in the comments.

DIY GIANT Daisy Wall Hanging

If you’re looking to make a big statement with your spring decor this year, you’re not going to want to miss this DIY GIANT Daisy Wall Hanging. With material you can find in your home, you’ll have a piece of decor that demands to be seen.

My favorite part about spring is all the flowers. Since the pandemic started, Mila and I really got into growing plants. They’re spread throughout our entire house. Honestly, they just bring so much life into our home. Plus, they’re perfect for her to learn about the science behind them and responsibility. It’s a win-win.

So, when Mila ditched her space themed birthday and wanted to do flowers and plants, I wasn’t so surprised. I just knew we had to make something special.

You can easily make this DIY with items you can find around the house. Here’s what you’ll need:

  • Cardboard
  • Scissors
  • Cotton Balls
  • Yellow Yarn
  • Hot Glue (a lot of it)

When I say you need a lot of hot glue, I mean that I probably used 15 sticks. This daisy is big and needs a lot of glue to make it stick!

But first… you need to cut out a circle for the middle and then the petals around it. I used six petals, but you can do what you think looks good for your DIY daisy.

I used a plate to trace the circle and one of the feathers from my headboard. You could free hand a petal or find something that’s a similar size and shape around your house. Then just cut everything out.

Next, hot glue yellow yarn on the circle. I just did a spiral pattern.

After that, got glue the petals to the back of the circle. I put about them about an inch in. This made the petals secure.

Once the hot glue is dry on the structure, it’s time for the cotton balls. This takes a while, but once you find a rhythm it starts to click. I tried to do patterns with them too. You’ll use a lot of hot glue here!

To secure the back, I made another petal and hot glued it on. Then I hot glued a string to be able to hang the flower.

Even though this DIY GIANT Daisy Wall Hanging took a little while to make, I love how it turned out. It’ll be perfect for a picture backdrop for her party! After I’ll have it in my home too.


What’s your favorite flower? As you can imagine mine are daisies!

DIY Match the Egg Memory Game

Looking for a fun way to challenge your little this season? A DIY Match the Egg Memory Game is an egg-ellent option!

When I saw the egg match printable from The Letter Vee, I knew I had to utilize it. Mila loves playing memory games, especially when they’re seasonal.

With a little work, it became such a cute and fun way for her to settle and use her brain.

This DIY Match the Egg Memory Game takes a little bit to make and set up. After the hard work though, it looks beautiful and my little loved it! She spent about 30 consecutive minutes playing with it.

Here’s what you’ll need:

Not going to lie… this DIY took a little work.

First, you need to print out the sheet from The Letter Vee. Then cut each of the egg pieces out.

Next, use modge podge to glue the paper on to pieces of cardboard. I only used a thin layer between the paper and cardboard. It seemed to have stuck perfectly fine.

Once the glue is dry, cut the cardboard into the right sized pieces too.

You could easily be done with your Match the Egg Memory Game, but we wanted to make it extra cute. This is totally optional, but I think it made it extra special.

We reused pink tinsel to trim out the pieces. To do this, I just cut the tinsel to size and hot glued around the cardboard. Then you just stick the tinsel around the outside and let it cool. I decided to leave the tinsel off of the side where the eggs come together too.

You can use these pieces as a traditional memory game or make it a little more special by hiding them in eggs around the house. Either way, it’s full of Easter fun!


What Easter games do you play with your kiddos? Let me know in the comments.

DIY Melted Crayon Artwork

Happy National Crayon Day, friends! To celebrate the day, Mila and I made these adorable DIY Melted Crayon Artwork eggs.

This was a fun and different way to utilize our broken crayons.

Mila and I like to color a lot and sometimes we can left with small ones that can’t color anymore. We’ve melted them to make other crayons, but we wanted to be more creative this time.

I’ve been so inspired by all the Easter content lately that I thought it’d be adorable to make Easter eggs.

Here’s what you’ll need to make yours…

  • Crayons
  • Grater
  • Iron
  • Wax Paper
  • Thick Paper

This activity is really simple, but there’s definitely a decent amount of prep and clean up for parents.

First, collect your broken crayons that are not useable. Then it’s time to start grating them.

Mila picked out a ton of different colors. Beware of this! They can all mix and melt together. She didn’t seem to mind so it all worked out for us!

Once everything’s grated, it’s time to design your Easter eggs. I’m sure older kids would be able to create different designs. You could even use washi tape to keep everything separated.

Mila had a fun time putting the crayon shreds on the paper and had even more fun watching the next part.

When the design is complete, lay wax paper over it. Then with a heated iron, lightly press on it to melt the crayons. Mila was not expecting it to melt so we got to talk about why and about color mixing too!

After it melted, we let the crayon melting dry and then cut out the eggs shape.

We will make these eggs into a cute garland with different textures of yarn… and maybe some glitter too. Glitter is always the answer in our house!

This is an inexpensive way to decorate for Easter while doing a fun craft and science experiment with littles.


Check out other ways Mila and I have utilized and upcycled old crayons:

Let me know in the comments what you do with old crayons. I’d love to hear what our other options could be!

Strawberry Cheesecake Stuffed French Toast

If you’re looking for a new breakfast recipe for this Easter, you have to try this Strawberry Cheesecake Stuffed French Toast. You can easily make it in regular squares or spice it up for Easter morning.

On Easter morning, we have the same routine. Wake up, find our Easter basket and eggs, and then eat a big breakfast before all the festivities of the day! It’s important on holidays to make sure to get food before everyone gets together and plays. That’s why I’m always on the hunt for recipes that Mila will love.

Since I love french toast and Mila’s into strawberries (I mean, me too if you remember last summer), this seemed like a perfect one to try! It combined all of our favorite flavors in one bite! Who wouldn’t love that?

I had most of the ingredients on hand, but if you’re wanting to try this recipe out, here’s what you’ll need:

For this Strawberry Cheesecake Stuffed French Toast recipe, it’s made similarly to regular french toast… besides the stuffed part!

The strawberry cheesecake stuffing consists of mixing cream cheese, vanilla, a pinch of sugar, and strawberries in a bowl. I mashed the strawberries a little bit to get the flavor consistent throughout the cream cheese. Then spread the mixture on one of the slices of bread. Next, put another piece of bread on top.

If you’re making your french toast with cut outs, this is the time to do it. We used different Easter shapes! No matter if you’re making it fun or traditional, make sure to press the sides down so it doesn’t all escape!

Now it’s time to dip them. Make a mixture consisting of one egg, milk, cinnamon, vanilla, and a pinch of sugar. Dip your bread in the mix. I make sure to add extra cinnamon every time.

After it’s coated, place on a hot pan that’s coated with butter to cook.The Strawberry Cheesecake Stuffed French Toast is done when both sides are brown and toasty.

Once it’s done, I’ll add maple syrup and sprinkles to top it off. Sprinkles make everything better.

Then enjoy!

We loved this tasty breakfast and I can tell we’ll be trying different flavors to stuff our french toast with. I think using the Easter cut outs made it even more fun and festive.


What’s your favorite breakfast food for Easter morning?

Farm Clean Up Sensory Play

What’s Mila’s favorite part about spring, minus the flowers and nice weather? All the baby animals! This Farm Clean Up Sensory Play idea is a perfect way to talk about new baby animals AND have fun being messy too.

This interactive play was easy to set up and let her play for a long time. The best part… it’s completely edible too.

First, I want to say a HUGE thank you to Terra by Battat for gifting Mila these animals to play with. They have these big Bucket Sets full of different types of animals that are amazing. Terra by Battat sent us farm animals, marine animals, and a few other goodies that we love.

Their toys are super realistic and come in their own world. Mila has spent hours with both the buckets. The marine animals have became her favorite bath tub toys. I’ll be posting different ways we’re playing with them. You should still totally check Terra by Battat out though. Would make perfect Easter presents!

Anyways…

When I saw the country world bucket, I instantly thought of this fun sensory play. To further create this world, here’s what you’ll need:

The hardest part of this sensory play is the set up. It just takes a little time, but it’s worth it.

To set the scene, all you need to do is spread chocolate pudding in one part of your sensory tray. I also added some crushed kix cereal to make it look more realistic.

I also made sure to make the animals ‘muddy’ too. Honestly, I didn’t know if Mila would want to do that so it just made it a little more fun for me.

Then, I set up the cleaning area. This just consisted of a wash cloth, cleaning brush, and soapy water. It was nice doing the water in a bowl because Mila instantly thought it was a bathtub! Which works for me.

The next little area was where the animals dried off. I just used shredded paper and tissue paper.

After it was all ready for her, I just let her do whatever. When we do sensory set ups like this, I try not to give her too much direction. She immediately started cleaning off the animals.

It was so cute to listen to her too. She pretended she was a zookeeper and it was cleaning day.

After the first clean up was done, she made the animals muddy again and kept the process going. I loved watching how creative she was through it all.

I think this activity would have been even better outside with more space, but it worked well inside too.

The clean up for this activity was really easy too. All I did was recycle the paper. Then I just used water to clean everything else off. It was quick and simple!

I have a feeling we’ll definitely be doing this set up again in the near future. Until then, I can’t wait to show you the other fun activities we have planned with the marine world bucket. It was another hit with Mila.

Make sure to check out Terra by Battat and order realistic play animals that your kids will love.


What edible sensory play do you do with your kids? I would love to hear ideas.

DIY Spring Bucket List

If you’re wanting to help plan on getting the most out of spring this year, this DIY Spring Bucket List can help! Not only will it motivate you to get everything you want done, it’ll look great in your home.

Mila and I love bucket lists. We make them every Christmas break and try to do one for the other seasons too! Here’s our one from last spring.

We usually just make ours out of craft paper, but when I saw the tags from The Letter Vee, I wanted to do something a little different. I used an existing floral mobile I had and gave it another use!

To make our bucket list come to life, we used:

First things first… it’s time for a family meeting. Have a talk with your family about what you would all like to do this spring. This will look different for every family.

Once you figure this out, it’s time to print.

The Letter Vee has some bucket list items already on their site, but also gives blank cards too! This way you can easily write down what you’d like. For our ‘other’ items, I just used a normal pen and you could easily see my writing.

Next cut them out and use a hole puncher for each tag.

I actually taped the tags on spring scrapbook paper to give it an extra pop and used a daisy hole punch. The extra details made it so cute.

We also decided to use pink, grey, purple, and light blue yarn to connect our tags.

All you have to do is a light tie on a piece of the yarn or ribbon on your wall hanging. I just shuffled them around so we could easily see them.

You can add as many bucket list items you’d like.

Our plan is to take pictures with each bucket list item. When we do it, we’ll pull it off and make a little scrapbook of our spring.

It’ll be a fun way to record what we do and reflect on it at the end of the year.

Either way, we’re super ready for springtime and to start pulling items off of our bucket list. We can wait to keep you all updated.


In the comments, let me know what’s on your spring bucket list.

DIY Flower Pom Poms

Springtime is here and we’re bringing the best parts inside. To decorate and embrace spring, we made DIY Flower Pom Poms.

These boho flowers are easy to make and really make a statement to any wall.

Mila and I are obsessed with plant and flowers. They bring us so much joy and are beautiful to look at too. I think they’re one of our favorite parts about springtime.

Even though we have plants and see flowers constantly, you can never have too many! That’s why I love this DIY Flower Garland.

Here’s the only two things you need for it.

  • Yarn
  • Scissors
  • Large needle
  • Pom pom maker (optional)

The first thing I did was pick out what color yarn I wanted for this project. I am in love with this orange, yellow, and pink color scheme lately. It gives me 70’s floral pattern vibes.

Then you need to make your pom poms. I personally don’t use a pom pom maker, just my hand.

All you need to do is cut and hold a string in your hands horizontally, then start wrapping string vertically around your four fingers. Wrap it around 150 times to get a full pom pom.

Next, you have to tie the first string you had horizontally. Once it’s tied, cut the loops for the rest of the strings to flare out.

After you have your little yarn ball, it’s time to shape and make it look fluffy. You’re going to trim A LOT of yarn here. Just keep cutting it down until it’s the size and puffiness you’d like. Once that’s done, your first pom pom is complete.

For each flower you do, you need to make six pom poms. I usually do a white center with colors on the outside.

To connect them, you can either use hot glue or stitch them together.

I made a garland of hearts, but you could easily make a single wall hanging, faux flowers, or a rear view window decoration. You can also change the size of your poms using a pom pom maker or different technique.

Personally, I love how this turned out and totally want to make one for my room too.

Prepare yourself for all the spring and Easter content. We are so excited for this tike of year and are so ready to create!


What craft or activity are you ready to tackle this spring? Let me know in the comments.