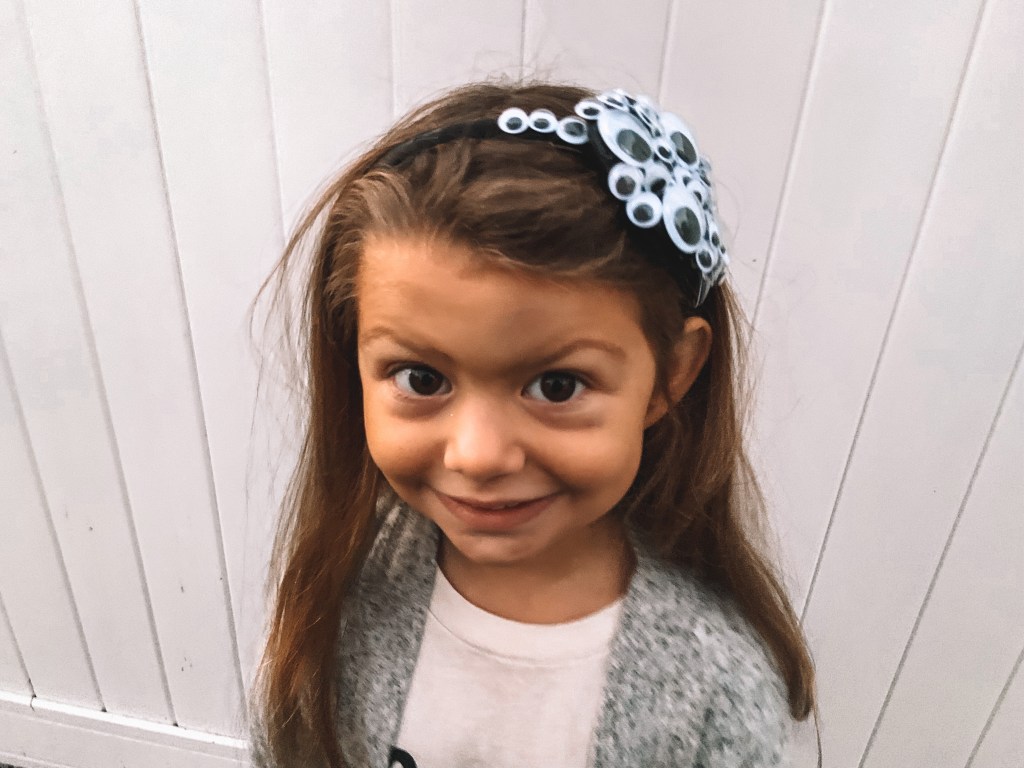
A smile is the best accessory a girl can wear… but a Googly Eye Headband is the spookiest.
Mila absolutely loves accessorizing for school, dance class, and everything in between. We had to make something a little creepy for Halloween week! This Halloween DIY was a fun one to make and made a huge statement too!
To make our Googly Eye Headband, we just needed three things… I found everything at our local dollar store:
Fluffy Kitty Headband
Hot Glue
Googly Eyes
First, remove the ears off of your cat headband. Mila’s were easy for me to take off. I just had to tug at them a little bit. They didn’t negatively impact the headband either!
Next, glue the two ear together to make a diamond shape. Be careful here, you could burn your fingers.
Then, start gluing googly eyes down.
I didn’t do it in a specific order. Just where I thought the different sizes should go.
Once the diamond shape was completely covered, I glued it to the headband. To make it more cohesive, I added a few googly eyes directly to the headband too.
After everything was glued down, I made sure to take off excess glue that stuck to the eyes and headband. I ended up adding a few more eyes on it too when it was put together.
Mila LOVED how it turned out and has worn it a couple of times already.
I think it would be perfect for a witch’s costume, if your child wouldn’t want to wear a hat. It might be cute for a monster costume as well.
My favorite way Mila’s worn it was with a Halloween shirt to school!
The headband doesn’t get weighed down by all the eyes and Mila had hers on for the entire day.
This simple Halloween DIY is a fun way to add a little spooky to your every day outfits. You can easily pick up these items at your local dollar store too!
I hope you and your little ghoul love this accessory as much as we did!
What’s your favorite wearable Halloween outfit or accessory you’ve made for either you or your child?
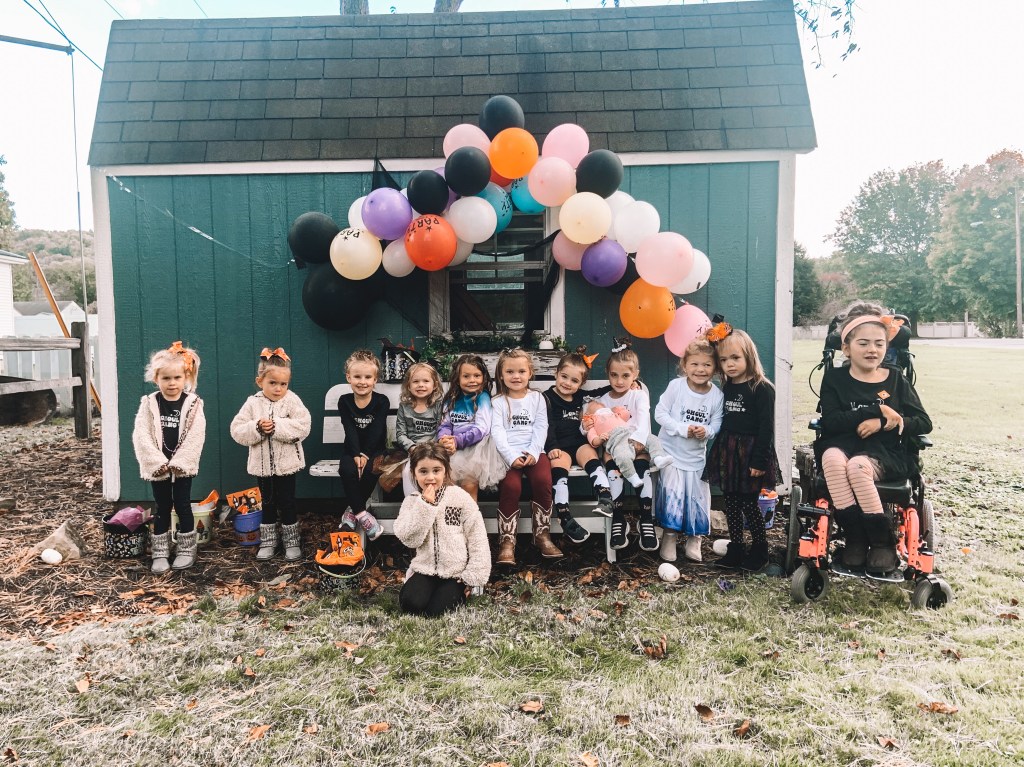
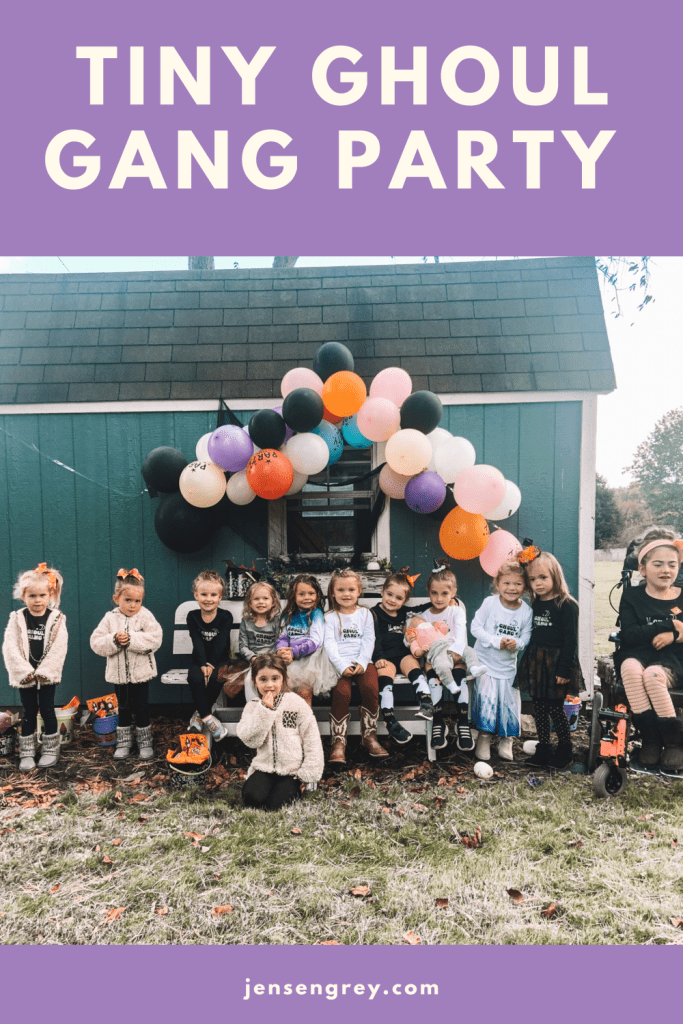
Mila and my’s favorite part about this October was her Tiny Ghoul Gang Party. It was a fun way to get all of her friends together and celebrate Halloween!
She had been asking me for weeks about having a party. For some reason she was convinced that her birthday was this month… and not six months away. Instead of fighting that battle for six more months, we invited her preschool and dance friends over and had a Tiny Ghoul Gang Party.
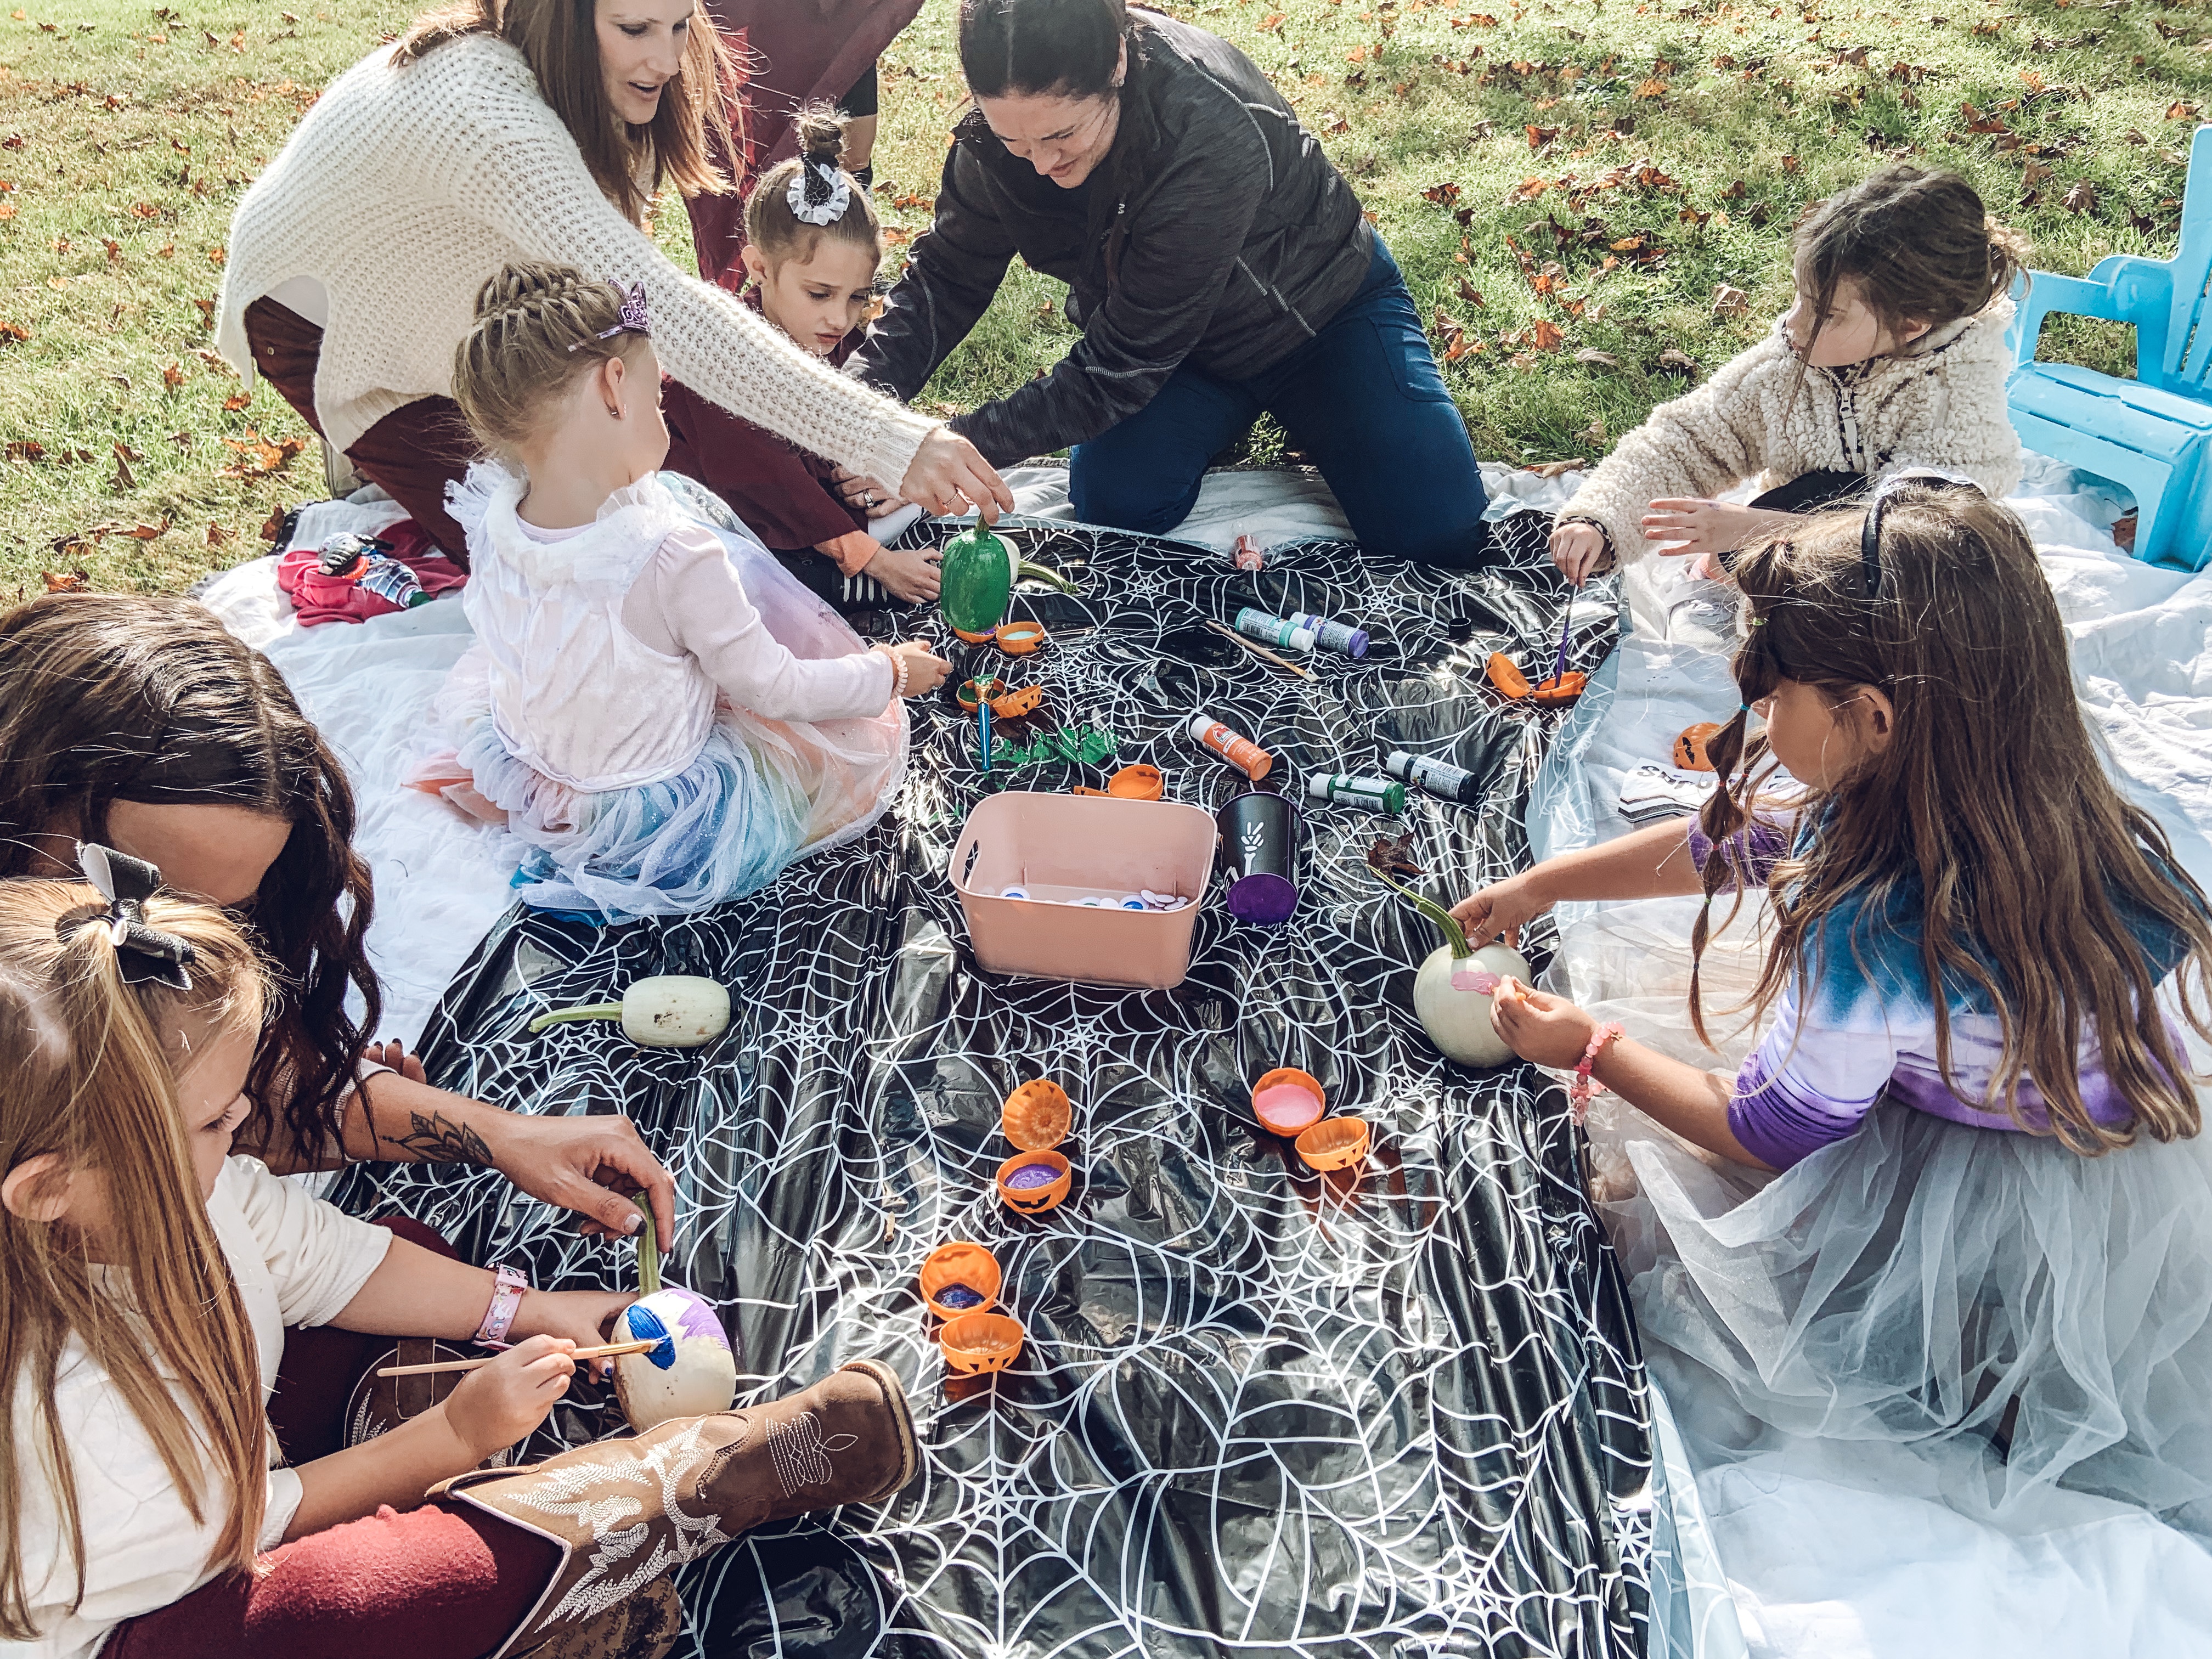
When I first decided to throw this party for Mila, I came up with a pumpkin painting party idea. She loves painting and crafts and I figured her friends would too.
I had a ton of Halloween activity ideas pinned and saved on Instagram. There’s so many creative people in the world, I’m so thankful they share their ideas! It was easy to find things for the kids to do.
Thankfully it was minimal prep too!
The Activities
Pumpkin Painting:
The main party activity was pumpkin painting. We literally laid down an old blanket and table clothes, set out paint and brushes, then let the kids have at it. Honestly, they went right to wanting to paint pumpkins which took me by surprise. If I would have known that, I would’ve got the paint out beforehand. Thankfully, there was a great group of parents who immediately jumped in and helped out!
Besides paint, we also let the kiddos put googly eyes on their pumpkins to decorate too! They all turned out adorable.
This activity is messy. Obviously. If I were to do this again, I’d have found more tables or gotten pallets for the kids to use. Just to stabilize the pumpkins and keep the brushes and paint upright.
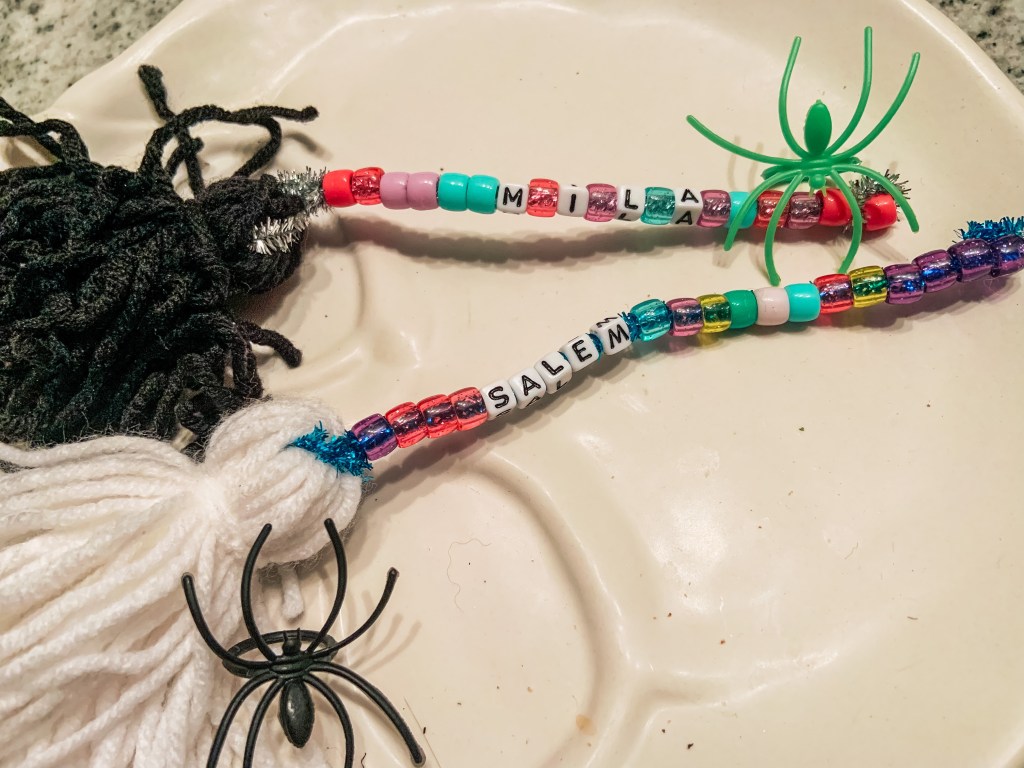
Witch’s Brooms:
I just talked about these in another blog post. They’re one of my favorite Halloween activities and went pretty well with a big group of girls. The hardest part was finding the letters of all the girls’ names.
Before the party, I made all of the brooms. If I would do this activity again for kids, I would have their name beads already set out or put in a bag.
Again, there was an amazing group of parents their with us that helped out!
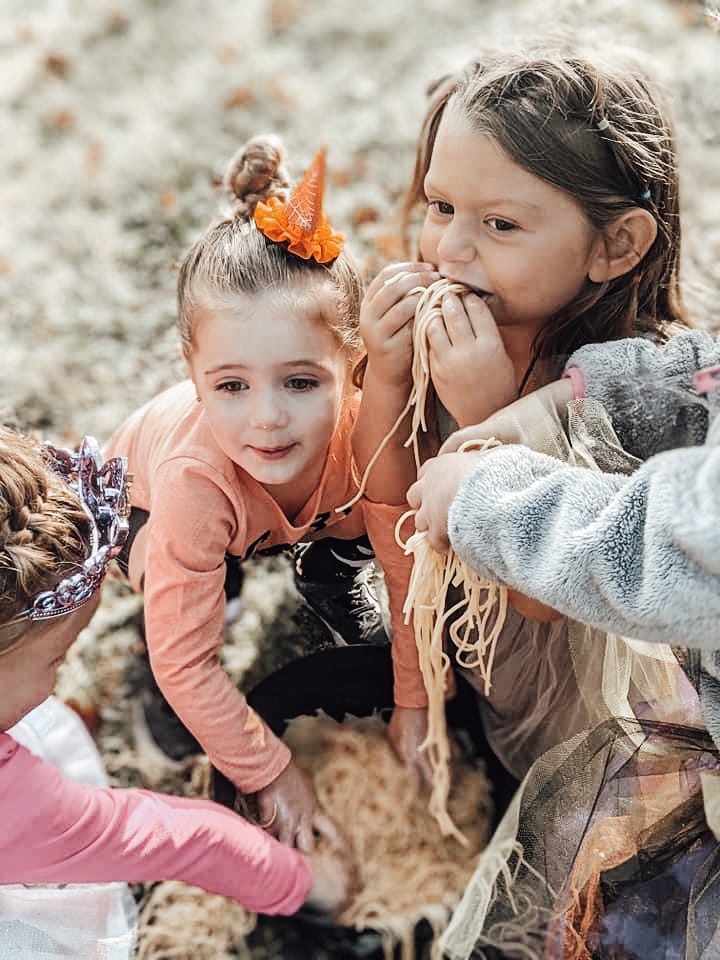
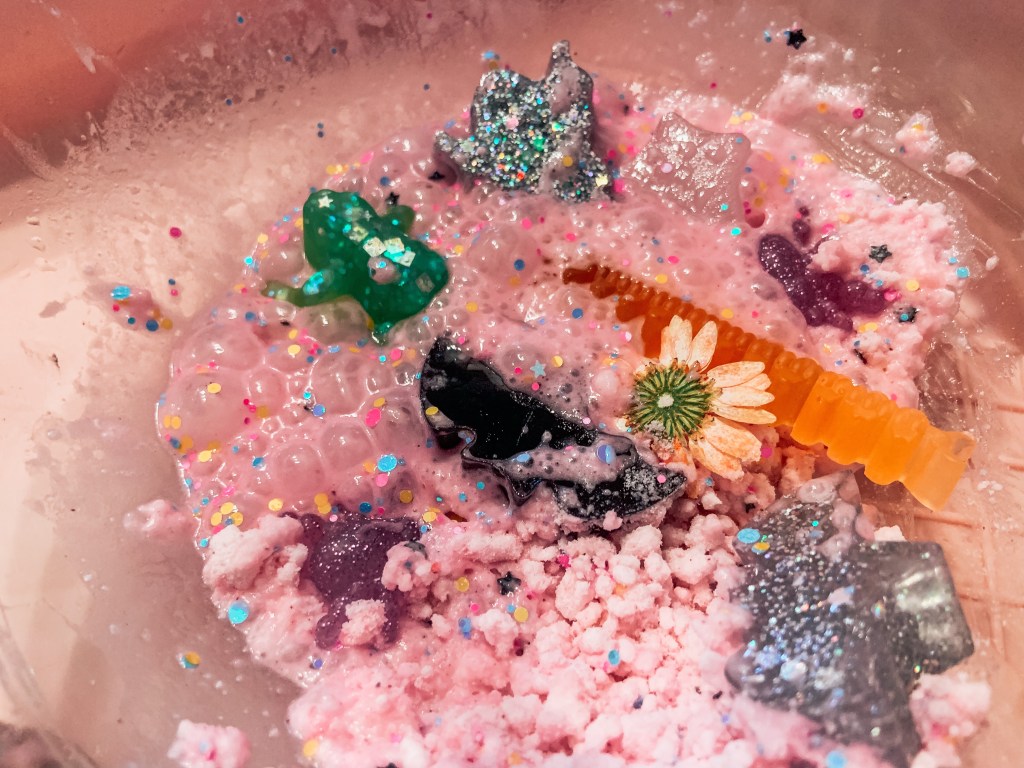
Sensory Bins:
Technically I had three sensory areas set up, but we only got to two. The one sensory play idea that wasn’t used was a potion making station. I think that was fine because it ended up getting cold, which is never good mixed with wet clothes.
The one bin that was used the most was the spaghetti bin. There were eyeballs, fingers, and spiders that the kids could find. But, a couple of them (mostly Mila), ended up just eating the spaghetti… yum. They all did seem like they loved playing with this sensory bowl.
Maybe for the next Halloween party, I’ll do multiple cold spaghetti bowls.
In the other sensory bowl was ‘monster soup.’ It just had torn up tissue paper, Halloween colored sensory items (balls, pipe cleaners, etc). The girls really enjoyed this too!
Bobbing for Apples:
Like I stated above, the cold and water don’t really mix, but the girls really enjoyed trying this. It’s just your classic bobbing for apples game. The ones who participated did really good… the others volunteered to just eat the apples.
Halloween Egg Hunt:
Mila helped prep this activity. I found Easter eggs that looked like jack-o-lanterns at Target. We filled them up with candy and Mila spread them around the yard.
I’m not sure how well she hid them… but the kids loved running and finding them. It was an easy activity and got them playing independently.
Throwing Games:
We also had a few throwing activities that I didn’t get pictures of. One was to throw rings around pumpkin stems. Again, easy set up and fun! Then my mom found this game where you throw a ball in pumpkin styled cups. What kid doesn’t like throwing?
I think all the kids loved what we had set up. There was Halloween music playing in the background, so we got to see some dance moves too. When the kids didn’t have a guided activity, they just ran, talked, or played on the play equipment too. I don’t think any of them were ever bored during the party.
It was so much fun to see Mila’s favorite groups of friends come together.
The Food
I promise I had every intention of making this party have more food than dessert. It just didn’t manifest that way.
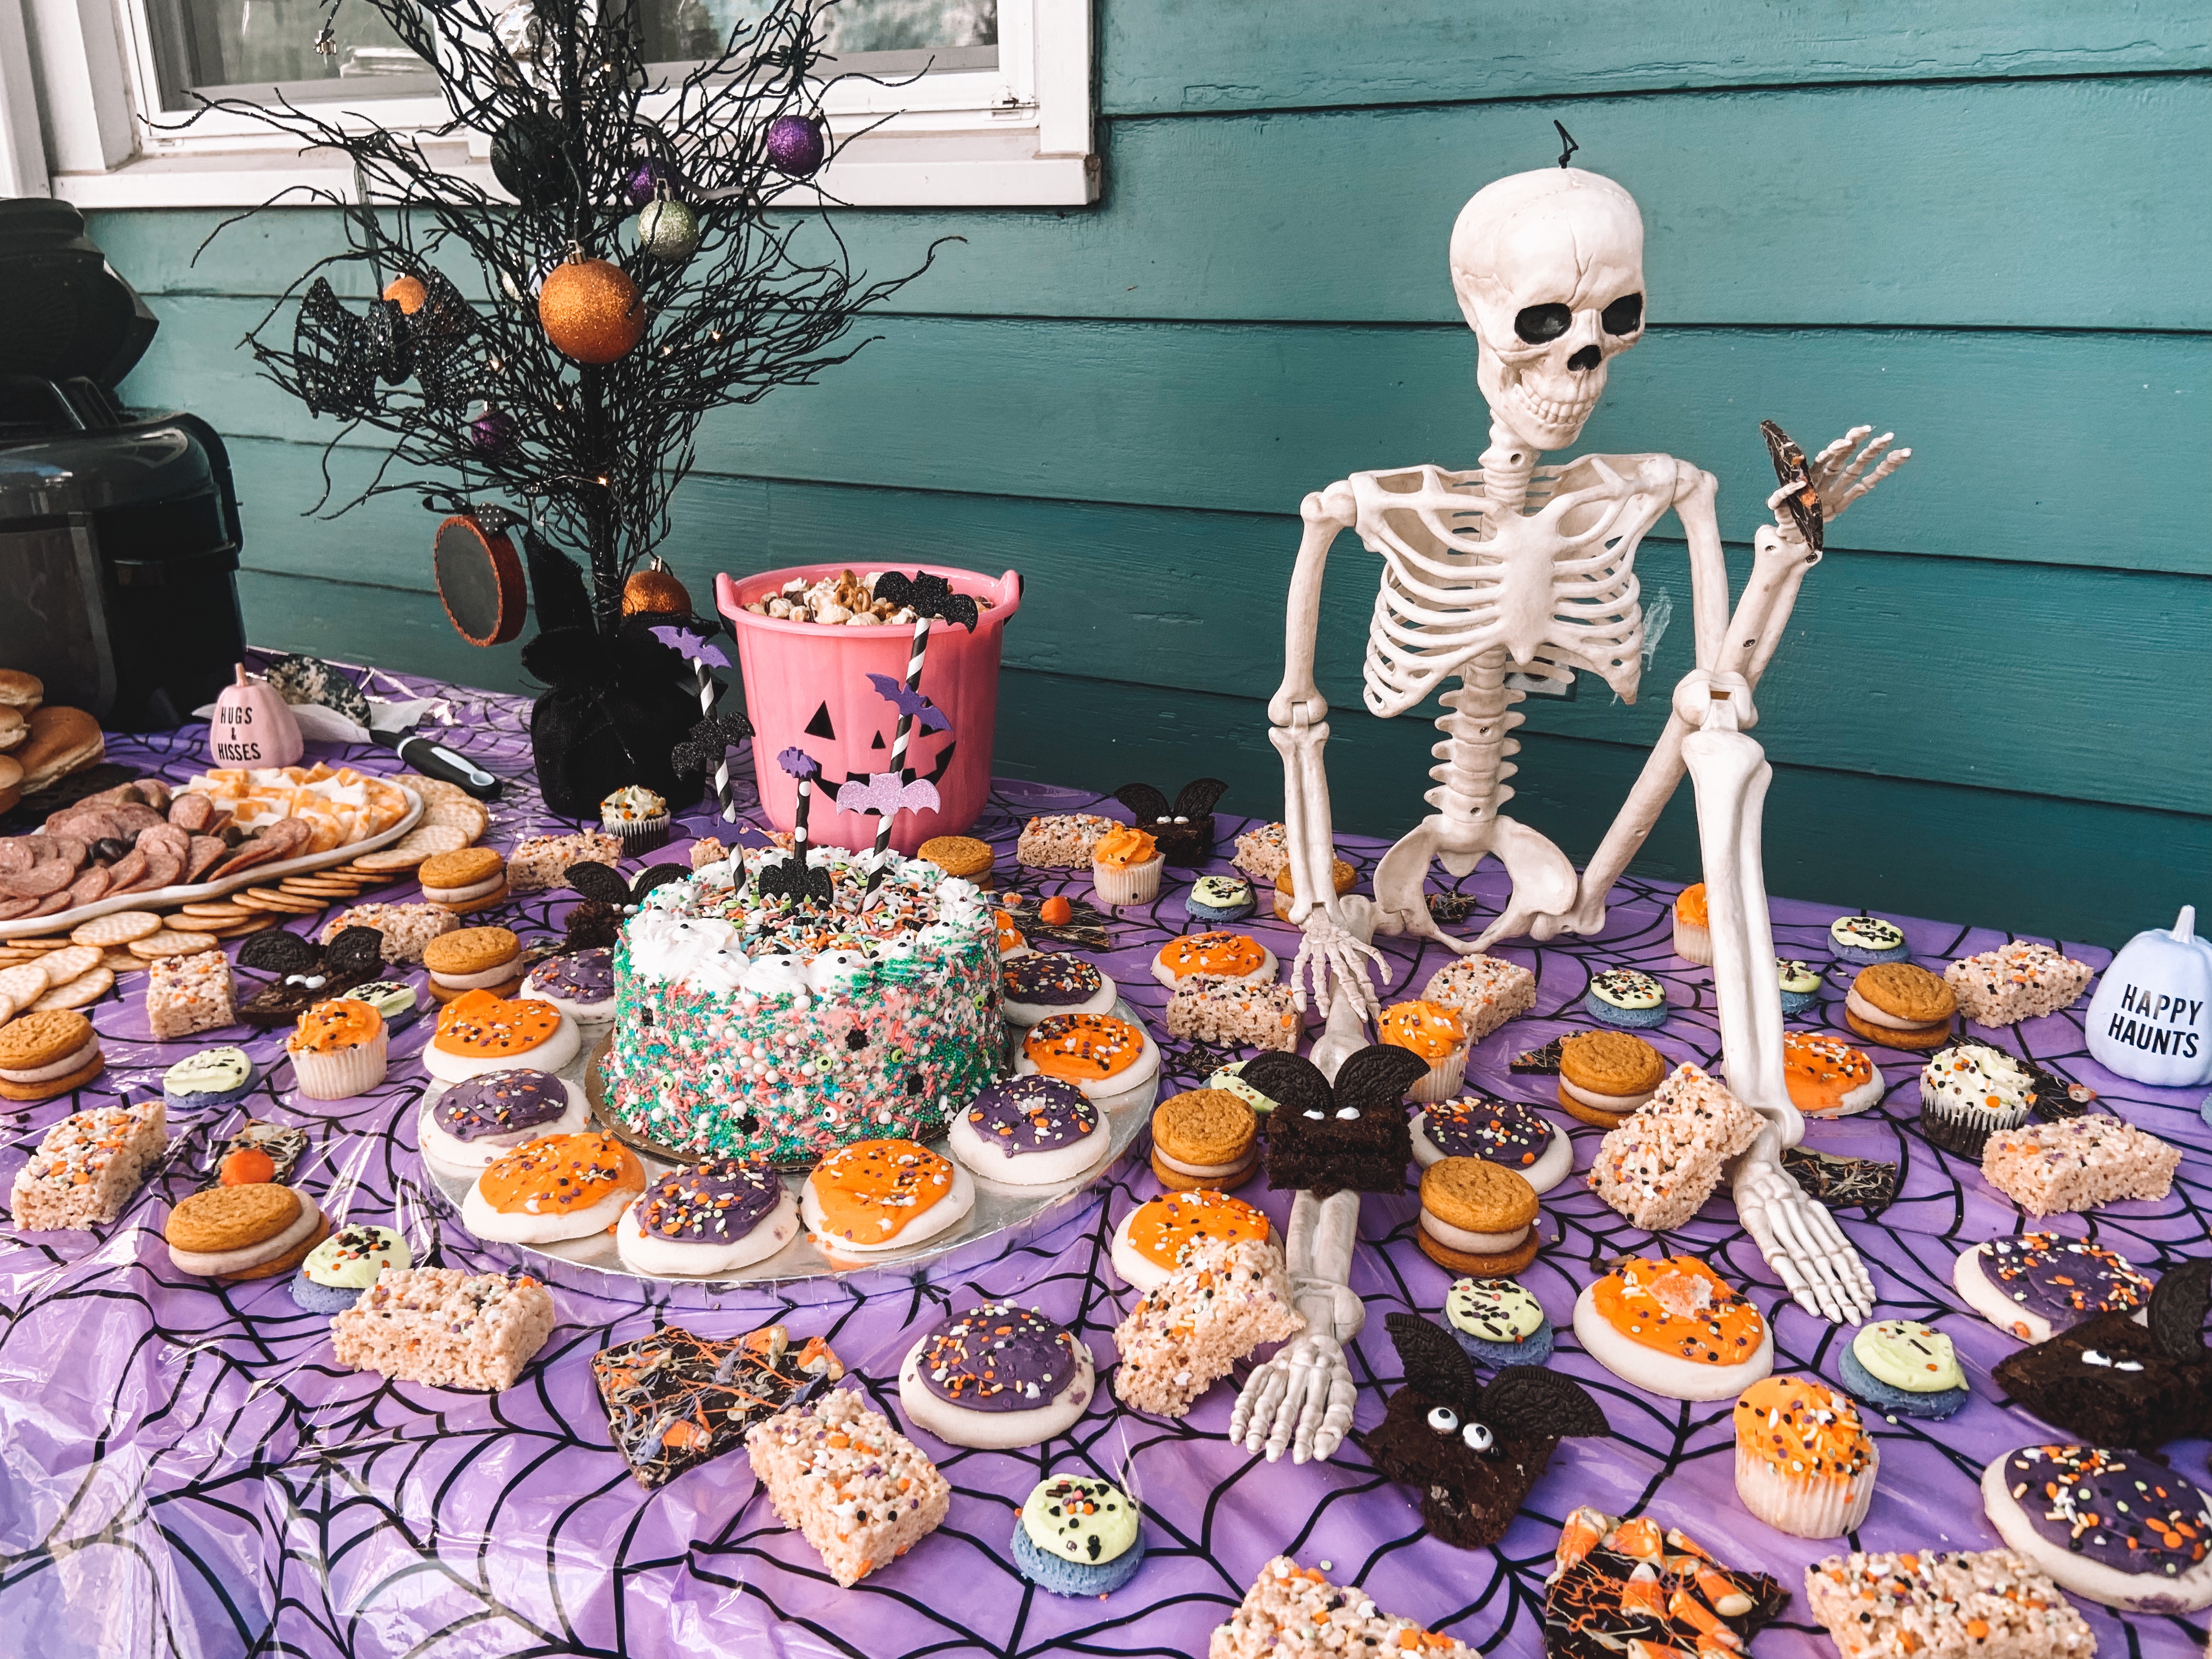
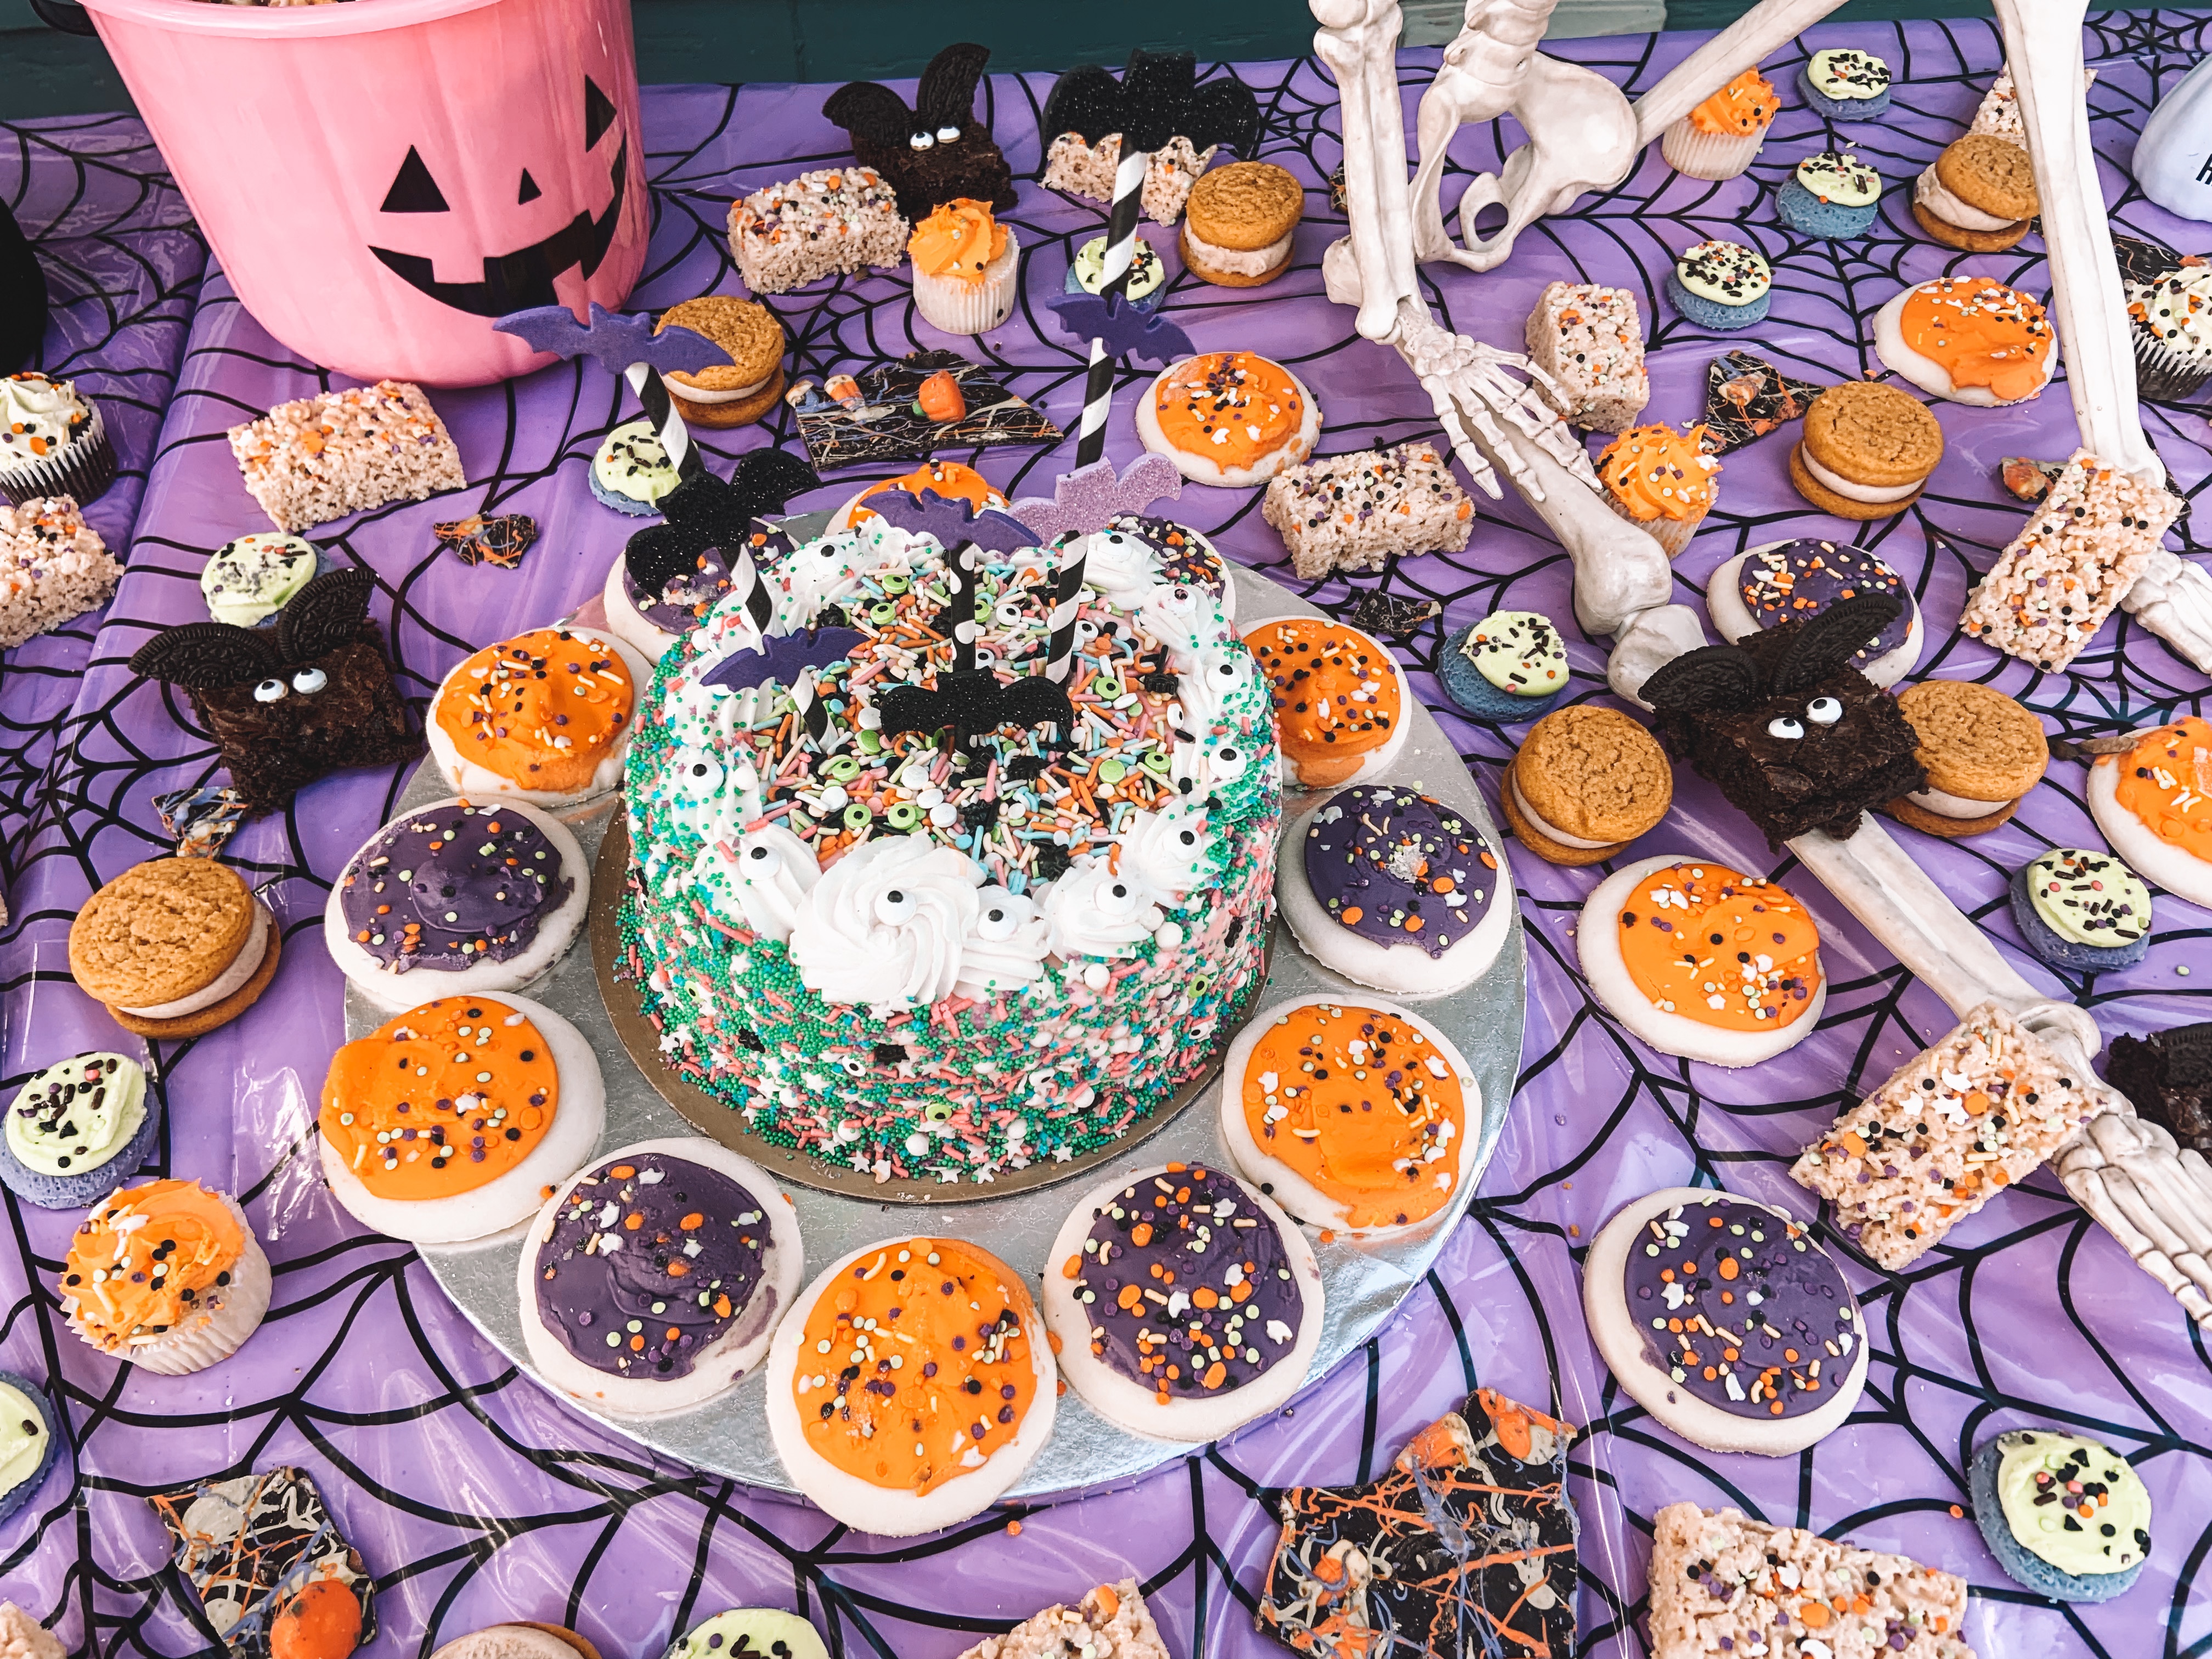
The food spread was mostly a dessert bar full of Halloween treats. To be honest, I bought all the desserts. I did not have time to make everything, besides adding extra Halloween sprinkles to the cake. Still, I loved how it turned out!
For the food, we had fruits, veggies, cream chicken, mummy hot dogs, and a skull meat and cheese plate. Plus, there were buckets of chips and a sweet Halloween mix too.
I was actually surprised with how much food was eaten. Of course I still had leftovers, but the majority of it was gone!
We also started a fire and had s’mores too.
The Goodies
To make it a little more special, I made Ghoul Gang shirts for the girls. I think they turned out adorable and even made myself a sweatshirt.
It made for really cute pictures and I love getting shirts, so I knew Mila’s friends would too.
We also made baskets for the kids to take too. It was just a trick or treat bucket filled with goodies for them to take home.
The best goodies for me was watching all of the ghouls having fun. Their smiles and laughs are the reason why any parent does what they do for their kids. I love that this group of girls get to grow up together. Just knowing Mila will have friends going into school and through life brings me so much peace for her.
I am so thankful for all the parents that let their kiddos come. Mila has talked about it almost every day since.
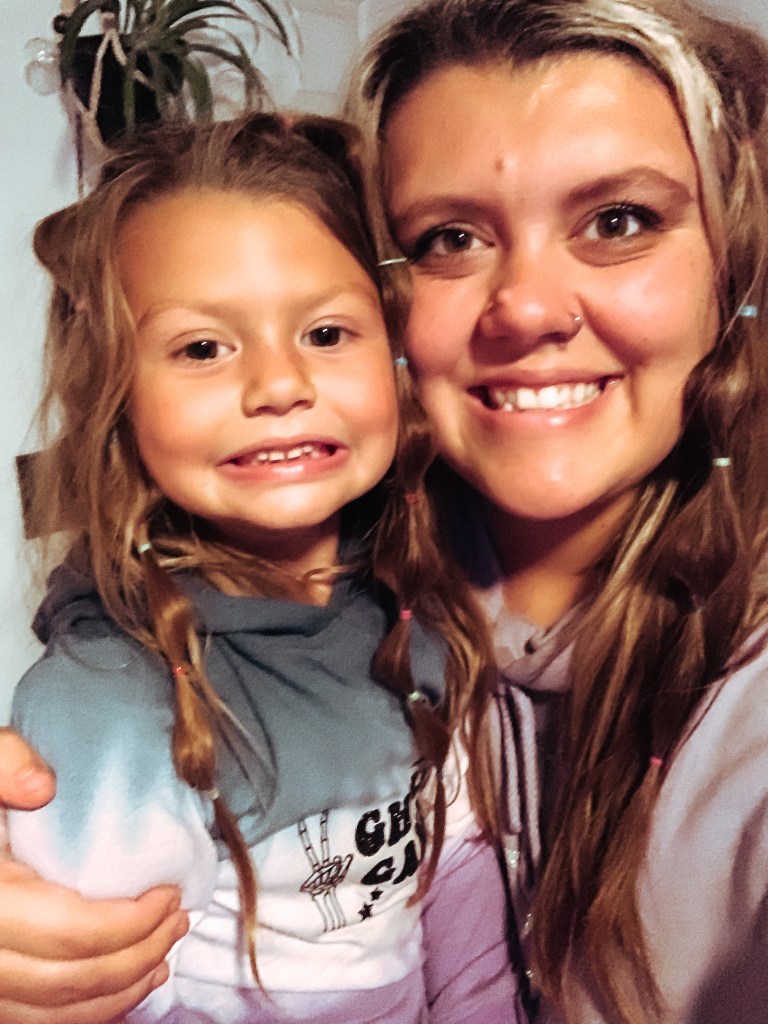
Throughout the madness of the day, Mila and I didn’t get a single picture at her party. This isn’t too crazy. We rarely remember to get pictures together.
Once we got home, she thanked me for her party and gave me a big hug. That’s when we got the picture.
I love being her mom and having the ability to do these types of things for her. Something tells me she’s going to be a kid that wants a party for all occasions. Fingers crossed we’ll be able to do it!
Even when life is crazy, it’s party days like those and the hugs after that make the hard parts worth it.
I can’t wait to see what we come up with for next year’s Halloween party.
Have you ever threw your child a Halloween party? What was your favorite activity at yours or Mila’s?
Mila and I have done a lot of fun activities to celebrate this month. I wanted to share Simple Halloween Activities you can easily put together before the big day.
All of these can have a version put together quickly at home, but they’re all fun for kids.
1. Potion Making
Mila has loved the idea of making potions this year. As always, water is a HUGE hit with kids.
Witch’s (or Warlock’s) potions help with gross motor skills and amps up pretend play. I always provide multiple bowls, jars, and spoons for her to use. Mila will sit at the island and play for a long time, especially if I keep filling up the water jar.
I won this particular potion making kit from an Instagram giveaway from Little October House.
Emily, the shop owner, is a fellow Ohioan and does an amazing job putting together seasonal sensory kits. I’ve been wanting to order and was so happy that I was able to win this kit.
It came with everything I needed, I just needed to set up the bowls and give Mila water!
Not only was it fun for Mila, it smelled so good.
I’ve also set up DIY potion kits for Mila to play with too. All I used was jars, bowls, spoons, food coloring, and dish soap.
It definitely gives the potion making vibes and she had fun with that too!
One thing I want to try to make it a little more special is grinding up one of her bath bombs too. I think it would give off more bubbles.
The resin creatures, bubbles, and elixir in Little October House is just too cute to pass up! We’ll probably be doing more DIY potions the q few days since it’s been Mila’s favorite way to unwind after preschool.
If you’re looking for an easy activity to set up and only need two to Inca, look no further.
All you need for this simple Halloween activity is Play-Doh and googly eyes! If you’re really feeling fun, you could add pipe cleaners too.
To get Mila started on this one, I just told her to make monsters with a lot of eyes. That seemed to do the trick. She dove right in and made all different kids of monsters.
She even started singing her latest song she learned at preschool.
Watch out for my big scary eyes. Watch out for a big surprise… BOO!
One way to make it more educational is to have kids count the number of eyes or tell them how many eyes to put on each monster.
But, they’re learning SO many skills by just picking up the eyes and playing with the play-doh too.
3. Boolage (Halloween Collage)
As we all know, Mila LOVES stickers. To prevent her from covering any surfaces in our home, having her create a collage on a piece of scrapbook paper was a way better option.
She was so happy to see a little bowl full of Halloween stickers. I told her to create a picture with them on the page a she went to work.
This is a great simple activity that kids can really take charge! Plus, they get to be creative.
Hello more Halloween art!
4. Halloween Letter Recognition
This activity is probably the most educational in this list. We love doing letter recognition in our house, especially with our Beags and Bubs resin letters.
But when I saw this printable coloring page from The Letter Vee, I knew I had a perfect match.
Not only can the duo be used to letter recognition, I’ve had Mila color the page with her matching the colors too.
I love all the possibilities you can use with these fun Halloween learning tools. Mila has used them both so much to talk about what she’s learned this month, spelling her name, and just having a little Halloween fun!
5. Threading a Witch’s Broom
We technically did these for Mila’s Ghoul Gang Party, but I wanted to share them here.
Threading activities are so helpful for kids this age. It really can teach them patience, how to use their hands, and (again) show their creativity.
Out of all the easy activities, this was one with a little more prep. All I used was pipe cleaners and yarn to make the broom. If you only have a couple to make, it doesn’t take that long!
Then, I set out the color beads and lined up the letter beads for their names.
I had a lot of help at the Ghoul Gang Party, but Mila’s made multiple ones of these in the week since. It could be used to make a fun gift tag or just a kids present to their favorite adults around Halloween time.
All of these Simple Halloween Activities have been a hit in our house. I’m sure they would be in yours too.
I’ve also shared other activities we did this year too. Here’s the list to get some more inspiration.
If you try any of these activities out, let me know in the comments or tag me on Instagram (@greyskies.rainbowhighs). I can’t wait to see how much you and your kids love them!
What are some last minute Halloween activities you do with your kids?
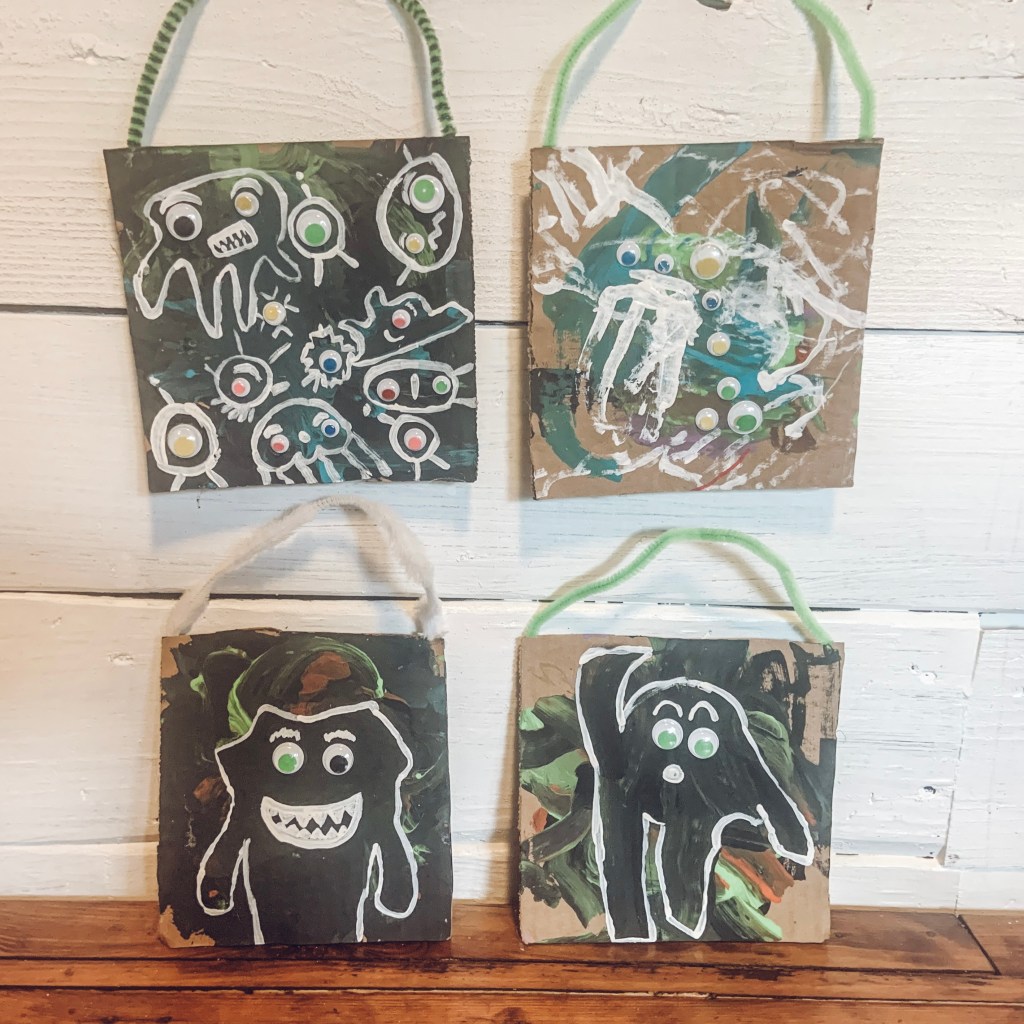
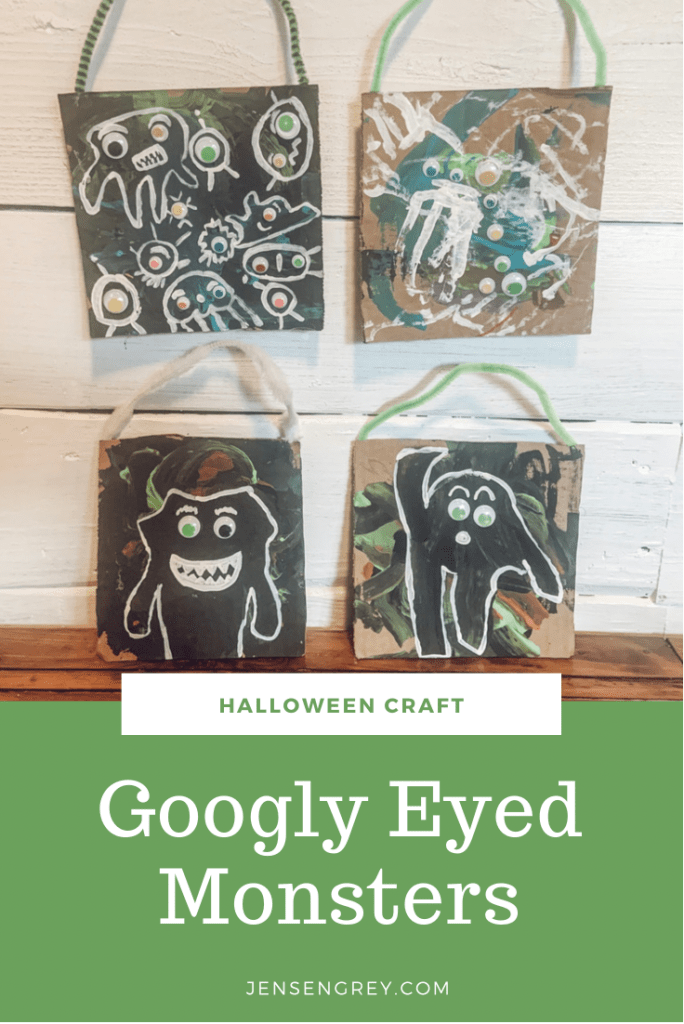
Halloween crafts and activities do not have to be complex. My preschooler’s favorite Halloween Craft are these Googly Eyed Monsters! Not only did she have a spook-tacular time making them, she loves making sure everyone sees them when they come in our home.
The best part about these monsters, you only really need to go buy googly eyes. Everything else are pretty common household items.
To set up this craft for Mila, I cut some squares from old cardboard boxes. We love to upcycle and reuse items. If we can make memories by doing that, I’m all for it!
Then, I put out the colors of paint she wanted to use. I tried to persuade her to use more Halloween colors. She insisted on blue though, but I think it turned out super cute even though it’s not a traditional color.
I let her free paint and do whatever she wanted. They didn’t start off as monsters, just as big blobs.
If you have older kids, they’ll be able to do this next part on their own. I went in and drew outlines of monsters with her blobs. She might be able to do it now, but I just follow her interest and patience level with these types of activities. There’s no right or wrong ways to outline them. Just let their artwork speak to you!
When the monsters were finished and dried, Mila put the eyes where she wanted them to be. Let your child pick out how many eyes and the eye color they think they need. It’s so cute to see how they end up seeing their monsters.
Then, you can hot glue a pipe cleaner on the back of the cardboard pieces to hand them. This is an optional step, but I love it.
I love this little progression picture. This activity came out so adorable and I’ll definitely be hanging these up throughout future Halloweens. At first, Mila was afraid of some of her pictures. Now she thinks they’re cute. She’s really getting in the spooky mood!
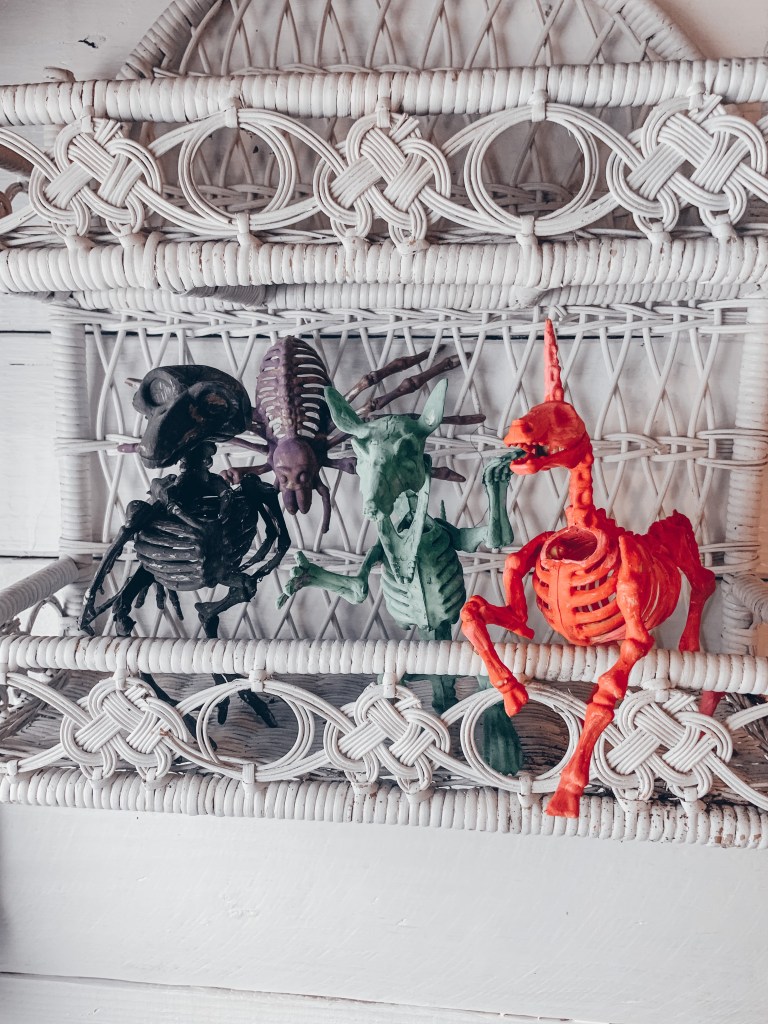
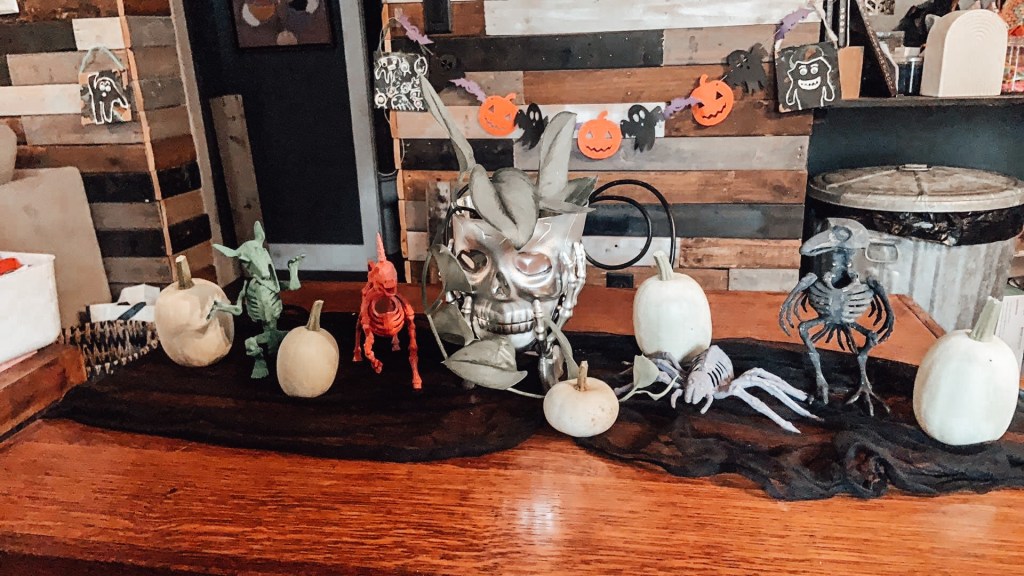
My entire house is fully prepped for Halloween! It’s been so fun to see the transformation. Our latest spooky DIY are these Skeleton Animal Glow Ups.
I have been back and forth with sharing these. They’re so creepy, but Mila loves them. Honestly, they’re sort of like a creepy Elf on a Shelf.
They were so easy to make and they fit our Halloween aesthetic. I found them at the Dollar Store for a dollar a piece. Not a bad price in my eyes; especially because it was a craft for both of us and they look so cute.
Cute as in… creepy. They can be both, right?
I will say, Mila had fun painting them, but it was a little tricky. She did them for a while, but I ended up finishing them.
If you do paint them and your kiddo wants to carry them around, I would suggest spraying them with a clear coat. It just helps the paint hold up a little longer. If you’re keeping them out of their hands, it should be okay!
Originally, I had them all on our dining room table. Like I said though, they’ve become our unofficial Halloween Elves on a Shelf.
I actually love how they turned out and will keep them for the years ahead.
Somehow they mesh really well with the white pumpkins and the general feel of my house. We like random things, so they make me smile.
Your Halloween decorations don’t have to be grand to make a statement. Sometimes all it takes is a little paint and a animal skeletons from the dollar store!
What’s your favorite way to decorate for this holiday: scary or pretty? Let me know in the comments.
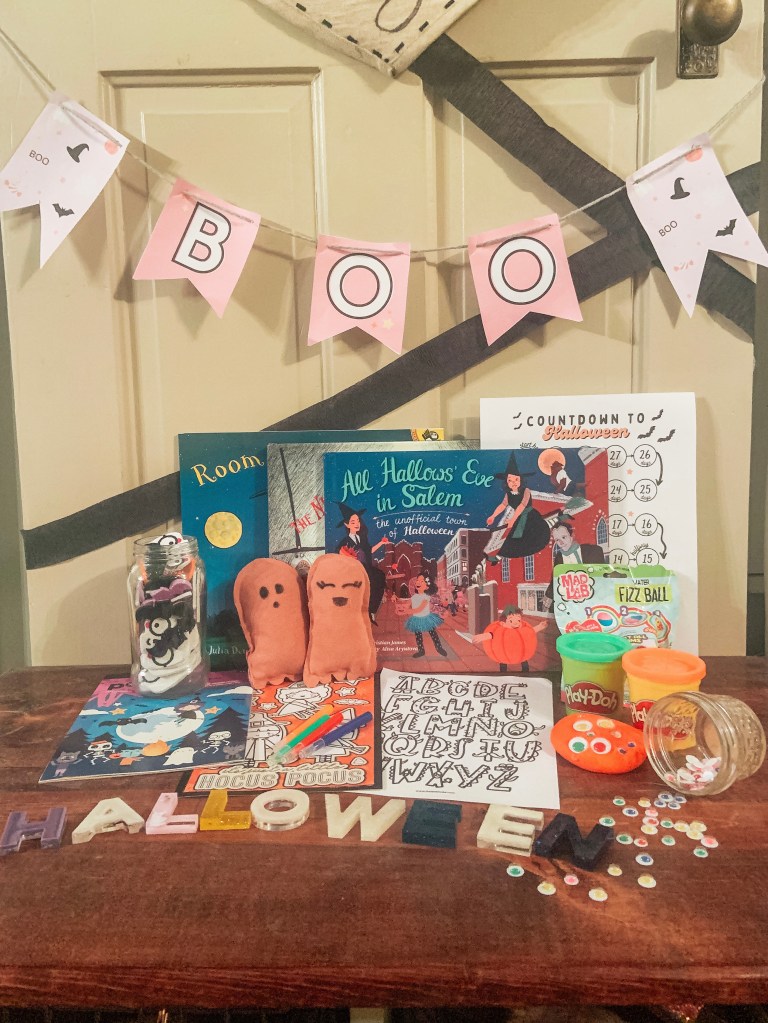
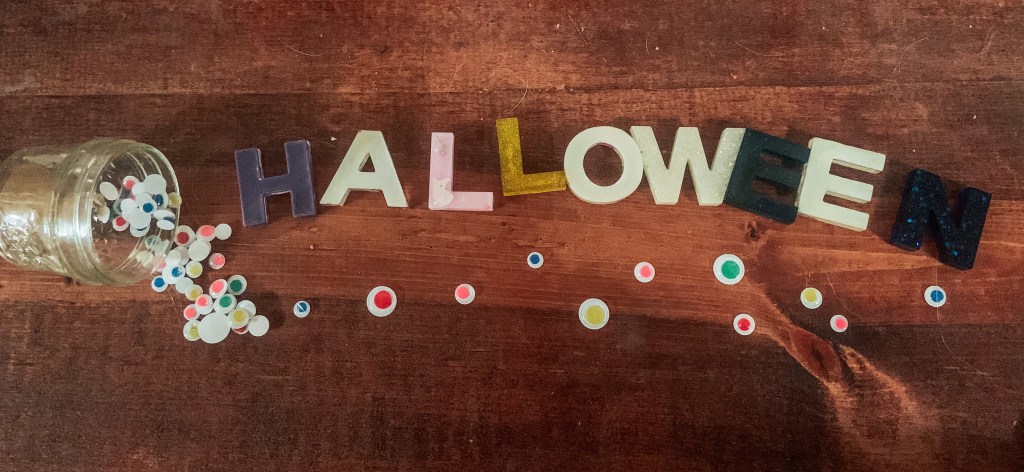
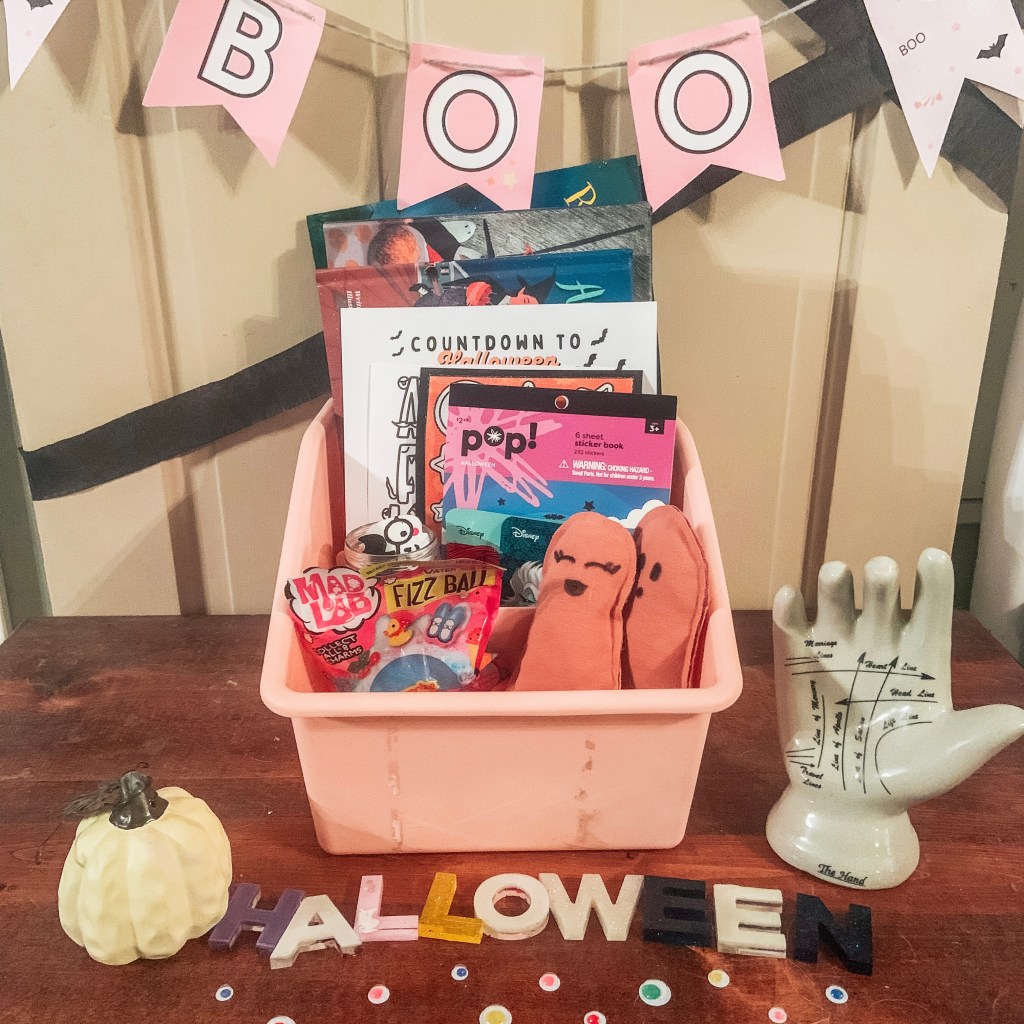
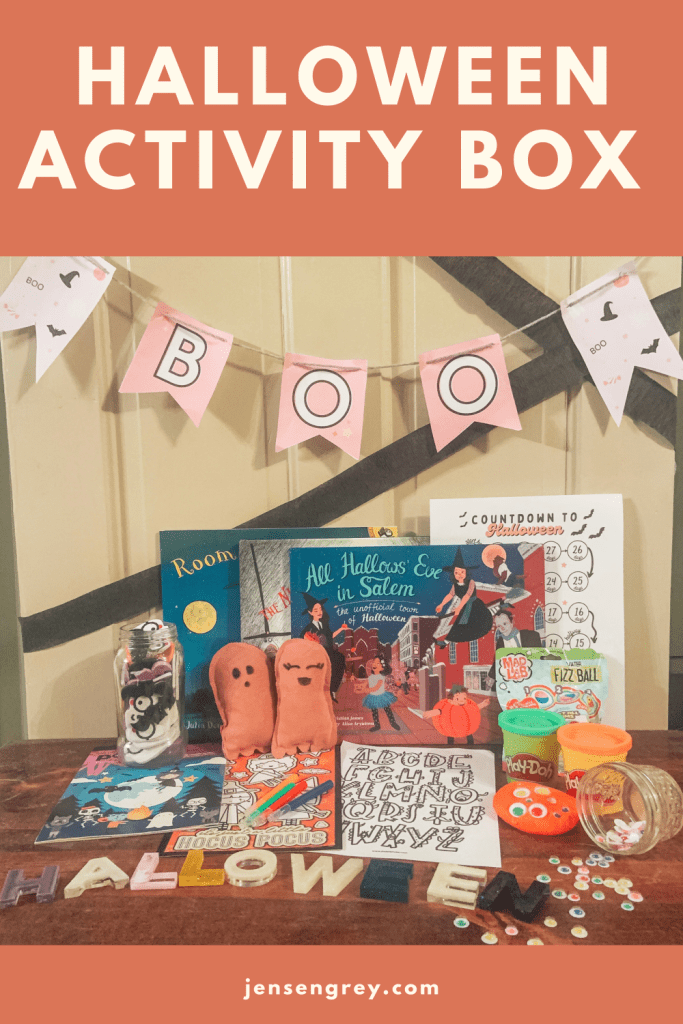
October is right around the corner and we’re gettin really excited for Halloween! To prepare Mila and to give her some activities to do when she’s not at preschool, I made this Halloween Activity Box.
It’s full of fun, but I’m saving a lot of activities we’re doing for the month of October. You’ll have to keep coming back for more.
I actually love Halloweven! It’s probably my favorite holiday besides Christmas. You get tk dress up and just feel magical for the month. Plus I love all the outdoor activities and the yummy treats.
This year seems just a little extra special because Mila is so excited and knows what’s going on.
I know she’ll be happy to see this box too!
Halloween Books
There are a TON of cute Halloween books out there, but I love these three! By the way, if you have any Halloween book recommendations, please let me know in the comments.
Tim Burton is one of my favorite creative minds. So, we have some activities around this particular book and I want to introduce Mila to some of his movies this season too. Room on the Broom is fun for Mila at this age because she tries to follow along and does a great job! I have an activity for this too!
Our newest Halloween book is All Hallows’ Eve in Salem by Kristian James. I found it on Instagram and knew I needed to get it for Mila. The characters are adorable and I already want to plan a trip to Salem for Mila and I!
I promise, you’ll want to get this book for your kids too!
Mila loves to play with play doh in her activity boxes, that’s why I include them!
This time, I added craft eyes for her to make monsters and to practice counting. It’s really cute to see all the creations she comes up with!
It’s such a simple activity, but she literally plays with it for a while. When there’s multiple ‘monsters,’ she pretends to do different voices and have conversations. It’s so much fun.
Plus, we use these craft eyes all the time! They make projects cuter and they’re perfect for Halloween!
For this activity box, I didn’t use worksheets from Mila’s normal preschool workbooks. There’s none quite that spooky. I did find some cute worksheets that are perfect for the preschool and toddler level, coloring pages, and stickers!
I found the foam stickers and sticker book at Joann’s Fabrics, but this pack is cute from Amazon.
Stickers can be used for telling stories, counting, or making collages. Your child will lead you.
The little coloring page was also from Joann’s!
I found two printables that will have multiple uses. They’re both so cute and Mila really liked how they both looked.
The monster letters are from The Letter Vee. They’re so adorable and I’ll have Mila color them in first, then practice letter recognition with her resin letters.
I also had to print out this Halloween Countdown from Celebration Stylist! They have SO many cute Halloween printables. The Boo Banner hanging over the activity box is from them too! Plus a few other things that you’ll see in October posts.
Anyways, this countdown can be used as a countdown or to practice counting in general. I’m sure Mila will be using her stickers to do the countdown!
Potion Kit and Ghost Friends
You’ve definitely seen this fizzy ball before! They’re seriously such a hit with Mila. This month, we’ll be using them to make a witch’s potion. She loves using her ladle with our new bowl, so I’m excited for her.
I’m doing a post about a different witch’s potion next month too.
Mila and I also made these little stuffed ghosts out of an old sweatshirt. We had a lot of fun with them and Mila liked drawing their faces (not pictured). It was so easy to do! I’ll post a video or blog about how to do this too!
These are just some fun ways for Mila to play and pretend. It’s always nice to have a little brain break.
Miscellaneous Tricks
As always, we love using resin letters in all of our activity boxes. I cannot wait to show you my new set from Beags and Bubs. It’s in the mail right now, but they’re ADORABLE!
Not pictured in this post were face masks. I decided to add them in there because masks are associated with Halloween snd the characters on the packaging are our Halloween costumes. Plus, anytime I can make time for Mila to practice self care, I do!
There were also crayons, markers, and some other tools to play with the play doh too.
This is probably my favorite activity box so far. I love letting her discover different holidays. This can easily be converted and customized to more boy themed too. All of the elements are perfect for both boys and girls though!
I can’t wait to start doing more spooky crafts and activities and share them all with you.
What are some of your favorite Halloween activities to do? Or what are your favorite Halloween books you enjoy reading this time of year? Let me know both in the comments.
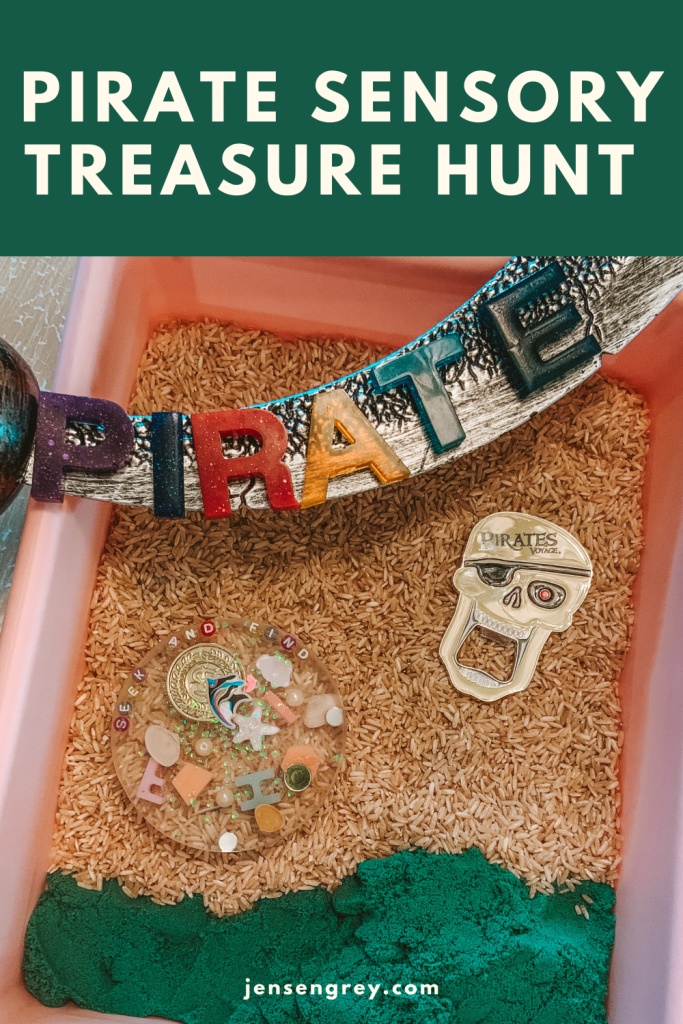
Ahoy there mateys! If you’re looking to celebrate pirates or how they talk, your toddler or young child love this Pirate Sensory Treasure Hunt.
Recently, Mila has been watching Jake and the Neverland Pirates. She loves all the adventure and when they find treasure. What little kid wouldn’t want to live on a boat and find coins buried in the sand?
I think she is still obsessed with mermaids too and the ocean reminds her of them!
Anyways, I thought it would be fun to bring the buried treasure to Mila… with some sensory elements mixed in too. Let’s just say this little activity was a hit.
Here’s all you’ll need:
Rice
Kinetic sand
Sensory bin
Seashells
‘Pearls’
Coins
Other little pirate/ocean toys or stickers
I actually used my resin seek and find from Beags and Bubs as Mila’s treasure map. So, some of the items in the seek and find, I put in the bin. It was another cute way to use it!
To assemble this bin you’ll first need to put the items in the bin.
I probably could have added more coins and probably will next time. It just depends on how long you want this play to last. By the way, the ‘pearls’ were under the seashell!
Then, add rice for the sand and blue kinetic sand as water. I put the fish and mermaid under the ‘water.’
Personally, I put the kinetic sand down first. It helped me cover the fish first. BUT, the rice is way easier to spread than the kinetic sand, so it was just easier to do it this way.
After it was set up, I got out some pirate accessories and resin letters to set it up for her.
She had fun finding all of the treasure. It was so cute to watch her just dive in there. I think the hardest thing to find were the coins. They moved around in the rice.
After she did find everything, she prepped it for me to find things!
It was fun to play along with her.
Then, she used the bin for some pretend play while she warched Jake! Anytime she extends play makes the work behind it well worth it!
I personally love this bin and can see us doing more treasure hunts in the future. Mila’s down every time she gets to put money in her piggy bank.
Do your kids like pirates? What are some ways you’ve used them in your play? Let me know in the comments.
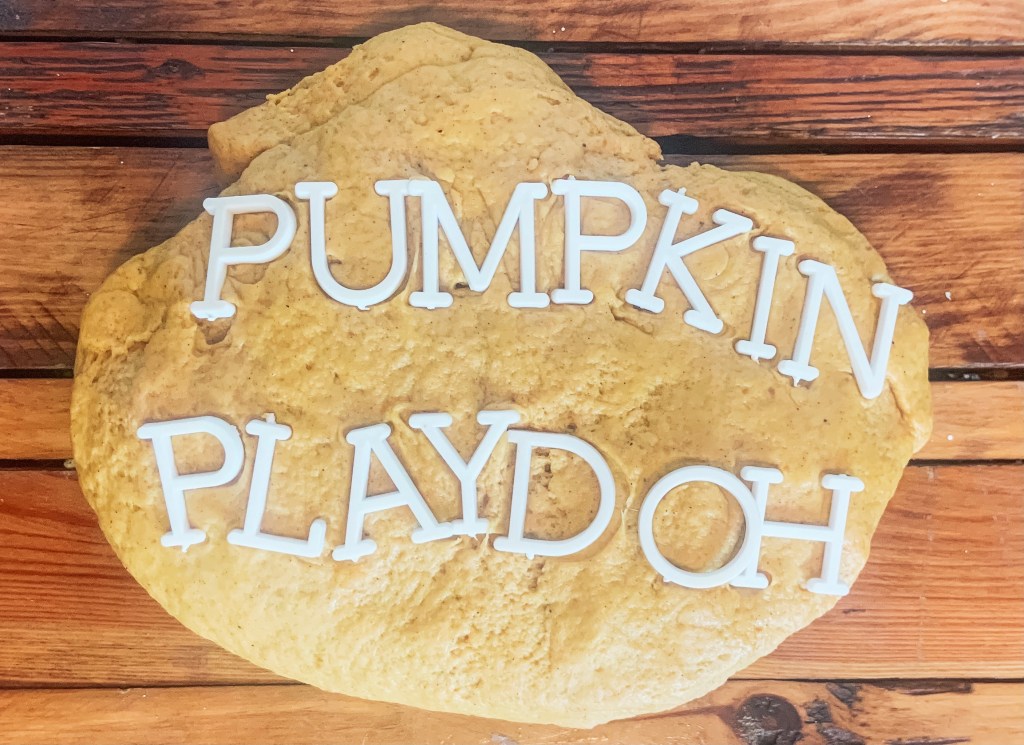
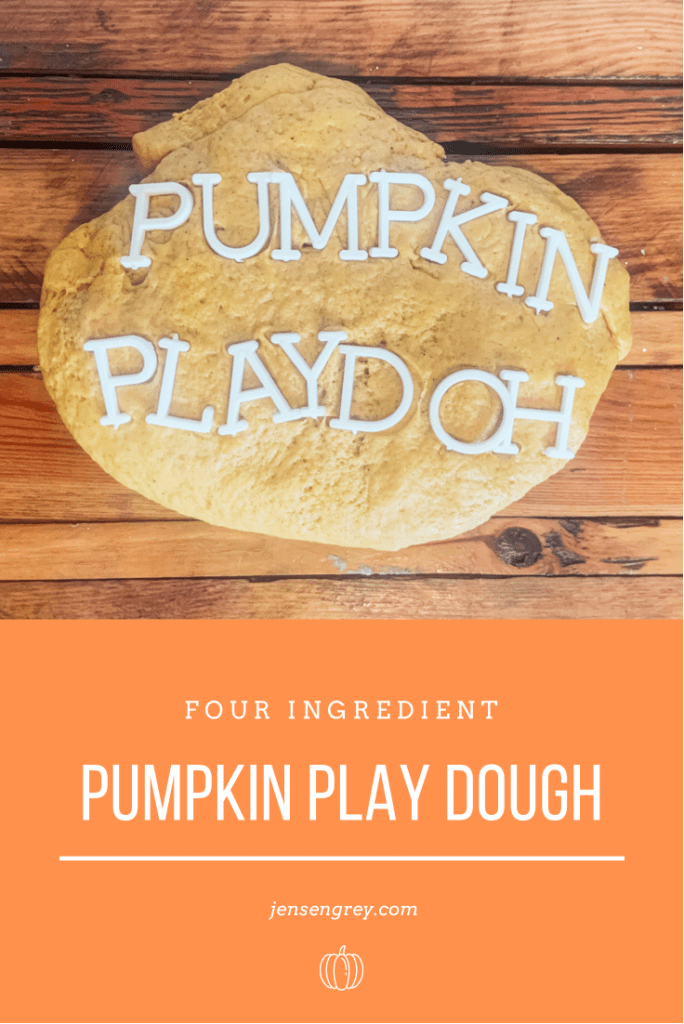
It’s almost fall, so that means it’s time for autumn themed play. This week, we made pumpkin spice play dough.
Not only does it smell amazing, it’s a ton of fun to play with… for kids and adults!
One BIG thing about this recipe is that it makes a lot of play dough. I was actually really surprised with how much there was after I made it. Honestly, I would suggest cutting this recipe in half. Unless you want to gift some to others!
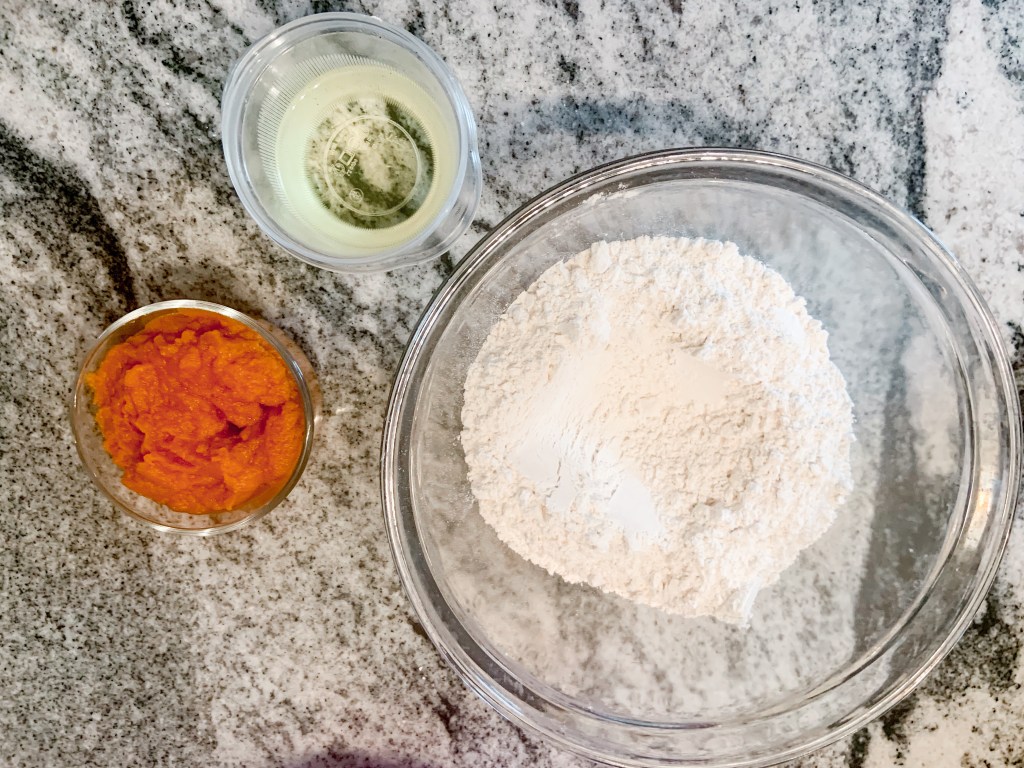
The best part of this DIY play dough is that it’s only four ingredients and you don’t even need to cook it like other recipes.
2 cups of flour
1/2 cup of vegetable oil
1/2 cup canned pumpkin
Dash of pumpkin spice
It’s crazy that you can make good smelling play dough with only four ingredients… really only three main ones if you don’t want it to smell like pumpkin spice.
Mila helped make everything! We measured out all of the ingredients and she helped pour everything in. At first we started stirring it with a fork, then it got too thick and we had to start mixing it with our hands.
For the pumpkin spice, we poured a lot more than a dash. We poured it in until we could smell it!
She ended up playing with it for a long time. I think play dough really calms her. It’s also fun to watch her do pretend play with play dough. Another way you can challenge your toddler or preschooler to play with play dough is to have them make different shapes. It’s fun to watch them try to figure out how to make the shape with their hands.
To store this play dough, just keep it in an air tight container in the refrigerator. Mines in a ziplock baggie with all the air pushed out.
Before Mila plays with it, I just have it on the counter to warm up a little bit.
I’ve been trying to take more videos, but I’m forgetting to take pictures… oops. Thankfully I can share them on here.
It’s fun to watch the memories live instead of just pictures. I’ll try to do both!
I can’t wait to see all the times Mila plays with the play dough throughout the season. If we think of more fun ways to play, I’ll share them here with you.
Have you ever made play dough before? What’s your favorite type to make?
Grandparent’s Day is this weekend! To celebrate, I, with the help of my favorite littles, helped create a DIY Handprint Photo Display.
One of my favorite ways to include Jensen with our family is to use his hand and foot prints. I learned how to transfer these a few years ago and I’m so thankful.
He’s always a part of our family.
My parents love pictures; my dad constantly takes them. Any gift that includes showcasing the grandkids is one they’re going to love.
This Handprint Photo Display is easy to do at home too! You’ll only need a few things…
First, attach a sawtooth hanger or whatever hanging device you like to the back. I normally do this first so I don’t hurt anything on the front when I hammer the hanger in.
The next and probably the most fun part of this DIY gift is the handprints.
You can find an ink pad at your local craft store. I think I found the one I’ve been using at Joann Fabrics. I’ve had it for a few years and it’s still full of ink!
There’s really no trick in getting the handprints nicely on there.
Since Mila is three, she can do it better than when she was younger. Isla, my niece, did not like the ink on her hands. I still think her handprint turned out adorable!
Just gentle press their hands on the pad then whatever else you’re using. Make sure to wipe their hands off after.
For Jensen’s, I do my special process. If you’d like to see some of my work, check out my Etsy page: Grey Woods Design.
Then, write their names over top their handprints. I just used a thin Sharpie, but you could use paint or even a circuit for this step.
After, heat up your hot glue gun and attach the clothes pins.
Add pictures of your parents’ favorite kids and you’ll have a perfect DIY Handprint Photo Display!
Although I didn’t take a ton of pictures of this DIY, I hope you liked the video! It was so much fun to do.
Do you celebrate Grandparent’s Day? If so what do you give to your grandparents?
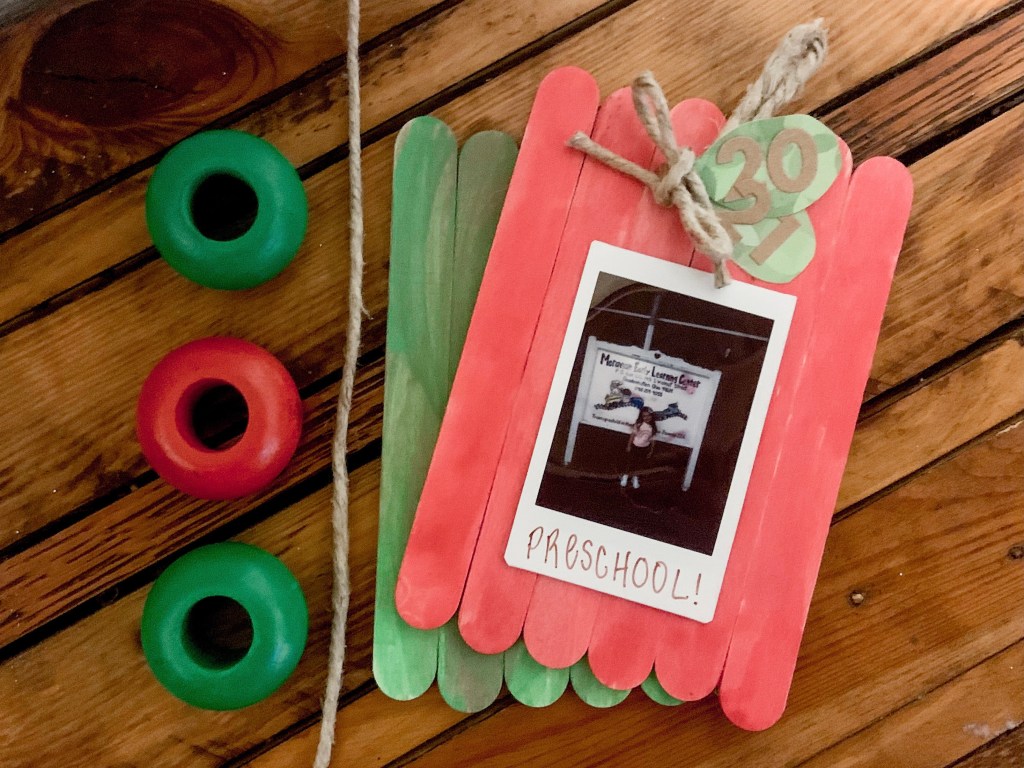
Mila’s first day of preschool was yesterday and she LOVED it. She had so much fun making new friends and playing. So, we had to make a craft to always remember this day.
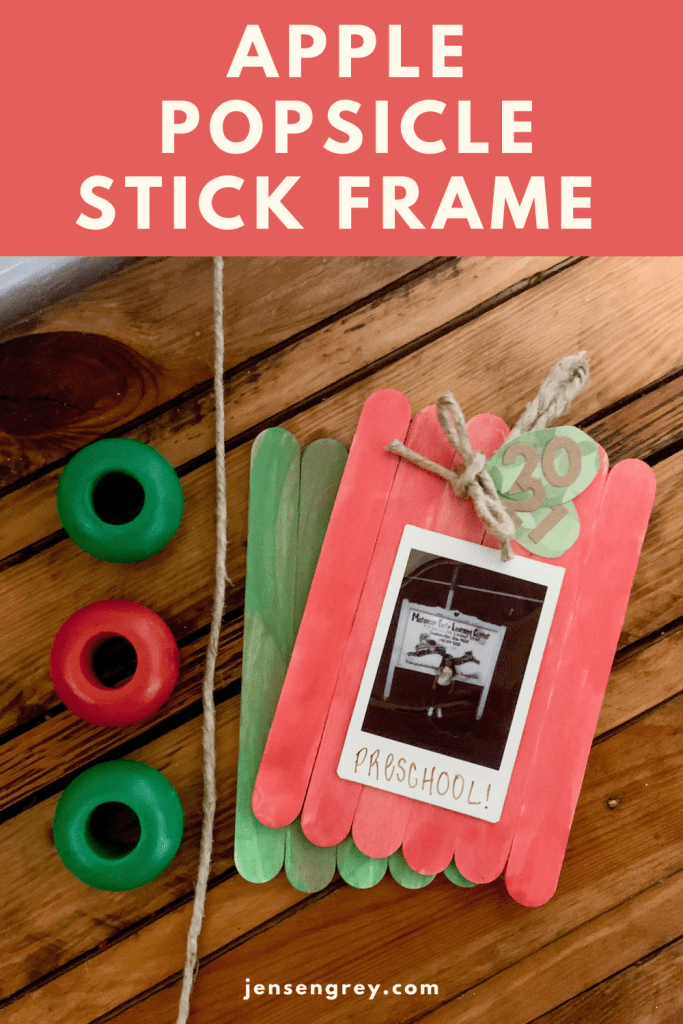
Since she’ll be learning all about the letter ‘A’ soon, we did an Apple Popsicle Stick Frame.
Let’s hope she remembers apple starts with A!
Here’s all you’ll need for this apple-solutely cute craft:
Before letting Mila go crazy with painting, I hot glued the frame. Even though she helped me get the craft sticks out, I still thought I should take over the hot glue gun.
I used six popsicle sticks to lay down flat. Then three on the back to hold them together.
Once the hot glue dried, it was time to paint!
I actually mixed water in the paint to make it more like a stain instead of thick paint. For me, it looks a little better for this particular craft and it was easier for her to paint too.
She ended up painting three Apple Popsicle Stick Frames: one red, one green, one mixed.
After the paint was dried, I used twine to make a stem. Then I hot glued it to the frame.
Next, I made leaves out of left over scrapbook paper. I wanted to make sure I put the year on there somewhere. The stickers worked perfectly, although they overlapped a little bit.
Then, I tapped an Instax picture I took before she went to school. You can use whatever picture works best for you and your child.
I love how simple this DIY was to make and how many memories it will hold.
Mila told a ton of funny stories about her first day of school. At the end of the week I’ll write a few down and share with all of you.
It’s crazy to think how quick she’s growing up!
Let me know in the comments what your favorite way to remember your child’s first day of school. I can’t wait to hear everyone’s ideas!